Usage of File Server Migration Toolkit
Windows 2003 Server has expired and there is no more support for the server. But the problem is still some of the organizations are using Windows 2003 as their servers such as active directory, file server, DHCP server.
To migrate some server roles are very easy because those have some in-built features or tools to migrate server role to the new version. Also for some servers, we can do the in place upgrade to new version. Windows 2003 we can upgrade to Windows 2008 R2 and then we can upgrade to the Server 2012. All the upgradable versions are listed in the below table.

But if we are running with Windows 2003 32 Bit editions, then this won't support for in place upgrade. Also if our servers are too old and not supported model, again we have to think about server migration.
To migrate existing windows 2003 file server to newest Windows server version, we can use File server migration toolkit.The main advantage of that tool is, it's free and easy. We can directly download if from Microsoft Site.
How to use File Server Migration Toolkit?
Download file server migration toolkit.
 \
\Install File Server Migration Toolkit on Windows 2012 R2 Server. (It's very straight forward process.)


We can install complete toolset.

For demonstration purpose, I'm going to migrate existing Windows 2003 server with single file share as below.

Now it's time to start the wizard from my new Windows 2012 R2 Server(Run the wizard and Click on "New").
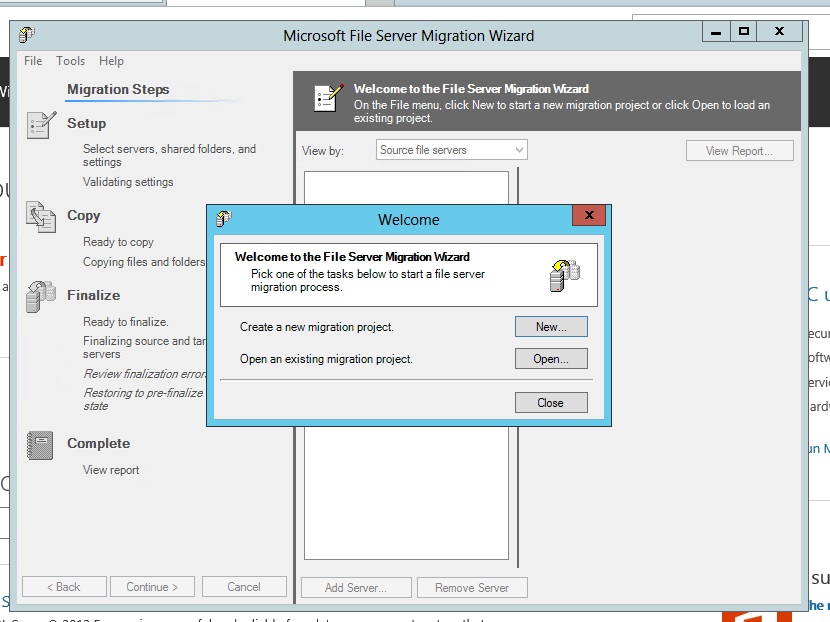
- Click on "Next".

Assign a name for the project. Also, we have to give a location for keeping a log.

Set the location for store share files/folders in the destination server.

Click on "Finish".

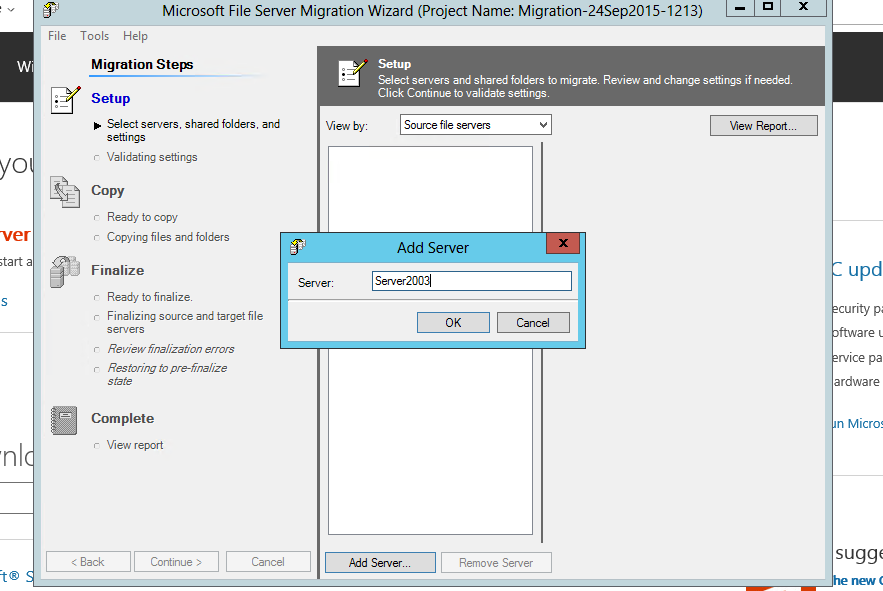
Now it's time to add source server. (In this demonstration, we are using Windows 2003 server as source server (server name is Server 2003).
- By default, the wizard will stop the source sharing once it's complete the file moving process.

Expand the server and select the shared folder, which wants to move to the new server. By default, the destination share folder will be created with including old server name.

Configure destination folder names, share names as required.

- Finalize the project.
