Office 365 - Move a cloud Exchange user back to on-premises
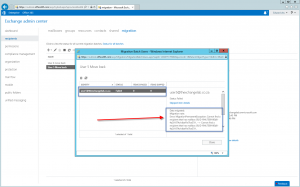
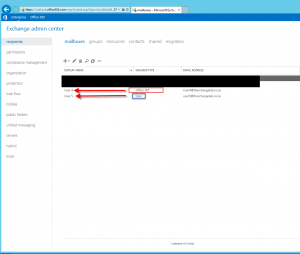
To move a Mailbox from Exchange Online (O365) back to Exchange On-Premises has a few steps more involved. If you try to move a mailbox from O365 back to Exchange on-premises using the EAC on Office 365 it will fail, more below:
https://collaborationpro.com/wp-content/uploads/2016/01/EXO1-300x187.png
In this example, User 5 was setup to move back to on-premises however after validation it fails with a mailbox GUID error.
Here is the list of steps we are going to complete in order to get the mailbox to migrate back:
A) Check the Exchange GUID of the mailbox on the on-premises Exchange Server.
B) Connect to Azure-AD, New-PSSession, Import the PSSession and check the Exchange GUID in the cloud.
C) Check the ExchangeGUID of the Cloud Mailbox. You could also just copy the GUID in the error above as well.
D) Set the ExchangeGUID on-premises with the GUID from the Remote Mailbox.
E) Run a full sync from AAD Connect.
F) Perform Migration.
https://collaborationpro.com/wp-content/uploads/2016/01/EXO2-300x223.png
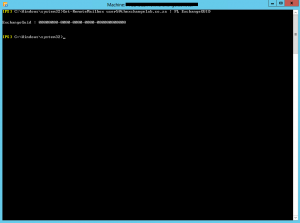
In Step A, on the Exchange Management Shell, we run the following command:
- Get-RemoteMailbox user5@thexchangelab.co.za | FL ExchangeGUID
This will give the result in the screenshot above, notice it shows 0's.
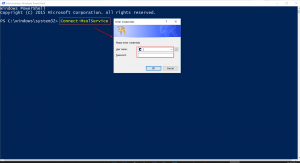
In Step B, we will connect to Azure AD using the Windows Azure AD PowerShell Module.
https://collaborationpro.com/wp-content/uploads/2016/01/EXO3-300x163.png
The first command to run is "Connect-MsolService". This will bring up the window as shown above and we can enter in our tenant login details. Once we click OK and it will appear nothing happened but it has connected.
https://collaborationpro.com/wp-content/uploads/2016/01/EXO4-300x163.png
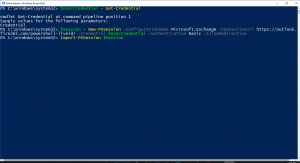
You can run the following commands:
- $UserCredential = Get-Credential
- $Session = New-PSSession -ConfigurationName Microsoft.Exchange -ConnectionUri https://outlook.office365.com/powershell-liveid/ -Credential $UserCredential -Authentication Basic -AllowRedirection
- Import-PSSession $Session
You can refer to this TechNet article if you want to see the commands:
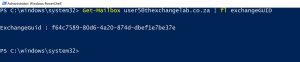
Now in Step C we can check the GUID of the Mailbox:
https://collaborationpro.com/wp-content/uploads/2016/01/EXO5-300x62.png
This is the command:
- Get-Mailbox user5@thexchangelab.co.za | fl exchangeGUID
In Step D we can now set the GUID on the Mailbox on your on-premises server. Open up the EMS and run the following command:
- Set-RemoteMailbox user5@thexchangelab.co.za -ExchangeGuid f64c7589-80d6-4a20-874d-dbef1e7be37e
In Step E we are going to run a sync so that O365 knows about the changes, etc.
https://collaborationpro.com/wp-content/uploads/2016/01/EXO6-300x46.png
Once the Full sync has run we can now perform the migration.
https://collaborationpro.com/wp-content/uploads/2016/01/EXO7-300x188.png
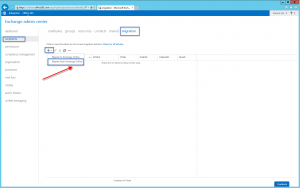
On the Office 365 Tab, select Recipients, Migration and then click the + button and choose the second option as per the screenshot above.
https://collaborationpro.com/wp-content/uploads/2016/01/EXO8-300x269.png
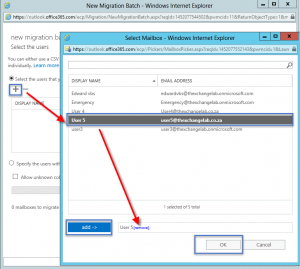
The New Migration Batch window opens, click the + button.
Now select the user, in this case it was User 5. Click Add ->
Click OK.
https://collaborationpro.com/wp-content/uploads/2016/01/EXO9-300x271.png
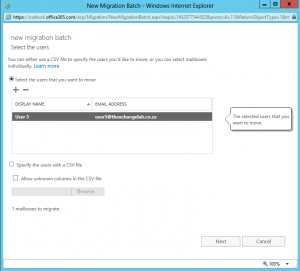
The user selected is now shown. Click Next to continue the off-boarding.
https://collaborationpro.com/wp-content/uploads/2016/01/EX10-300x271.png
Click Next.
https://collaborationpro.com/wp-content/uploads/2016/01/EX11-300x180.png
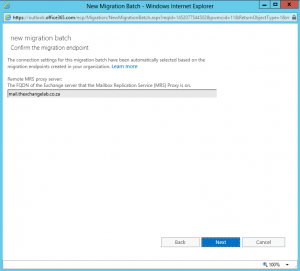
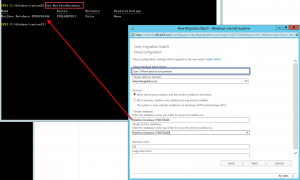
Enter in all the information required.
Give the move a friendly name, ensure that your domain is entered in Step 2. To get your mailbox database you can run the command as in the PowerShell window behind the main screenshot to get the name. Click Next.
https://collaborationpro.com/wp-content/uploads/2016/01/EX12-300x270.png
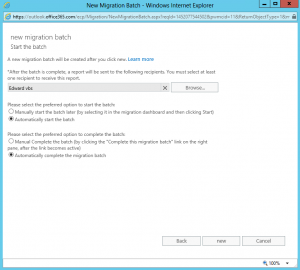
You can now click new to do the migration. Give it a few minutes depending on your connection to complete.
https://collaborationpro.com/wp-content/uploads/2016/01/EX13-300x188.png
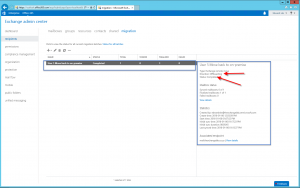
Now we can see that the migration completed successfully.
If we go back to our on-premises server now and check the user you will see that User 5 now is listed as a user mailbox type and you can see User 4 is listed as O365 mailbox type.
https://collaborationpro.com/wp-content/uploads/2016/01/EX14-300x254.png