Azure Resource Manager - Create and Configure VM
Azure Resource Manager enables you to work with the resources (virtual machine, storage account, and virtual network, or a web app, database, database server, and third-party services) in your solution as a group. You can deploy, update or delete all of the resources for your solution in a single, coordinated operation. You use a template for deployment and that template can work for different environments such as testing, staging and production. Resource Manager provides security, auditing, and tagging features to help you manage your resources after deployment.
Resource manager benefits:
- Deploy, manage, and monitor all of the cloud resources as a group (resource groups).
- Resources can be deployed repeatedly and will be in a consistent state.
- Declarative templates to define your deployment.
- Define the dependencies between resources so they are deployed in the correct order.
- Apply tags to resources to logically organize all of the resources.
- Apply access control in your resource group using Role-Based Access Control (RBAC).
We will be creating the virtual machine using Visual Studio 2015 and we need to install Azure SDK 2.7 for .NET for the Azure Resource Manager templates to work
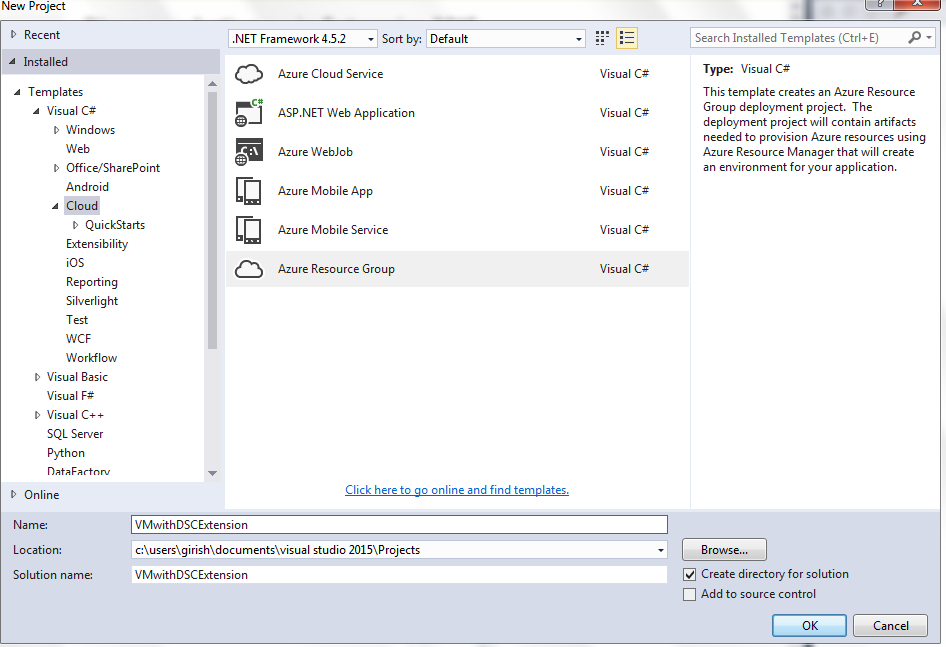
Create a new Visual Studio project and select Azure Resource Group as shown:
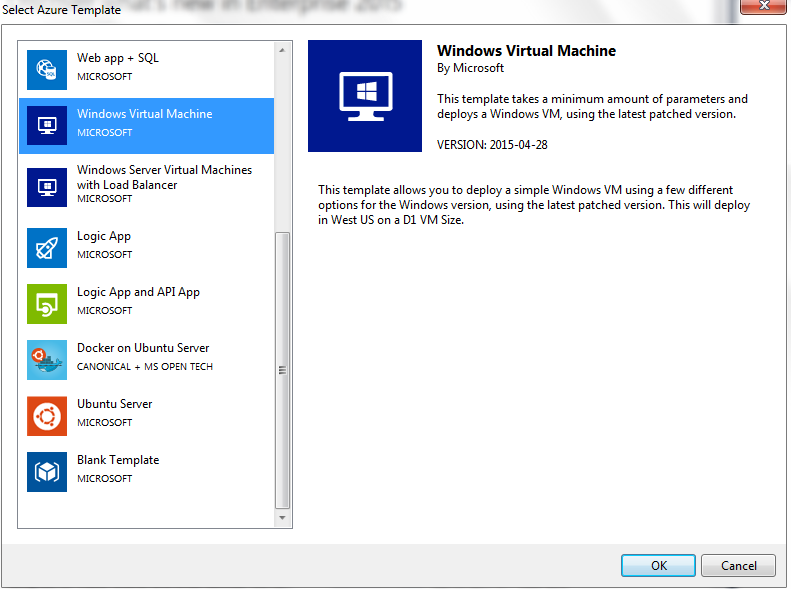
Select the virtual machine to be created.
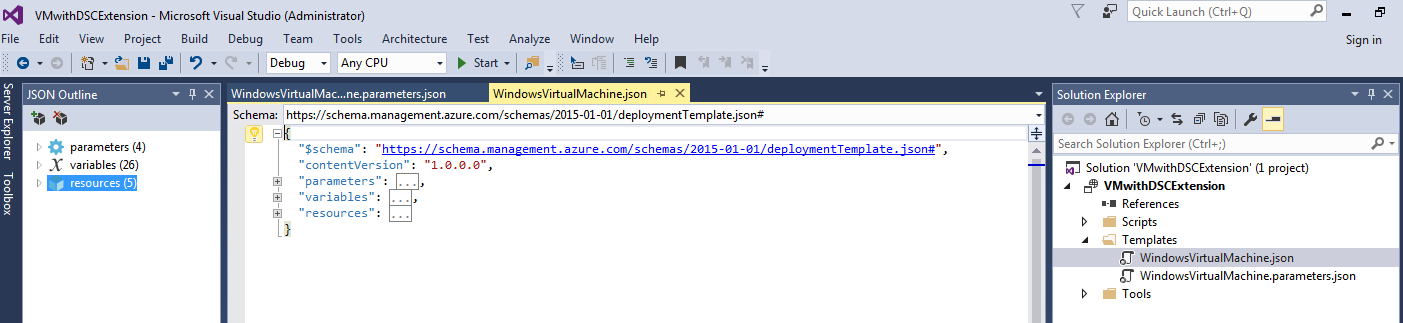
This will create the following two files as shown:
- WindowsVirtualMachine.json: JSON template
- WindowsVirtualMachine.parameters: JSON parameters file
JSON template file contains the following sections:
- Parameters: These are used to collect user input for resource properties prior to starting the deployment.
- Variables: These are used to store values for different resource properties and re-use them.
- Resources: These define a collection of resources that you plan to deploy as a part of the template deployment.
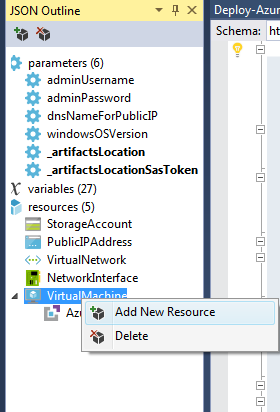
Resources are made up of following components.
StorageAccount: All the data stored in Azure Storage is stored in a storage account.
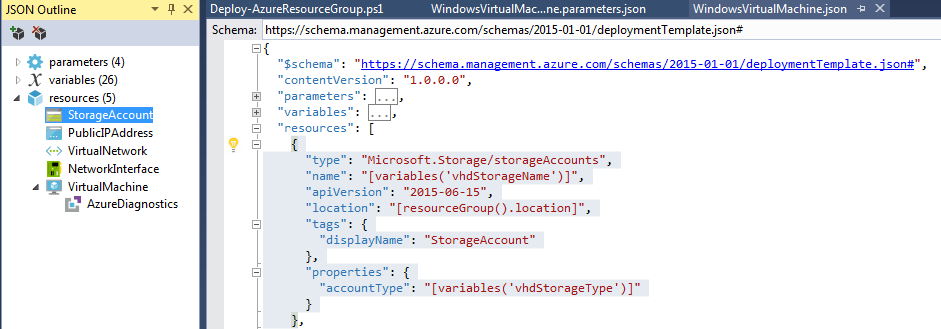
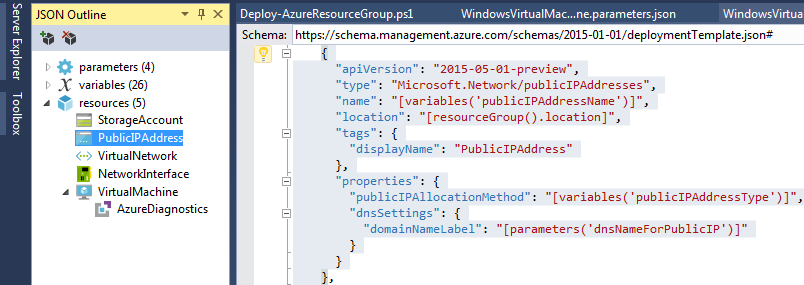
PublicIPAddress: This is the IP address assigned to a specific VM and can be used to directly access the VM.
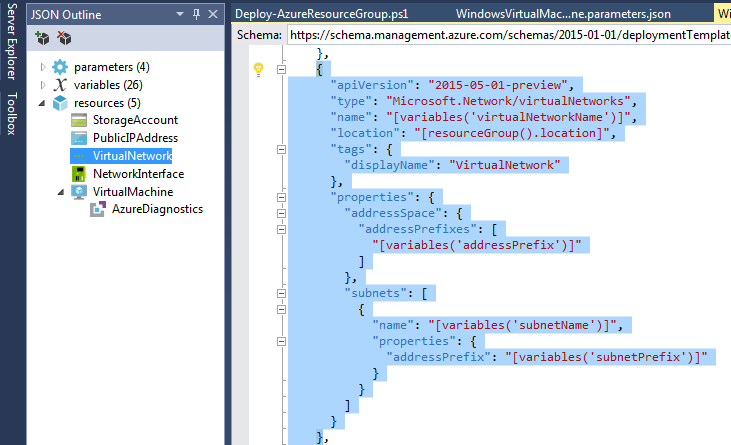
VirtualNetwork: All the virtual machines must be part of a virtual network and live within a Resource Group.
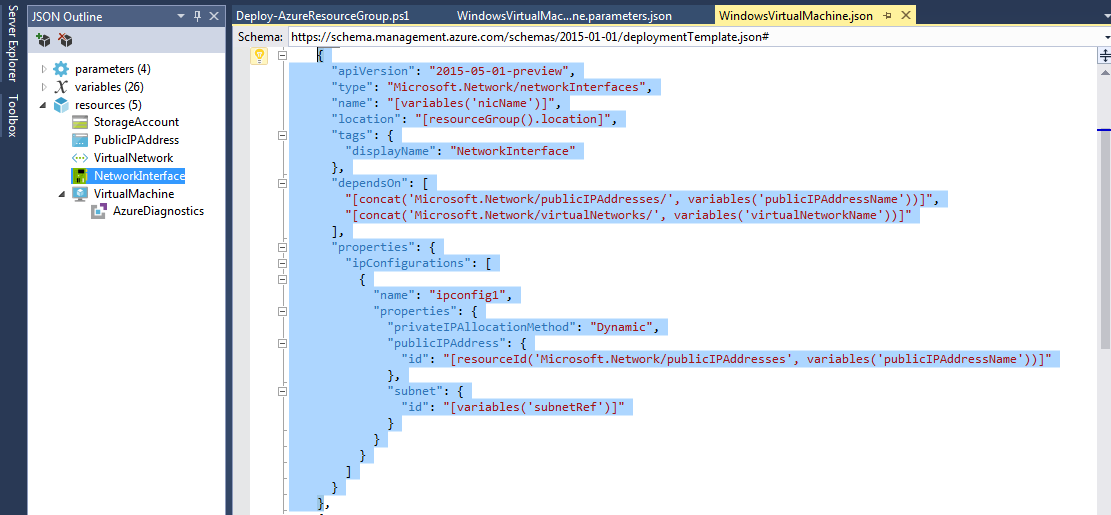
NetworkInterface: Network adapters should be created before creating the virtual machine.
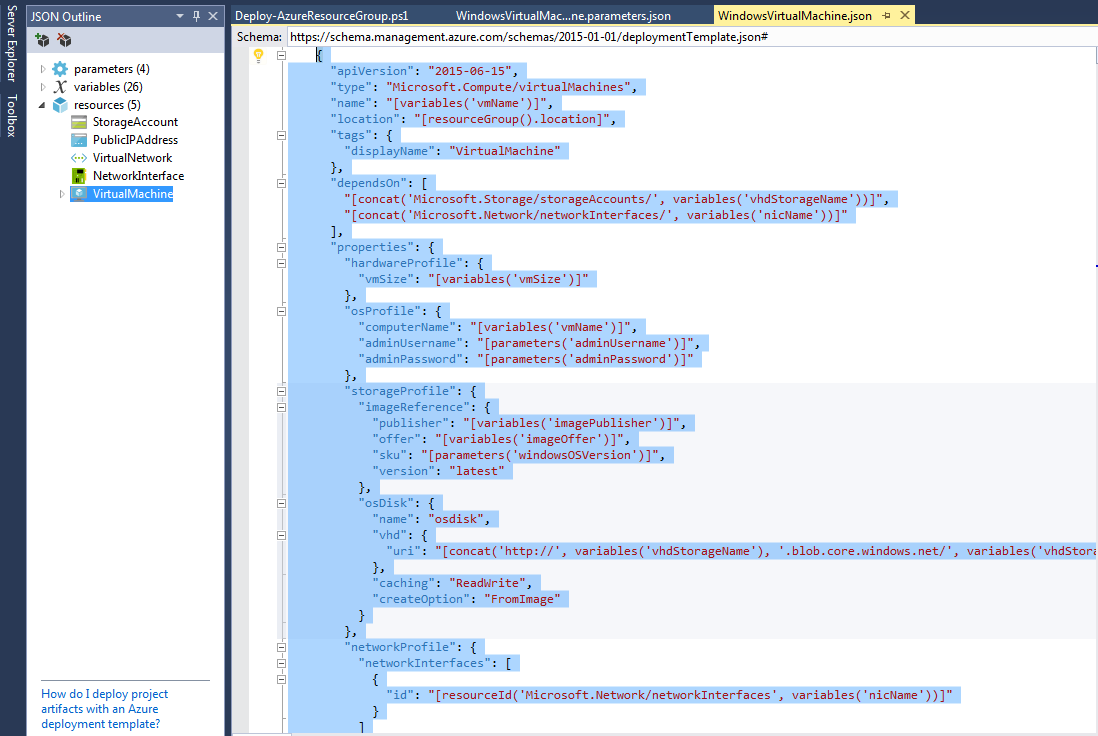
VirtualMachine: These resources will be used to create the virtual machine.
We can use the "Powershell DSC extension" to configure the machine as shown:
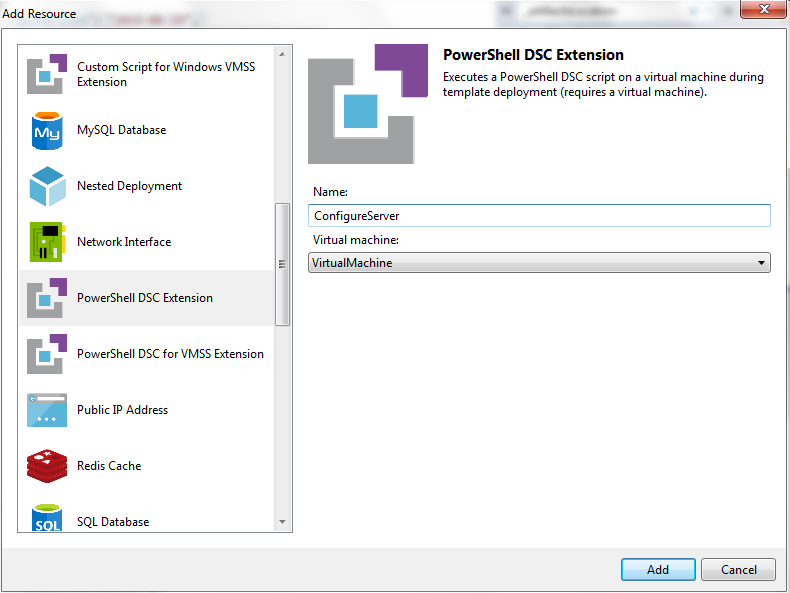
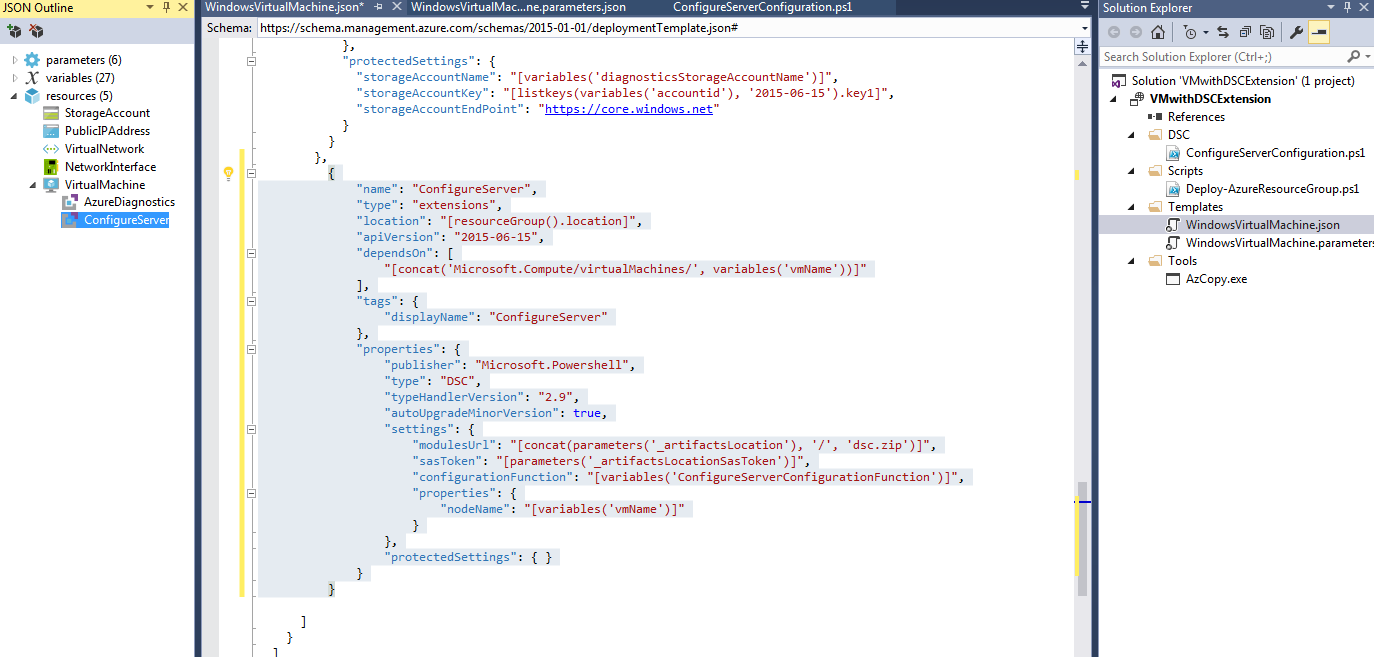
Specify the path of the DSC configuration file. (In this case, the file was uploaded to GIT repository and referring the path.)

DSC configuration file will be has shown:
Configuration IISAndASPNet
{

   Node localhost
   {

       # Install the IIS role
        WindowsFeature IIS
        {
              Ensure          = "Present"
              Name            = "Web-Server"
        }

        # Install the ASP.NET 4.5 role
        WindowsFeature AspNet45
        {
              Ensure          = "Present"
              Name            = "Web-Asp-Net45"
        }

    }

}
Deploy the template from Visual Studio.
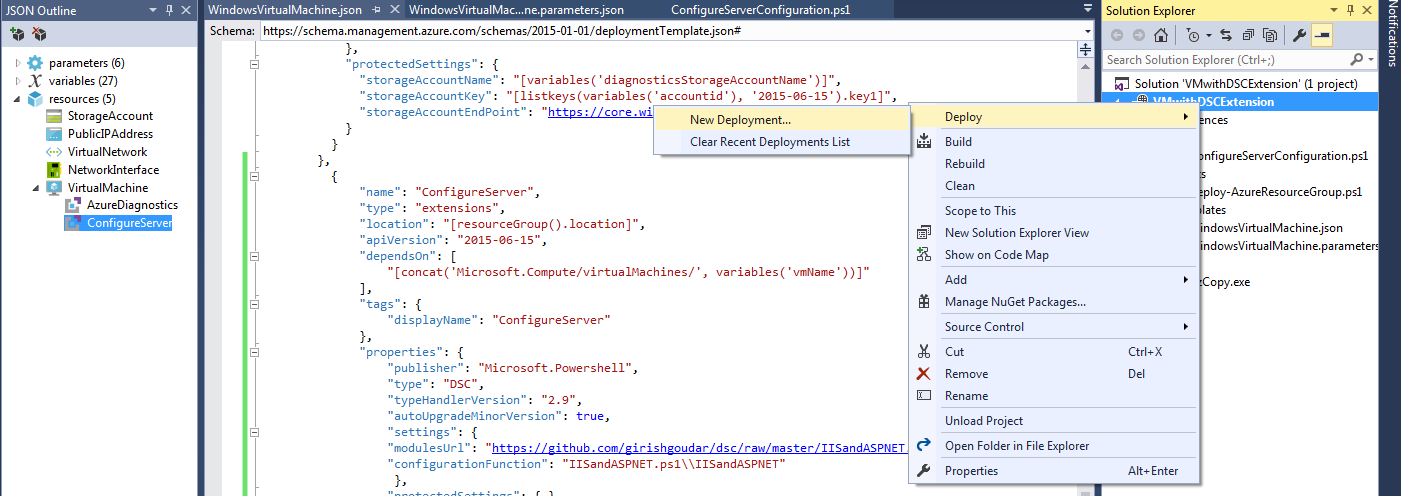
A virtual machine is created and configured as specified.