ASP.Net: Cruds in NancyFx and FluentNHibernate Using Repository Pattern
Download Code: Cruds with NancyFx using
Introduction
In these days RAD (Rapid Application Development) is growing at its large. There are numerous framework available to develop Web Applications or Web Projects. We can use either ASP.Net or ASP.Net MVC from Microsoft or any other framework. Although, NancyFx is having its own support for View Engines eg. Super Simple View Engine or Razor View Engine. Also, anyone can define own custom view engine. In this article we will use NancyFx to build a restful service using ASP.Net and FluentNHibernate and understand how it works step-by-step.
What is NancyFx?
In simple and shorter words NancyFx is a lightweight web framework for .Net. In these days, this tools is most popular among C# developers for web development. NancyFx is inspired by ruby's Sinatra. I never work on Ruby so, don't compare the things between Sinatra and NancyFX. NancyFX is built in to handle all requests (GET, PUT, POST,DELETE etc. ).
Why Use NancyFx?
There are numerous reasons to adapt NancyFX for your web development. Here are as per my views (we are not discussing these points in this article):
- Less costlier
- Inbuilt IoC container (TinyIOC)
- Easy to test (just like ASP.Net MVC)
- Not pushing to implement any UI framework (viz. MVM, MVC etc.)
- Providing customization (built-in feature to replace any part as required)
- Runs on Mono
- No configuration required to setup NancyFx
- Free from Design Framework
- Can run anywhere (IIS, WCF, can embed within an EXE, as a Window Service etc.)
Lets Start Creation of a Sample Project
We need to setup NancyFx and FluentNHibenrate support for our project.
Pre-requisites
To implement and play with the source code, one should have:
- Visual Studio 2013 express or later
- ASP.Net
- Basic knowledge of RestFul services
- Basic knowledge of FluentNHibernate
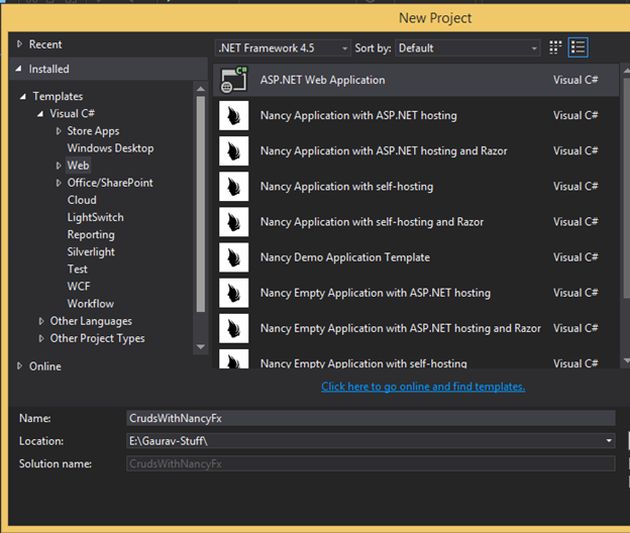
Create Skeleton/Empty ASP.Net project
To start we are using simple empty ASP.Net project:
- Start Visual Studio and select File->New->Project (or enter Ctrl + Shift + N).
P.S. - do not confuse with installed Nancy template (we will discuss in next article)
In the Template dialog select Empty template
(P.S.: Alternatively you can Host this on cloud - we are not discussing this topic here)
* *
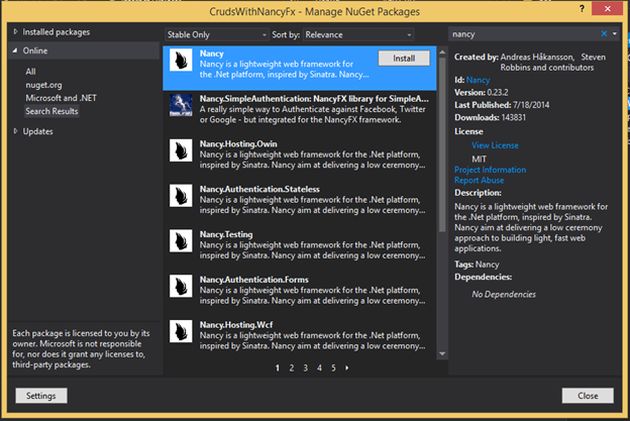
Adding NancyFx and FluentNHibernate support
We can add NancyFx and FluentNHibernate in many ways, here we are using nugget package:
- Open nugget package manager search `Nancy' and select as described in image:
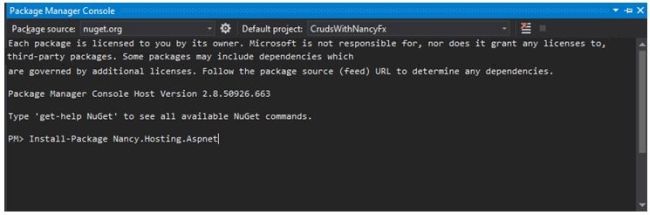
2. Alternatively, go to Package Manager Console and hit following command
3. To install FluentNHibernate go to Package Manager Console and hit following command
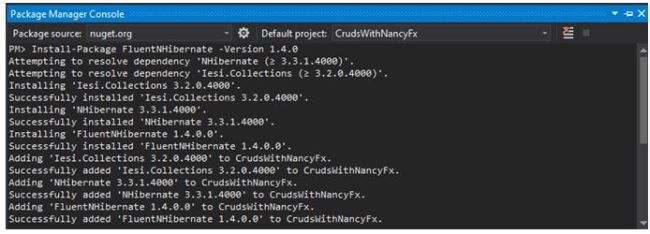
(P.S. We installed stable release, currently there is a pre -release available you can go with pre- release if want to try)
We are ready with a template of our app. Now, lets start writing simple Crud Operations.
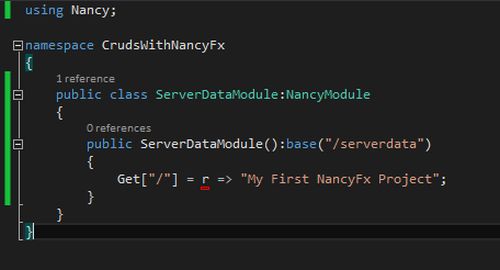
- Add new class file and Named it
`ServerDataModule.cs'

- Add following code to your class (this is just to test that your
NancyFxhas been setup J)
3. Lets check our NancyFx resources - Run your application (Hit F5) from Visual Studio

If you see the output in your browser. It means you have successfully setup the required things.
4. Now, lets setup our model classes and Repository.
-
- Add a new folder named Models from solution explorer and add classes:
- ServerData.cs
- Add a new folder named Models from solution explorer and add classes:

- ServerDataMap.cs
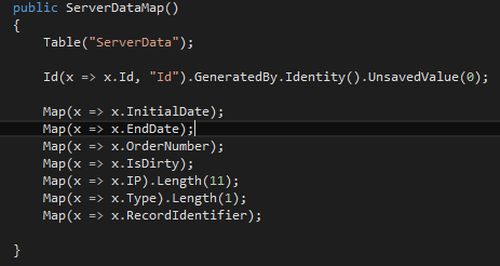
P.S. Do not forget to add

- Add new folder named Persistent beneath Models from solution explore and add an Interface IServerDataRepository:
using System.Collections.Generic;

namespace CrudsWithNancyFx.Models.Persistence
{
 public interface  IServerDataRepository
 {
 ServerData Get(int id);
 IEnumerable<ServerData> GetAll();
 ServerData Add(ServerData serverData);
 void Delete(int id);
 bool Update(ServerData serverData);

 }
}
- For our project we have created a helper class which support our repository Pattern of NHibenrate. Just add a new folder named Helper using solution explorer and add a class NHibernateHelper
At this point, we have done with core preparation of our project. Now, we just need to implement our repositories in the flavor of NancyFX.
Lets revisit our NancyModule class ServerDataModule and modify it.
Get["/"] = _ => Response.AsJson<object>(serverDataRepository.GetAll());
Here, we are passing int type parameter and on returning a Json object. One most exciting thing of NancyFx is that it will automatically recognized the parameters [parameters are defined within {} braces], we called this as dynamic parameterization of resources.
Post["/"] = _ =>
 {
 var data = serverDataRepository.Add(this.Bind<ServerData>());

 return HttpStatusCode.OK;
 };
Here, we are using Post resource and this.Bind<ServerData>() automatically Bind incoming request to our ServerData model.
Add Database
Creating DataBase
Complete SqlScript is attached. Following is a sql of our Table:
CREATE TABLE  [dbo].[ServerData](

 [Id] [int] IDENTITY(1,1) NOT NULL,

 [InitialDate] [datetime] NULL,

 [EndDate] [datetime] NULL,

 [OrderNumber] [int] NULL,

 [IsDirty] [bit] NULL,

 [IP] [nvarchar](15) NOT NULL,

 [Type] [int] NULL,

 [RecordIdentifier] [int] NULL,

PRIMARY KEY  CLUSTERED

(

 [Id] ASC

)WITH (PAD_INDEX = OFF, STATISTICS_NORECOMPUTE = OFF, IGNORE_DUP_KEY = OFF, ALLOW_ROW_LOCKS = ON, ALLOW_PAGE_LOCKS = ON) ON  [PRIMARY]

)
Adding Bootstrap and Custom Exceptions to our project
As of now we are using inbuilt exception and lets now move-forward and implement custom exceptions and Bootstrap things.
Adding Bootstrap
We are going to use `Structure Map' there are many other IoC framework available but I picked SM for make our demo easierJ.
Go to nugget package manager and install Nancy.BottStrappers.StructureMap as mentioned below:
using Nancy.Bootstrappers.StructureMap;

namespace CrudsWithNancyFx.IoC
{
 public class  BootStrapper : StructureMapNancyBootstrapper
 {
 protected override  void ConfigureApplicationContainer(StructureMap.IContainer existingContainer)
 {
 Container.Configure(existingContainer);
 }
 }
}
Add new class named as BootStarpper.cs as mentioned below:

Now, add two more important files: Container and BootStrapper
using StructureMap;
using StructureMap.Graph;

namespace CrudsWithNancyFx.IoC
{
 public class  Container
 {
 public static  void Configure(IContainer container)
 {
 container.Configure(config => config.Scan(c =>
 {
 c.TheCallingAssembly();
 c.WithDefaultConventions();
 }));
 }
 }
}
using Nancy.Bootstrappers.StructureMap;

namespace CrudsWithNancyFx.IoC
{
 public class  BootStrapper : StructureMapNancyBootstrapper
 {
 protected override  void ConfigureApplicationContainer(StructureMap.IContainer existingContainer)
 {
 Container.Configure(existingContainer);
 }
 }
}
Adding Custom Exception
Now, we are near to add custom exception to our project. For this we need to add to our application.
Add new class named as ErrorPipeline (here we simply defined one custom exception for demo purpose).

Here is what we implemented:
using System.Text;
using CrudsWithNancyFx.Exceptions;
using Nancy;
using Nancy.Bootstrapper;
using HttpStatusCode = Nancy.HttpStatusCode;

namespace CrudsWithNancyFx
{
 public class  ErrorPipeline : IApplicationStartup
 {
 //Hook all kind of errors here
 //we are simply defined one custom exception for demo
 public void  Initialize(IPipelines pipelines)
 {
 pipelines.OnError += (context, exception) =>
 {
 if (exception is ServerDataNotFoundException)
 return new  Response
 {
 StatusCode = HttpStatusCode.NotFound,
 ContentType = "text/html",
 Contents = (stream) =>
 {
 var errorMessage =
 Encoding.UTF8.GetBytes(exception.Message);
 stream.Write(errorMessage, 0,errorMessage.Length);
 }
 };

 //If not expected exception simply throw 500 exception
 return HttpStatusCode.InternalServerError;
 };
 }
 }
}
In above you can see we are just attaching our customization to OnError hook, there are many more ways and here we took above only for demo.
Revisiting Module Code
Lets revise ServerDataModule our code as below:

We are not going to explain refactoring in details.
Testing NancyFx
We have already created our Crud operations using NancyFx, as we are planning to deploy this project as a services on a server which is a separate from client servers (P.S. client may be a console app, web app or from any other source which can consume NancyFx services), we need to make sure that our services are working properly and providing desired results.
Create New Test Project
Create a new project named it CrudsWithNancyFx.Test. We are going to use NUnit with Moq framework for our project. Add new class and named it as ServerDataTest.cs
Adding Testing support to NancyFx project
Open Nuget package manager and install Nancy.Testing as shown in following image:

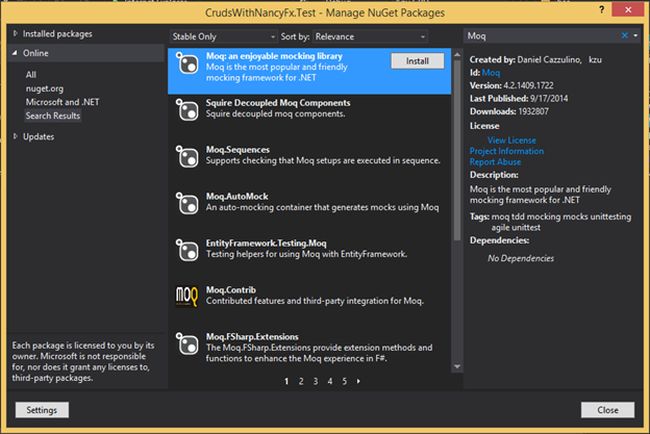
Adding Nunit and Moq Framework
Open Nuget Package Manager and add Nunit and Moq framework as mentioned below:

Add Simple Test
We added a simple test to verify (we are not going to explain each and every test in details).
[TestFixture]
 public class  ServerDataTest
 {
 [Test]
 public void  Should_return_ServerData_When_Exists()
 {
 var mockServerDataRepository = new  Mock<IServerDataRepository>();
 mockServerDataRepository.Setup(d => d.Get(1)).Returns(FakeServerData());

 var browser =
 new Browser(c =>
 c.Module<ServerDataModule>().Dependencies<IServerDataRepository>(mockServerDataRepository.Object));

 var response = browser.Get("ServerData/1", with =>
 {
 with.HttpRequest();
 with.Header("Accept", "application/json");
 }).Body.AsString();

 Assert.That(response, Is.Not.Null);

 Assert.That(response.Contains("1009"));
 }
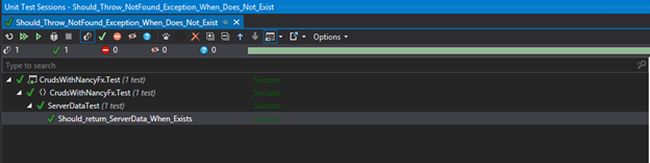
We are using Resharper so, it easy to run tests from within Visual Studio:
Conclusion
In this article we learn how to get started with NancyFx with FluentNHibernate and Repository Pattern. We covered Nancy Testing. Download complete source code from: GitHub