An Introduction to Microsoft Graph API
https://msdnshared.blob.core.windows.net/media/2016/05/0640_NinjaAwardTinyGold.pngGold Award Winner
What is Microsoft Graph ?
In the simplest terms Microsoft Graph is the easiest way to call the Microsoft APIs be it Users, Groups, Mail, Calendars, Contacts, Files etc. all from a single endpoint. This was previously known as the Office 365 Unified API. It exposes multiple APIs from Microsoft Cloud Services like Outlook, OneDrive, OneNote etc through a single REST API endpoint (https://graph.microsoft.com). Prior to this, in order to fetch data from each of these services you have to make different endpoint calls to the respective services making it a complex procedure. Using Microsoft Graph, you just have to make a single endpoint call to the cloud services and require a single authentication token.
As per Microsoft, “the Microsoft Graph gives you:
- A unified API endpoint for accessing aggregated data from multiple Microsoft cloud services in a single response
- Seamless navigation between entities and the relationships among them
- Access to intelligence and insights coming from the Microsoft cloud”
Microsoft Graph Developer Stack
The following image shows how the Microsoft Graph Developer Stack works. At the bottom of the stack you can see the different data sources available in the cloud. Using the Microsoft Graph API call we can fetch data from all these sources using a single endpoint call to https://graph.microsoft.com. In order to make calls to Microsoft Graph API we require an OAuth 2.0 access token.
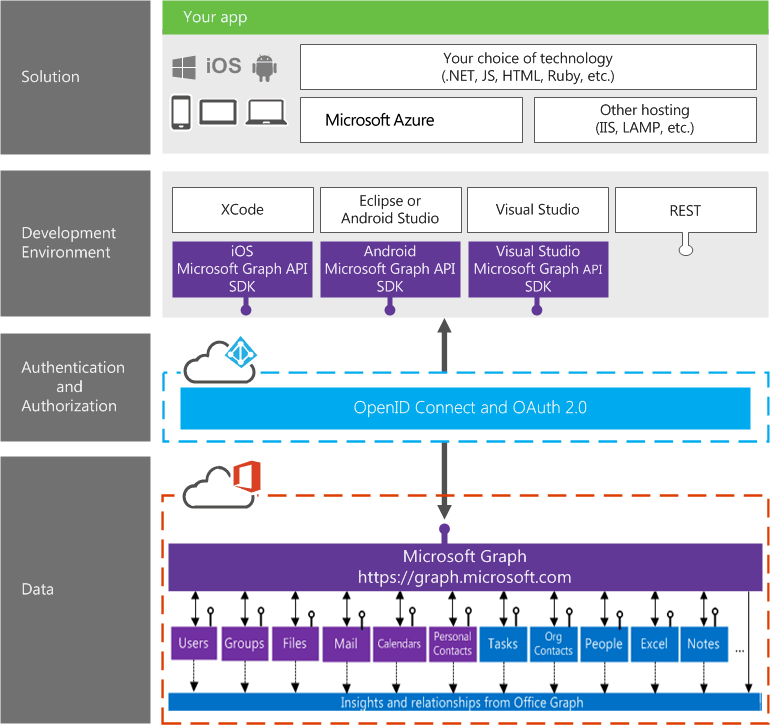
Microsoft Graph Developer Stack (Source : http://graph.microsoft.io/en-us/docs)
Authentication Flow
The Microsoft Graph API uses Azure AD for authentication. The basic flow to get your app authenticated is listed below:
- Request an authorization code
- Request an access token based upon the authorization code. Besides the access token, you also receive a refresh token.
- Make call to the Microsoft Graph endpoint.
- When the access token expires, use the refresh token to get a new access token instead of going through the entire authentication flow again.
Microsoft Graph API Request Structure
All Microsoft Graph API requests use the following URL pattern:
https://graph.microsoft.com/%7Bversion%7D/%7Bresource%7D?%5Bodata_query_parameters%5D
This can be explained as:
- https://graph.microsoft.com is the Microsoft Graph API endpoint.
- {version} is the target service version. Available versions are v1.0 or beta.
- {resource} is the resource segment or path such as users, groups, devices or organization
- [odata_query_parameters] represents additional OData query parameters such as $filter and $select
C
Common Microsoft Graph API requests
Few of the common requests that we make using this endpoint includes the following.
- Get my Profile : https://graph.microsoft.com/v1.0/me
- Get my Mail : https://graph.microsoft.com/v1.0/me/messages
- Get my Manager : https://graph.micrsosoft.com/v1.0/me/manager
- Get people related to me : https://graph.microsoft.com/beta/me/people
- Get people I am working with : https://graph.microsoft.com/beta/me/workingWith
For more details on available queries have a look at the following link:
http://graph.microsoft.io/en-us/docs/overview/overview
Scenario
Now let us get started with a scenario where we will make use of the Microsoft Graph API in order to fetch user’s mailbox on cloud and show it in an app. We will make use of an MVC application to achieve this.
In order to achieve this below are the steps that needs to be followed.
Register your application in Azure AD
The first and foremost thing that needs to be done here is to register your application in Azure AD.
Below are the steps that needs to be followed to achieve this.
Login to your Azure Management Portal using your Azure AD credential.
Click Active Directory on the left navigation menu and select the active directory of your Office 365 tenant.
Click Applications on the top menu.

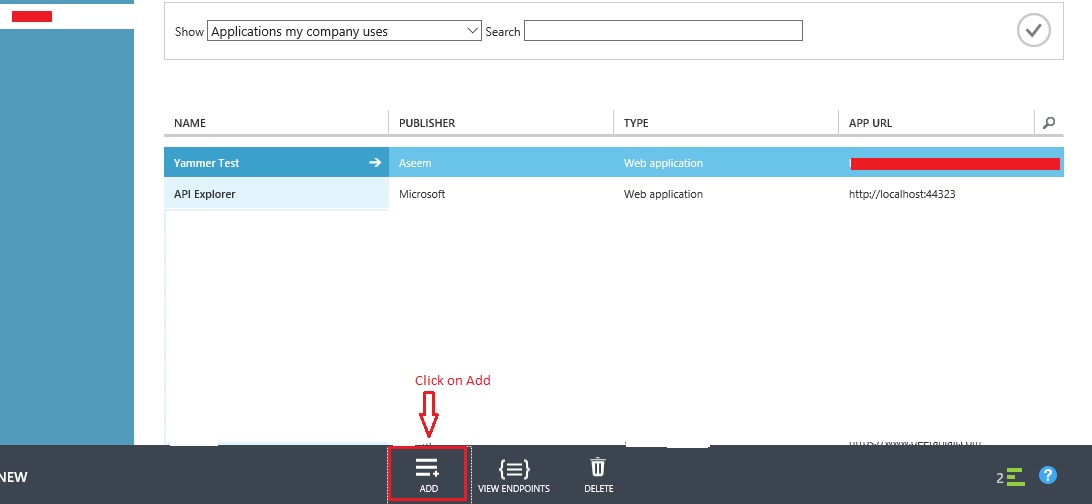
4. Once you click on the applications, you will see a listing of all the applications. Now in order to create a new application, click Add at the bottom of the page.
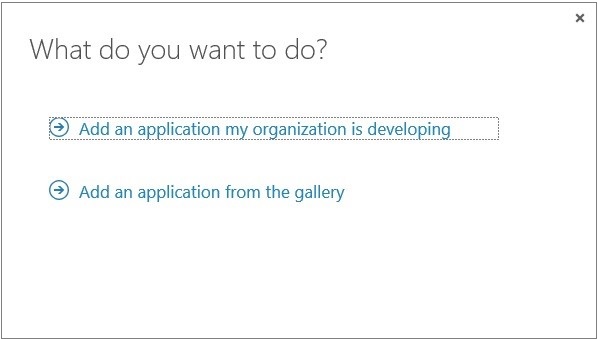
5. A pop up will open “What do you want to do?” In this select “Add an application my organization is developing”
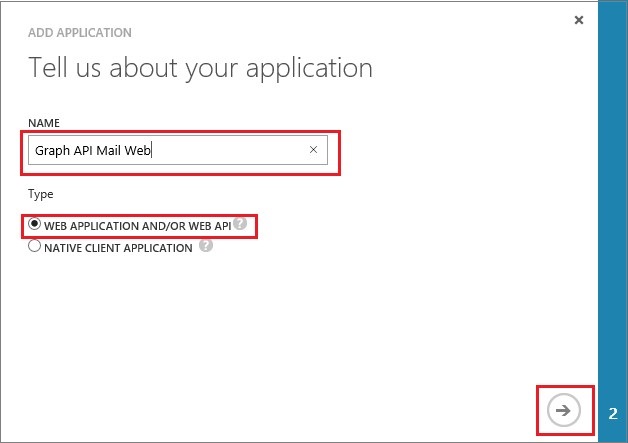
6. The dialog box, “Tell us about your application” will come where you will be required to provide the Name and Type for your application.
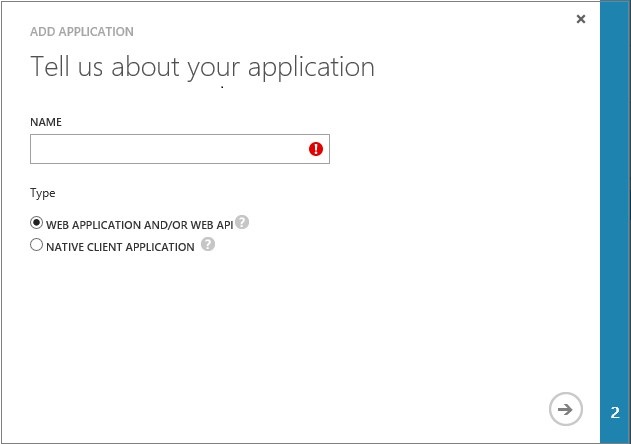
7. Provide a name for the application. Let us say we give "Graph API Mail Web” as the name of our application and select “WEB APPLICATION AND/OR WEB API” as the type. After that click on the arrow to navigate to the second page.
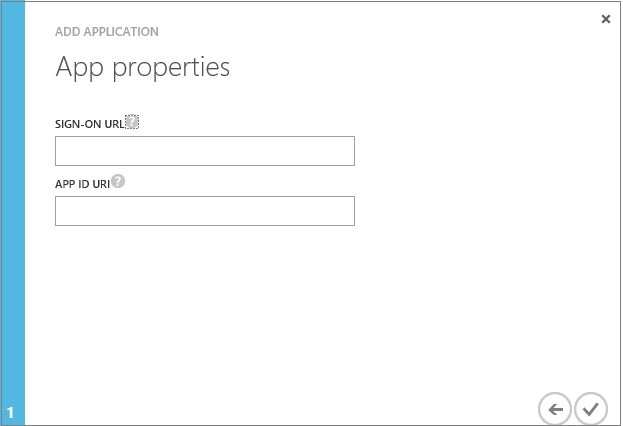
8. In the “App Properties” page, provide a Sign on url and App Id URI and click on tick. This will add your application.
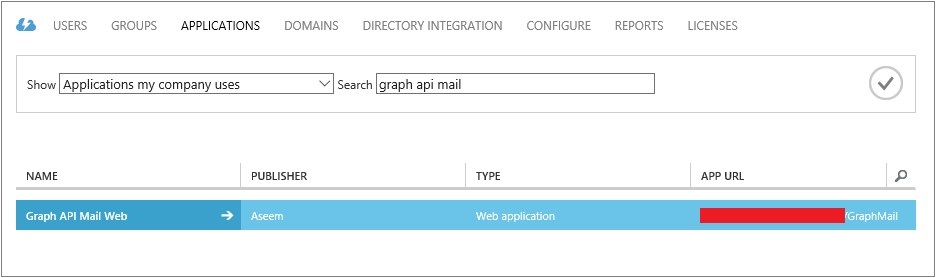
9. Now that you have added the application, you can see it in the applications list.
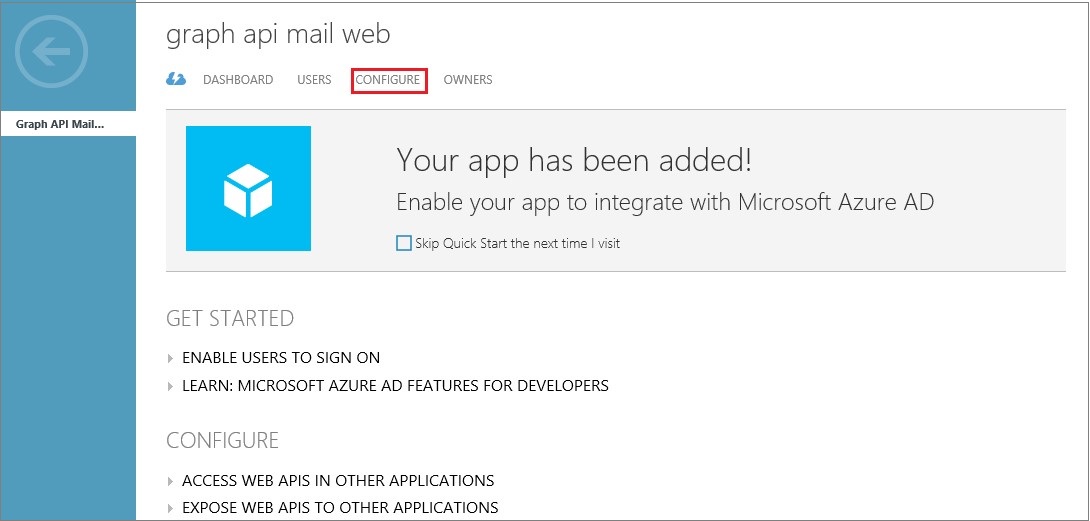
10. The next step is to give the permissions to the application. For this, from the application page click on the Configure from the top menu.
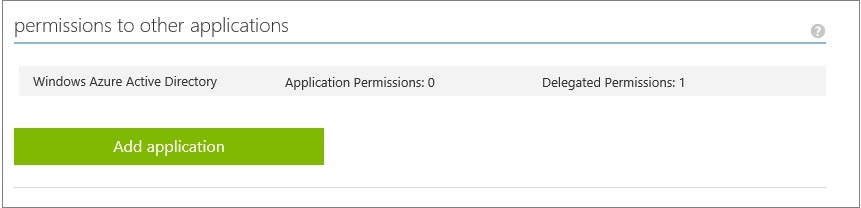
11. Copy the value of the Client ID provided on the page as this will be required in future. In the keys section, add a key for duration of one year and save this key value. This will act as your client secret. Once you have done this navigate at the bottom of the page for the “permission to other applications” section. It is here that will give permission to the “Microsoft Graph” API.
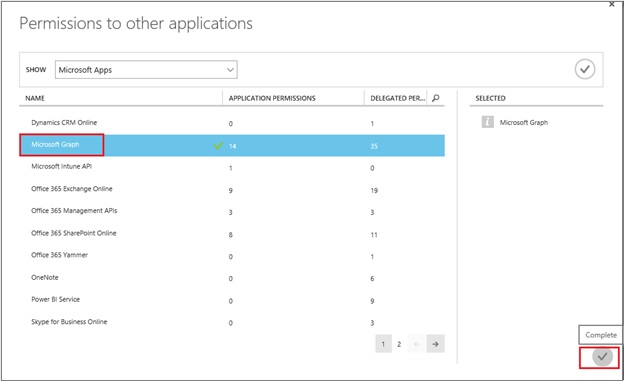
12. Click on “Add application” and then in dialog box select “Microsoft Graph” from the list of available applications and then save.
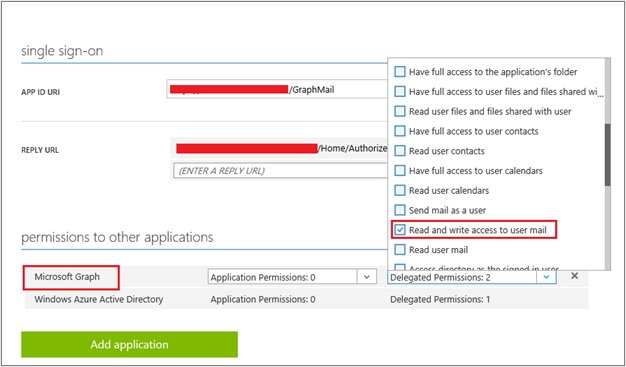
13. On the application configuration page, select the delegated permissions as “View user’s email address” and “Read and write access to user mail”. We can select the delegated permissions based upon our requirement.
This completes the registration of your application in Azure.
Now that we have completed with the application registration, the next step is to write code for authentication flow in our MVC application so that it can use the Microsoft Graph API and fetch the user mailbox and show it in an MVC app.
The MVC Application:
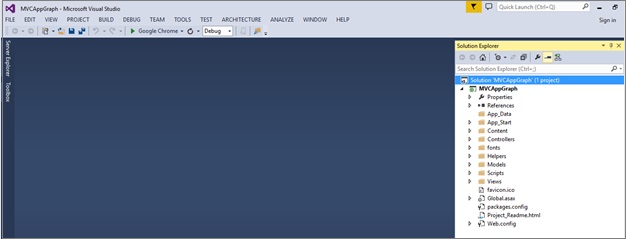
- Run your Visual Studio instance. In this scenario we will be using Visual Studio 2013 for the development. Create an ASP.NET MVC application.
2. Now we will add the “Active Directory Authentication Library” NuGet package installed in the project.
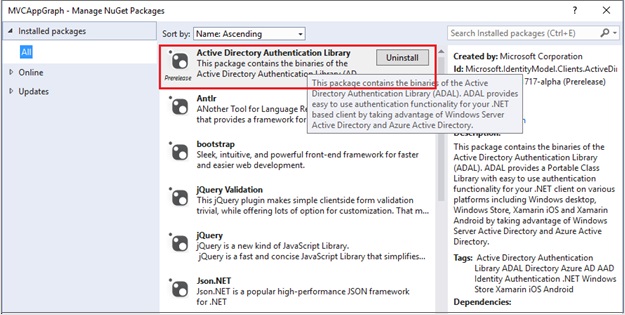
Once we have added this package we are good to write our code.
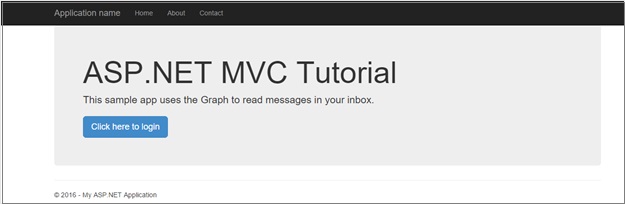
3. The first thing that we will do in our code is to modify the view for the home page. Navigate to ./Views/Home/Index.cshtml file and replace the contents of the file with the following code.
@{
    ViewBag.Title = "Home Page";
}

<div class="jumbotron">
    <h1>ASP.NET MVC Tutorial</h1>
    <p class="lead">This sample app uses the Graph to read messages in your inbox.</p>
    <p><a href="@Url.Action("SignIn", "Home", null, Request.Url.Scheme)" class="btn btn-primary btn-lg">Click here to login</a></p>
</div>
4. Next we will add the client id and client secret in the web.config file in the <appSettings> section.
<add key="ida:ClientID" value="client id" />
<add key="ida:ClientSecret" value="client secret"/>
5. Now if we look at the code in step 3, we have added an action named “SignIn” in the view. So, in this step let us actually implement this action in our controller class. Browse to .\Controllers\HomeController.cs file. Add a method named “SignIn” with the below implementation.
public async Task<ActionResult> SignIn()
{
     var authContext = new  AuthenticationContext(SettingsHelper.AzureADAuthority);

     // The url in our app that Azure should redirect to after successful signin
     Uri redirectUri = new  Uri(Url.Action("Authorize", "Home",  null, Request.Url.Scheme));

     // Generate the parameterized URL for Azure signin
     Uri authUri = await authContext.GetAuthorizationRequestUrlAsync(SettingsHelper.MicrosoftGraphResource, SettingsHelper.ClientId, redirectUri, UserIdentifier.AnyUser, null);

     // Redirect the browser to the Azure signin page
     return Redirect(authUri.ToString());
}
6. In the code above, we can see some parameters being passed using SettingsHelper class. Below is the code snippet of the SettingsHelper class.
public class  SettingsHelper
    {
        public static  string ClientId
        {
            get { return ConfigurationManager.AppSettings["ida:ClientID"]; }
        }

        public static  string ClientSecret
        {
            get { return ConfigurationManager.AppSettings["ida:ClientSecret"]; }
        }

        public static  string AzureADAuthority
        {
            get { return "https://login.microsoftonline.com/common"; }
        }

        public static  string MicrosoftGraphResource
        {
            get { return "https://graph.microsoft.com/"; }
        }
    }
So in the code above, we are fetching the values of Client ID and Client Secret from web.config file and the remaining two have constant values.
7. Next let us write another called “Authorize” that is used in our Redirect URL.
public async Task<ActionResult> Authorize()
        {
            string authCode = Request.Params["code"];

            AuthenticationContext authContext = new  AuthenticationContext(SettingsHelper.AzureADAuthority);

            Uri redirectUri = new  Uri(Url.Action("Authorize", "Home",  null, Request.Url.Scheme));

            // Use client ID and secret to establish app identity
            ClientCredential credential = new  ClientCredential(SettingsHelper.ClientId, SettingsHelper.ClientSecret);

            try
            {
                //Get the token
                var authResult = await authContext.AcquireTokenByAuthorizationCodeAsync(authCode, redirectUri, credential, SettingsHelper.MicrosoftGraphResource);

                // Save the token in the session
                Session["access_token"] = authResult.AccessToken;

                return Redirect(Url.Action("Inbox", "Home",  null, Request.Url.Scheme));
            }
            catch (AdalException ex)
            {
                return Content(string.Format("ERROR retrieving token: {0}", ex.Message));
            }
        }
In the code above, we are obtaining the authorization code from the query string parameters and using the authorization code we are fetching the access token. We are also saving this access token value in the session variable. And finally we are calling a new action “Inbox”.
8. Create a new action named “Inbox” in the code.
public async Task<ActionResult> Inbox()
        {
            string token = (string)Session["access_token"];
            if (string.IsNullOrEmpty(token))
            {
                ViewBag.Message = "Please Login";

                return Content("Test");
            }

            try
            {

                using (var client = new HttpClient())
                {
                    using (var request = new HttpRequestMessage(HttpMethod.Get, SettingsHelper.MicrosoftGraphResource + "v1.0/me/messages"))
                    {
                        request.Headers.Add("Authorization", "Bearer " + token);
                        request.Headers.Add("Accept", "application/json;odata.metadata=minimal");

                        using (var response = client.SendAsync(request).Result)
                        {
                            if (response.StatusCode == HttpStatusCode.OK)
                            {
                                var json = JObject.Parse(response.Content.ReadAsStringAsync().Result);

                                JArray messages = (JArray)json["value"];

                                var msgHtml = "<table><tr><th>Subject</th><th>From</th></tr>";
                                foreach (var message in messages)
                                {
                                    msgHtml += "<tr><td>" + message["subject"] + "</td><td>" + message["from"]["emailAddress"]["name"] + "</td></tr>";
                                }

                                msgHtml += "</table>";
                                ViewBag.JsonResponse = msgHtml;


                            }
                        }
                    }
                }

                //return Content(ViewBag.JsonResponse);

                return View();
            }
            catch(AdalException ex)
            {
                return Content(string.Format("ERROR retrieving messages: {0}", ex.Message));
            }
        }
In the code snippet above, we are fetching the value of the access token and using it we are making a call to the graph api to fetch the messages. If we look at the HttpRequestMessage we see we are making a GET request to https://graph.microsoft.com/v1.0/me/messages.
We are also passing the access token in the header. After parsing the JSON response that we received we are reading the response to fetch the values of subject and from field for each message obtained and building an html for the same. Finally we are showing this in a view.
9. Let us finally create a view for the inbox that will be rendered to show the user’s mailbox. For this let us add a view named “Inbox” and add the following code to our view.
@model IEnumerable<MVCAppGraph.Models.DisplayMessage>

@{
    ViewBag.Title = "Inbox";
}

<h2>Inbox</h2>
<div id="divMessages">@Html.Raw(ViewBag.JsonResponse)</div>
10. Now we have completed with the code. Next step is to finally publish this to Azure. Once you publish it you we see the below screen where you will be asked to login.
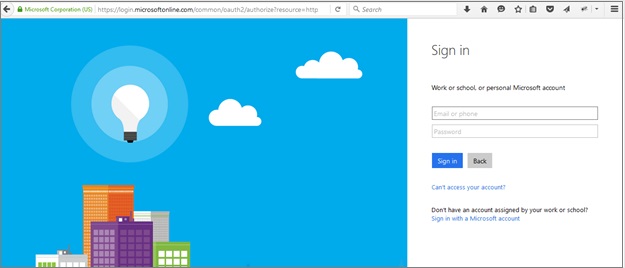
11. Once you click on login, you will be redirected to the Azure AD login page where the user will enter his/her credentials
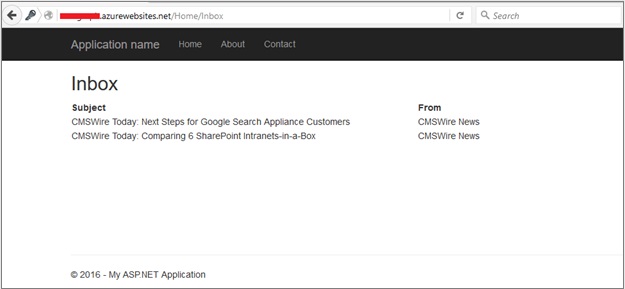
12. Once the credentials are successfully authenticated, the application will be taken to the redirect url mentioned in the code (Refer to step 5). This redirect url is a url to another action in our MVC app and i.e. the Authorize action. At this point the url also contains the Authorization Code (Refer Step 7). Now in this action, we will fetch the access token using the authorization code and use it to further make the REST call to Microsoft Graph API to fetch the mailbox. The final result is shown in the screen below.
Graph Explorer
Before we actually conclude this article, there is another thing that we want to talk about and it is “Graph Explorer”. It is a great tool for making REST calls to Microsoft Graph API without actually writing the code.
http://graphexplorer2.azurewebsites.net/
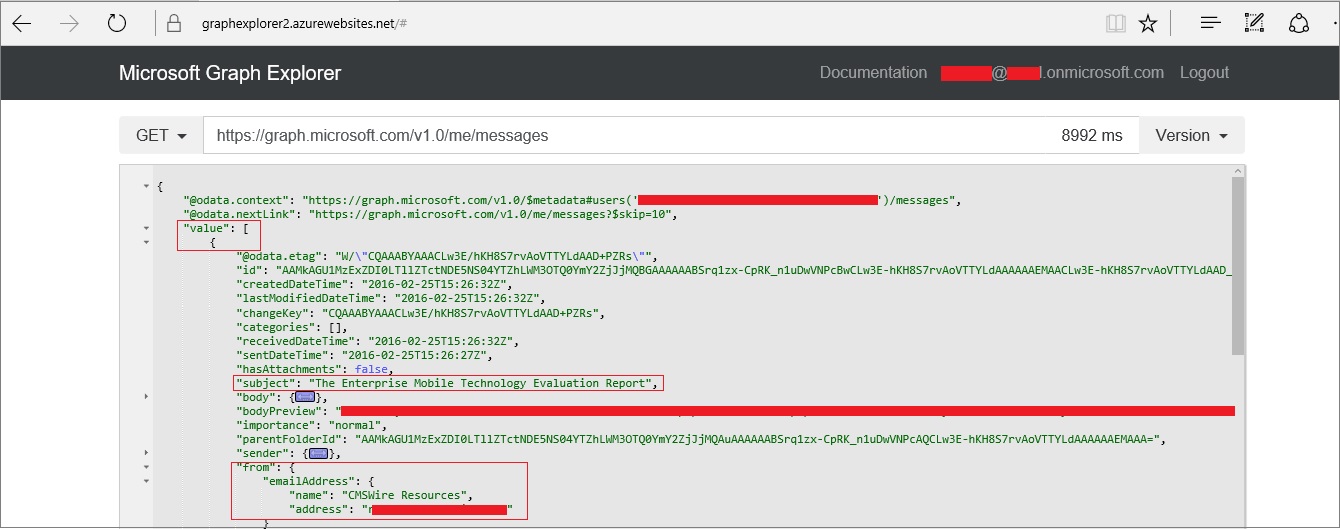
In the above screen, we are making use of Graph Explorer to fetch the JSON response for the logged in user's mailbox. As you can see we have made a REST call using Microsoft Graph API to https://graph.microsoft.com/v1.0/me/messages. The result contains messages stored in the form of an array in the "value". Each individual message is an item of "value" array. And for each individual message you can read various properties like "subject", "from" etc in the format above. If you relate this to the code in the previous sections (Step 8 in the MVC Application) you will see the relation.
This is how you can make use of Graph Explorer to make REST calls to Microsoft Graph API without actually writing any code.
Here is a "Getting Started" Wiki article on Graph Explorer:
Conclusion
Microsoft Graph is a really powerful and easy way to call the Microsoft APIs and all from a single endpoint. It is a unified API endpoint for accessing the data, intelligence and insights coming from the Microsoft cloud. In the above article we have created an MVC application and used Microsoft Graph API to fetch the user's mailbox. Also we have seen the use of Graph Explorer to make REST calls to the API without writing any code.
References
- http://graph.microsoft.io/en-us/docs
- https://msdn.microsoft.com/en-us/library/azure/dn645542.aspx
- http://graph.microsoft.io/en-us/docs/platform/rest#msg_calling_rest_api
- http://graph.microsoft.io/en-us/docs/authorization/app_authorization
Gallery
You can download the entire solution from the Technet Gallery at https://gallery.technet.microsoft.com/Using-Graph-API-to-fetch-8e5b9f87