Microsoft Bot Framework: Build Your First Bot Application
Bot Framework Overview
The bot is an app with a new user interface. It provides services such as web API that interact with the user in a conversational format. The intelligent bots interact with your users naturally wherever they are, from your website or app to text/SMS, Skype, Slack, Facebook Messenger, Office 365 mail, Teams, and other popular services. The Microsoft Bot Framework is a set of tools, services, products, and APIs to build and deploy software bots. The framework consists of the Bot Builder SDK, Bot Connector, Developer Portal, and Bot Directory. There's also an emulator that you can use to test your bot.
The Bot Builder SDK is an open source SDK available on the GitHub that allows developers to build intelligent apps without knowing or learning an additional skill, such as machine learning. It provides tools and services required to build bots. It can be build using .NET, Node.js, or REST API.
The Bot Framework Developer Portal lets you register and connect your bot to many different conversation experiences (Skype and Web are auto-configured), providing broad reach for your text/speech, image, button, card-capable and audio/video-capable bot. Make your bot available to your users through the Bot Framework.
The Bot Directory is a public directory of all reviewed bots registered through the Microsoft Developer Portal. Users will be able to discover, try, and add bots to their favorite conversation experiences from the Bot Directory.
The Microsoft Bot Connector is a communication service that helps you connect your Bot with many different communication channels (Skype, SMS, email, and others). If you write a conversational Bot or agent and expose a Microsoft Bot Framework-compatible API on the Internet, the Bot Framework Connector service will forward messages from your Bot to a user, and will send user messages back to your Bot.
What Bots are
The bot has many features which help to connect your customer from other conversational channels. These are as follows.
- Apps with a new interface: The bot is an app with a new interface, such as web or app. It provides a new communication method to your users for your business.
- Faster Access: As it's configured with other communication channels, it provides data to a user in a fast way as a service.
- Available across more platforms: There is no need to develop iOS and Android bots separately. There is no need to develop bots as per conversation channel. One bot can interact with different platform and conversation channels.
- Less friction to build and deploy: It’s easy to develop with .Net or Node js. There is Bot SDK available. It’s easy to register a bot and deploy on bot platform.
- More natural interaction: The bot doesn't only work for natural processing languages, but also it works perfectly with command line languages.
To understand a bot, let’s see a scenario. Suppose, you have a travel website which generates leads and you convert those leads. You share a static advertisement of travel package on the Facebook. Now, some customers are interested in this package and want to interact with you. Your customers have four options to follow.
- Post a comment on your post.
- Send a message using Facebook messenger to you.
- Post a message on your Facebook timeline.
- Come on your site and create a lead.
In the fourth option, your customer leaves your static advertisement page and comes on your website or app, so there is the chance to lose some genuine leads. In the rest of the operations, you need to hook an agent so that he/she can deal with them and convert leads.
Now, what can a bot do here? You develop a bot and configure it with Facebook messenger. Your customer just sends a request for that holiday package and the bot sends back available booking options to that customer. The customer can see more details as per his/her request and books that package. So, there are fewer chances to lose a lead and customer doesn't need to leave that static advertisement.
What Bots aren’t
There is some misconception about bots which are,
- Artificial intelligence only: It’s a misconception that bots are artificial intelligence only. The bots can be simple automation utilities such as password reset. It processes business logic and a set of steps.
- Text Interface only: The conversation can utilize simple text strings or something more complex such as rich cards that contain text, images, and action buttons.
- **Natural Language Processing only:**Bots can receive/transmit information without natural language. It can handle regular expression and commands.
Getting Started With Bot
To set up the bot framework connector SDK .NET template in the Visual Studio 2015, this is a step-by-step guide.
- Install Visual Studio 2015 (latest version)
- Download bot application template from this download link here
- Save the zip file to your Visual Studio 2015 templates directory which is traditionally in "%USERPROFILE%\Documents\Visual Studio 2015\Templates\ProjectTemplates\Visual C#\. For example, “C:\Users\USERXX\Documents\Visual Studio 2015\Templates\ProjectTemplates\Visual C#”
- Open the Visual Studio and create a new C# project using the new "Bot Application" template Figure 1: Bot Application Template

This template is fully functional and inputs text as request and response.
Building Bot Application
We want to build a Microsoft bot application which shows facial attributes, such as Age, Gender and Smile, using the Cognitive Service Face API. We will create the application using the bot template as shown in figure 1. This bot application has the following features.
- Integration of Cognitive Service Face API in the Microsoft Bot Application.
- Shows the face attributes, such as Age, Gender, and Smile, from an image which is an input in the Bot application.
For the bot application with Cognitive Service, we need to create an account on Cognitive Service. After that, register the Face-Preview API and get a key which will be used in the bot application.

Figure 2: Cognitive service Face Preview
To implement the Face-Preview API, we install Microsoft.ProjectOxford.Face NuGet package in the bot application.
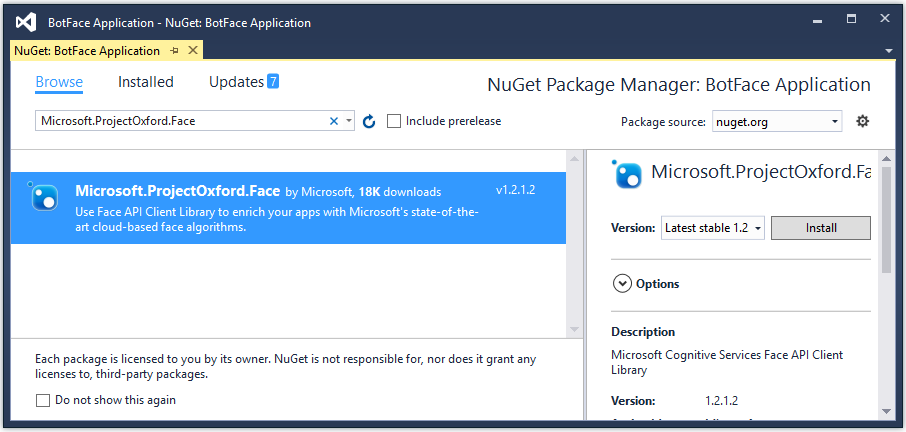
Figure 3: NuGet for Face API
Now, create a class named Utility which has the Cognitive Service Face-Preview API integration, as per the following code snippet.
using Microsoft.ProjectOxford.Face;
using System;
using System.Configuration;
using System.IO;
using System.Linq;
using System.Net;
using System.Threading.Tasks;

namespace BotFaceApplication
{
    public static  class Utility
    {
        private static  readonly IFaceServiceClient faceServiceClient = new  FaceServiceClient(ConfigurationManager.AppSettings["FaceAPIKey"]);
        public static  async Task<string> UploadAndDetectFaces(string imageFilePath)
        {
            try
            {
                var requiredFaceAttributes = new  FaceAttributeType[] {
                    FaceAttributeType.Age,
                    FaceAttributeType.Gender,
                    FaceAttributeType.Smile
                };
                using (WebClient webClient = new WebClient())
                {
                    using (Stream imageFileStream = webClient.OpenRead(imageFilePath))
                    {
                        var faces = await faceServiceClient.DetectAsync(imageFileStream, returnFaceLandmarks: true, returnFaceAttributes: requiredFaceAttributes);
                        var faceAttributes = faces.Select(face => face.FaceAttributes);
                        string result = string.Empty;
                        faceAttributes.ToList().ForEach(f =>
                            result += $"Age: {f.Age.ToString()} Years  Gender: {f.Gender}  Smile: {f.Smile.ToString()}{Environment.NewLine}{Environment.NewLine}"
                        );
                        return result;
                    }
                }
            }
            catch (Exception ex)
            {
                return string.Empty;
            }
        }
    }
}
The bot application which is created with the help of bot template has the pre-defined code. This code updates as per the following code snippet to handle the face image and send face attributes as an output.
using Microsoft.Bot.Connector;
using System;
using System.Net;
using System.Net.Http;
using System.Threading.Tasks;
using System.Web.Http;

namespace BotFaceApplication
{
    [BotAuthentication]
    public class  MessagesController : ApiController
    {
        /// <summary>
        /// POST: api/Messages
        /// Receive a message from a user and reply to it
        /// </summary>
        public async Task<HttpResponseMessage> Post([FromBody]Activity activity)
        {
            if (activity.Type == ActivityTypes.Message && activity.Attachments.Count > 0)
            {
                ConnectorClient connector = new  ConnectorClient(new  Uri(activity.ServiceUrl));
                string imageUri = activity.Attachments[0].ContentUrl;
                Activity reply = activity.CreateReply(await Utility.UploadAndDetectFaces(imageUri));
                await connector.Conversations.ReplyToActivityAsync(reply);
            }
            else
            {
                HandleSystemMessage(activity);
            }
            var response = Request.CreateResponse(HttpStatusCode.OK);
            return response;
        }

        private Activity HandleSystemMessage(Activity message)
        {
            if (message.Type == ActivityTypes.DeleteUserData)
            {
                // Implement user deletion here
                // If we handle user deletion, return a real message
            }
            else if  (message.Type == ActivityTypes.ConversationUpdate)
            {
                // Handle conversation state changes, like members being added and removed
                // Use Activity.MembersAdded and Activity.MembersRemoved and Activity.Action for info
                // Not available in all channels
            }
            else if  (message.Type == ActivityTypes.ContactRelationUpdate)
            {
                // Handle add/remove from contact lists
                // Activity.From + Activity.Action represent what happened
            }
            else if  (message.Type == ActivityTypes.Typing)
            {
                // Handle knowing that the user is typing
            }
            else if  (message.Type == ActivityTypes.Ping)
            {
            }

            return null;
        }
    }
}
The bot application is built successfully. Let's test it. To test the bot application, install the bot emulator.
Now, download the Microsoft Bot Framework Emulator from here. The bot emulator is an executable file named "botframework-emulator-Setup-3.5.21.exe". Just download and install it.
Figure 4: Installing Bot Framework Emulator
Now, run the application. Hit F5 or choose the Debug or Start Debugging menu command. The browser shows the following page. It is default.htm page in the bot application.
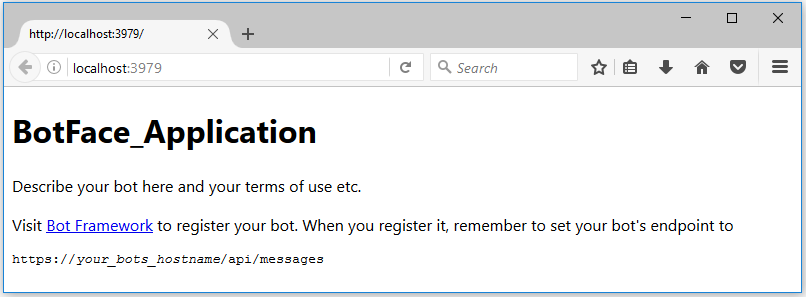
Figure 5: Bot application default page
Now, run the Microsoft Bot Framework Emulator and use the same port in the emulator which is mentioned with localhost in the browser. You need to type the URL "http://localhost:xxxx/api/messages" in the Bot Framework Emulator to run the bot application.
Both, Microsoft App ID and Microsoft App Password, need to be left blank. Then, click on "Connect". Now, choose an image which has a face and gets results as in figure 6.

Figure 6: Bot Framework Emulator runs application
Download
You can download the complete source code from MSDN sample. Click on download to Build First Bot Application With Bot Framework.
Conclusion
This article elaborated about how to build the Microsoft Bot application and integrate the Cognitive Services.