Implement Data Loss Prevention (DLP) in SharePoint Online
Problem Statement
With Online and Cloud storage, sensitive user information and company details can be inadvertently disclosed. This results in a non-compliance with business standards and industry regulations as the private data is compromised and can make its way to non-intended users. Securing of sensitive information like Credit Card Number, SSN, Passport Number etc are of utmost priority while using SharePoint Online for content management.
The Solution: Data Loss Prevention(DLP)
Data Loss Prevention (DLP) is a feature available in SharePoint that helps you to protect your data while it is stored or shared. DLP had been in existence in Microsoft Exchange but has been brought to SharePoint Online as well, as users are storing sensitive data and sharing them using SharePoint Online. Outlook implements DLP using Policies and Rules so that whenever we are drafting a mail and it contains sensitive information like Credit Card Number or SSN or any other similar information, we get a notification regarding the same.
DLP uses similar rules and policies to implement DLP. By setting up the required policies we can prevent sensitive information from being shared. If an attempt to share a document with sensitive information is shared we get the below alert as mail as well as an icon is placed in the document indicating it is blocked for use only by the owner, last modified and the site owner. Once the sensitive information is removed from the document, the block is released.
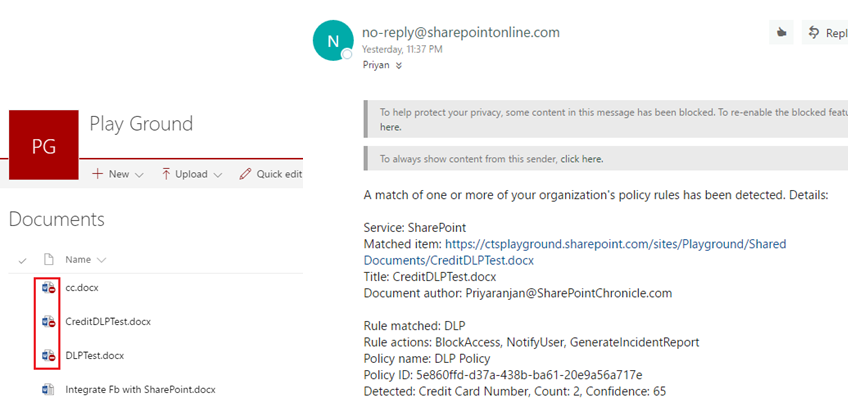
As you can see in the image below, left-hand side of the image shows the documents with a blocked icon indicating it has been blocked for further use with other non-admin users, until the security issue is resolved. Towards the right side of the image, we have the notification alert mail that was received indicating the compliance violation which was triggered by the DLP rules.
DLP Implementation
In this article, we will see how to set up the Data Loss Prevention Policy for securing Credit Card Information using Rules and Policies in SharePoint Online.
Set up DLP Policy
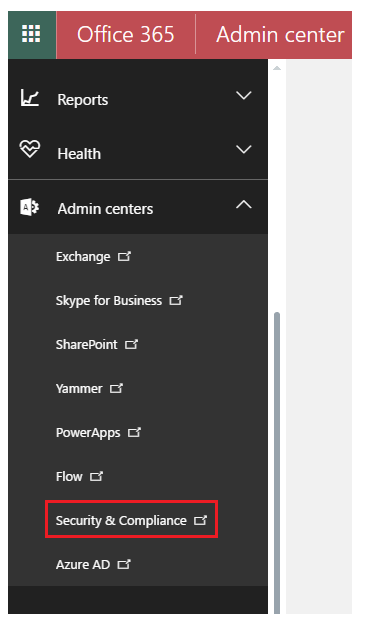
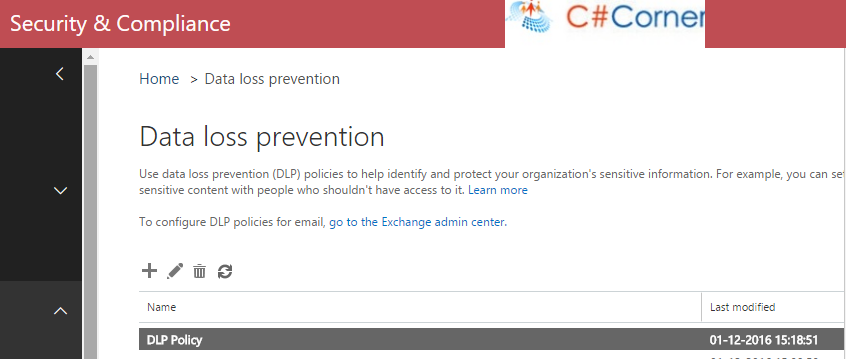
Let’s head over to the SharePoint Admin Centre and select Security and Compliance.
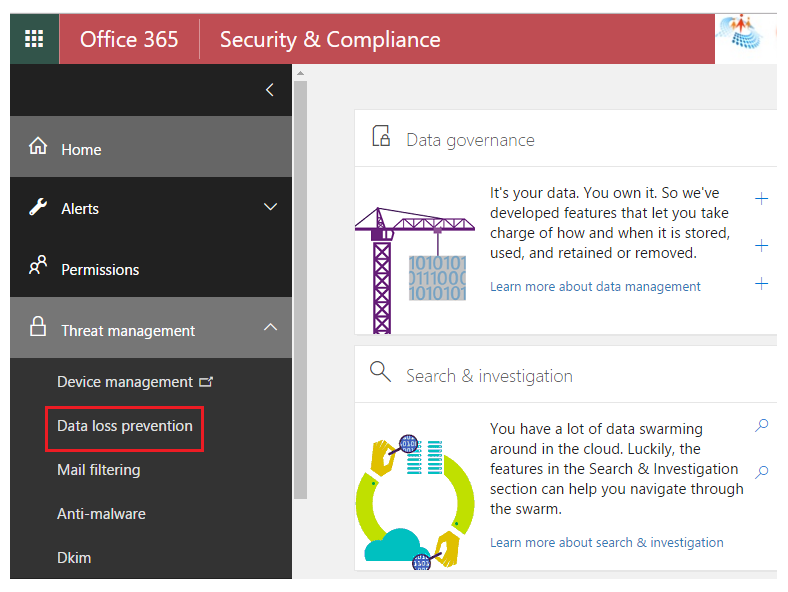
From threat management select ‘Data Loss Prevention’ option.
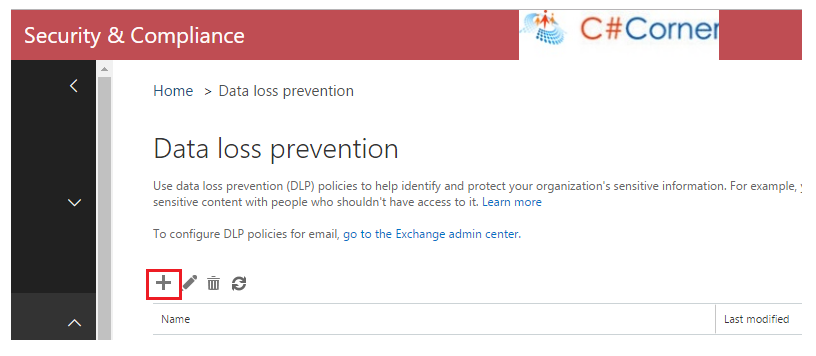
Click on the Plus icon to add a new DLP Policy.
This will open up a window from where we can select the type of information that we would like to protect. We can either select already available templates or we can select Custom option to build a custom policy.

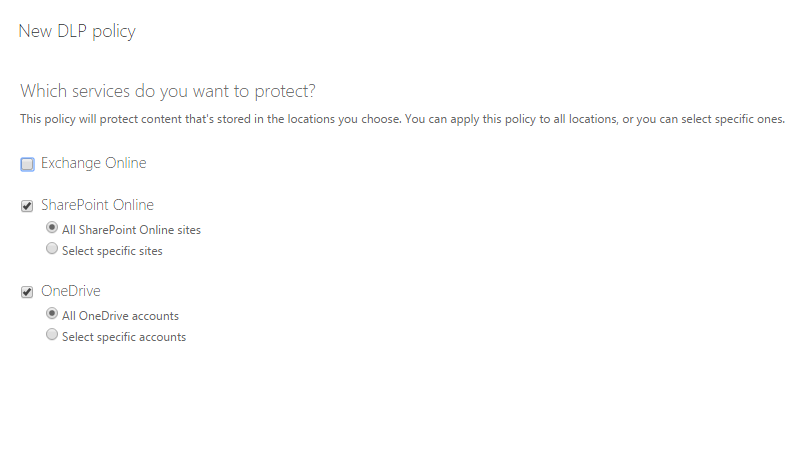
Now we have to select the services that we would like to protect. Let’s select SharePoint Online and One Drive.
Setup Rules for the DLP Policy
As part of creating the Policy we have to assign specific rules that will catch the sensitive information while in transit. Click on Plus icon to configure the Rule.

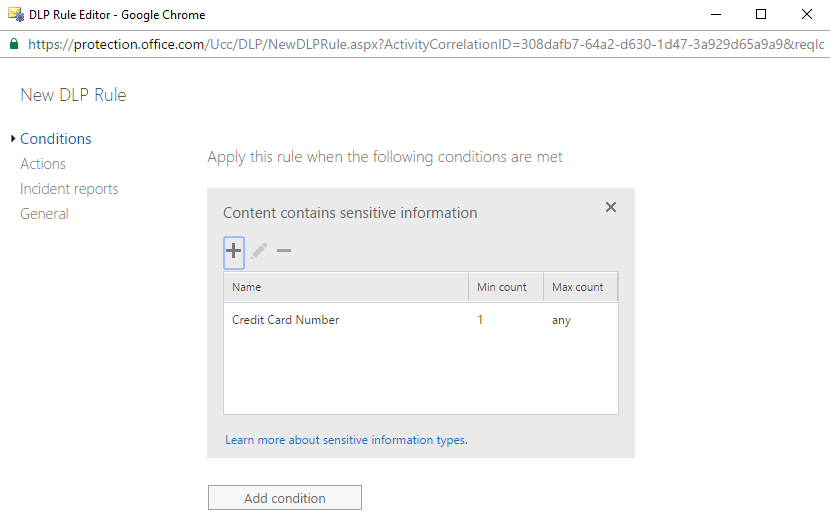
Click on Add Condition to add conditions that will form the satisfying condition for the DLP Rule.

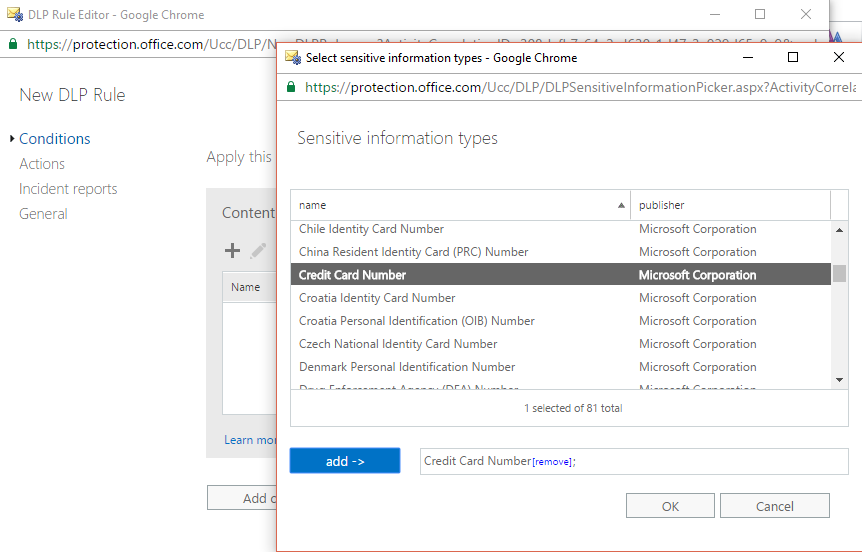
Let’s select “Content contains sensitive information” as the main condition that will trigger the Policy.

We can select multiple sensitive information types. We will go ahead with Credit Card Number as the primary sensitive information that we would like to protect.
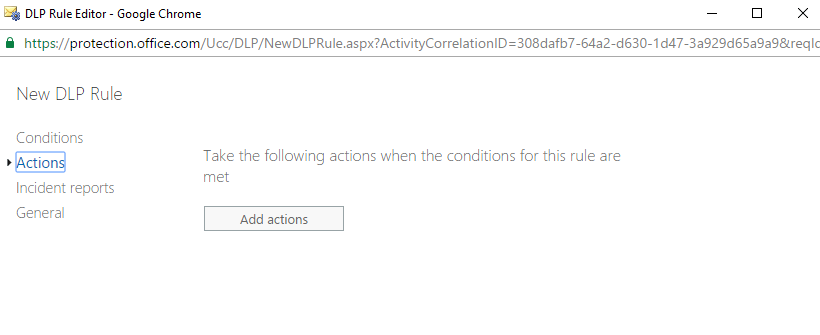
Now we have to specify what action should be taken when the specific rule is met. Click on Add actions to trigger the resulting action.
Let’s select block the content as the first action.
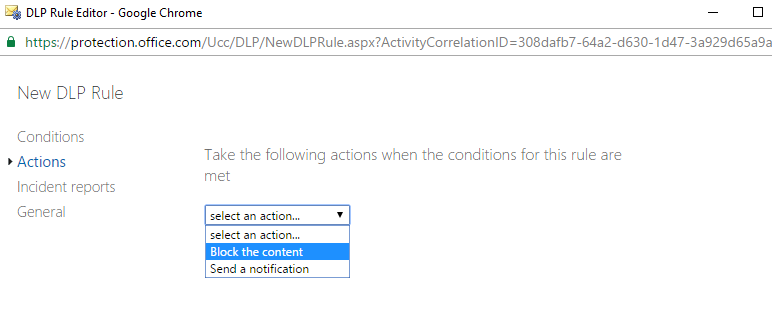
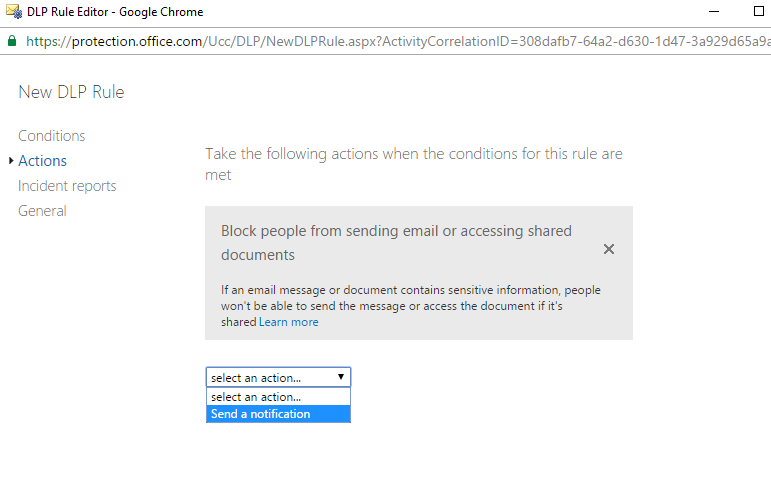
Once it is blocked we will have to send a notification regarding the block of sensitive information data to the end user. In order to do that select the ‘Send a notification’ option as well.
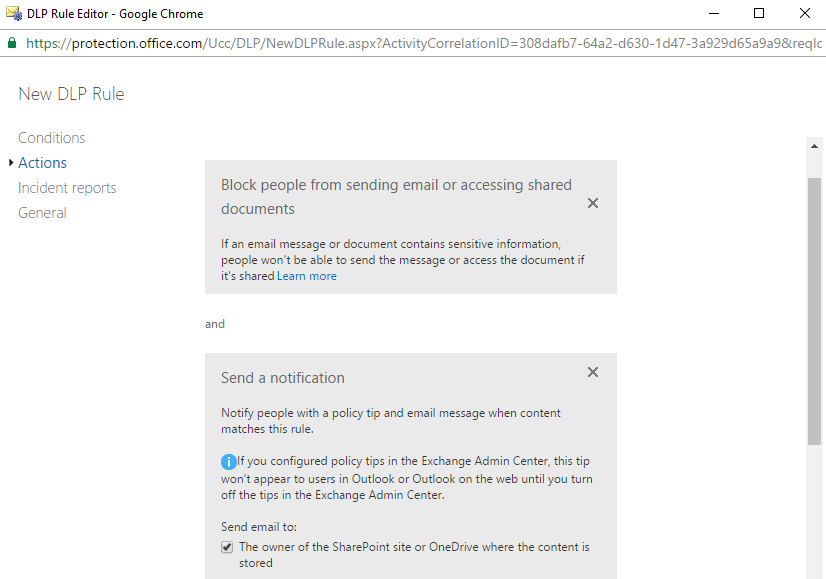
Thus we have set up the below actions by which the content will be blocked and notification will be sent to end user regarding the same.
We will save the rule by giving it a name and click on OK.

If we want to add more rules we can click on the Plus icon, else click Next.
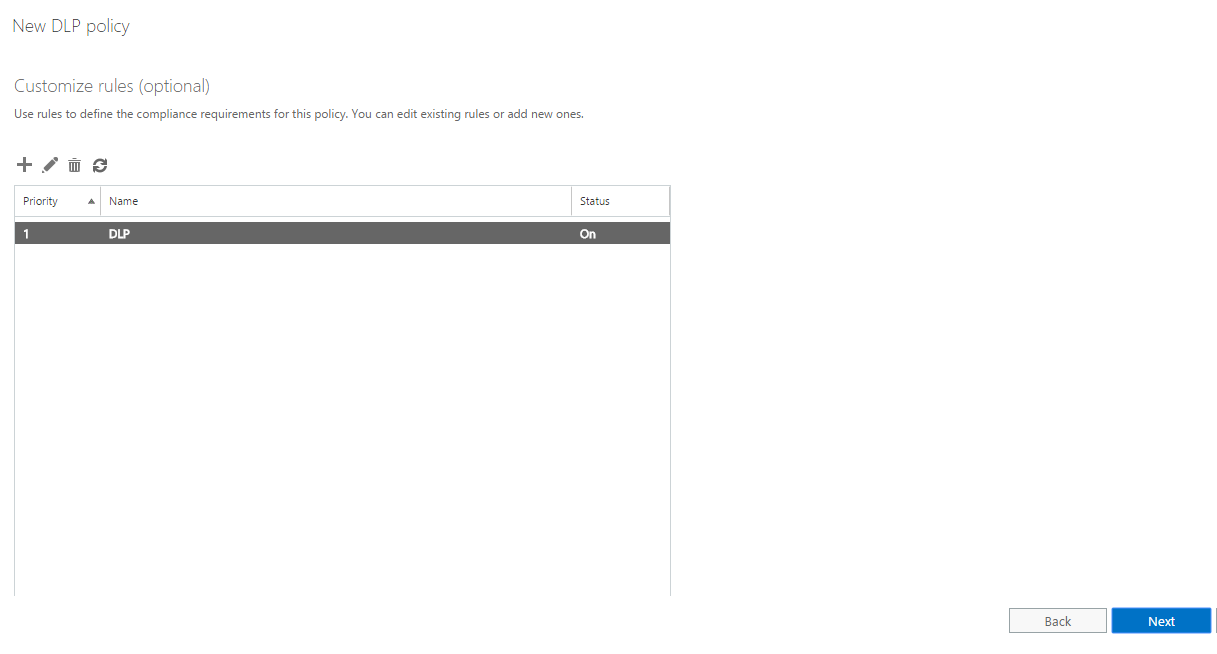
Now let’s give the DLP Policy a name and click on Create. This will complete the creation of the DLP Policy.

Thus we have completed the creation of the DLP Rule and the Policy.
Test the DLP Policy
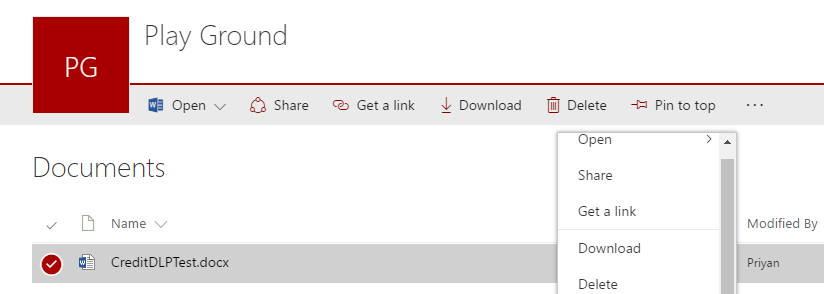
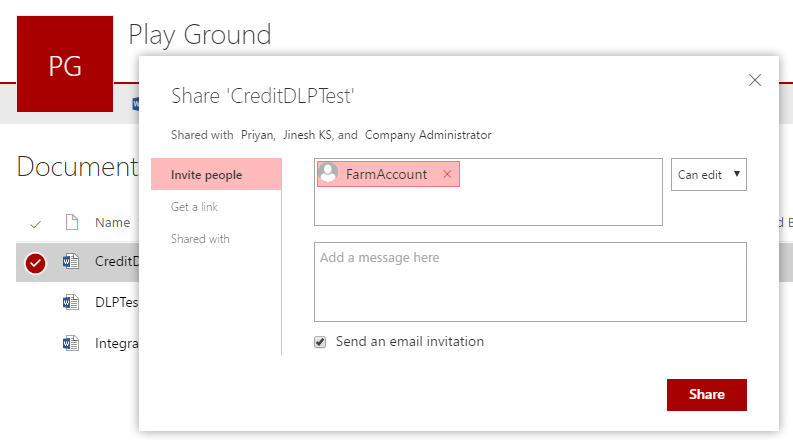
We can now test the DLP Policy we have created. I have uploaded few documents which contain the sensitive information – Credit Card Number. Upon sharing the document, the DLP policy should get triggered which will block the content and send a notification mail to the end user. To test DLP, let’s Share one of the documents that contains Sensitive information.
It has been shared with a SharePoint User account.
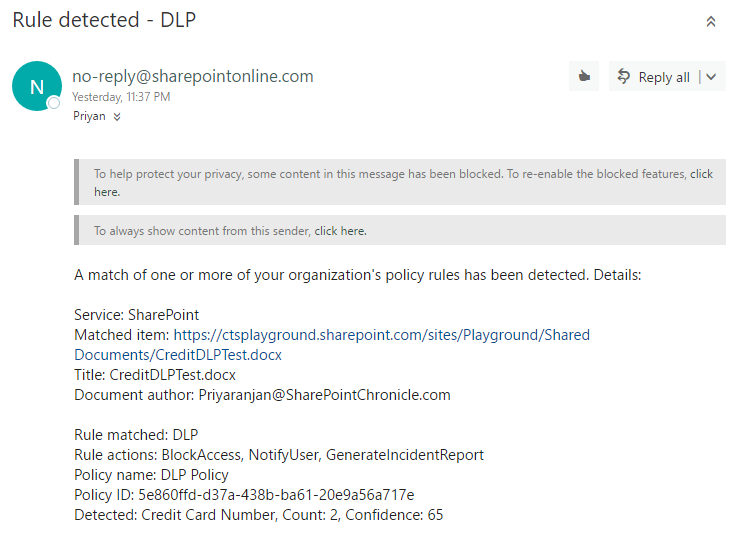
In a few minutes time, we will get a mail notification stating that the DLP rule has been matched and it has to be rectified.
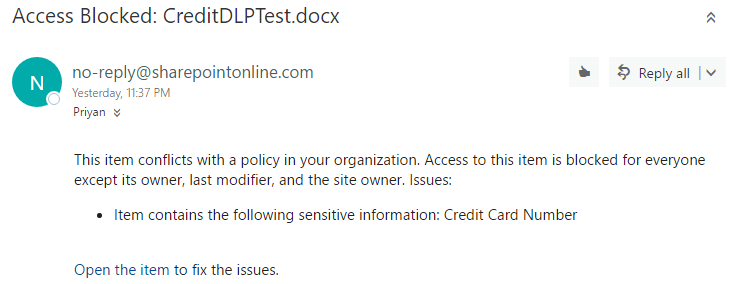
Until the sensitive information has been removed from the user, the document access will be restricted to its owner, last modified and the Site owner.
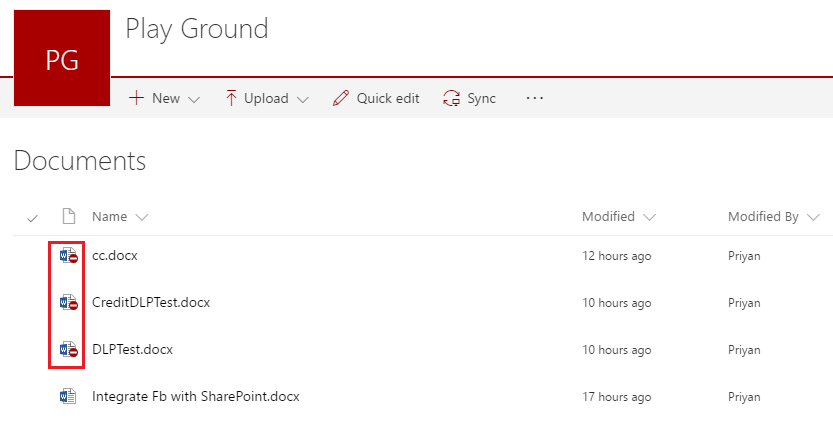
If we go to the Library we can see that a blocked icon has come up against each of the documents that match the DLP Rule. Unless the specific sensitive information is removed from these documents, it will continue to be blocked from other users.
Summary
Thus we have seen how to create a Data Loss Prevention Rule and Policy in SharePoint Online to prevent sensitive information from being shared among users.
See Also
This article was first published and can be viewed in detail from the below link :