Visual Studio: Upload Files Or Images To Server Using Node JS
Introduction
In this post we will see how we can upload files or images to server using Node JS. Here we are going to use Visual Studio for our development and preceding NPM packages for our easy development.
- express
- multer
- body-parser
We will briefly explain the use of these packages. As you all know Node JS is a run time environment built on Chrome's V8 JavaScript engine for server side and networking application. And it is an open source which supports cross platforms. Node JS applications are written in pure JavaScript. If you are new to Node JS, we strongly recommend you to read few posts about Node JS here.
Download source code
Background
Few years back if you need to upload any files or images to server, you were completely depended on server side languages like C# and PHP. Everything is changed after the revolution of Node JS. Here we will show you how to upload the files to server using Node JS, without writing even a single line of server side code. We hope you will like this.
Create a Blank Node JS Web Application
Create a blank Node JS web application.

Set Up Dependencies in package.json
To get started, we will set up our dependencies first. To do so, please open your package.json file and paste the preceding code.
{
  "name": "node_js_file_upload",
  "version": "0.0.1",
  "description": "Node_JS_File_Upload",
  "main": "server.js",
  "dependencies": {
    "body-parser": "^1.15.2",
    "express": "^4.14.0",
    "multer": "^1.2.0"
  },
  "author": {
    "name": "Sibeesh"
  }
}
Now, run the NPM install command as follows.
npm install
Once you run the command, you can see that the dependencies are installed in the solution.
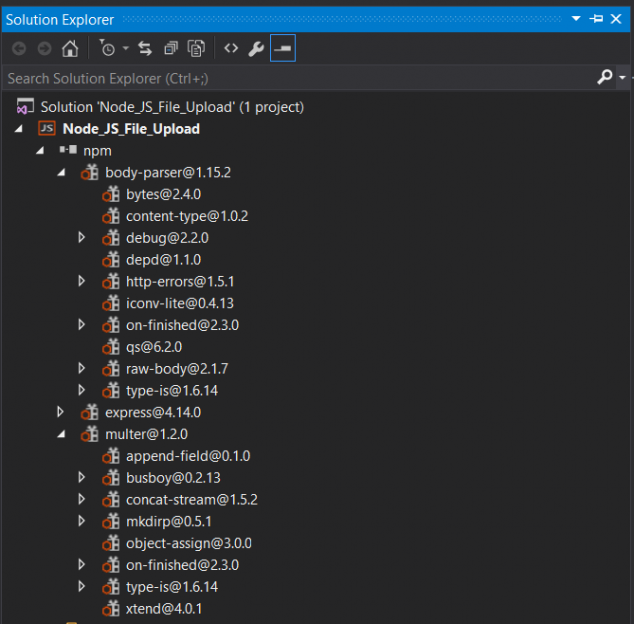
Now we can understand what are these dependencies used for.
- express
As per the Express Team, Express is a minimal and flexible Node.js web application framework that provides a robust set of features for web and mobile applications.Express provides a thin layer of fundamental web application features, without obscuring Node.js features that you know and love. You can always learn more about Express Package here.
- multer
Multer is a node.js middleware for handling multipart/form-data, which is primarily used for uploading files. It is written on top of busboy for maximum efficiency. Please read more about multer package here.
Start using our dependencies
You can create the instances of our dependencies as follows.
var Express = require('express');
var multer = require('multer');
var bodyParser = require('body-parser');
var app = Express();
app.use(bodyParser.json());
Then, it is time to create a storage which says where and how the files/images should be saved.
var Storage = multer.diskStorage({
    destination: function  (req, file, callback) {
        callback(null, "./Images");
    },
    filename: function  (req, file, callback) {
        callback(null, file.fieldname + "_" + Date.now() + "_" + file.originalname);
    }
});
Each file contains the following information:
fieldname : Field name specified in the form
originalname : Name of the file on the user's computer
encoding : Encoding type of the file
mimetype : Mime type of the file
size : Size of the file in bytes
destination : The folder to which the file has been saved
filename : The name of the file within the destination
path : The full path to the uploaded file
buffer : A Buffer of the entire file
Now please create multer object as follows.
var upload = multer({ storage: Storage }).array("imgUploader", 3); //Field name and max count
Here multer accepts the storage we created in our previous step as the parameter. The function array(fieldname[, maxCount])
accept an array of files, all with the name fieldname.
Now it is time to write our post and get action.
app.get("/", function  (req, res) {
    res.sendFile(__dirname + "/index.html");
});

app.post("/api/Upload", function  (req, res) {
    upload(req, res, function  (err) {
        if (err) {
            return res.end("Something went wrong!");
        }
        return res.end("File uploaded sucessfully!.");
    });
});
Here /api/Upload is the action name we are going to set in out HTML page which we will create soon. And last but not the least, we need to make sure that the app is listening to our particular port, in this case it is port 2000.
app.listen(2000, function  (a) {
    console.log("Listening to port 2000");
});
Create HTML page and set up uploading
You can create the page as follows with the references of the <em>jquery-3.1.1.min.js</em> and <em>jquery.form.min.js</em>.
<!DOCTYPE html>

<html xmlns="http://www.w3.org/1999/xhtml">
<head>
    <meta charset="utf-8" />
    <title>Upload images to server using Node JS</title>
    <script src="Scripts/jquery-3.1.1.min.js"></script>
    <script src="Scripts/jquery.form.min.js"></script>

</head>
<body>
    <form id="frmUploader" enctype="multipart/form-data" action="api/Upload/" method="post">
        <input type="file" name="imgUploader" multiple />
        <input type="submit" name="submit" id="btnSubmit" value="Upload" />
    </form>
</body>
</html>
Please be noted that the ecctype for your form must be multipart/form-data and the action must be same as we set in our API.
Create Ajax submit event
Now it is time to create our ajax event where we are going to call our API.
<script>
        $(document).ready(function () {
            var options = {
                beforeSubmit: showRequest,  // pre-submit callback
                success: showResponse  // post-submit callback
            };

            // bind to the form's submit event
            $('#frmUploader').submit(function () {
                $(this).ajaxSubmit(options);
                // always return false to prevent standard browser submit and page navigation
                return false;
            });
        });

        // pre-submit callback
        function showRequest(formData, jqForm, options) {
            alert('Uploading is starting.');
            return true;
        }

        // post-submit callback
        function showResponse(responseText, statusText, xhr, $form) {
            alert('status: ' + statusText + '\n\nresponseText: \n' + responseText );
        }
    </script>
Here ajaxSubmit function is part of the plugin jquery.form.min.js, so please make sure that you have included it.
Run your application
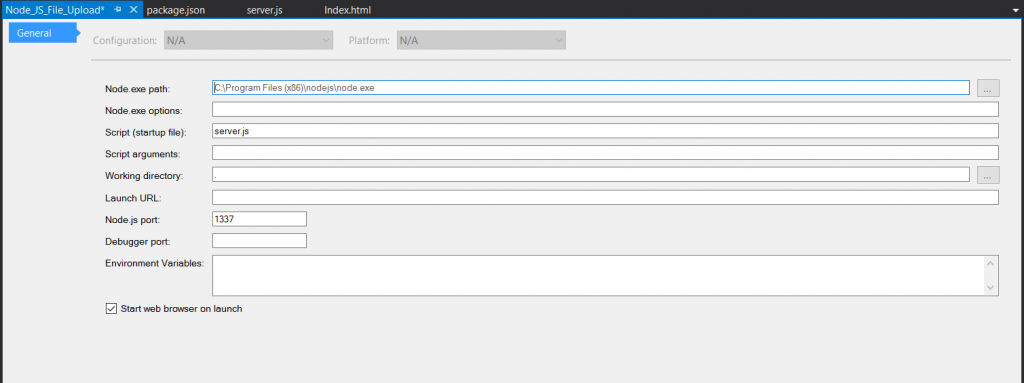
Now please run your application. Before running your application, you can always set your script file as your start up file, to set it, please right click on your project and click on properties.
Now you can open your command prompt, you can manually locate your project in command prompt or you can use the 'Open command prompt here' option. To select, please right click on your project and select the option as follows.

Now type node server.js in your command prompt which will make sure that your server is running. And if everything is fine, you can see a window as follows.

We can run our webpage now as our server is ready, please go to your browser and type the URL as http://localhost:2000. Select few files using the file uploader we have created.

If you click submit, you can see we are calling our method action and the files are uploaded. You can always download the source code attached to see the complete code and application. Happy coding!.
See also
Conclusion
In this article we have learned how we can upload the images or files to our server using Node JS. Did we miss anything that you may think which is needed? Could you find this post as useful? We hope you liked this article. Please share your valuable suggestions and feedback.
Your turn. What do you think?
This isn’t an article without comments, but do try to stay on topic. Please share us your valuable suggestions. Thank you