DHCP
In networking if you you want to communicate your node to another node (E.g. Laptop, Router). You must have an IP Address without IP Address you cannot communicate to another devices. Now a days IP Address are in Refrigerators, engineers can check the problem in their offices no need to come with their tools they also can operate on this while siting in their offices. Suppose, we have a network in which four computer are connected with a router they cannot communicate to other node without an IP Address.
We have to methods of assigning IP Addresses in our network.
Static
In Static, we add IP in our Network manually. It doesn't change by itself. Once we assign it remain constraint. It is recommended that we assign Static IP to our Servers.
We have a problem in Static IP assigning.
- Time Consuming
- Error of IP Conflict
- Un Complete IP Assigning
In Static IP we have 2 methods of assigning IP Addresses in our Network.
- GUI
- Command Line

You can see in network nodes communicate to other computer only on the bases of IP Address. They also have the need of Gateway your destination. DNS for name resolver and Subnet Mask for check what is your IP Address class.
Dynamic Host Configuration Protocol (DHCP or Dynamic IP)
It is automatic way of IP distribution. In this we distribute IP from a Centralize Server. We just configure this Server in our Network and this Server takes responsibility to distribute IP in network. It is fast better than Static. Normally we use a server known as DHCP.
It is a Server that distribute IP in Network automatically. New version of Bootstrap Protocol (BOOT Protocol which was used in NT 4.0)
In this we create Scopes. Scope is the range of IP Addresses that we configure to distribute in our Network. In this we add all require IP Address that we need in our Network such as:
- Internet Protocol IP
- Subnet Mask
- Default Gateway
- Domain Naming System "DNS"
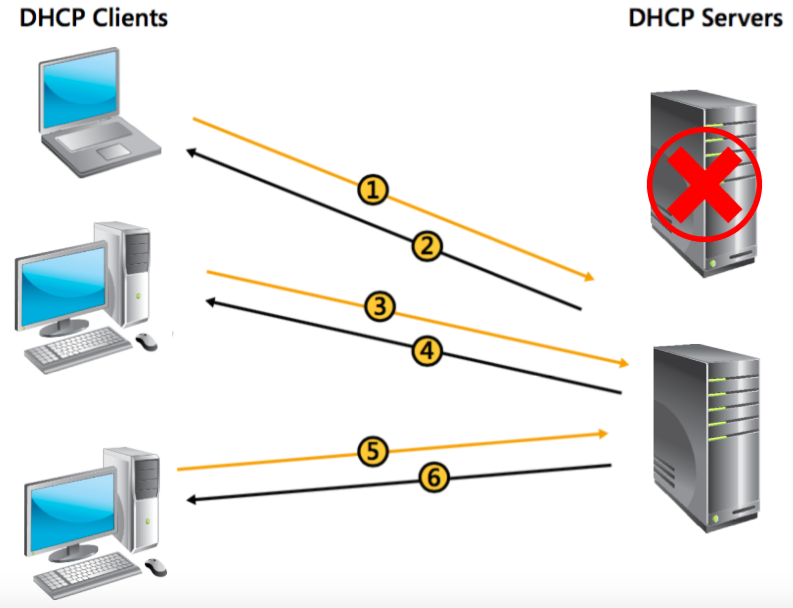
By default DHCP assign IP to a computer for 8 days lease time. We can view from client. DHCP works on the bases of DORA which is explaining this following figure.
D for Discover
When you power on your PC it check is their any Server who can give me IP Address
O for Offer
If there any Server exist it will say yes i am here i can give you IP Address
R for Request
Then client request to Server for IP Address
A for Acknowledge
This is the last message in DORA in which Server send acknowledgement message to client machine, mean it send to client a confirmation message with assigning an IP Address
APIPA ( Automatic Private IP Addressing )
APIPA is private IP range that is un configurable in computer. It works automatically when DHCP goes down in network. It is available in your LAN Card but we cannot see it by default also cannot configure it. It also use the range that is start from 169.254.0.0 end at 169.254.255.254. This IP only valid till DHCP turn on in our network.
Scope
In DHCP Scope you define the range of your IP Addresses. We also set Exclusion range in it that what IP Addresses we don't want to assign. Also DNS set in it.
As you can see we have a DHCP Scope with the name of Test Scope.
Add DHCP role an authorise your DHCP Server
Click on Commit button for complete configuration
Right click on IPv4 or IPv6 what ever you use IP Scheme and click on new Scope and your Server name and description
Assign the range of you IP Address
Add exclusion range what IP addresses you don't want to assign
what is expiration time you your IP addresses
click on Yes, I want to configure these options now
Add router or you Server IP Address in Gateway section
Specify DNS Server
Active your scope

Now you can assign IP Address in your network with your scope
Superscope
If our network is large and ranges as following
192.168.1.1 - 192.168.1.254
192.168.2.1 - 192.168.2.254
192.168.3.1 - 192.168.3.254
192.168.4.1 - 192.168.4.254
192.168.5.1 - 192.168.5.254
192.168.6.1 - 192.168.6.254
By default DHCP listen one scope and if our network is large then we will create a Superscope.Many scopes can be added in one Superscope by its name.
DHCP Binding
Lets if we have 2 or more NICs in our system then we will use Network Binding option. In example i have two NICs we can send or receive DHCP request with both NICs in our network.
Right click on your Server and click on Add/Remove Bindings
Check NICs which you want to enable
DHCP Failover
In a network if one Server goes down all traffic will stop. If we implement a DHCP Failover in our network it provides load balancing and DHCP Backup Server. If our primary Server goes down automatically all traffic will move to secondary Server.

Click on Configure Failover
Add partner Server
Select from the list or browser and type your partner Server name
Specify the percentage of your both Servers
Load Balancing
If we have two branches first one is in USA and second one is in Pakistan and we want to assign IP Address Pakistan user from Pakistan Server and USA user will get IP Address from USA Server then we shall use DHCP Load Balancing option.
Split Scope
It provide Load Balancing and Failover options in it.
Right click on your scope and in advanced section click op Split Scope


