Node.js With Visual Studio 2017
Introduction
This article is intended to create first node.js application with the Visual Studio 2017. The Node.js is a JavaScript-based platform, built on Google’s Chrome V8 engine. It’s not a JavaScript library while it’s a server-side runtime environment which used to run JavaScript code. It has following features.
- It is open source and cross-platform application.
- All API of Node.js are asynchronous. It means request executes parallel rather than in queue.
- Its input/output operations are non-blocking. So, its performance is also better.
- It’s event driven. In other words, all the tasks are performed accordance of the event.
- It creates HTTP server similar to SignalR Server rather than same as IIS.
As browser runs JavaScript code on client side same as Node.js runtime runs JavaScript on server side.
Node.js Installation
There are some steps which comply during installation of Node.js on the windows machine. These are as follows:
- 1. Download Node.js Set up installer from official site https://nodejs.org/en/. There are two window installer options, one is V6.10.0 LTS while another is V7.7.3 Current. So, go with first option. It downloads a windows installer named node-v6.10.0-x64.msi. The LTS is Long Term Support version which uses for production while Current version has new features which uses for development.
 Figure 1: Download Node.js Set up
 - Now, runs node-v6.10.0-x64.msi Windows installer. It opens installation wizard. So, follow these steps til finish.
 Figure 2: Node.js Set up wizard
 - Once the installation completes, restart the system.
Test Node.js Environment
As per above procedure, Node.js has been installed in the system. Now make sure Node and NPM installed by running simple command.
First to see Node is installed or not. Run the PowerShell and type command node –v and press enter. It prints Node.js version something like v6.10.0
Now, To see NPM is installed type npm –v in the window. If its prints version number such as 3.10.10 that means NPM has been installed.
Run some js sample to test that Node.js works on system. First starts Node.js using command “node”. It opens shell where JavaScript code executes by row or block. After that type JavaScript code such as console.log(“Hello Node Js”); in the shell window and runs it.
Node executes this code and prints output “Hello Node Js” followed by “undefined”. Node always returns a value of each command and console.log function doesn’t return anything.
Now, types command .exit in the terminal so that we can exit from Node.
An another way to test that node.js works is to create a JavaScript file: name it hello.js, and just add the code console.log('Node.js is ready to use');. To run the code, type node hello.js. This will start Node and run the code in the hello.js file. We should see the output 'Node.js is ready to use'.
 Figure 3: Test Node.js Environment
Node.js with Visual Studio 2017
To develop the Node.js application using the Visual Studio 2017 IDE, We install Node.js development workloads. This installation creates in-built templates for Node.js application.
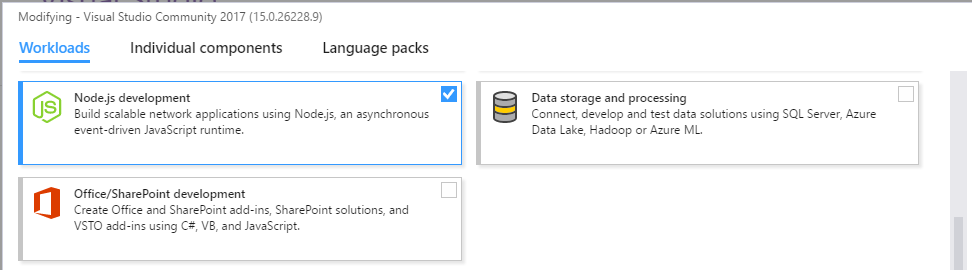
Figure 4: Visual Studio Workloads
We develop a simple web application with Node.js using Visual Studio. We create a new Project and select “Blank Node.js Web Application”. It creates a web application solution for same.
New Project --> Templates --> JavaScript --> Node.js --> Blank Node.js Web Application
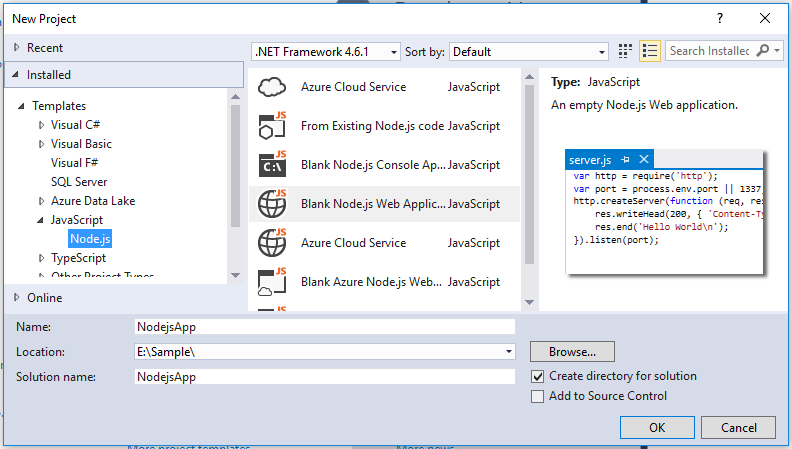
Figure 5: Node.js Application Templates
It creates a Node.js application with default template. It holds server.js file with following code snippet.
'use strict';
var http = require('http');
var port = process.env.PORT || 1337;

http.createServer(function (req, res) {
    res.writeHead(200, { 'Content-Type': 'text/plain' });
    res.end('Hello World\n');
}).listen(port);
console.log('Server running at http://127.0.0.1:1337/');
This is a “Hello World�� application using Node.js. Let’s see the component of this Node.js application one by one.
Import Require Module: A module is reusable component which can be include in other module. The above code snippets uses require directive to include the HTTP module and stores the returned HTTP instance in the variable named http. The following code snippet for same.
var http = require('http');Create Server: To handle HTTP request and response, we create a server. This server runs on available port. We use the created HTTP instance and call http.createServer() method to create a server instance. This server binds with port 1337 using listen method. We pass a function to perform some client-server operation in this. This passed function holds two parameters which are request and response. This always returns “Hello World” and prints same as on browser window when make a request with port 1337.
http.createServer(function (req, res) {
    res.writeHead(200, { 'Content-Type': 'text/plain' });
    res.end('Hello World\n');
}).listen(port);
Runs the Application: Now, to run the application either press F5 key or click Start in the Visual Studio. It asks to allow firewall to access it and shows result. Another option to runs the application is manual, Opens one of the terminals among Node.js command prompt tool, Windows Command Prompt and PowerShell window. Now, types command to runs this created server as per following command.
node E:\Sample\NodejsApp\NodejsApp\server.js
It starts new created node.js server instance. As per below figure, server has started.

Figure 6: Run Node.js Server
Now, we make request to the Node.js Server. Open http://127.0.0.1:1337/ in any browser and observe the following result.
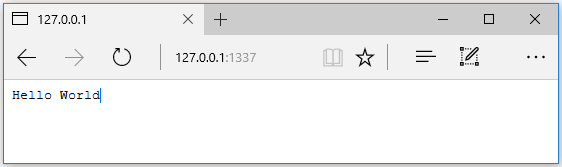 Figure 7: Response from server
Conclusion
These are some of the basics to set up Node.js environment on windows machine with Visual Studio 2017, which .NET developer starting to learn Node.js should know. This article is written for .NET developer who can use Node.js.