ADFS: How to change the ADFS server FQDN from one domain to another
How To change the host name of the ADFS 3.0 from one domain to another
*Recently we have a situation whereby we have a requirement to implement a single sign-on page with Dynamics CRM. We have a CRM application with IFD enabled. We set up the ADFS in the CRM server itself and using the same domain name as CRM. For e.g. https://org.application.com:5556 as CRM and https://org.application.com as ADFS. With this in place after when we try to add or custom web page with the single sign-on, we are facing problem whereby the cookies of both ADFS and CRM are conflicting with each other. Because of this conflict, the sign in page went to an infinite loop. After various research, we found that it is recommended to use a different subdomain or a different domain address for ADFS and CRM. We decided to change the domain name of the ADFS from org.application.com to org.adfsapplication.com. *
Steps
- First step. import your new SSL certificate to your local computer personal certificate store.
- This can be done by typing in MMC in the run command and open the MMC console.
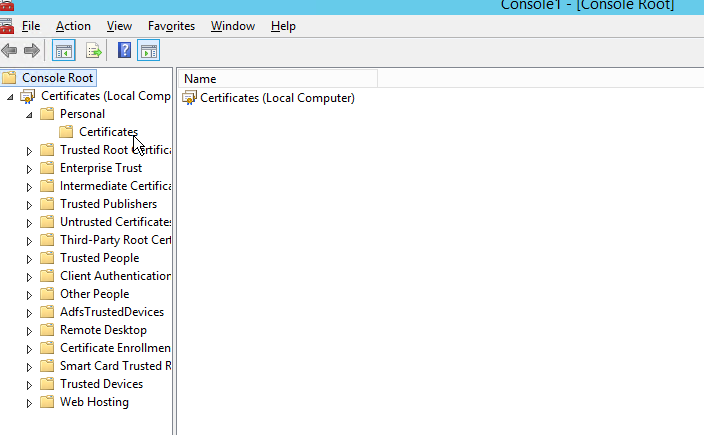
- The choose File --> Add/ Remove snapin.. In the Add/ Remove snapins window under the available snapins on the left-hand side choose Certificates and click on Add-> button in the middle.
- Choose Computer account in the popup wizard click Next and Finish.
- Click ok in the subsequent popup.
- In the Personal --> Certificate import the SSL certificate and make sure the ADFS service account has read access to the private key.
- Open the ADFS Management application, on the right, is the "Edit Federation Service Properties" and change the Federation service name and identifier with the new domain name. In our case, it will be org.adfsapplication.com.
- Update the ADFS certificate that it uses. Open Powershell and run "Update-ADFSCertificate". This will generate the new token-decrypting certificate and token-signing certificate that you can see in the ADFS Management (under AD FS -> Service -> Certificates). The org.application.com certificate is still remaining on the primary certificates. You can see another set of the certificate as a secondary category.
- We cannot change the new set of the certificate as primary. This is because, by default, the ADFS auto certificate rollover is set as TRUE. In order to change the certificates as primary, we need to issue a command in Powershell as "set-ADFSProperties -AutoCertificateRollover $false". Now in the ADFS management under the certificate right-click the secondary certificate and choose set as primary. Need to follow this both in Token-decrypting and Token-signing part.
- Now need to remove the two secondary certificate on Token-decrypting and Token-signing sections.
- Update back the auto certificate rollover option to true by running "set-ADFSProperties -AutoCertificateRollover $true" in the Powershell.
- In the Powershell, type "get-ADFSSslCertificate" and this should show three certificates, two for the org.application.com hostname: port and one for localhost.
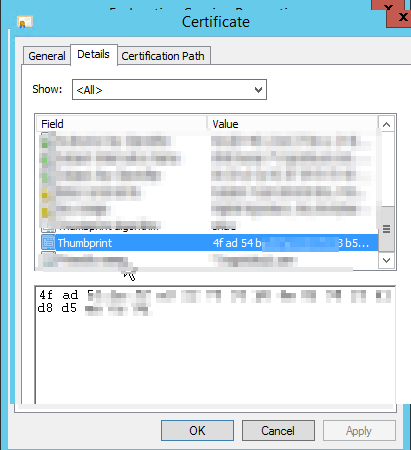
- Copy the CertificateHash of your new certification, this is the tricky part. We will be lucky if the update ADFS certificate command executes successfully without any error. In Powershell run "set-ADFSSslCertificate -thumbprint <CertificateHash>. This must be done on each server in the farm. Certificate HASH can be obtained from the SSL certificate as below. (remove the spaces in between)
- If the set-ADFSSslCertificate -thumbprint <CertificateHash> command didn't work out and you are getting "ADFS not able to find the certificate using the hash in the computer personal store" error message. In this case, we need to forcefully update the new certificate to ADFS, this can be done with the following steps.
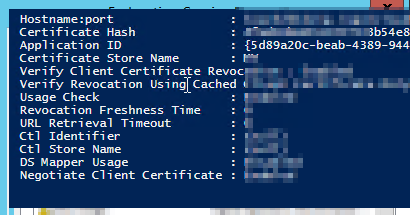
Back to Powershell and run the NETSH HTTP SHOW SSLCERT command. This will list five entries with three for ADFS. In those five, two of them are from CRM and three are for ADFS provided if you don't have any other websites or application running on that server. Make a note of the application ID which is a GUID
Now remove the existing entries for the ADFS application with the old hostname org.application.com.
-
netsh http delete sslcert hostnameport=org.application.com:443
netsh http delete sslcert hostnameport=org.application.com:49443
The next step is to add the two entries back with the new hostname i.e. org.adfsapplication.com.
-
netsh http add sslcert hostnameport=org.adfsapplication.com:443 certhash={CertificateHASH} appid={5d89a20c-beab-4389-9447-324788eb944a} certstorename=MY netsh http add sslcert hostnameport=org.adfsapplication.com:443 certhash={CertificateHASH} appid={5d89a20c-beab-4389-9447-324788eb944a} certstorename=MYreplace the cert hash with your hash code of your SSL certificate and appid with your application id from the above step.
- Run the get-ADFSslCertificate again and there should be 5 certificates now, one for localhost, two for the old name and two for the new name.
- The ADFS is now updated with your new SSL certificate. Navigate to ADFS Management --> Trusted relationships -->Relying party trust. Update your claims to take effect of the new domain name.