Visual Studio Step-By-Step: Basic steps to create an Extension example
Basic steps to create Microsoft Visual Extension:
Here is the details to create simple Visual Studio Extension:
File -> New -> Project -> Visual C# -> Extensibility -> VSIX Project

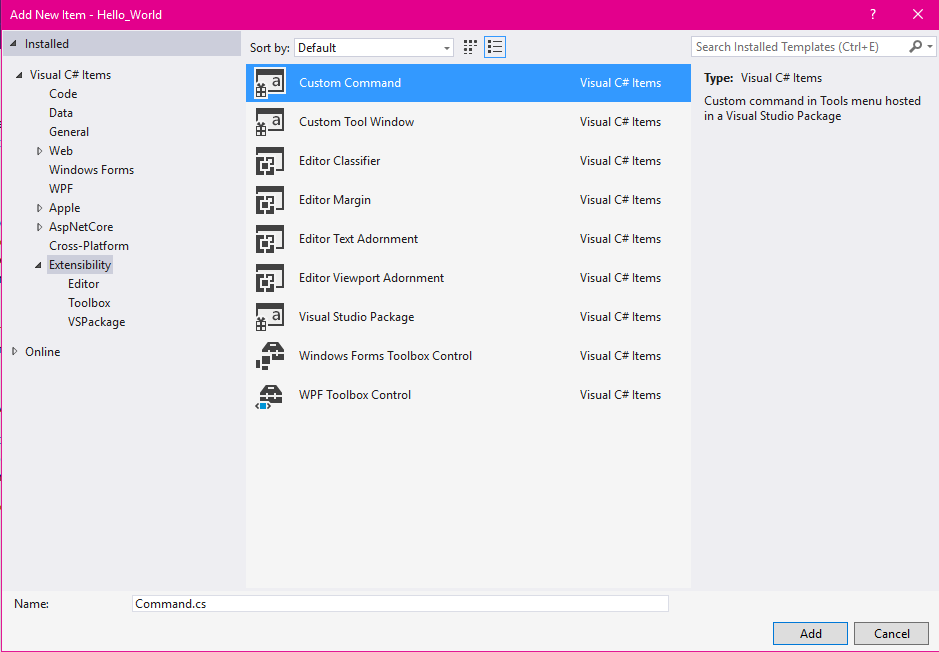
Add a Custom command
Right-click the project (not the solution). On the context menu, click Add, and then click User Control.
Go back to the Extensibility section, and then click Custom Command.
Now we need to modify the code.
At this point, the Button we are adding is pretty generic. we'll have to modify the VSCT file and CS file if you want to make changes.
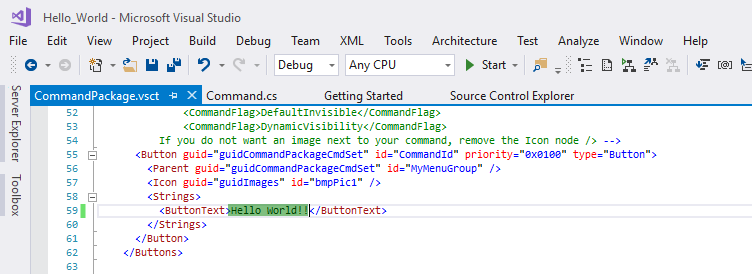
The VSCT file is where you can rename your commands, as well as define where they go in the Visual Studio command system. As you explore the VSCT file, you will notice a lot of commented code that explains what each section of code controls.
The CS file is where you can define actions, such as the click handler.
In Solution Explorer, find the VSCT file for your new command. In this case, it will be called CommandPackage.vsct.

We need to modify below lines to change Command button text name
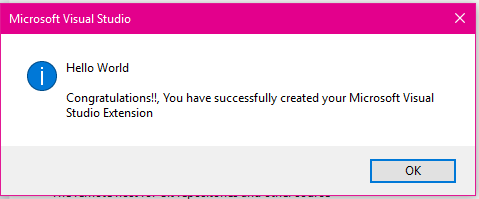
Go back to Solution Explorer and find the Command.cs file. Change the string message for the command to “Hello World!” - this the place where we will be doing actual workflow.

Run program.

Click on "Hello World".