MIM 2016: Configure SAP Web Service Connector with Certificate-based Authentication
Introduction
In MIM 2016 and FIM 2010 R2, creating a web service connector to SAP (or any other SOAP-based web service) using basic authentication is fairly straightforward. However, sometimes there is a requirement to have a more secure authentication method to the web service. The Web Service connector in MIM supports the use of certificate-based authentication.
However, this also introduces a couple of issues when configuring the connector, and extra steps are required to ensure that all works as expected. In particular, the Web Service Configuration Tool requires a specific naming format to recognise the client authentication certificate. Also, depending on the quantity of data that needs to be imported, the default timeout configuration for the web connector may be too short.
Configure certificate-based authentication for web connector
Overview
This procedure steps through configuring the certificate-based authentication option for the web service connector. It doesn't cover the actual configuration of the actual connector, attribute mapping and so on.
Obtain the MIM Web Service Configuration Tool and samples
The Web Service Configuration Tool to create the connector and sample SAP connector project files must be downloaded from Microsoft and installed on the MIM server: http://go.microsoft.com/fwlink/?LinkId=717495
The documentation for the Web Service Configuration Tool installation and base connector configuration is found here: http://go.microsoft.com/fwlink/?LinkID=226245
Create a basic-authentication SAP web service configuration
The initial configuration is probably easiest using basic authentication with username/password only in a Development environment, if the SAP developer can provide the functionality.
Using standard web service configuration methods per the documentation, use the Web Service Configuration Tool (WSCONFIG) to create the binding to the SAP web service and attribute mappings for the data import into MIM.
This will result in a .WSCONFIG file that is then used for the actual configuration of the SAP Web Service connector. This may be used to test the synch job using the Synchronisation Service Manager.
Configure client authentication certificate
Create a signed Client Authentication certificate, ensuring it's signed by a PKI for which the SAP server also has the root certificates installed. When creating the certificate signing request, note that:
the certificate Key Usage should be
Digital Signaturethe Enhanced Key Usage should be
Client Authentication (1.3.6.1.5.5.7.3.2)the Subject name can be anything meaningful - we used the name of the account configured in SAP to connect to the web service
On the MIM server, import the certificate and private key into the Local Machine Personal store. Change the NTFS permissions on the MachineKeys folder to allow the FIM Synchronisation Service account to read the cert (see instruction on changing NTFS permissions below).
Alternatively, you may logon as the Synchronisation Service account and import the certificate and private key into the Current User Personal Store. It would avoid the issue of changing the NTFS permission on the MachineKeys folder, but the Synchronisation Service account would require interactive logon rights to the server.
Supply the public certificate and/or Subject Name to the SAP team to configure the SAP account to allow certificate-based authentication. This SAP Wiki article describes the configuration options and testing methods.
https://wiki.scn.sap.com/wiki/display/Basis/How+to+configure+client+certificate+logon+to+AS+ABAP
Once the account is configured with certificate authentication in SAP, import the cert and the private key into a standard web browser (or other SOAP testing tool that can use certificate-based authentication) on a client that is able to reach the SAP web service URI.
Enter the SAP web service URI into the browser, and ensure that certificate authentication is successful. The WSDL for the SOAP binding and schema of the target web service should be displayed with no authentication prompts or 401 access-denied errors.
Modify SAP web service configuration for certificate authentication
This section assumes the following steps have been completed:
A basic authentication SAP web service has been configured and the WSCONFIG file created.
The authentication cert has been imported into the Local Machine Personal store.
The SAP web service and the user account that will be used for access to the web service have been configured by the SAP administrator to accept authentication via the supplied certificate, and has been tested.
The MIM web service config will only bind the certificate for authentication if the subject name is entered into the WSConfig tool in a specific format. The usual format for a certificate subject is not recognised.
To correctly format the subject name for importing by the Web Service Configuration Tool:
Note the
Subjectof the SAP account authentication certificate.
Reformat it to consist of only the attribute values of the Subject separated by commas followed by spaces in reverse order. i.e. If the subject consists of a fully-qualified X500 path:
- omit "CN=", "OU=" etc.
- reverse the order of the values to start with the Country (where it exists)
- separate each field with a comma + space
For example, Certificate Subject is:
- CN = ws_admin, OU = SAP, O = Contoso, L = Canberra, C = AU
Formatted for WSConfig:
- AU, Canberra, Contoso, SAP, ws_admin
Open the .WSCONFIG file created for the SAP web service in the Web Service Configuration Tool.
In the Discovery section, click Edit to modify the discovered service.

Select Next on the following screen to get to the authentication configuration screen.
Select Certificate authentication and the following settings, complete with the reverse-formatted certificate subject name:
- Store Location: Local Machine
- Store Name: My
- Subject: AU, Canberra, Contoso, SAP, ws_admin
When the Next button is clicked, the WSConfig tool will attempt to bind and download the SAP web service schema and objects. If this is successful, the .WSCONFIG file can be saved and used to configure the SAP Web Service Management Agent in the Synchronisation Service manager.
PowerShell for formatting the certificate subject
Using PowerShell to format the certificate subject from the data in the actual certificate will help avoid typos. This example reads the certificate subject from the Local Machine certificate and formats it correctly for WSConfig.
$cert =  Get-ChildItem Cert:\LocalMachine\My | where {$_.subject -like "*ws_admin*"} |select -ExpandProperty Subject
$str =  ($cert -replace "\w+=")  -split ", "
$strArray[-1..-($str.Count)] -join ", "

AU, Canberra, Contoso, SAP, ws_admin
NTFS Permissions change for FIM Synchronisation service to read cert
If the certificate has been installed in the Local Machine store, rather than the FIM Sync Service account, change permissions on "C:\ProgramData\Microsoft\Crypto\RSA\MachineKeys" to grant the FIM Sync Service account (FIM_SYNC) Read and Execute permission.
C:\ProgramData\Microsoft\Crypto\RSA>icacls MachineKeys

MachineKeys    Everyone:(R,W)
          CONTOSO\FIM_SYNC:(OI)(CI)(RX)
          BUILTIN\Administrators:(F)
Default perms for reference: https://support.microsoft.com/en-us/help/278381/default-permissions-for-the-machinekeys-folders
Verify SAP connector
Once the above steps have been completed, verify import from the SAP Service by creating a Web Service Management Agent connector.
This is similar to creating any kind of connector: /en-us/microsoft-identity-manager/install-mim-sync-ad-service
Configure an Import profile for the SAP Web Service Management Agent (or Export profile, if that is the direction the data is flowing).
Run the MA (preferably to a log file per the above recommendation and/or with a limited number of objects).
Validate the MA was able to connect to the SAP Web Service and complete the Import with no errors.
Once the Web Service MA can connect to the SAP Web Service, this procedure has been successfully completed.
Recommendation: Create the MA with a Run Profile that logs to a file only, and imports a limited number of objects.
SAP Web Service timeout configuration
Web service timeout errors
If Sync Manager pops up an error and shows the status stopped-extensible-extension-error, this may be a web service timeout error.
Event 6801 and 6803 are recorded in the Application event log. In Event 6801, the stack trace part will include the text:
System.TimeoutException: The HTTP request to https://saperp...has exceeded the allotted timeout of 00:01:00. The time allotted to this operation may have been a portion of a longer timeout.
If the Web Service connector log is configured (it appears in the <Program files>\Microsoft Forefront Identity Manager\2010\Synchronization Service\Extensions folder), the same exception text will appear.
The error indicates that default timeouts set in cfg.config in the web service WSCONFIG file are too short.
Configure SAP Web Service timeout
This assumes the SAP Web Service WSCONFIG file has already been correctly built using the Web Service Configuration tool.
Extract the SAPWebServices WSCONFIG file with a zip file uncompression utility.
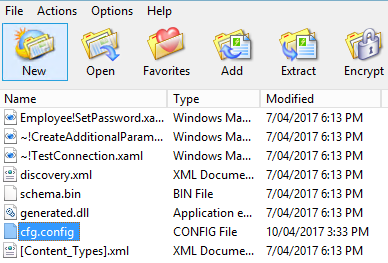
Edit the
cfg.configfile in the archive and change thebasicHttpBindingproperty to update the timeout values. Note that the SAP connector must also have theallowCookies="trueproperty.Most timeout settings in the config are 1 minute by default – initially, set all timeouts on line 06 except the
receiveTimeoutto00:02:00(receiveTimeoutis 10 mins by default01.<?xml version="1.0" encoding="utf-8"?> 02.<configuration> 03.<system.serviceModel> 04.<bindings> 05.<basicHttpBinding> 06.<binding name="binding" closeTimeout="00:02:00" openTimeout="00:02:00" receiveTimeout="00:10:00" sendTimeout="00:02:00" allowCookies="true" maxBufferSize="2147483647" maxReceivedMessageSize="2147483647" transferMode="Buffered"> 07.<readerQuotas maxDepth="2147483647" maxStringContentLength="2147483647" maxArrayLength="2147483647" maxBytesPerRead="2147483647" maxNameTableCharCount="2147483647" /> 08.<security mode="Transport" /> 09.</binding> 10.</basicHttpBinding> 11.</bindings> 12.<client> 13.<endpoint address="https://saperp:44321/sap/bc/srt/scs/sap/zhr_mim_sap_ws_connect?sap-client=511" binding="basicHttpBinding" bindingConfiguration="binding" contract="NS.ZHR_MIM_SAP_WS_CONNECT" name="binding" /> 14.</client> 15.</system.serviceModel> 16.</configuration>Save the changes to the
cfg.configfile, repack the archive and re-save as the .WSCONFIG file.If the timeout error recurs, increment the timeout settings in
cfg.configuntil the import can complete successfully.