Azure: Create Windows Server VM in the new portal
Introduction
All Wiki articles describing Windows VM deployment from the portal are referring to instructions on the classic portal. As the new ARM portal offers many more options to configure your VM we will go over all the steps and available options. When major updates are done on the platform we will update this article with the latest info.
Portal Login
Navigate to the URL https://portal.azure.com and log-in with your credentials that have access to the subscription where you want to deploy your new resource.
After login, click on your account (top right) and select the correct Azure AD Tenant and subscription. (check Also See: Working with the new Azure portal (chapter 10))
Create VM
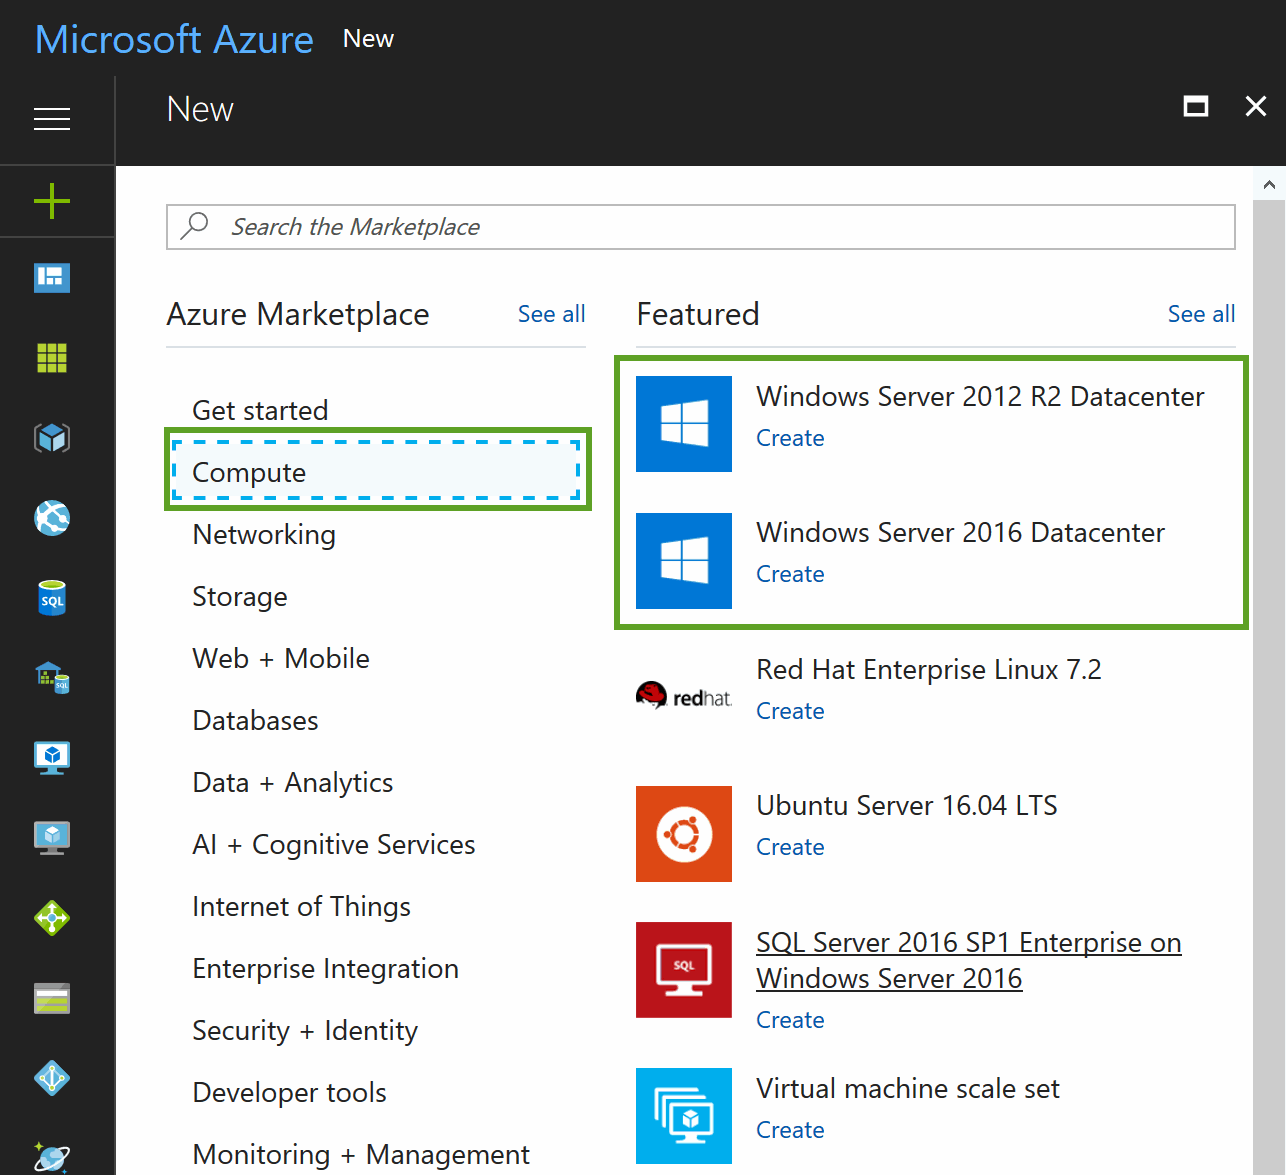
Now that we have made sure we selected the correct tenant, we can start with clicking on the sign in the side menu. This will open the Marketplace where you can search for resources that you want to deploy. In this demo, we want to install a Windows Server so and there are 2 ways to get what you want:
use the search bar
Select from the logically structured menu
In this demo we will select Windows Server 2012-R 2 where we will be presented with the following page:
If you are looking for more details on the resource itself, you will find some useful links here.
By default, the page will display Resource Manager for deployments, but know that you can also deploy to the classic model if you need to (no longer recommended)
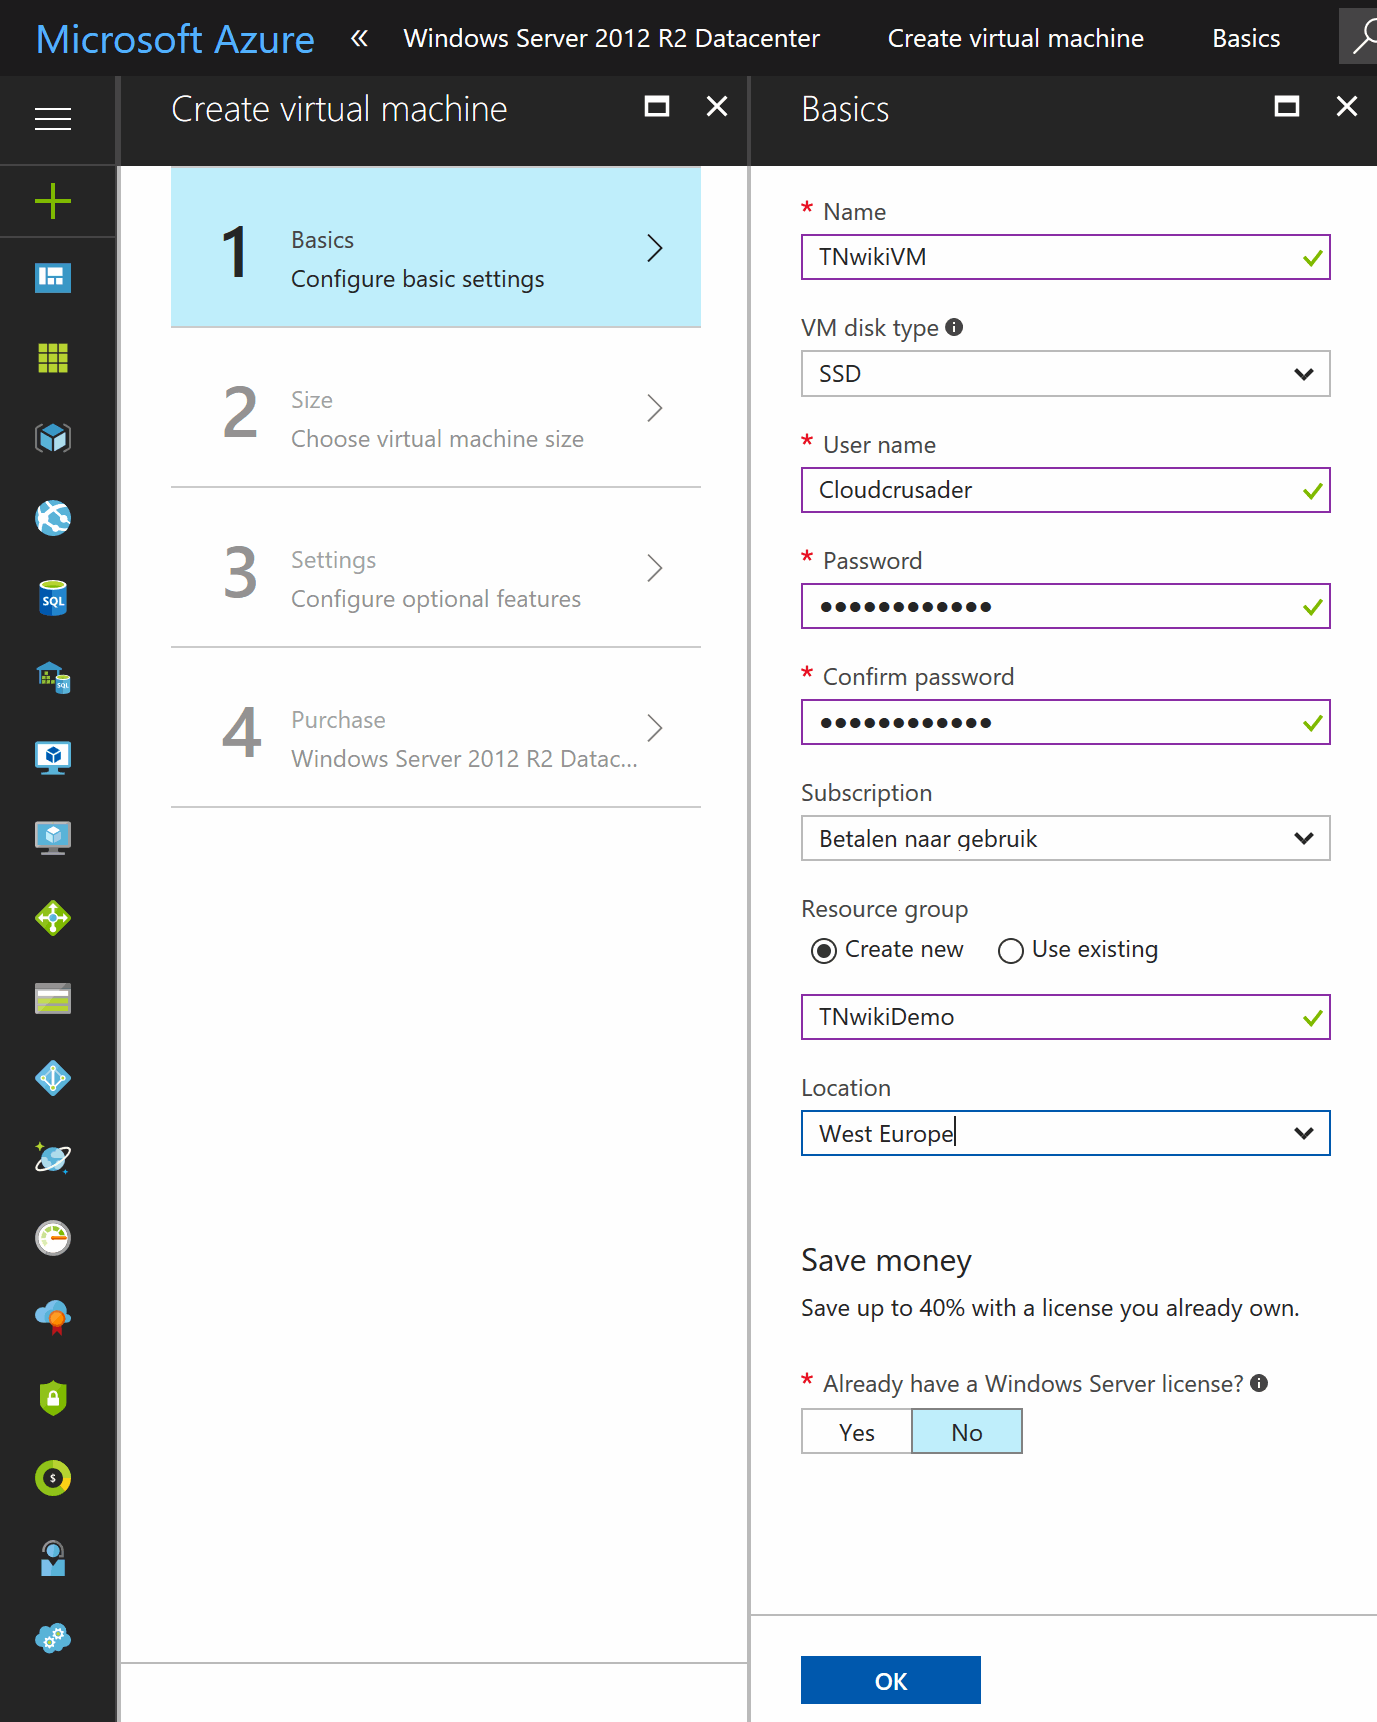
Click Create on the defaults, next we will have to fill in the basic information for our VM:
Basics
- Enter a name for your VM, the name must be between 1-15 characters long
- Select if you want (premium) SSD or standard HDD drive for your VM
- Enter username and password (twice) that you will use to RDP into the machine, this will be your primary local admin account.
- Select the subscription you want to deploy in (as Azure AD can have multiple subscriptions linked to it)
- Create a new Resource Group for your VM, or select an existing one.
- Select the location (Azure region) where you want to deploy the VM
- Select if you have valid Windows Server licenses if so you can get up to 40% reduction
- When all fields are filled, enter the next page by clicking the OK button
Select the VM Size
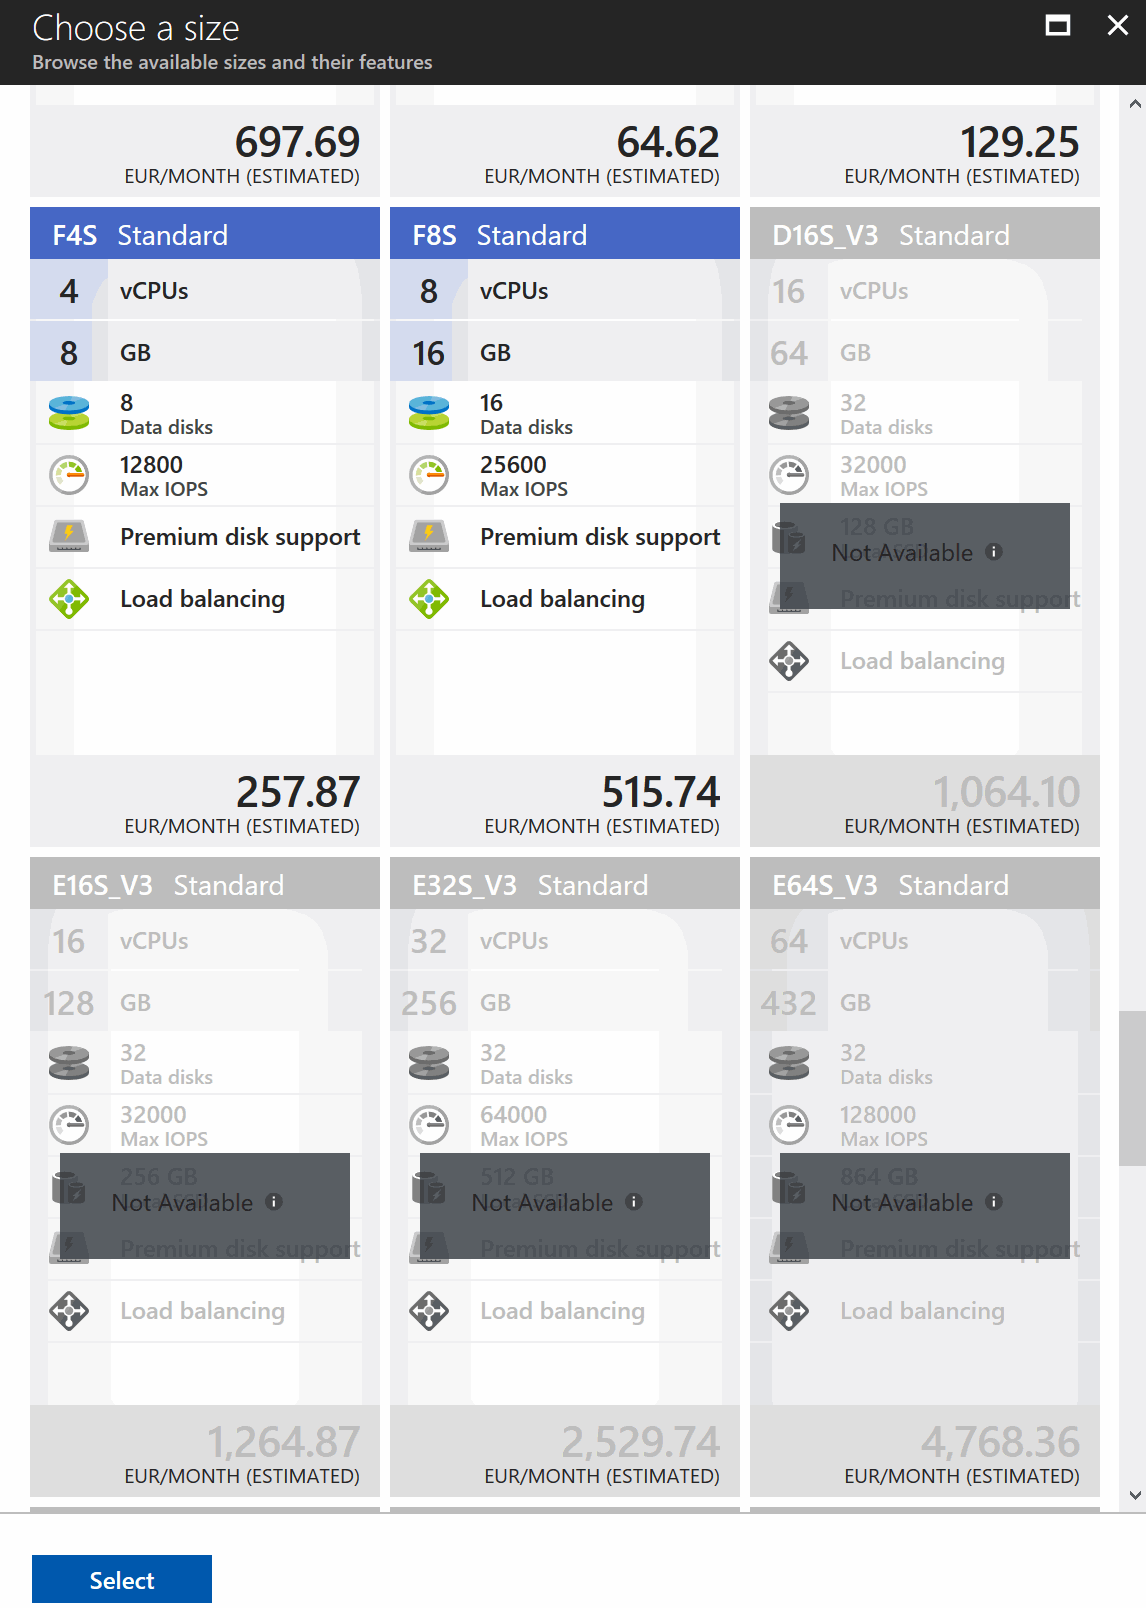
By default Azure will display the most frequent selected Azure VM sizes, if these do not meet your requirements, click the "view all" link.
All available sizes for your subscription/region will be displayed. If some sizes are not available this will result in a grayed-out option:
Select the size you need and click on the "Select" button
Next part of the wizard is the VM Setting
VM Settings
"High Availability" Here you can create or select an availability set that you want to link to this VM. AV Sets are the only option to get into the 99.95 SLA from Azure, this will require at least 2 VM's in the same availability set.
"Storage" will give you the option to use managed disks or not. If you say no to this then you have to configure a storage account for your VM disks.
Networking
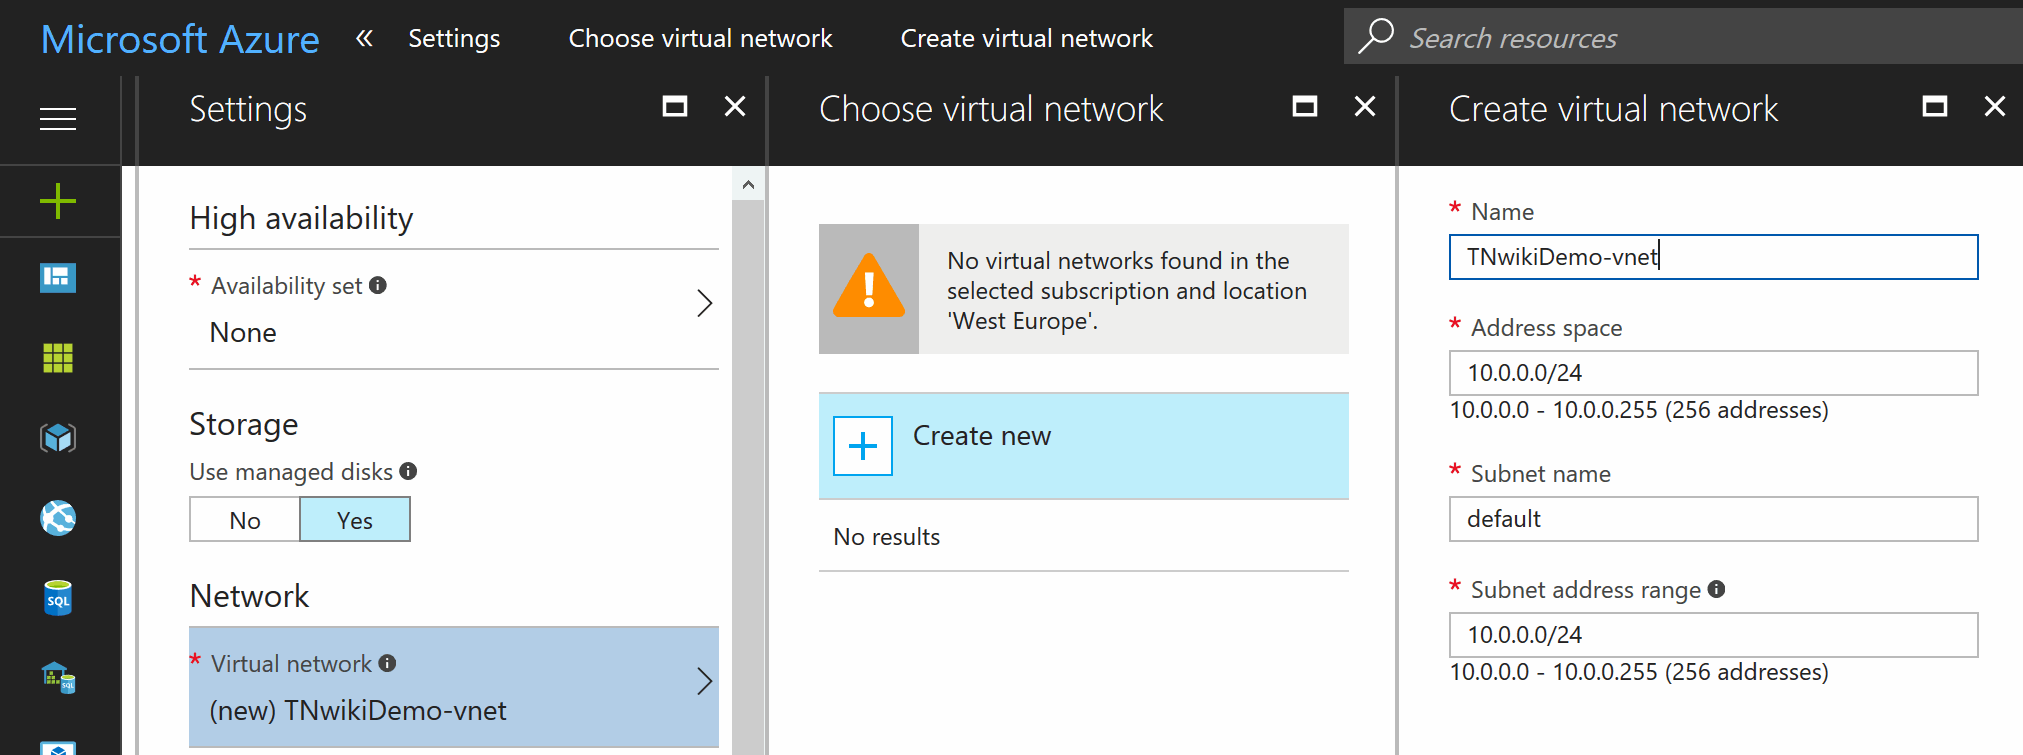
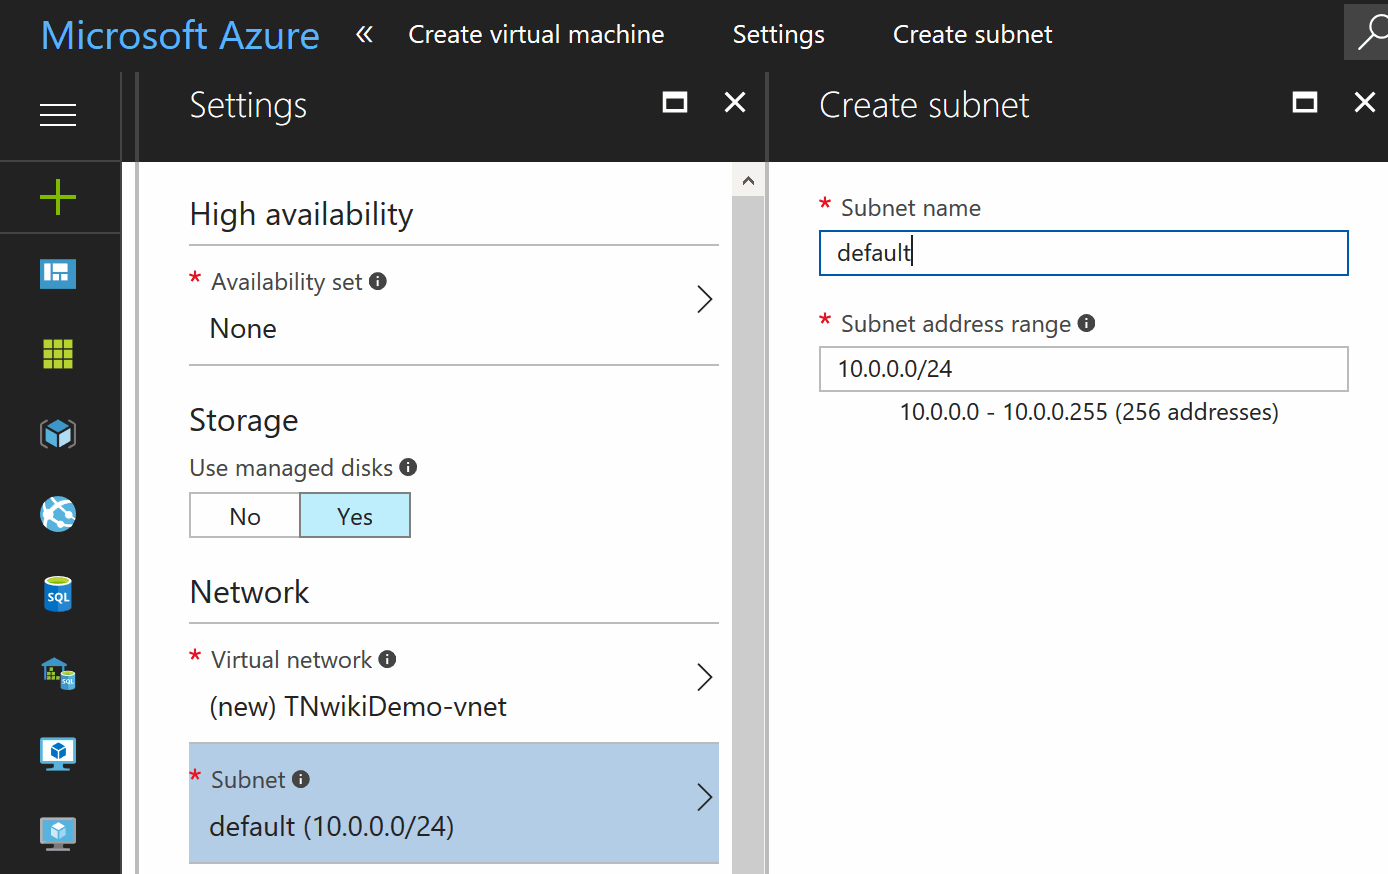
Virtual Network: specify the name, Address space, sub-net name, and sub-net address range
In the subnet section, you can change the settings like name and size of the subnet
In the "Public IP Address" section you can opt to assign a static or dynamic IP address. In case of hybrid scenario you could also say 'none' and by doing so restricting RDP(Remote Desktop Protocol) connections to only the internal IP Address (which is a lot safer -> due to the many RDP brute force attacks)
"Network Security Groups" can be enabled on the VM NIC. This can be seen as a flat firewall where you can specify open ports/protocols.
If you have many VM's on the same subnet it could be wiser to apply an NSG to the subnet instead of the VM. All VMs on the same subnet will automatically inherit the NSG settings linked to the subnet.
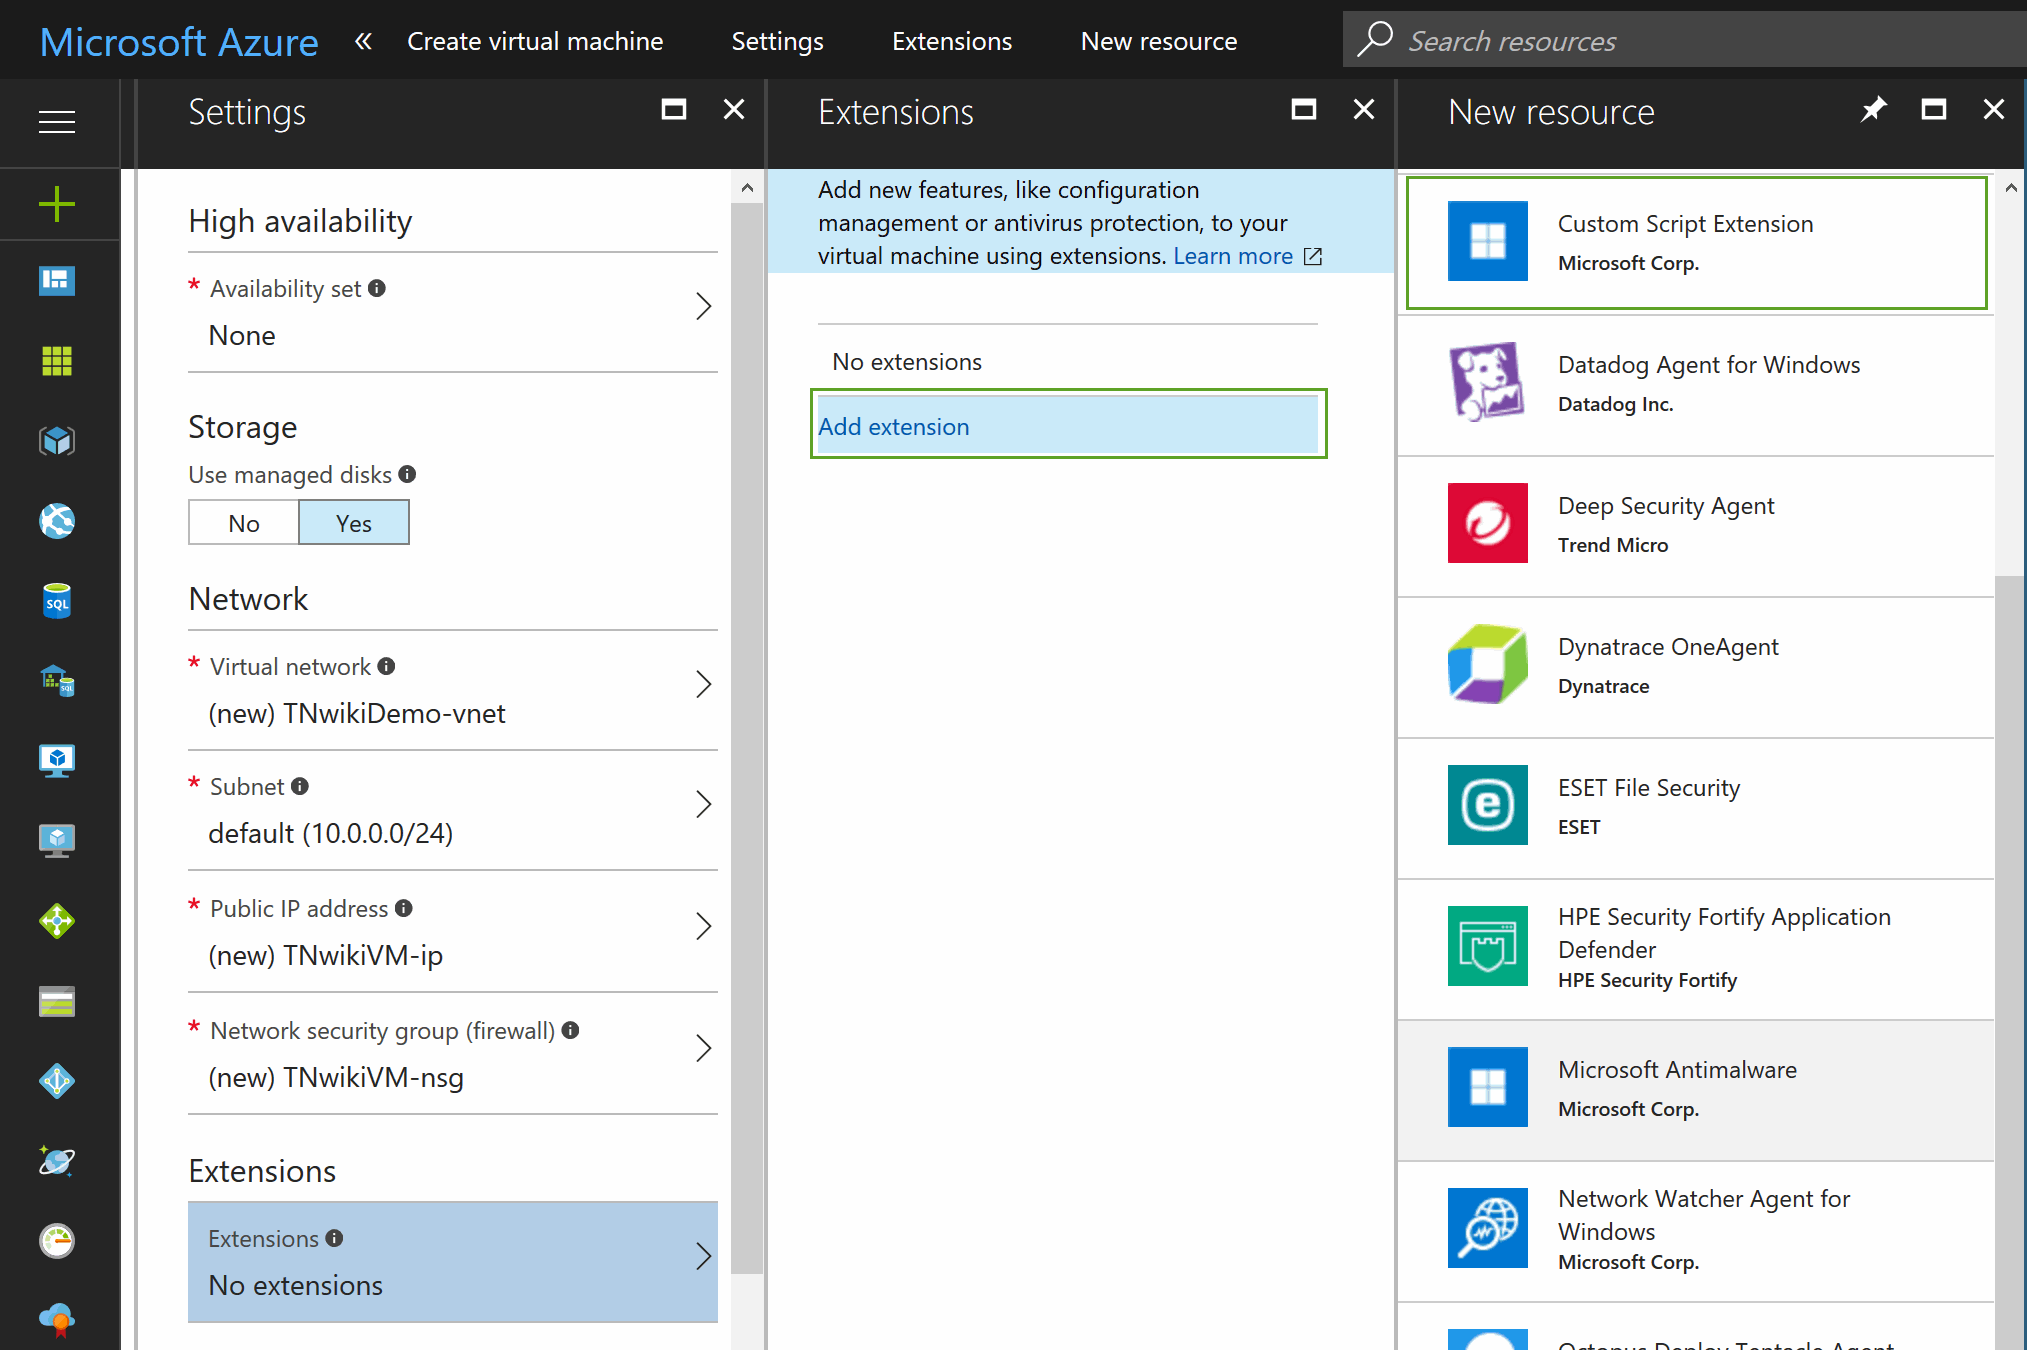
The extensions section gives you the option to apply extensions to the VM. This can also be custom extensions where you can add your own scripts that need to run as soon as the VM is up and running. See this as a way to install/configure software/settings on the VM without having the need to login by RDP and do your stuff.
"Auto Shutdown" can save you money!! If you don't have the need for the VM to be up and running 24/7 (e.g. dev/test VM) then it's good to consider to automatically shut it down upon a certain time in the day:
The "monitoring" section is where you need to be if you want to configure diagnostics & monitoring
boot diagnostics will capture console print screens to see what is happening during the boot process
Guest OS diagnostics will capture metrics (every minute) that you could use for alerting and/or automation purposes.
Diagnostic storage accounts are needed to persist in your data collection.
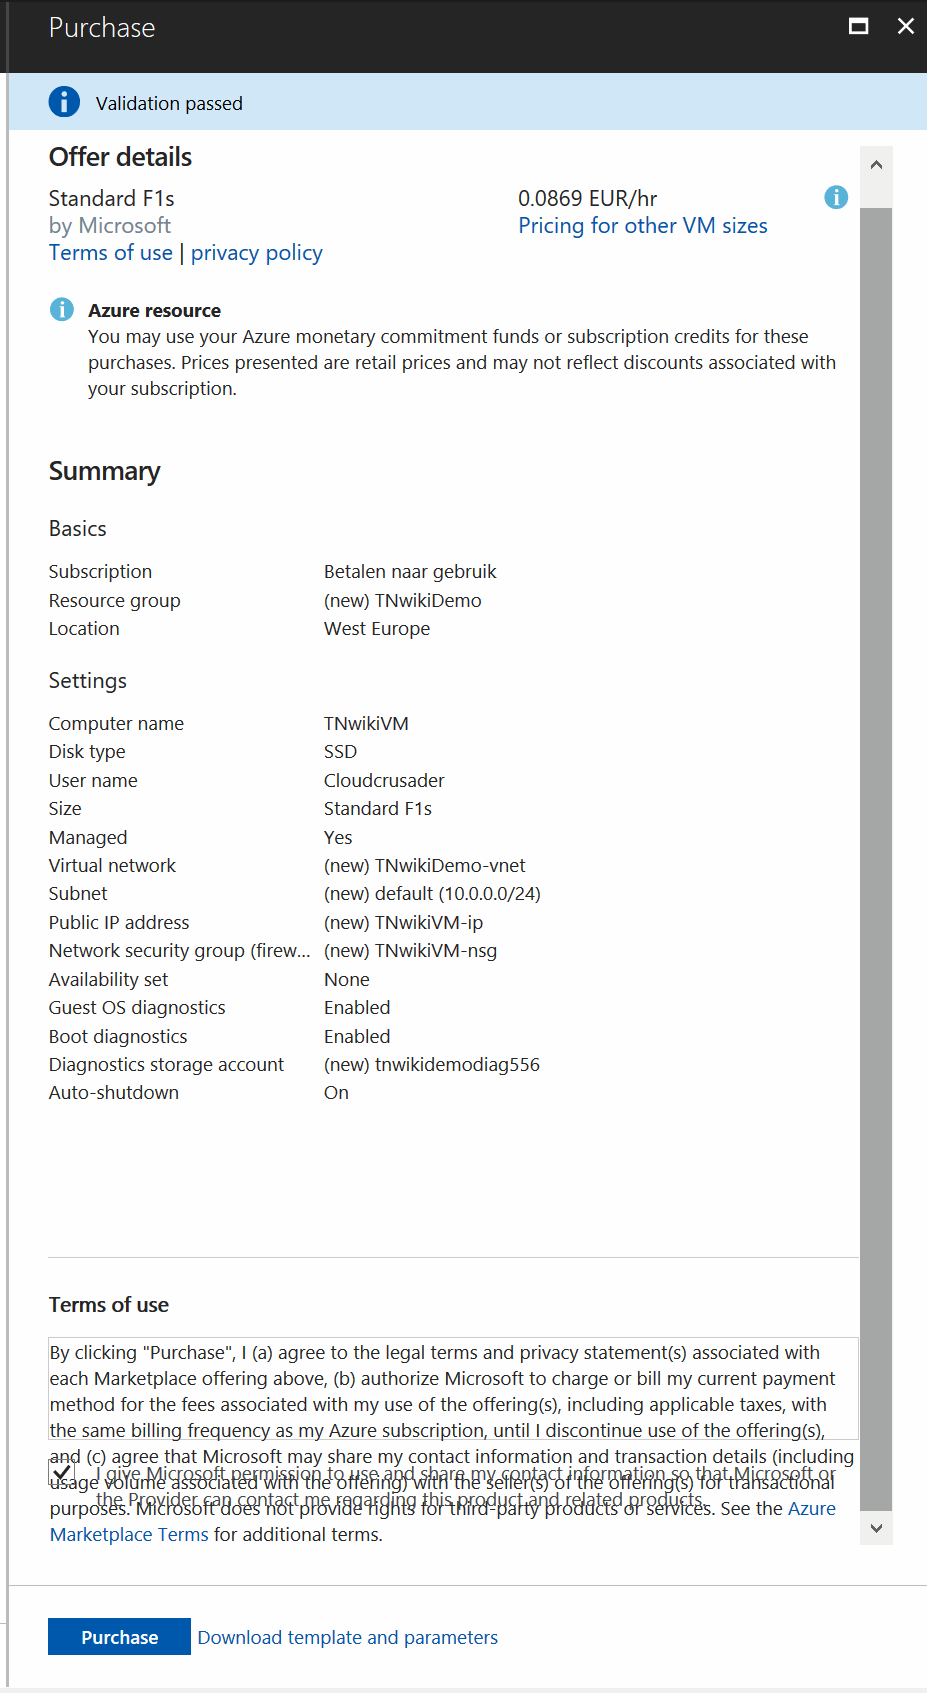
As the final step we will a validation summary, read carefully through the settings again.
At the bottom, you will need to agree to the Azure terms and click the "purchase" button to complete and start a deployment.
When selecting the "Download template and parameters" you will be able to save the ARM JSON code (locally, in the Azure template library,..) that would build a VM with these settings.
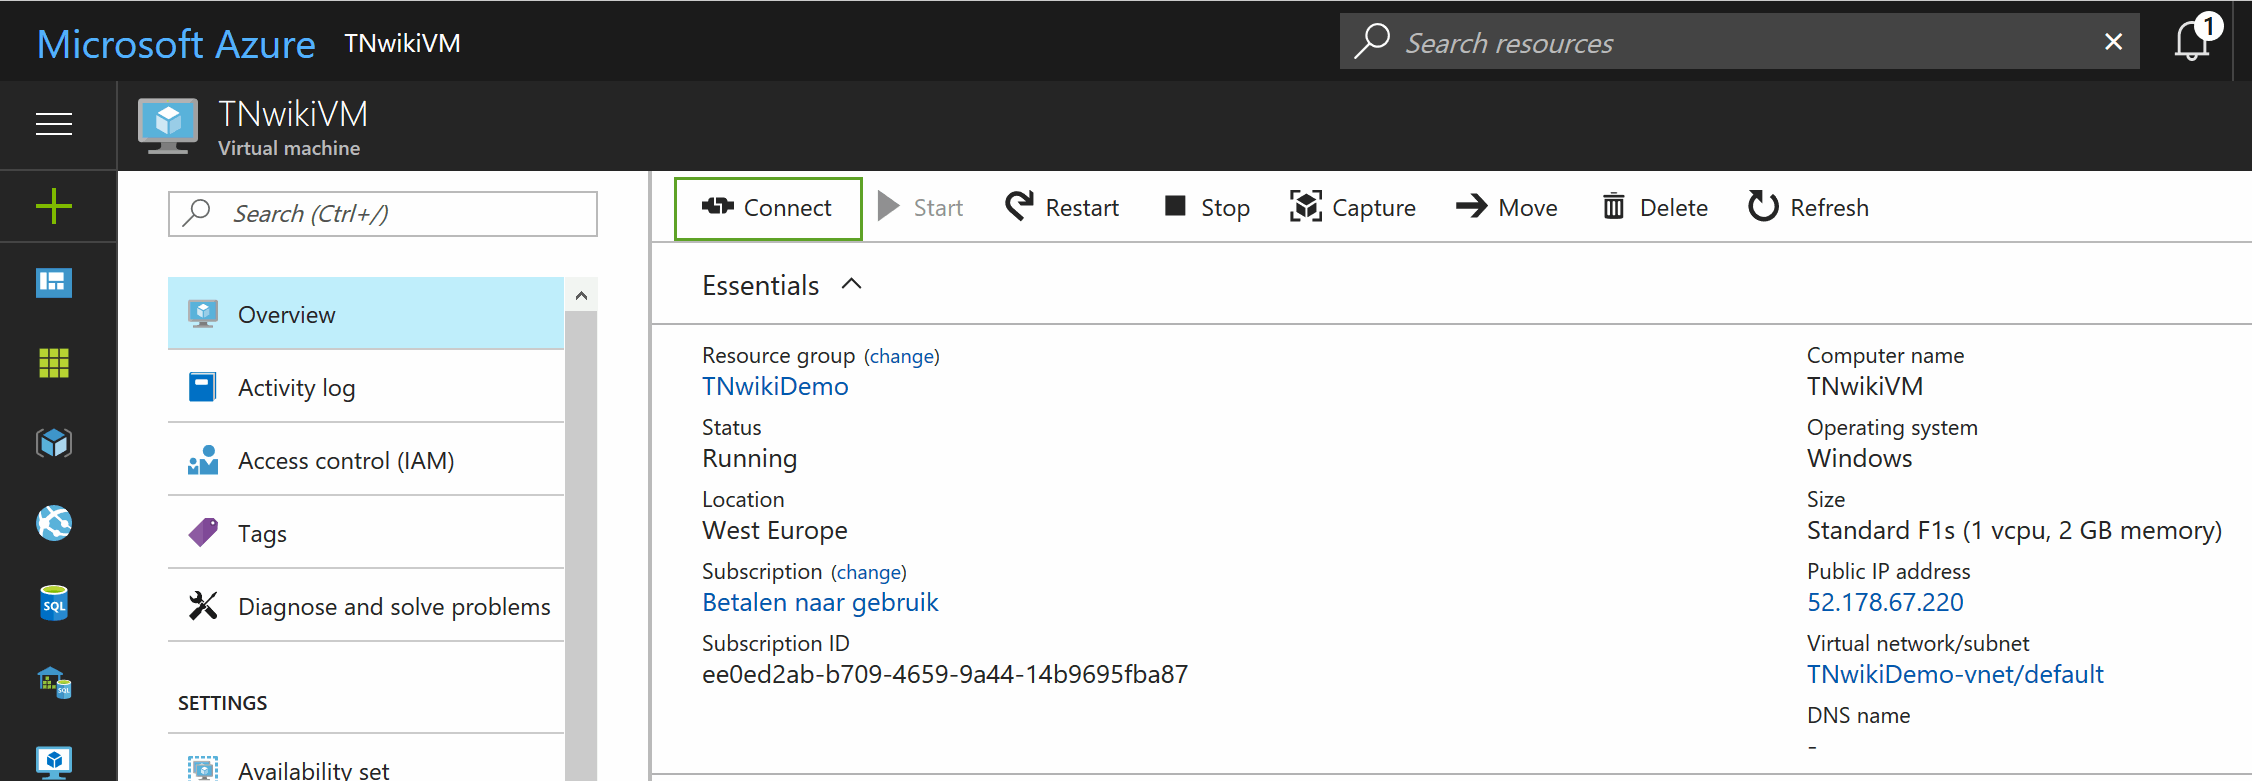
After some minutes your VM is created you can connect to it by downloading the RDP file from the portal:
Conclusion
Using this article we came to know the method of using the new Azure ARM portal to create the virtual machines. Please leave your feedback.
Glossary
| Item | Description |
| VM | Virtual Machine |
| ARM | Azure Resource Manager |
| RDP | Remote Desktop Protocol |
| Json | JavaScript Object Notation |
| SSD | Solid State Device or Solid State Drive |
| dev | development |
| NIC | Network Interface Card |
| NSG | Network Security Groups |
| SLA | Service Level Agreement |
| IP | Internet Protocol |
| AV | Azure Virtual Machine |
| AD | Active Directory |

