Network Monitor Wizard Getting Started Guide
Introduction
The Network Monitor Wizard project was born in 2006 and developed by Roberto Farah and Yuri Diogenes. Later on, the tool was enhanced by Sebastian Canevari. The goal for this tool is to allow users to easily build nmcap command lines by using a friendly wizard interface. This project was developed in C# and it’s currently available at http://netwiz.codeplex.com.
This article can be used as a guide on how NetWiz works and to send a call for action to developers around the world that may want to enhance the tool or use the source code as a framework for new projects based on the same concept.
Should anyone have any other functionality that could make it easier for the end user please feel free to use the Network Monitor Wizard source code available on Codeplex.
There are so many parameters in NMCap that it might become difficult for the average user to build a full command line that meets their needs. Network Monitor Wizard covers the main scenarios and that’s why the community effort to make this tool even better is so important.
Using Network Monitor Wizard
Launch
When Network Monitor Wizard is launched, it performs mainly 2 tasks during the “Load” Event:
1) It shows up a license agreement on the screen
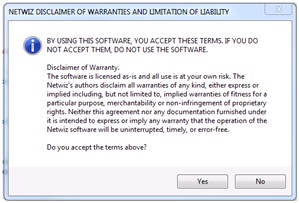
2) It checks to see if Network Monitor is installed, giving the option to download it if it’s not already present

3) It shows the Welcome tab.
Welcome tab
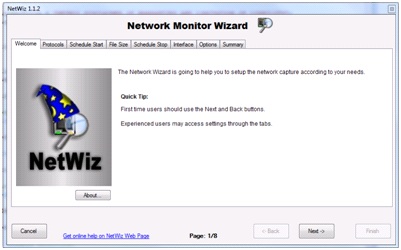
The Welcome tab provides:
- a brief description of the tool
- an About… button
- a link to online help
- a status pane with a progress indicator
Protocols Tab

The Protocols tab provides the following:
- Selection Summary: Shows the selected options on the top window and the resultant command line on the bottom window.
- A series of radio buttons with different options for choosing which protocols will be captured in the trace
- All traffic (all protocols and all packets received): Will capture everything that’s on the wire
- All packets received where the protocol is equal to: Enables the Select Protocols… button for further configuration
When the button is pressed, the following selection window appears:

A list of well-known protocols is shown and 1 or many options can be checked at once. Confirmation is done by clicking on the OK button.
- All protocols coming from this host (IP Address): Enables a text box where the IP address of the intended remote host should be entered
- Custom: Enables the Select Custom Protocols… button for further configuration
When the button is pressed, the following selection window appears:
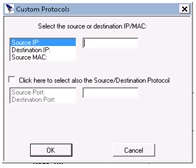
The configuration options are as follows:
- Source IP: Only packets originating from this IP will be captured
- Destination IP: Only packets sent to this IP will be captured
- Source MAC: Only packets originating from this MAC will be captured
- If the checkbox is clear, all protocols will be captured
- If the checkbox is checked:
- Source port: Only packets originating from this port will be captured
- Destination port: Only packets sent to this port will be captured
Schedule Start Tab

The Schedule Start tab provides the following:
- Selection Summary: Shows the selected options on the top window and the resultant command line on the bottom window.
- A series of radio buttons with different options for choosing when the capture will start
Now: The capture starts when completing the wizard
On the following day and time: The capture will start at the specified time and date.
When the following traffic comes in: This option enables the Select Traffic… button. When the button is pressed, the following dialog appears:

- Type the IP Address: This allows to enter an IP address and then use the Source and Destination radio buttons to specify if a packet coming OR going from that IP address will start the capture
- Select the Protocol: This allows to specify if the packet that will activate the capture is TCP or UDP
- Port Number: This allows specifying what port number will start the capture.
File Size Tab
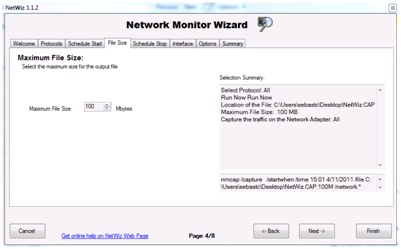
The File Size tab provides the following:
- Selection Summary: Shows the selected options on the top window and the resultant command line on the bottom window.
- Maximum File Size: This option allows setting the maximum size for the resulting capture file. If the capture is larger, it’ll overwrite frames as needed.
*
*
Schedule Stop Tab
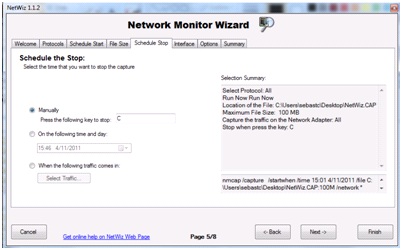
The Schedule Stop tab provides the following:
- Selection Summary: Shows the selected options on the top window and the resultant command line on the bottom window.
- A series of radio buttons with different options for choosing when the capture will stop
Manually: Enables a text box to enter a key
- Press the following key to stop: Allows to enter a key that will stop the capture
On the following day and time: The capture will stop at the specified time and date.
When the following traffic comes in: This option enables the Select Traffic… button. When the button is pressed, the following dialog appears:
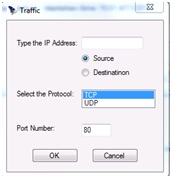
- Type the IP Address: This allows to enter an IP address and then use the Source and Destination radio buttons to specify if a packet coming OR going from that IP address will stop the capture
- Select the Protocol: This allows to specify if the packet that will stop the capture is TCP or UDP
- Port Number: This allows specifying what port number will stop the capture.
Interface Tab
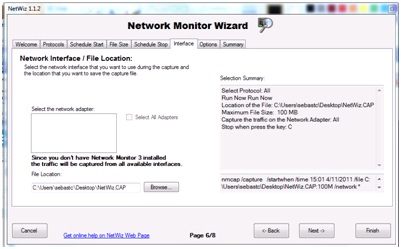
The Interface tab provides the following:
- Selection Summary: Shows the selected options on the top window and the resultant command line on the bottom window.
- If Network Monitor is installed:
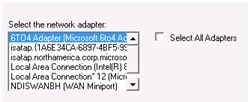
The Select the network adapter selection box and the Select All Adapters checkbox are enabled.
- Select the network adapter: A list of all present physical and virtual adapters is displayed. One or many can be selected (pressing ctrl)
- Select All Adapters: If this checkbox is selected, selected traffic coming and going to/from all present adapters will be captured
- If network monitor is not installed a legend displays stating that traffic will be captured in all interfaces
- File Location: Allows to type a file name (full path) or to select it by pressing on the Browse… button (displays a browse for folder dialog).
*
*
Options Tab
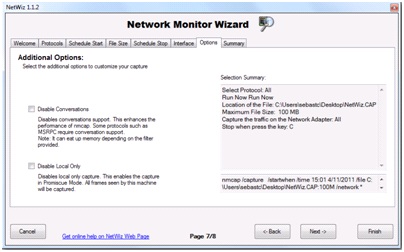
The Options tab provides the following:
- Selection Summary: Shows the selected options on the top window and the resultant command line on the bottom window.
- Disable Conversations: This checkbox has a self-explanatory legend. It is used to disable conversations support.
- Disable Local Only: This checkbox has a self-explanatory legend. It is used to enable promiscuous mode.
*
*
Summary Tab
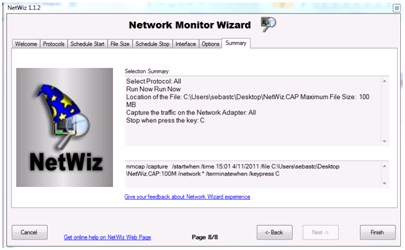
The Summary tab provides the following:
- Selection Summary: Shows the selected options on the top window and the resultant command line on the bottom window.
- Give your feedback about Network Wizard experience: This link opens the e-mail client to send an e-mail to netwiz@microsoft.com.
*
*
Finish Button
The finish button can be pressed at any time during the process.
When pressed, if the capture is not set to start immediately, the following window appears:
Once OK is pressed the script is created and available at the specified location.
If the capture is set to start immediately, the window is displayed and after OK is pressed, two command prompt windows show up:
When the capture stops, the .cap file will be located at the location specified during the wizard.
This article was first written by:
Sebastian Canevari, Escalation Engineer US-CSS DSC PROTOCOL TEAM |
Yuri Diogenes, Senior Technical Writer Windows Server iX | IT Pro Security Microsoft Corporation
|