A Minimal UWP App
Introduction
The introduction of Windows Template Studio makes it easy to set up a well-formed Universal Windows Platform (UWP) app that implements the (Model-View-View Model) MVVM design pattern according to best practices in no time.
This kind of wizard-based experiences may be appealing to some developers, but in this articleI will show how you can create a minimal UWP app from scratch without using any wizards nor auto-generated code.
When you create a new UWP app using the Blank App (Windows Universal) template in Visual Studio, it generates two code files for you, namely App.xaml.cs and MainWindow.xaml.cs. When you then build the app it also automagically generates an entry point (Main) method.
DISABLE_XAML_GENERATED_MAIN
If you delete both App.xaml and MainWindow.xaml, including the code-behind files, and add the DISABLE_XAML_GENERATED_MAIN compilation symbol under Project->Properties->Build->General, you have effectively removed all auto-generated code and now have a truly “blank” app. If you try to build at this point, you should get an error saying the “Program does not contain a static ‘Main’ method suitable for an entry point”.
http://magnusmontin.files.wordpress.com/2017/10/vsbuild.png?w=921&h=273
Defining a custom entry point is easy. Just create a class with a static Main method that calls the static Start method of the Windows.UI.Xaml.Application class:
public class  Program : Application
{
    static void  Main(string[] args)
    {
        Start(_ => new  Program());
    }
}
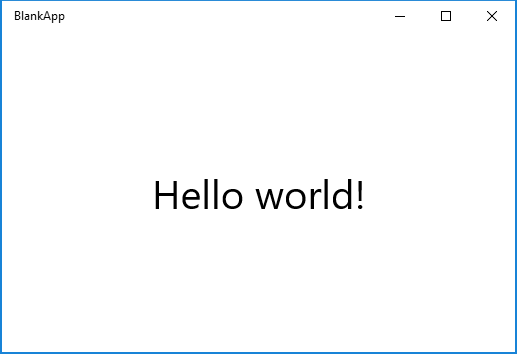
That’s all code that is required to get a minimal UWP app up and running. If you build and run the application at this stage, you should see a blank window pop up that you can resize and move around just as usual.
https://magnusmontin.files.wordpress.com/2017/10/blankapphw.png?w=518&h=354
ApplicationInitializationCallback
The Application.Start method accepts a ApplicationInitializationCallback delegate that is supposed to create an instance of the Application class. This class will take care of the process of creating and initializing the app’s core window and dispatcher to start processing and dispatching window messages.
You can then simply override the OnLaunched method to set the Content of the window to any UIElement:
protected override  void OnLaunched(LaunchActivatedEventArgs args)
{
    base.OnLaunched(args);

    Window.Current.Content = new  TextBlock
    {
        Text = "Hello world!",
        VerticalAlignment = VerticalAlignment.Center,
        HorizontalAlignment = HorizontalAlignment.Center,
        FontSize = 40
    };
    Window.Current.Activate();
}
In the above sample code, I have set the Content property to a TextBlock but you can of course set it to whatever UIElement you want including a Page or a UserControl. These could for example be defined in a stand-alone class library that you reference from the app itself.
In a real-world app, you may obviously want to extend the Program class to handle things such as navigation and lifecycle management but that’s out of the scope of this article.
Application Package Manifest
Besides the single class that derives from Application, you also need an application package manifest to be able to run a UWP app. Visual Studio creates one for you. A package manifest is nothing but an XML document. If you right-click on the auto-generated Package.appxmanifest file and choose “View Code”, you can easily see and the edit its contents.
The manifest contains the information that Windows needs to be able deploy the app. This includes a package identity, package dependencies, required capabilities, and extensibility points. If you want to, you can easily create a basic and minimal package manifest yourself using any text editor you want and replace the auto-generated one with this one.
The manifest also describes some visual aspects of the app, that is its default tile, logo images, text and background colors, initial screen orientation, splash screen, and lock screen tile appearance. One thing to point out here is the ability to generate visual assets of different sizes automatically using a single source file. You can do this using the asset generator in Visual Studio 2017. You will find it under the “Visual Assets” tab in the package manifest designer which you can open by right-clicking on the appxmanifest file and choose “View Designer”, or just “Open” if you haven’t modified the default settings.
This is a nice “auto” feature. I certainly don’t mind having the required image files auto-generated for me by Visual Studio but I usually prefer to write most part of the actual code myself and start from scratch when I develop a new application.