ASP.NET Core: Add Class Library using .NET Core Command-Line Interface (CLI)
Introduction
This article explains how to add Class Library in ASP.NET Core using .NET Core Command-Line Interface (CLI) in a simple way. Before reading this article, read the previous part of this article using the below article link.
Serve Static files in ASP.NET Core Using Visual Studio 2017
.NET Core CLI
The .NET Core command-line interface (CLI) is a new cross-platform command line for developing .NET applications. Using .NET Core CLI we can open new .NET core application, modify the applications or add class libraries and so on. We can manage our application using the command line.
Background
We manage the ASP.NET Core applications using the Graphic User Interface (GUI). Whenever we developing an application we are doing many tasks, that adds files, compile the application, run the application using graphic user interface but we can do those using command line. The way of .NET Core CLI we can manage our ASP.NET Core application.
Steps for Adding Class Library Using CLI
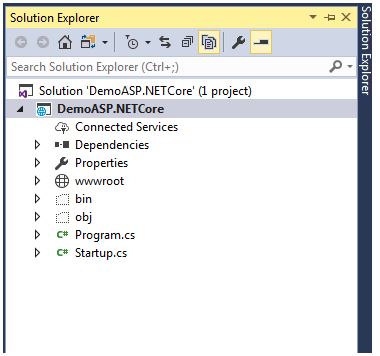
First, open the one new ASP.NET core application and adds one sample page then build and run the application. Go to the solution explorer and we can see only one project in.
Open PowerShell
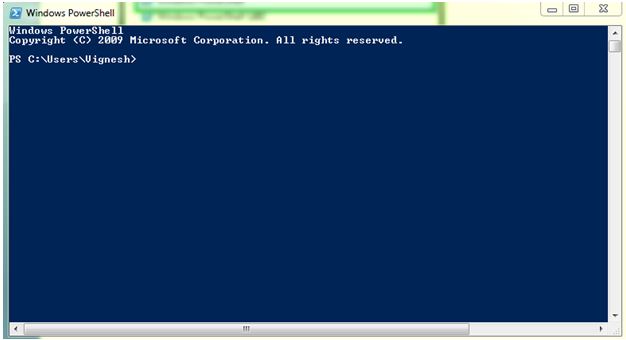
Now we are going to add the class library using some of the steps with the help of .NET Core CLI. Open the Windows PowerShell.

Now Windows PowerShell window will be open. We can see the looks on a screen short.
Project Location
Our project is saved in “C:\Users\Vignesh\Documents\Visual Studio 2017\Projects” in our system and our project name” DemoASP.NETCore”. Now we are going to our project location in CLI
Command
Using below command we can go to our project location and can see the list project.
PS C:\Users\Vignesh> cd '.\Documents\Visual Studio 2017\
PS C:\Users\Vignesh\Documents\Visual Studio 2017> cd '.\Projects'
PS C:\Users\Vignesh\Documents\Visual Studio 2017\Projects> ls
Using “ls” we can see all list of files or projects in the specified path. We can see the Windows PowerShell screen looks like below screenshot.

We are going to add a new class library in “DemoASP.NETCore” solution, now go to the project location and can see the “DemoASP.NETCore.sln” solutions.
Command
PS C:\Users\Vignesh\Documents\Visual Studio 2017\Projects> cd .\DemoASP.NETCore\
PS C:\Users\Vignesh\Documents\Visual Studio 2017\Projects\DemoASP.NETCore> ls

HELP Command in CLI
Using help command we can get full information about a specific command in CLI, for example, we are going to add new items in .NET Core so we should know about “new”. Type below mentioned command to know about “new”.
Command
PS C:\Users\Vignesh\documents\Visual Studio 2017\Projects\DemoASP.NETCore> dotnet new –help
We can create Console Application, Class Library, Unit Test Project, xUnit Test Project, ASP.NET Core Empty, ASP.NET Core Web App and ASP.NET Core Web API templates using “dotnet new” command with the short name of the template name in CLI. We can see the below example.
Template |
Short Name |
Example Command |
Console Application |
console |
dotnet new console |
Class library |
classlib |
dotnet new classlib |
Unit Test Project |
mstest |
dotnet new mstest |
xUnit Test Project |
xunit |
dotnet new xunit |
ASP.NET Core Empty |
web |
dotnet new web |
ASP.NET Core Web App |
mvc |
dotnet new mvc |
ASP.NET Core Web API |
webapi |
dotnet new webapi |
Solution File |
sln |
dotnet new sln |

Add New Class Library
We are going to add the class library using CLI command. We can see the below command for add class library. We need to run the below command in the specified project path.
Command
dotnet new classlib -n democlass -o democlass

After adding class library we get the message as
“The template "Class library" created successfully”.
We can see all list of items in our solutions using “ls” command.
Modify the Our Solution
We are going to modify the solutions so that we know the command for modifying the solutions. We are using the command
“dotnet --help”.
We can see the below screenshot when entering “dotnet –help” command and can see the command to modify the solutions.
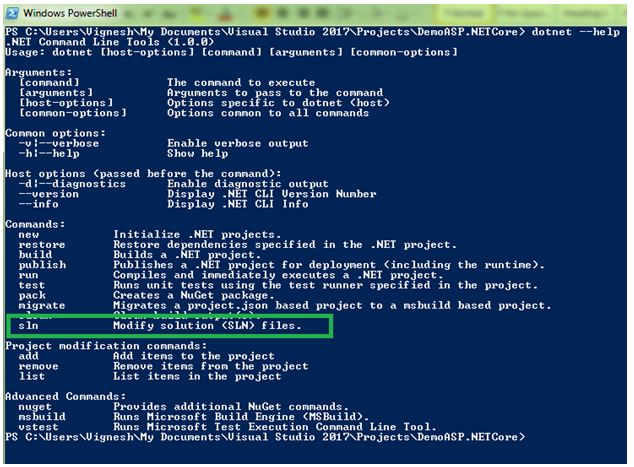
We are using “sln” command to modify the solutions. We can see the above screenshot. We need to run below command in our project specifies the path.
Command
dotnet sln add .\DemoClass\DemoClass.cspro
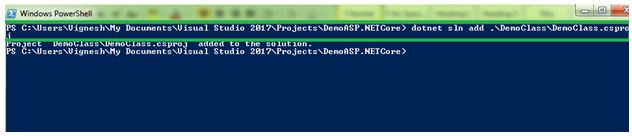
After running the command we get the message as “Project `DemoClass\DemoClass.csproj` added to the solution.”
Now we can see all projects in our solutions using below CLI command.
Command
dotnet sln list

There are two projects in our solutions. One is “DemoASP.NETCore.csproj” and another one is “DemoClass.csproj”.

Now we go the visual studio it will show the message as “The Solutions DemoASP.NETCore has been modified outside the environment”. We can see the full message above screenshot. When we press the reload button our solution will be reloaded and can see the new class library which we have been added. We can see the class library which we have been added in below screenshot.

We can add a reference to any project and can use the class library.