Azure SQL: Setup And Connect
Introduction
Microsoft Azure SQL Database (formerly known as SQL Azure) is a managed cloud database i.e. Software as a Service (SaaS) provided by Microsoft Azure. In simple words, Microsoft Azure SQL is a cloud database that runs on a cloud computing platform and access to it is provided as Service.
Managed database services support backup, HA (high availability), and scalability of the database. Azure SQL uses SQL Server 2016 codebase and is compatible with SQL Server 2014 and most of the features in SQL 2016.
Pricing
Azure SQL database can be set up as a Standalone database or an Elastic database pool (allows multiple databases to share storage and compute the resources). It is priced in three tiers – Basic, Standard, Premium.
- Basic - Can be used for the small database. It supports single active operation at a given time. Best suited for development, testing applications
- Standard - More frequently used option. Supports multiple concurrent queries. Mostly used along with web applications
- Premium - Supports many concurrent users at a time. Designed for mission-critical applications.
Create Azure SQL (Azure Portal)
Creating Azure SQL from Azure Portal is few simple clicks and helps us to set up an Azure SQL in a few minutes.
Note
Please note, the old portal does not support the creation of any Data Services nowadays.
Creating Azure SQL is only supported from the New Azure Portal.
- Login to New Azure Portal.
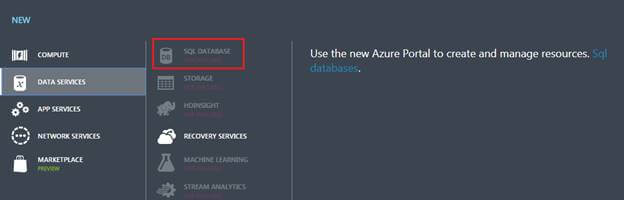
- Click "New" button from the top left corner.
- Select "Databases".
- Select the "SQL Database".

Fill in the SQL Database details
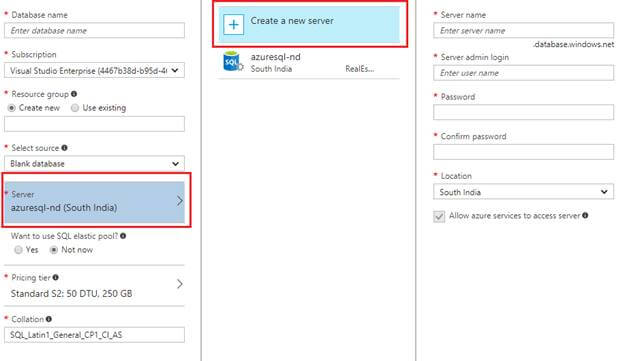
Fill in the SQL Database details as below,
- Database name -Name of your Azure SQL Database. E.g. sampleSQLDB
- Subscription - Select any of your MSDN subscription.
- Resource Group -Create a new resource group or use any of the existing.
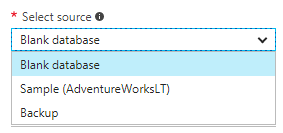
- Source -You may choose to create a blank database of any predefined database (e.g. Adventure Works)
Create the Server
To create the server we need to click on "Create a new server", as the image below shows.
Fill in the Server details
Fill in the SQL server (logical server) form as below,
- Server Name - Any globally unique name
- Server admin login - Any valid name (e.g. user1)
- Password - Any valid password
- Location - Select any location for hosting SQL Server. Preferably select any location near to your location or same location where your web application is deployed.
When we filled up the fields, click "Select".
Specify the Service Tier
We need to click Pricing tier to specify the service tier and performance level for the new database. Use the slider to select 20 DTUs and 250 GB of storage. (or as per we need)
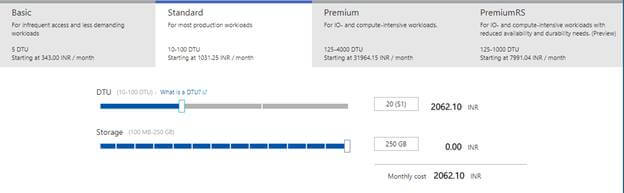
- Click "Apply" to save your selection.
- SQL Database form is now complete; click "Create" to provision your database.
- In the toolbar, click "Notifications" to see the deployment progress.
Create Server level Firewall rule
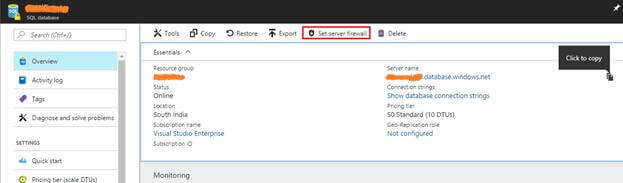
- Once the deployment finishes, click "SQL databases" from the menu.
- Click the database created in the above process. E.g. sampleSQLDB.
- Click "Set server firewall".
Add the Firewall Rule
Click "Add client IP" to add your current IP address to the new firewall rule. The firewall rule will open port 1433 to a single IP address or range of IP addresses. And click "Save".

Query SQL Database
To query the SQL Database follow the next steps.
- On the SQL Database page, click "Tools".
- Click "Query editor (preview)".
- Click Preview terms checkbox, and then click "OK".

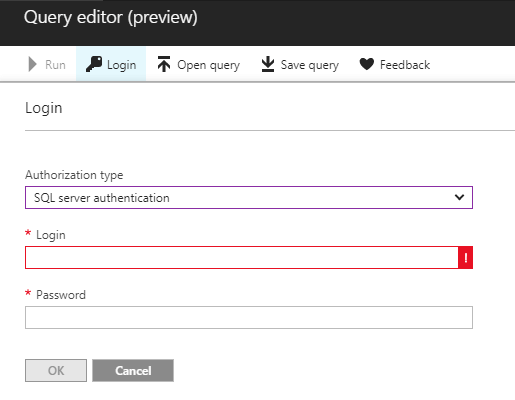
Login to the Query Editor
- Click "Login"
- Select SQL server authentication.
- Enter server admin login and password created earlier.
- Click "OK", and we are ready to execute SQL queries
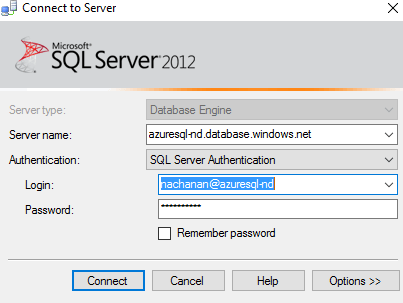
Connect to Azure SQL using SQL Server Management Studio (SSMS)
- Open SQL Server Management Studio (SSMS)
- In the connect to server dialog
- Enter server name as <server-name>.database.windows.net
- <server name> is value while sever creation
- Enter Login name as usename@<server-name>
- Enter the password
- Click "**Connect" **to proceed.
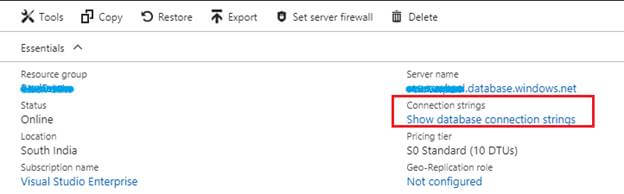
Get Connection String for SQL Azure
The next steps show how we can get the connection string for an Azure SQL Database.
On the SQL Database page, click "Show database connection strings", this will show the connection string on the next page. After that, we are ready to use this connection string in a Web Application.
Summary
SQL server can be easily set up using the MS Azure SAAS service. It by default supports backup, HA (high availability), and scalability of the database.