Azure Storage: C# Create Container, Upload and Download Blobs
In this post, we will see how anyone can connect to an Azure storage account, create a container and see how can upload and download files, using C# code.
Prerequisites
- Active Azure Account
- Subscription
- Resource Group
- Storage Account with Container
- Visual Studio (2013 or higher)
Active Azure Account
If we don't have an existing Azure account, we must create a new one by opening this page.
To sign up for a free account we need:
- Microsoft account (Hotmail, Outlook)
- Credit or Debit card
- Phone number
Subscription
When we create the Azure free account, at the same time we get a free trial subscription.
Note
Free trial subscription includes € 175.7 or $ 200 to spend for the first 30 days, free access to most popular Azure products for 12 months and access to more than 25 products that are always free. At the end of 30 days or once the first credits used up, the free trial subscription must be upgraded to pay-as-you-go subscription.
Resource Group
Create resource group
At the main blade select Resource groups, and click Create resource group.
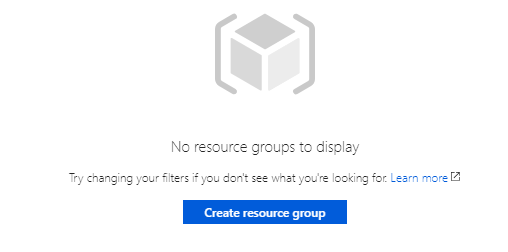
At the next step, field the necessary fields and click Create.

Create Storage Account
The Resource group is ready and now we need to create and put the Azure storage account on it.
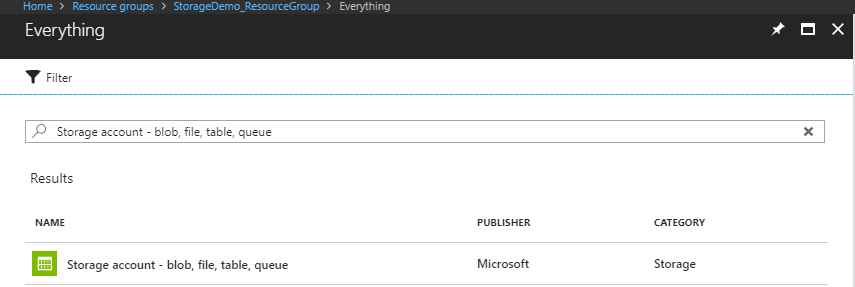
Search for the service
The first we need to do is to search for the service "Storage account - blob, file, table, queue", and click on the result.
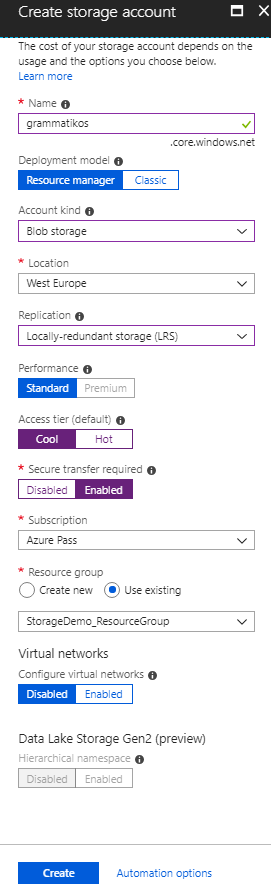
Create the Storage Account
Enter all the necessary fields and click Create.
| Setting | Value |
| Name | Type the storage account name, which MUST be unique |
| Deployment model | For new deployments, select Resource manager, for existing deployments, select Classic |
| Account Kind | For more details, visit the following link |
| Location | Select the storage account location |
| Replication | For more details, visit the following link |
| Performance | HDD drives are for Standard Performance and SSD drives are for Premium Performance |
| Secure Transfer required | For more details, visit the following link |
| Subscription | Select Azure Subscription |
| Resource group | Select the Resource group for the storage account deployment |
| Virtual networks | If enabled the Vnet (existing or a new one) can access the storage account |
| Data Lake Storage Gen2 |
Accelerates big data analytics workloads and enhances shared data lake security with file-level permisions |
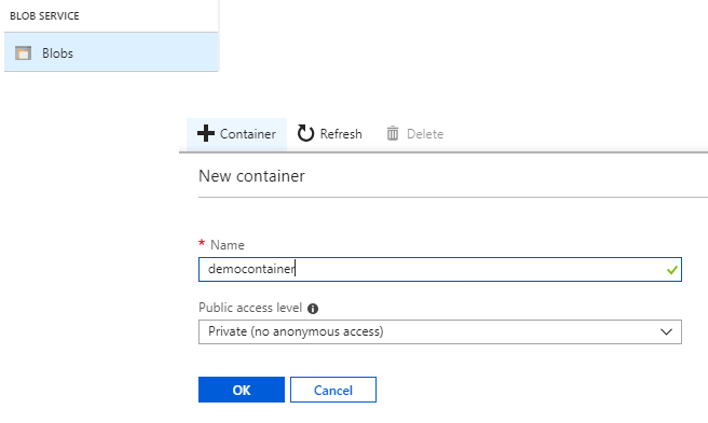
Create a Blob Container
The next move is to create a Blob Container. To do this, from the main storage account blade find the BLOB SERVICE, select Blobs and then +Container, type the
container Name and finally click OK.
The Visual Studio Part
For the next step as the title mentions, we need Microsoft Visual Studio.
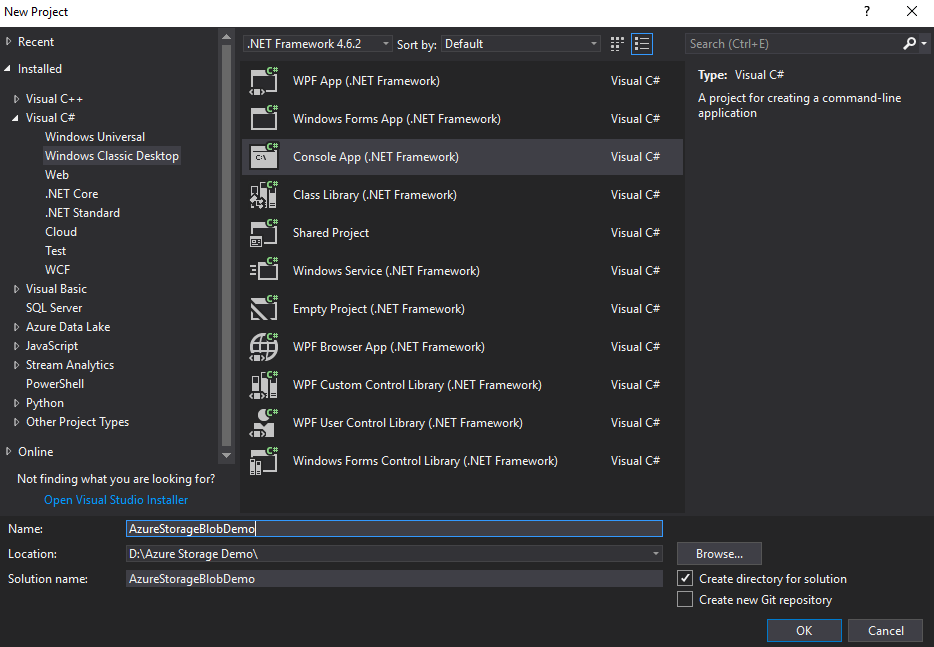
Create a New Console App Project
Select from the menu File - New - Project..., type a name for the project , as the next image shows, and click OK.
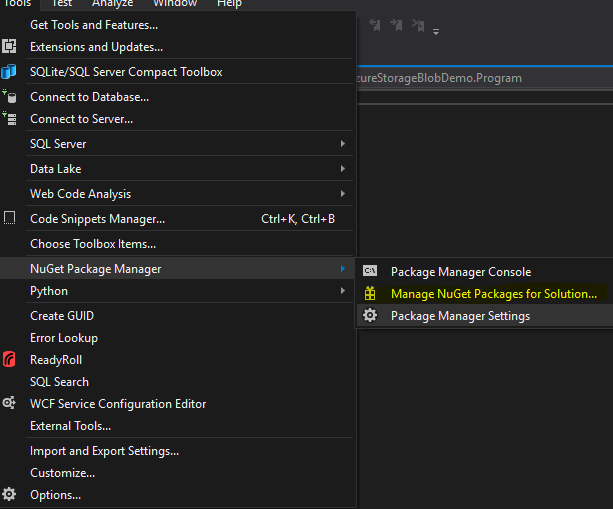
NuGet Package (Windows.Azure.Storage)
Import the necessary NuGet Package, which is {Windows.Azure.Storage}. From the menu Tools - NuGet Package Manger - Manage NuGet Packages for Solution...
**
**
Search and Install the NuGet Package
At the next step we must search for the name {Windows.Azure.Storage}, select it and click Install.

App Config File
At the next step we must add AppSettings node on the App.config file, like the code below show.
<?xml version="1.0" encoding="utf-8" ?>
<configuration>
    <startup>
        <supportedRuntime version="v4.0" sku=".NETFramework,Version=v4.6.2" />
    </startup>
  <appSettings>
    <add key="StorageConnectionString" value="DefaultEndpointsProtocol=https;AccountName=grammatikos;AccountKey=xxxxxxxxxxxxxxxxxxxxxxxxxxxxxxxxxxxxxxxxxxxxxxxxxxxxxxxxxxxxxxxxxxxxxxxxxxxxxxxxxxxxxxxxxxxxxxxxx==;EndpointSuffix=core.windows.net"/>
  </appSettings>
</configuration>
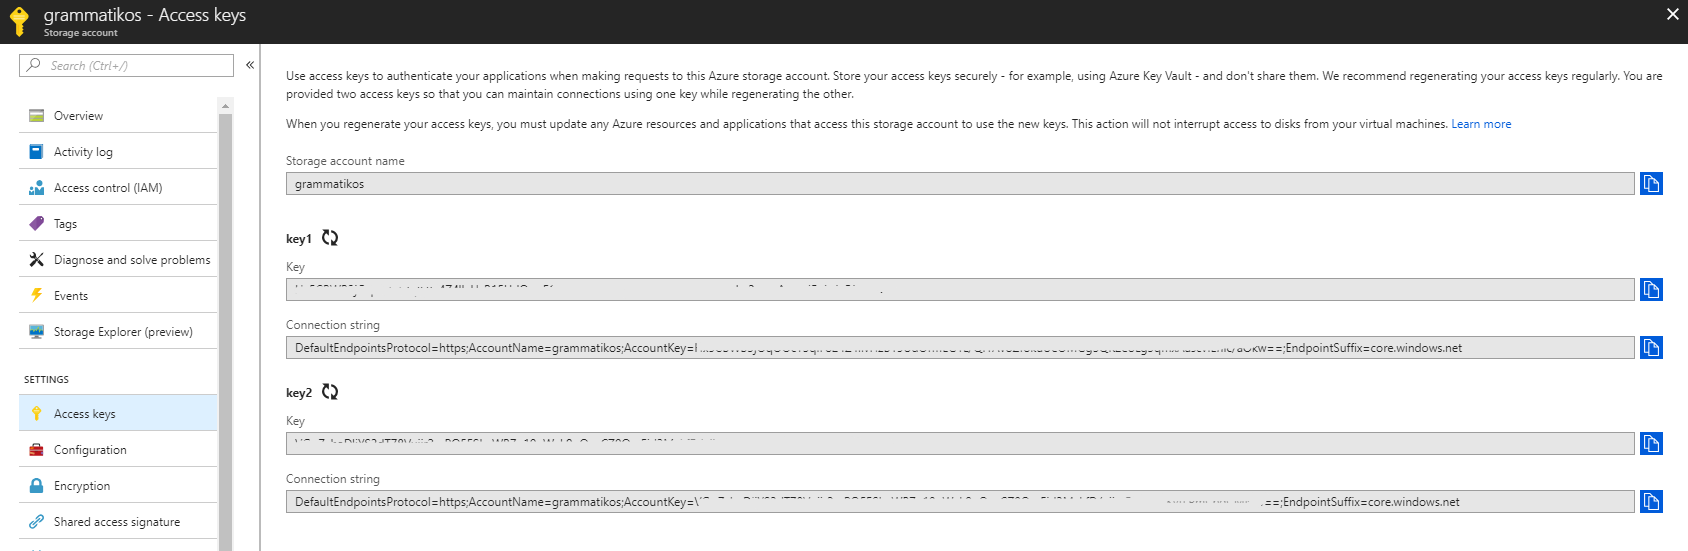
Find the connection string on the Azure Portal, from the main blade SETTINGS - Access keys - key1 - Connection string
 Add Namespaces To Project
After the NuGet Package installed successfully we must add the needed Namespaces to the Project.
using System;
using System.Collections.Generic;
using System.Linq;
using System.Text;
using System.Threading.Tasks;
//Add The following Namespaces to the project
using Microsoft.Azure;
using Microsoft.WindowsAzure.Storage;
using Microsoft.WindowsAzure.Storage.Blob;
Upload File To A Container
The next lines shows how we can Create a Container if this is not exist and upload a file on it.
// Create Reference to Azure Storage Account
String strorageconn = System.Configuration.ConfigurationSettings.AppSettings.Get("StorageConnectionString");
CloudStorageAccount storageacc = CloudStorageAccount.Parse(strorageconn);

//Create Reference to Azure Blob
CloudBlobClient blobClient = storageacc.CreateCloudBlobClient();

//The next 2 lines create if not exists a container named "democontainer"
CloudBlobContainer container = blobClient.GetContainerReference("democontainer");

container.CreateIfNotExists();

//The next 7 lines upload the file test.txt with the name DemoBlob on the container "democontainer"
CloudBlockBlob blockBlob = container.GetBlockBlobReference("DemoBlob");
using (var filestream = System.IO.File.OpenRead(@"D:\Azure Storage Demo\test.txt"))
{

    blockBlob.UploadFromStream(filestream);

}
Download File From A Container
Finally, the next C# code lines shows how we can download a file from an Azure storage container.
//The next 6 lines download the file test.txt with the name test.txt from the container "democontainer"
CloudBlockBlob blockBlob = container.GetBlockBlobReference("DemoBlob");
using (var filestream = System.IO.File.OpenWrite(@"D:\Azure Storage Demo\Download\test.txt"))
{
    blockBlob.DownloadToStream(filestream);
Note
Get the Source Code from GitHub.
Conclusion:
As we demonstrated above, Microsoft enforces us to use Azure Cloud Services in a combination with C# or other programming languages to take advantage of the azure Storage Services.
Related Links:
- Quickstart: Upload, download, and list blobs using .NET
- Azure Storage Blob - Channel 9
- Azure Blob Storage Samples for .NET