Azure Log Analytics: Deploying the first log analytics workspace
Overview
Microsoft listens to the customer's voice and proves it once more time by moving the OMS portal to Azure Portal. In that way, we can monitor and manage both on-premises and Azure workloads from the same point(Azure Portal). Of course, a lot of changes will happen when the OMS portal ends, see more details here.
What is Log Analytics?
Log Analytics is a service which collects data from a set of different sources. These data are organized into tables created automatically. From that point and forward we can monitor, analyze, visualize and create alerts for that data.
Log Analytics Diagram
In the image below we can see a basic diagram of the Log Analytics service.
- The Agents send telemetry data from each guest OS to Log Analytics service
- Log Analytics service collect data and classifies the data into different tables
- With several tools, the End User can monitor, analyze, create reports, dashboards, alerts based on the data.

Log Analytics Sources
Azure Log Analytics service collects data from several sources,
Log Analytics Pricing
At the table below we can see the pricing details for the Log Analytics service
| Feature | Free Units Included | Price |
| Data Ingestion | 5GB/month | €2.522 per GB |
| Data Retention | 31 days | €0.11 / GB / month |
Note
The first 5 GB of data ingested to the Azure Log Analytics service every month is offered free.
Every GB of data ingested into your Azure Log Analytics workspace is retained at no charge for the first 31 days.
Log Analytics Workspace
In the following steps, we create a Log analytics workspace, install Monitoring Agent to an On-Premise windows computer, Connect Azure Virtual Machine to the Workspace.
Create The Workspace
In the Create [Log analytics workspace] blade type the following information as the image shows:
| Setting | Value |
| Create New / Link Existing | Select to Create a New workspace or Link Existing if already is deployed. |
| OMS Workspace | Type Workspace Name, the name should include 4-63 letters, digits or '-', The '-' shouldn't be the first or the last symbol. |
| Subscription | Select the Azure Subscription |
| Resource Group | Create a New Resource Group or select an existing |
| Location | Select the Location, for example, "West Europe" |
| Pricing tier | Select the pricing tier for the log analytics workspace |
Note
The cost of your workspace depends on the pricing tier and what solutions you use.< Learn more about Log Analytics pricing. This subscription is currently in the new pricing model , that has a single pricing tier for Log Analytics (“Per GB”) with a simple pay-as-you-go pricing model based primarily on data ingestion.

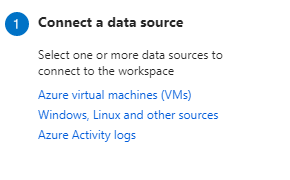
Connect A Data Source (On-Premise Windows computer)
After the Workspace is deployed we must select data sources to connect to the workspace. The first data source in this post is an on-premise windows computer.
Download The Windows Agent
To download the Windows Agent click on the "Windows, Linux and other sources" option.
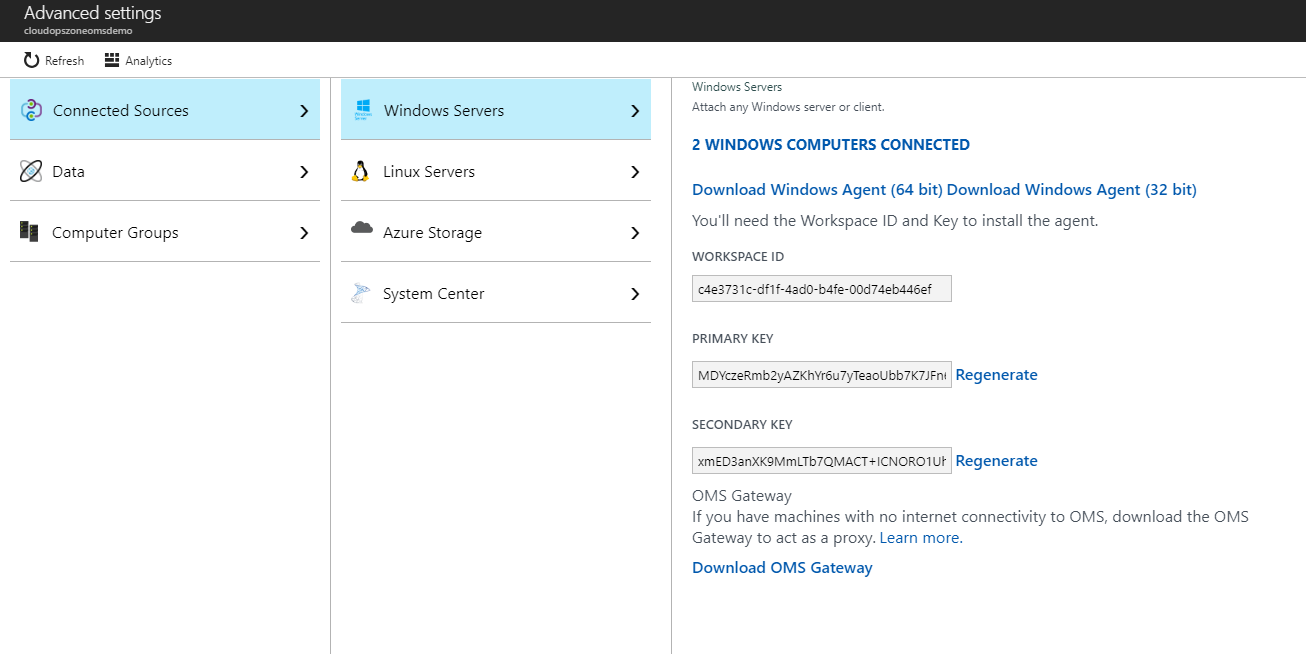
Next, select Connected Sources - Windows Servers, and click Download Windows Agent (64 bit).
Windows OMS Agent Installation (Following the Wizard Steps..)
Step 1
Click the button Next to begin the Wizard installation.

Step 2
Read the Microsoft Software License Terms, and click "I Agree",

Step 3
Leave the default installation path or change it by clicking button {Change}, and click "Next >"

Step 4
In this step we have to select between two options, Connect the Agent to Azure Log Analytics or Connect to System Center Operations Manager, in this case, we select the first option (because the demo is about the Azure Log Analytics service), and click "Next >".

Step 5
In Step 5, we must type the **Workspace ID* **the Workspace Key*, select [Azure Commercial] and click "Next >"

* Find The Agents Workspace ID, key on Azure Portal

Step 6
After we complete all the previous steps we are ready to start the Agent installation by clicking "Install"

Step 7
At the final step, click "Finish".

Check The Microsoft Monitoring Agent Service
After installation is finished we need to check that the service is running on windows services form. We can open windows services just typing on windows RUN (Win + R) the command "services.msc"

A few minutes later we can see that the Windows computer is connected to Workspace.

Note
The OMS portal is moving to Azure. To learn more and start using service from the Azure Portal. CLICK here.
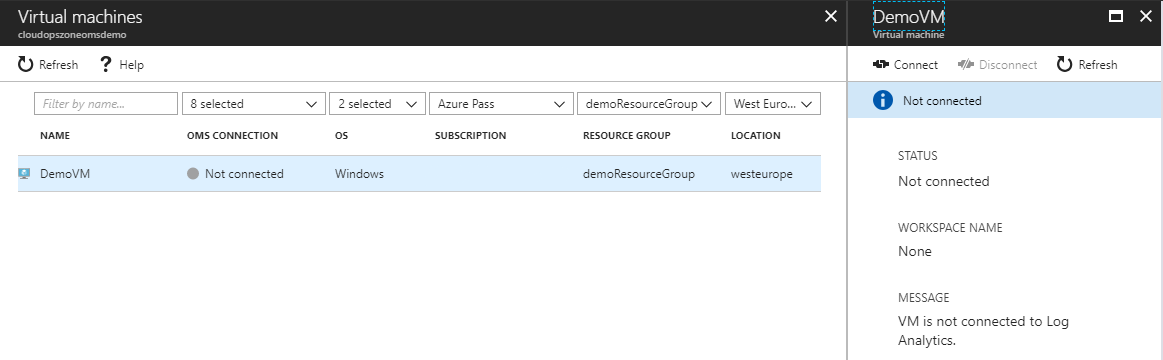
Connect A Data Source (Windows Azure VM )
At the next steps, we make a connection between a Windows Azure VM and the Workspace.
From the Workspace main blade, go to WORKSPACE DATA SOURCE - Virtual machines, select the VM and in the new blade that opens to the right click the button "Connect".** ** {This procedure takes no more than 5 - 10 minutes}.
After 7 minutes (for this demo), the Azure Windows VM is connected to the Workspace.

Create Dashboard
Note
In this demo dashboard, we will use ONLY one solution for the Dashboard and this is the Azure Activity Logs, which means that the demo data is ONLY about Azure VM logs.
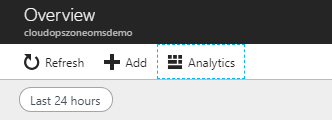
From the main blade, select Overview - Get Started with Log Analytics - Configure monitoring solutions and click View solutions.
Next, click "+Add",
and select from the Management Solutions blade the {Activity Log Analytics} solution and click "Create".
Azure Activity Logs
On the Overview blade we can see the tile Azure Activity Logs,

and if we click on it, then we can see the dashboard of the Azure Activities logs.

Conclusion
In this post, we talked about Azure Log Analytics. This service will replace the OMS (Operations Management Suite) which is deprecated. Also, with the help of a diagram, we saw the logic of this service. We talked about the service charges and the price list. And finally, we have deployed a demo talking about Azure Log Service Workspace, Microsoft Monitor Agent and a final dashboard with demo data.