Azure Web App: Basic Introduction about Creating App to Azure Database for MySQL
1. Introduction
This article about Azure database Server from MySQL. And Its help to faster, Trust and Manage your Database Servers. Azure supporting to Secure, Update and Quickly build the Database Server. Azure Database for MySQL provides fully managed the MySQL database as a service. The MySQL Community Edition helps you easily lift and shift to the cloud, using languages and frameworks of your choice.
Usage:** **
- Community MySQL that’s fully managed
- Languages and frameworks
- Built-in high availability
- Protect your database with built-in intelligence
- Simple and flexible pricing
- Unparalleled security
2. Creating Web App Service to Azure Database for MySQL
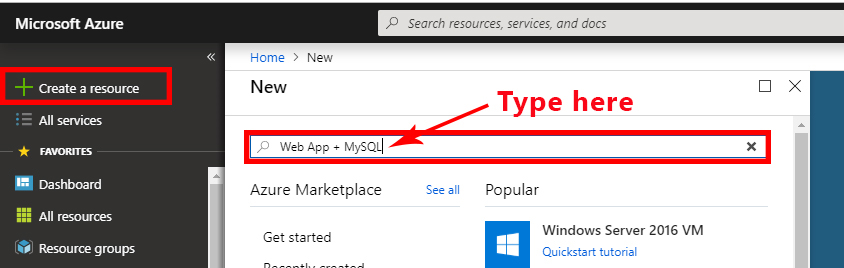
a. Open Azure Portal (Your Account). Click the Create a resource then type into the Search bar *“Web App + MySQL” *Enter.
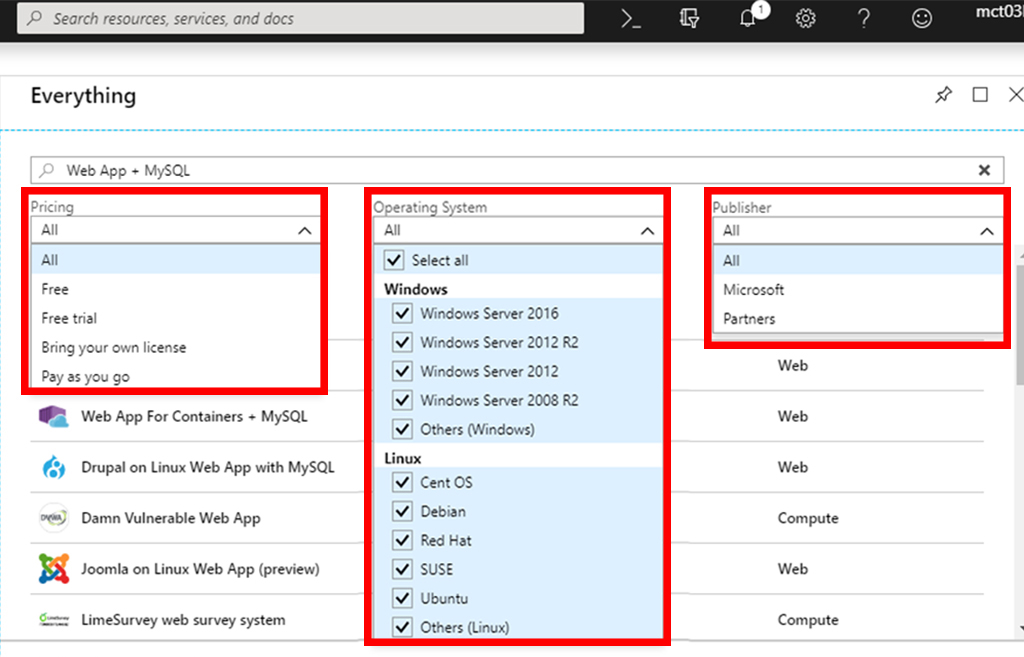
b. After, the enter look the results. Three kinds of menus (Pricing, Operating System, Publisher) here. If you need filtering that menus.
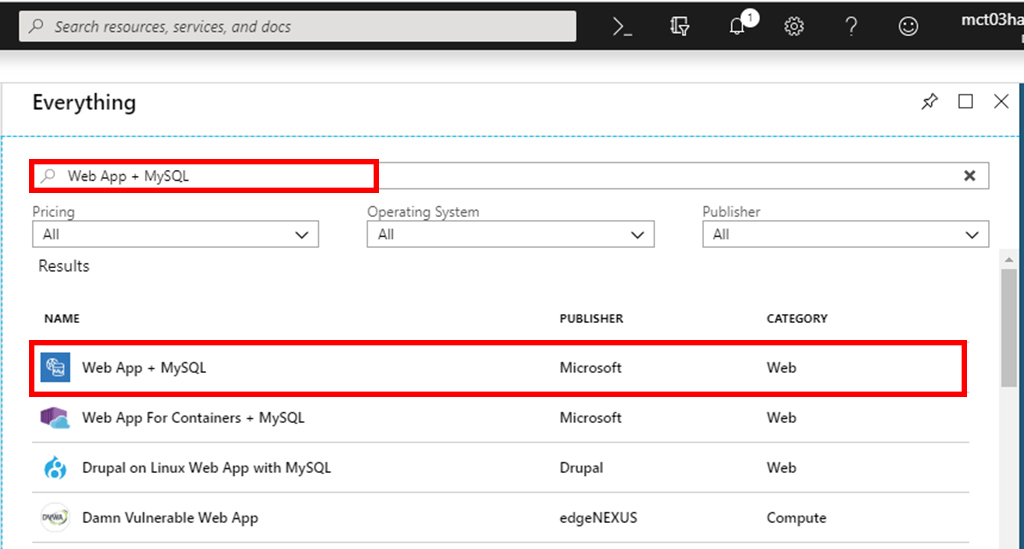
After, Select and Open “Web App + MySQL"
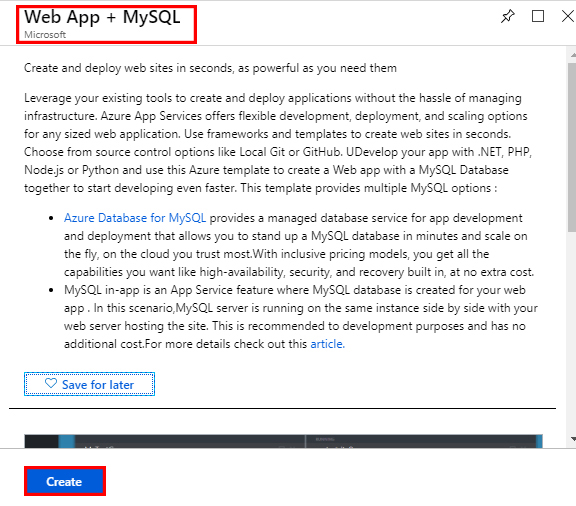
c. Then, click “Create” button for create new web App + MySQL. This part is introduced about Web App + MySQL.
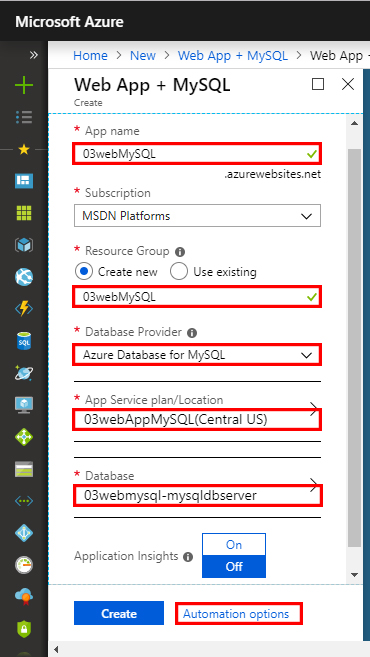
d. Fill out the Web App Service & Azure Database for MySQL form. App name: Write the standard name. ? Resource Group: Two options (Create new resource group / Use existing)  e.Then, Use Database Provider. Second one, App service plan. If you need create new App Service plan. App Service plan/Location a Click***“ Create new”*** a Fill out the***“New App Service Plan”***

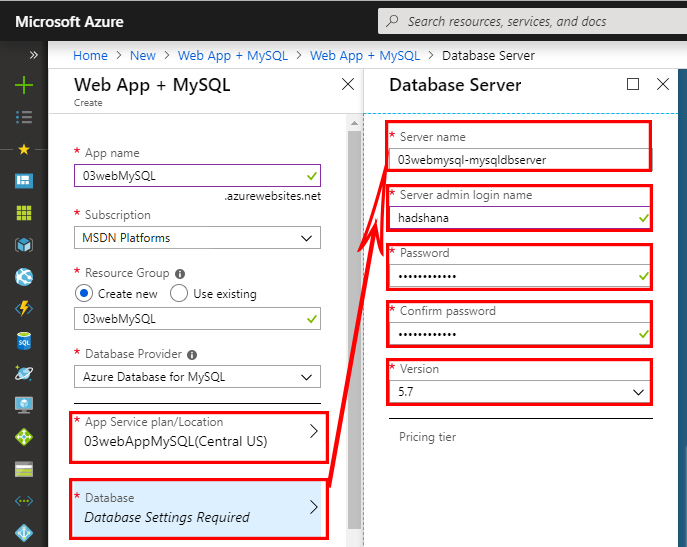
**f. **After fill out the App Service Plan. Next create Database Server. Click Database a Open new form “Database Server”.
Server name: Write the standard name.
Server admin login name: Write the administrative name.
Password: Create high secure password.
Version: Use the standard version.
**g. **part about the Pricing tier. Three kinds of options here. Some details about this,

Then, Pricing tier Select the **(vCore | Storage | Backup Retention Period) **Click “OK” button.

** **
**h. **After See the details, Click “OK” button. If you need Change the Database name.

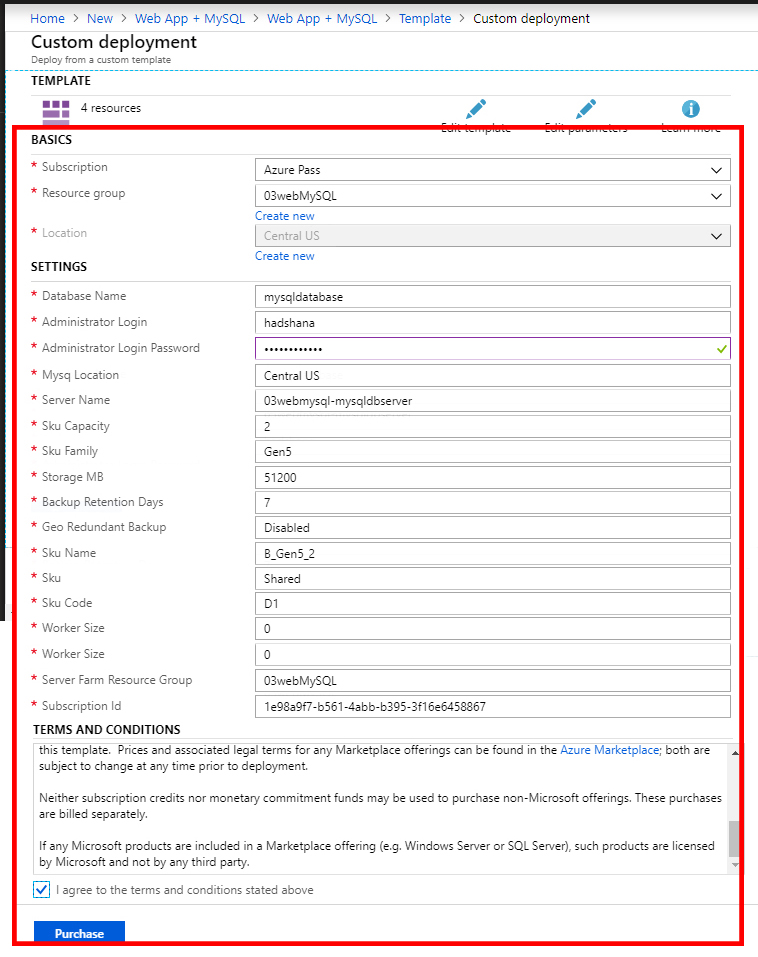
**i. **Fill out the form after, See the information and click the “Automation options” option.
** j.** After clicking the “Automation options”. See three kinds of menus (Download | Add to library | Deploy).
If you need download the code or** **edit that codes

k.When the click "Deploy". See full details.
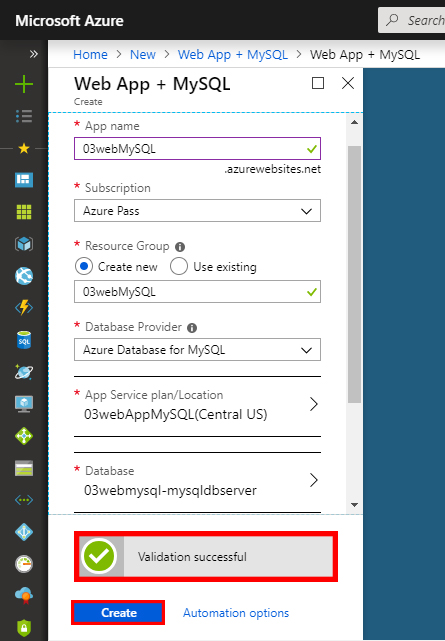
l. After, back to come see “Validation successful”. Click “Create” button.
**m. **After, deploying, Open All resources à Select and Open ***“03mysql-mysqldbserver(Azure Database for MySQL)” ***
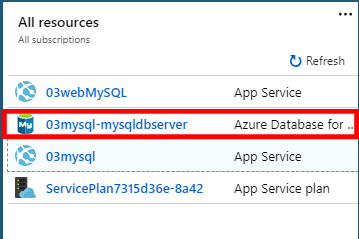
n.See the details, Server name and Server admin login name

** **
o*.* Open All resources a Select and Open “03WebMySQL (App Service)”
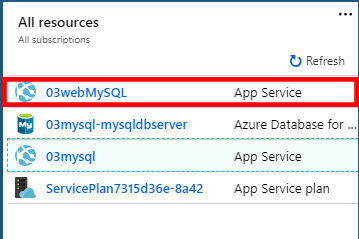
p. See the details
