Azure VM: Troubleshoot The RDP Connection
Remote Desktop Connection Error in Microsoft Azure
Introduction
Hello everyone in this lesson we are going to learn how to fix the Azure remote desktop connection error. Recently I got the several request from my students regarding Remote Desktop Issue, earlier it was very easy to connect our cloud computers using RDP, but in the updated Azure portal It’s difficult to connect the remote server using RDP.
At the following steps, we are going to troubleshooting this RDP issue.
Troubleshooting Steps
Step 1 - Login To Azure Portal
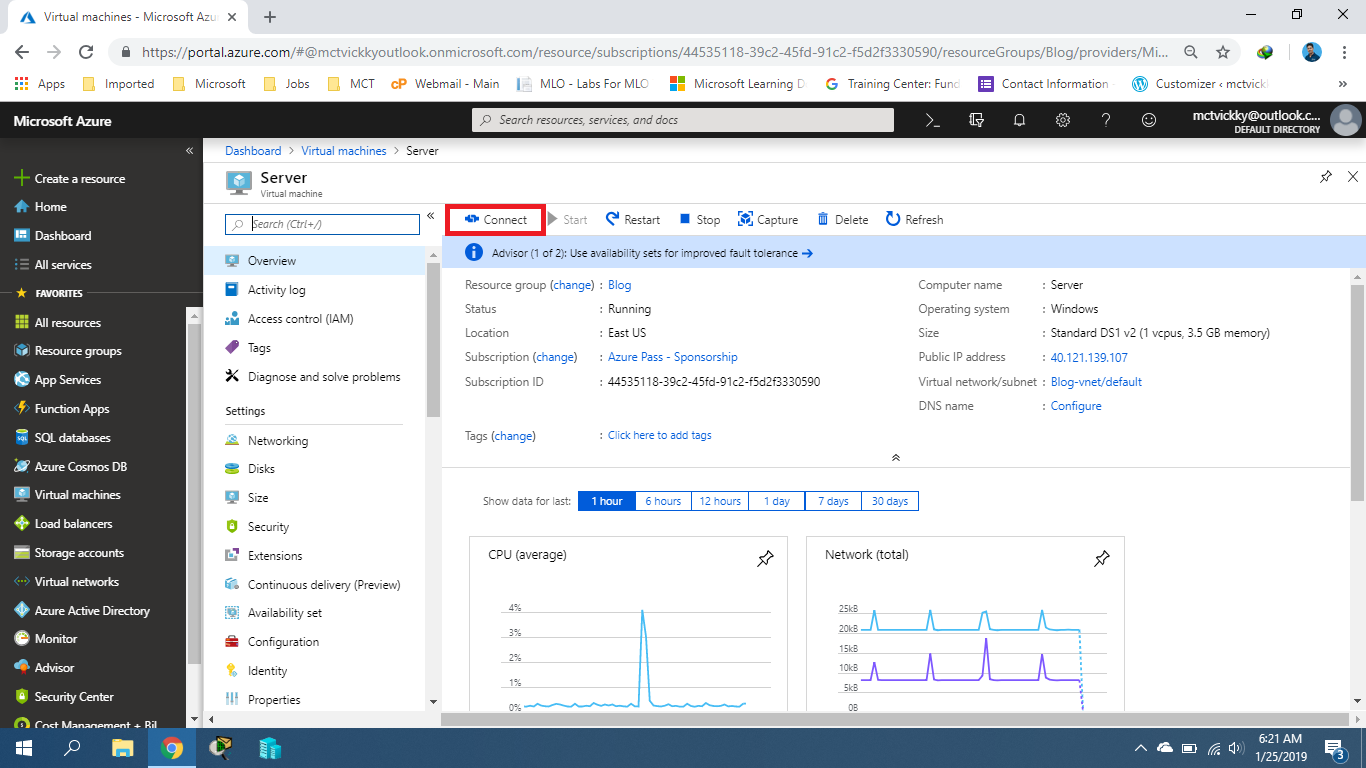
Log in to the Azure Portal using https://portal.azure.com.
In the portal where already provisioned Server 2016, named “Server”, we need to connect our Server through the RDP, so click “Connect”.
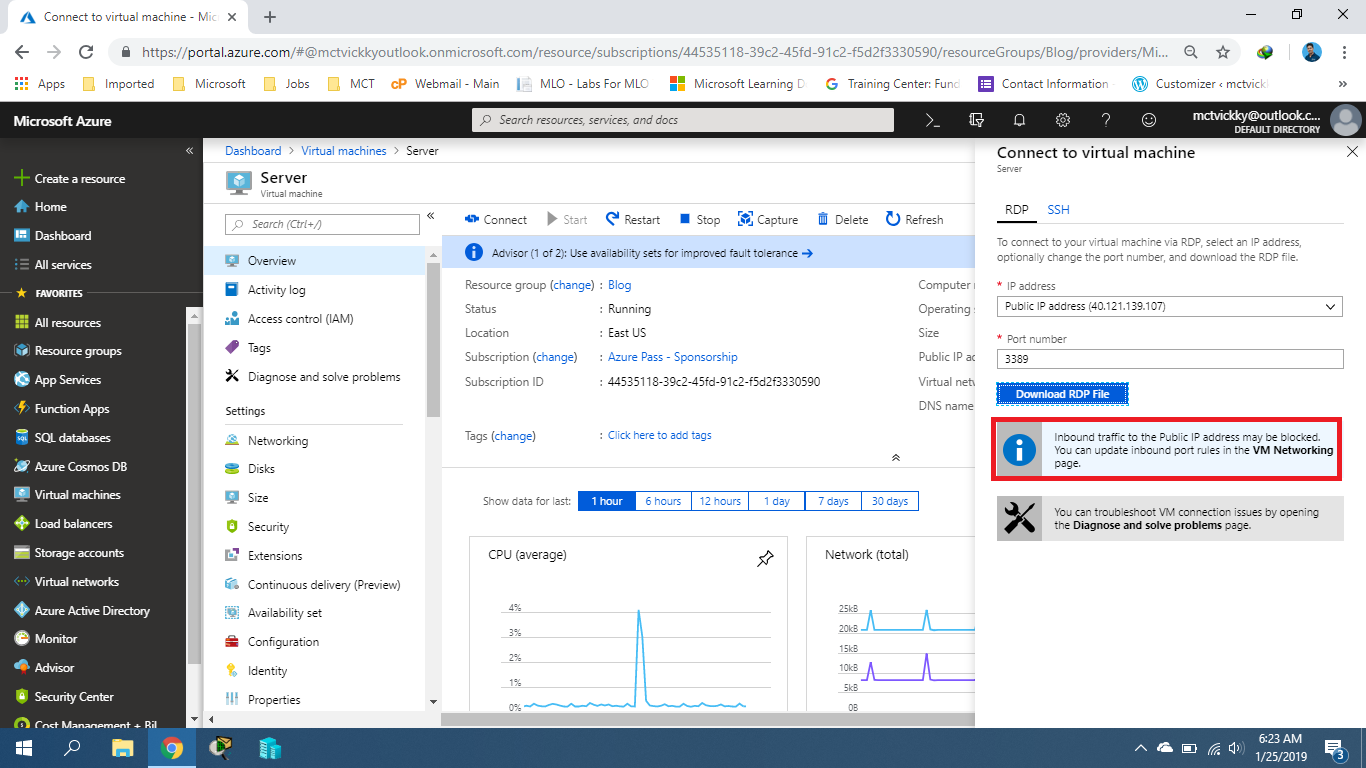
Step 2 - Download RDP File
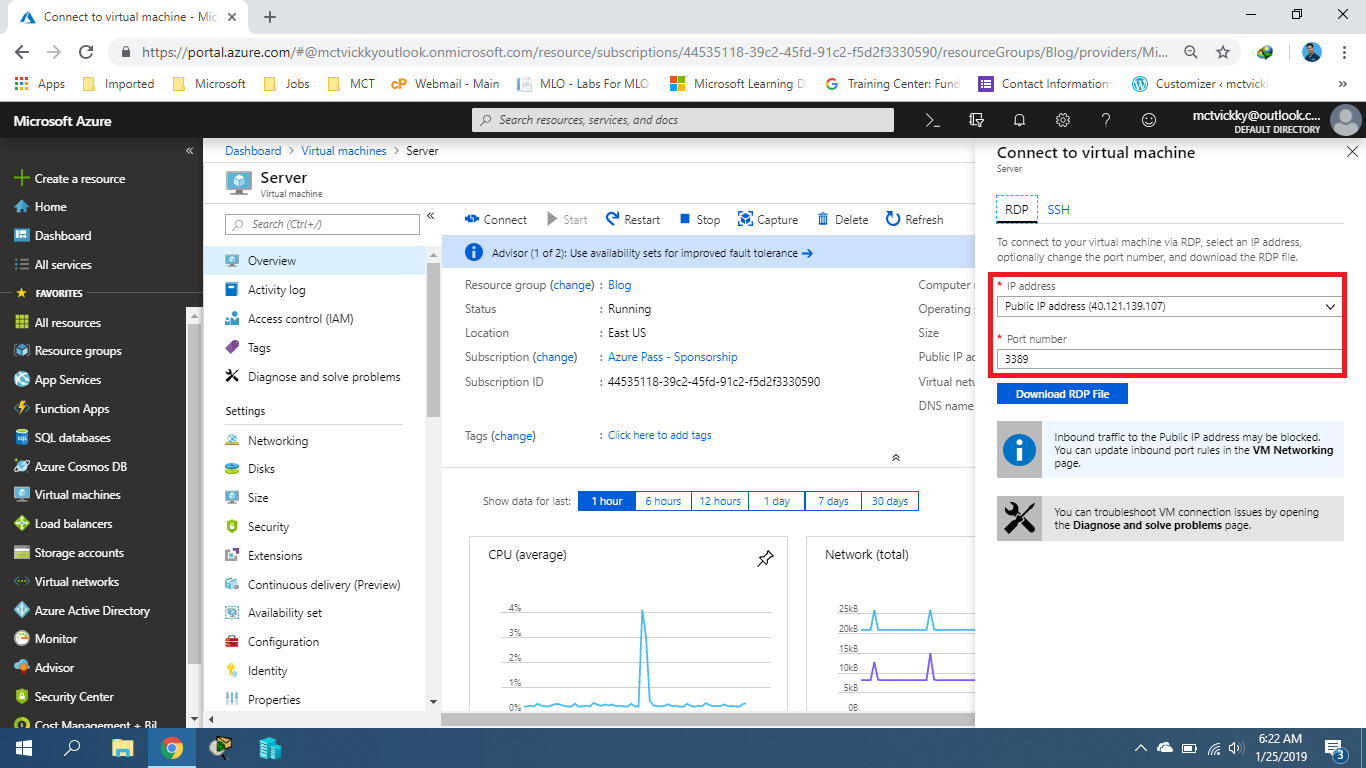
In the right side you can find the “Download RDP File” Button under the “Connect to virtual machine”, before you download you can select IP address, you can connect via Public IP address, or if you using VPN connection you can choose Private IP Address, and then select Port number “3389”, and click “Download RDP File”.
Step 3 - Find .rdp File
So, our RDP connection is downloaded, you can find the RDP file named “Server.rdp”, its bottom of the page.

Step 4 - Open The .rdp File
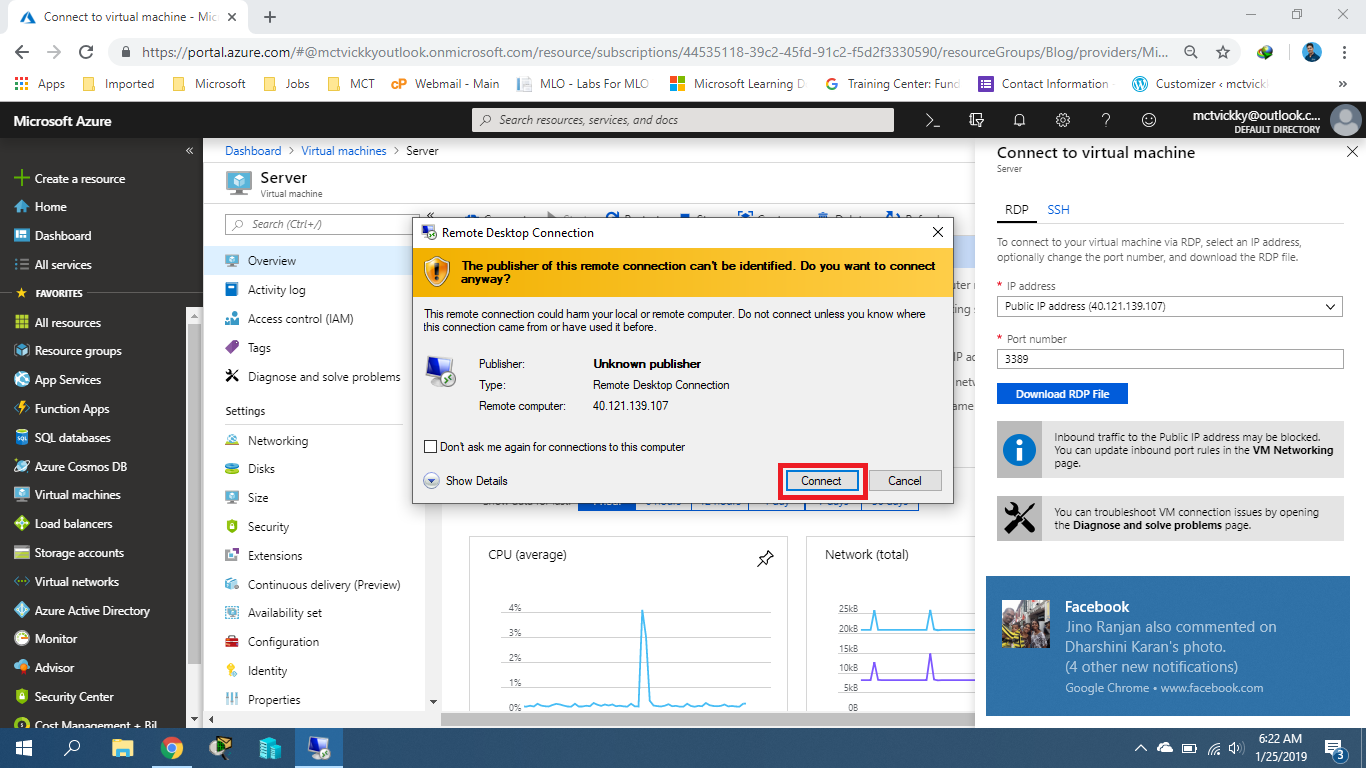
Open the “Server.rdp”, and then click Connect.
Step 5 - Get The Error Message
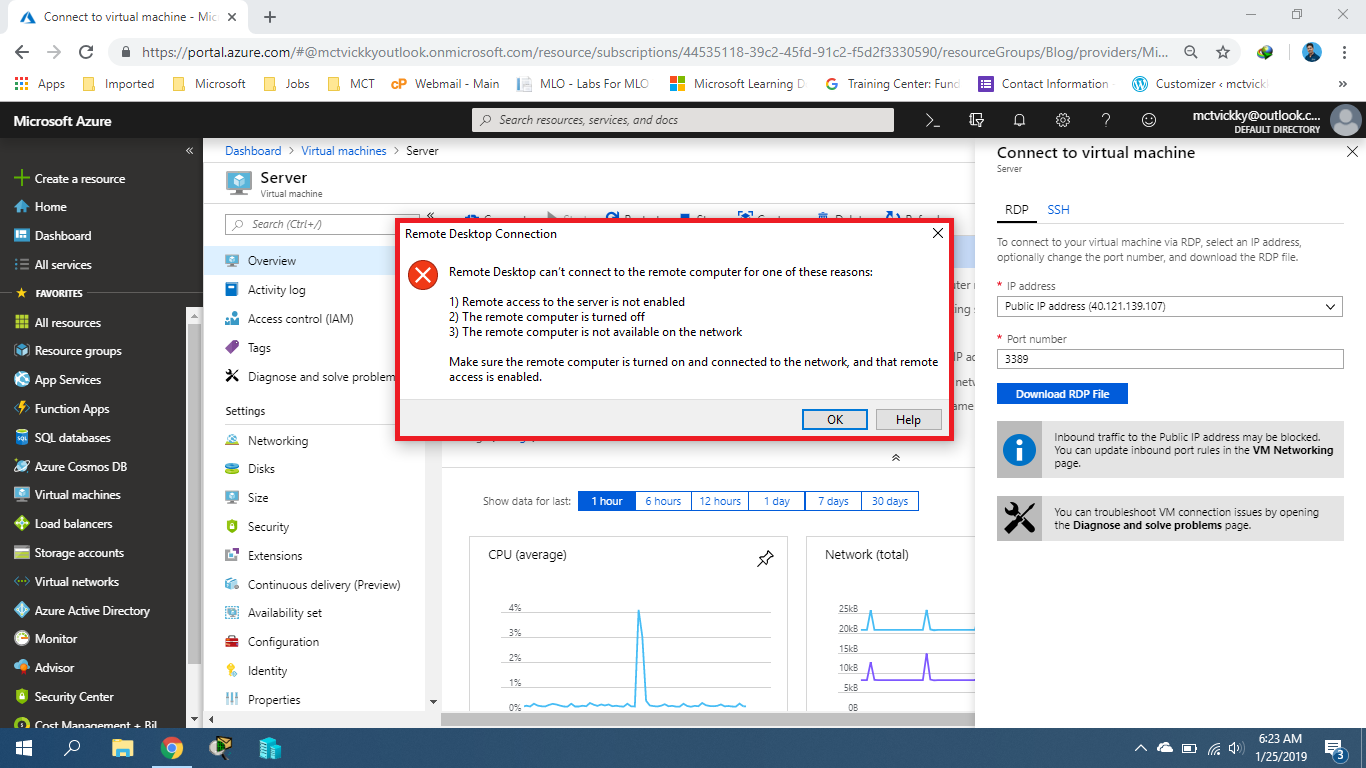
Yes, now you can find the error message is “Remote Desktop can’t connect to the remote computer”, but your Server is running and the remote desktop connection is turned on, so click “OK”.
Step 6 - Check Notification From The Portal
Before you download the RDP file you need to add the “Remote Desktop Port Number” by default it’s not configured under the networking.
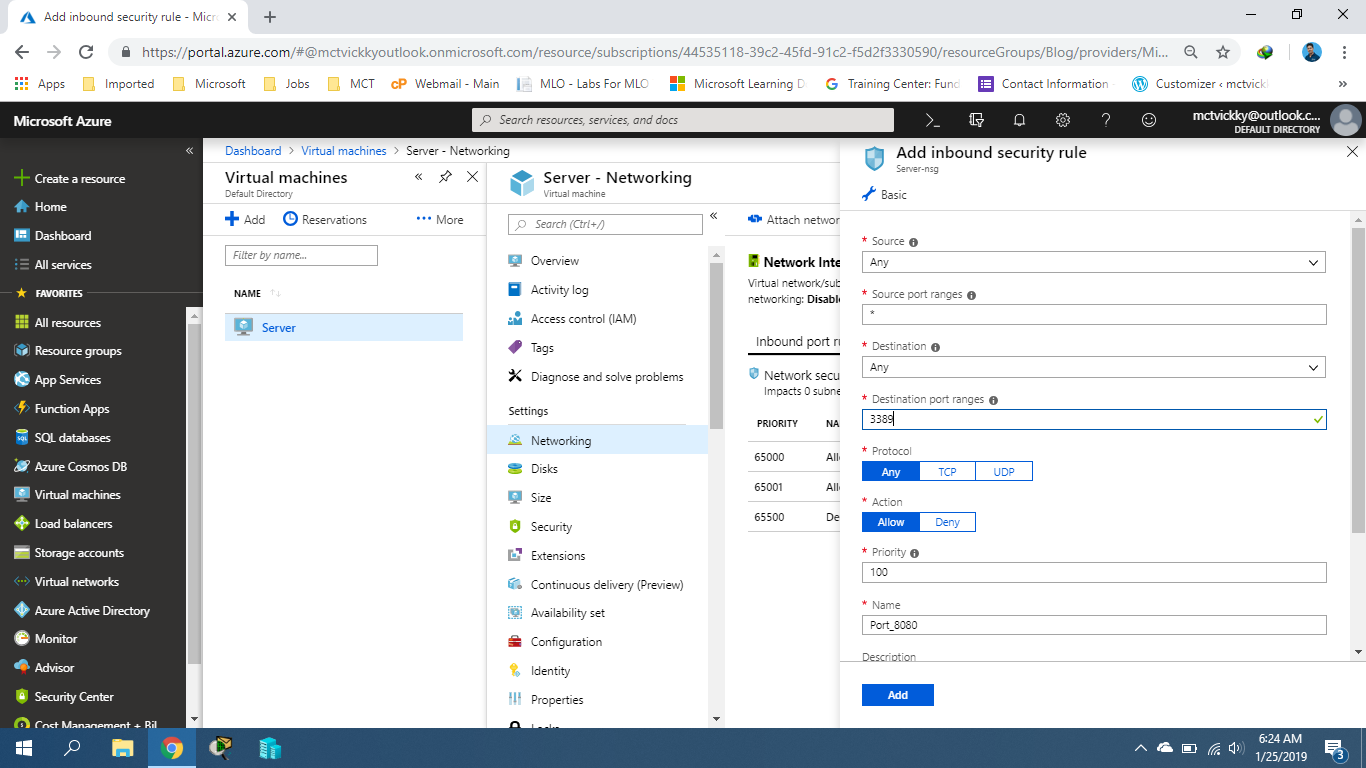
Step 7 - Configure The VM Networking
On the Virtual Machine Page Click “Networking”, now you can find there is no any inbound port rules for RDP connection, so click “Add inbound port rule”.

Step 8 - Add The RDP Rule
In the Add inbound security rule, Enter the port number “3389” on the Destination port ranges, and change the Name like “Port_3389” or Remote Desktop Port, and then Click “Add”.
Step 9 - Download A New RDP File
Again Click Connect and Download new RDP file, or you can use your existing RDP file to connect the remote server.

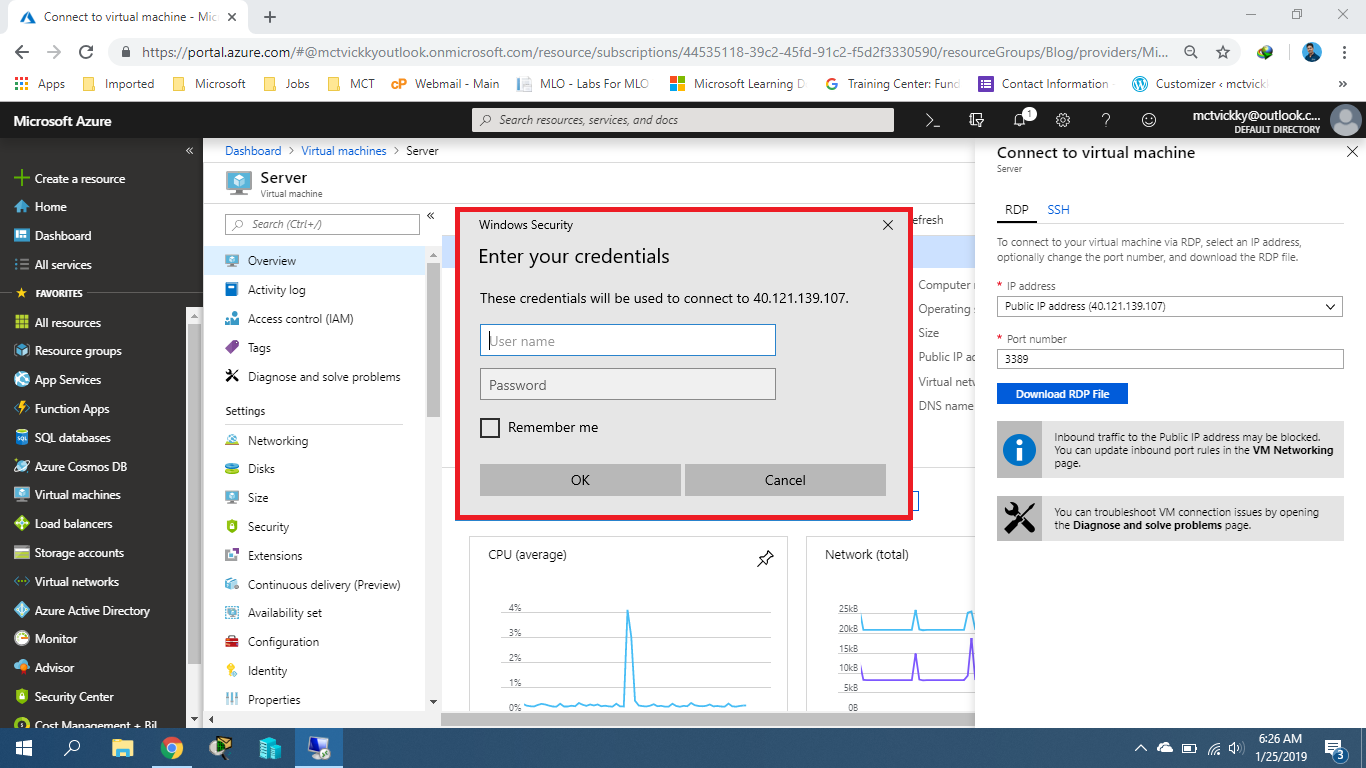
Step 10 - Type VM Credentials
Yes, now you can find the Remote Server response window, so enter your User Name and the Password, then Click “OK”.
Step 11 - Apply The Certification Notice
In the certificate pop-up, tick the “Don’t ask me again for the connection to this computer” check box and click “Yes”.

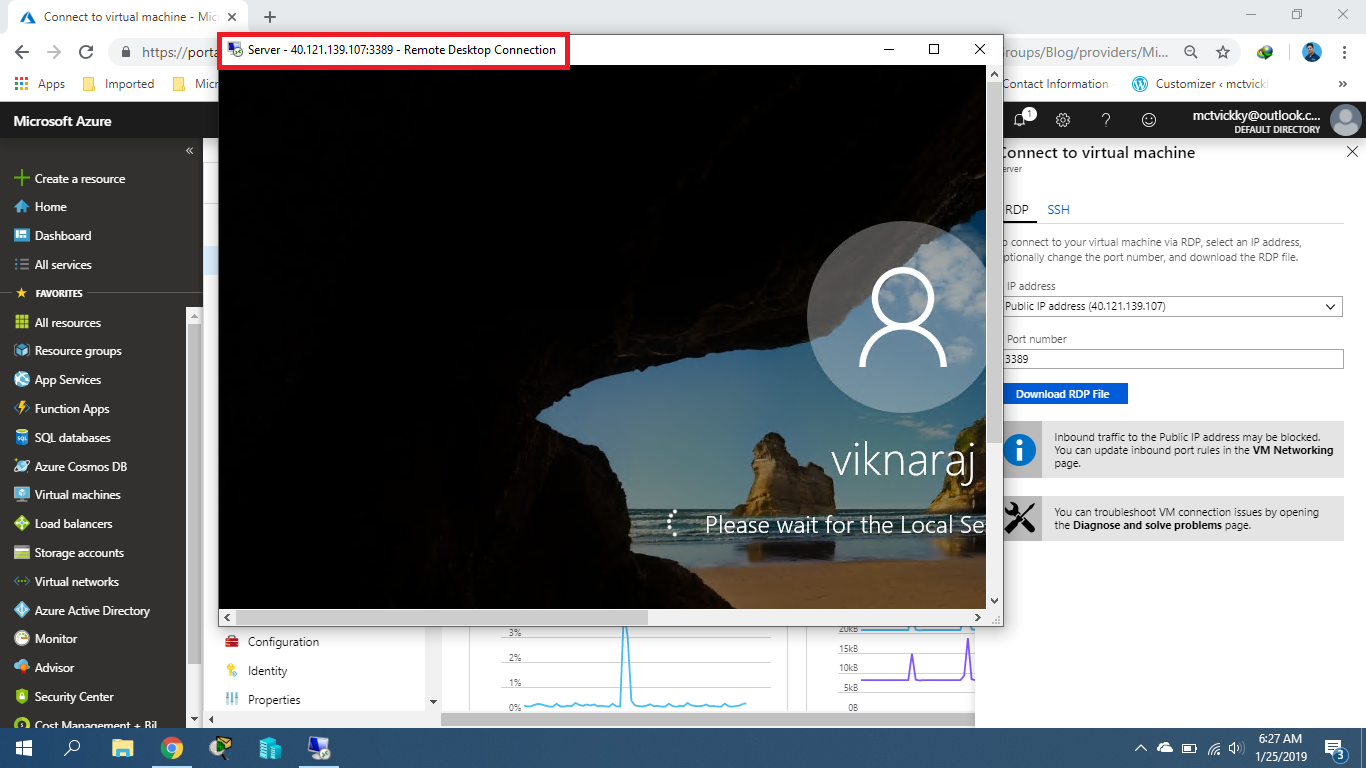
Step 12 - Access The VM
Now you can access your Cloud Server using Remote Desktop Connection.
Summary
In this article we learned how troubleshoot our Azure Remote Desktop Connection, hope you will understand this article, if you have any questions feel free to comment under the comment box.