Office 365 : Auto Provision Site Assets in SharePoint Online using PnP Provisioning Templates,Microsoft Flow and Azure Functions
Introduction
Automation of asset provisioning is a common requirement for organization intranet as it gives the flexibility to end users to add new workspaces or additional functionality to existing site collections. It also saves time which otherwise would take multiple approvals to get the manual work done. In this article, we will see how to automate the provisioning of site collection by using Microsoft Flow,PnP Provisioning Templates and Azure Functions.
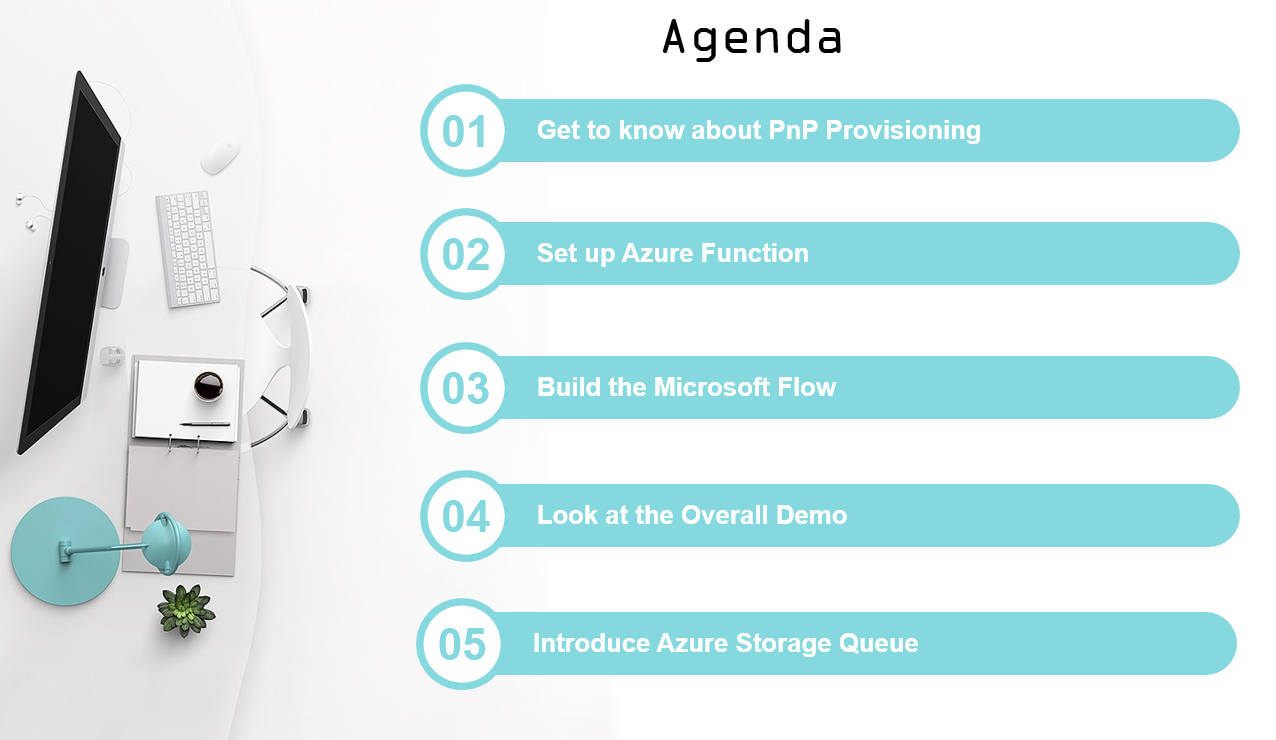
What are we going to do?
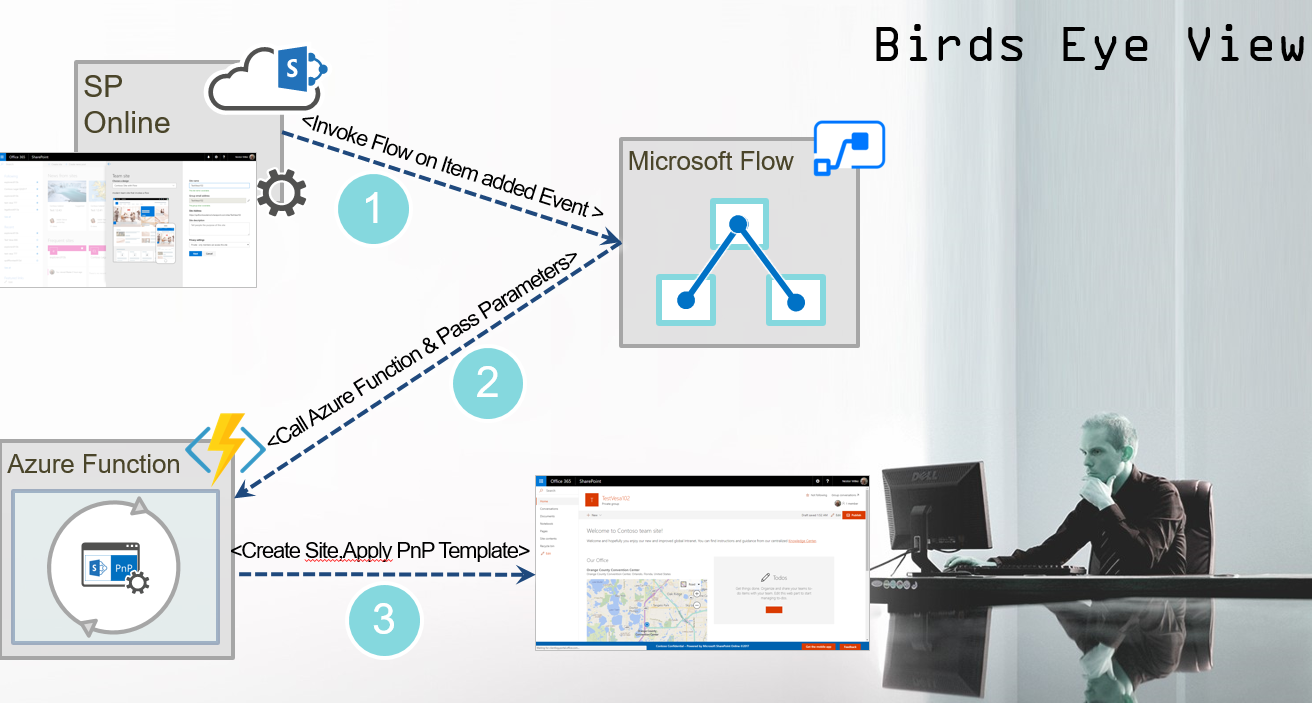
As part of automating the provisioning of the site collection, the flow would be as:
- The user adds a new SharePoint List item and fills out the column with values which would be used to create the Office 365 Group site collection
- On Item Created Event, Microsoft Flow is triggered
- Flow get the SharePoint List Item values and calls the Azure Function and pass them as parameters
- Azure Function contains the core logic which will perform the provisioning of Site Assets, In our case Office 365 Group Site Collection,
- Once the Site collection is created, PnP provisioning template of an existing site collection is applied on to it
PnP Provisioning Templates
PnP provisioning framework provides a template-based platform for provisioning your sites. We can use it to move sites from one environment to another or provision site collection based on the blueprint of an existing site collection. It works with both SharePoint Online and on-premise.
Why PnP Provisioning Templates
Microsoft has given a strong indication of moving away from Full Trust solutions in favor of Add-Ins and new Client Side SharePoint Framework development model. As part of these innovations, it’s imperative that even the provisioning model had to be revisited.
The benefits of using PnP Provisioning Templates
- Saves the current site design and can be used to create, clone or move them to new environment easily
- Give the flexibility to create a template using XML from scratch by validating it against the PnP Provisioning Schema . We can even use managed code to create the XML object hierarchy.
- It gives us the advantage of Delta Provisioning by which we can provision the site on top of an existing site and the add/updates will happen on top of the existing features. It also gives us the option to easily upgrade site functionality by preserving data integrity which was a bottleneck with Add-Ins.
- We can use CSOM/REST or PowerShell to create the new site collection and apply the PnP Template
- Works uniformly across Office 365 as well as SharePoint Server.
- Can be used to provision assets like Site Columns,Content Types, Lists,Navigation,Term Groups, Content Pages,Master Pages,Branding Files,Composed Looks, Features,Custom Actions,Property Bag, Security Groups,Workflow,Search Settings,Add-ins
Get the PnP Template
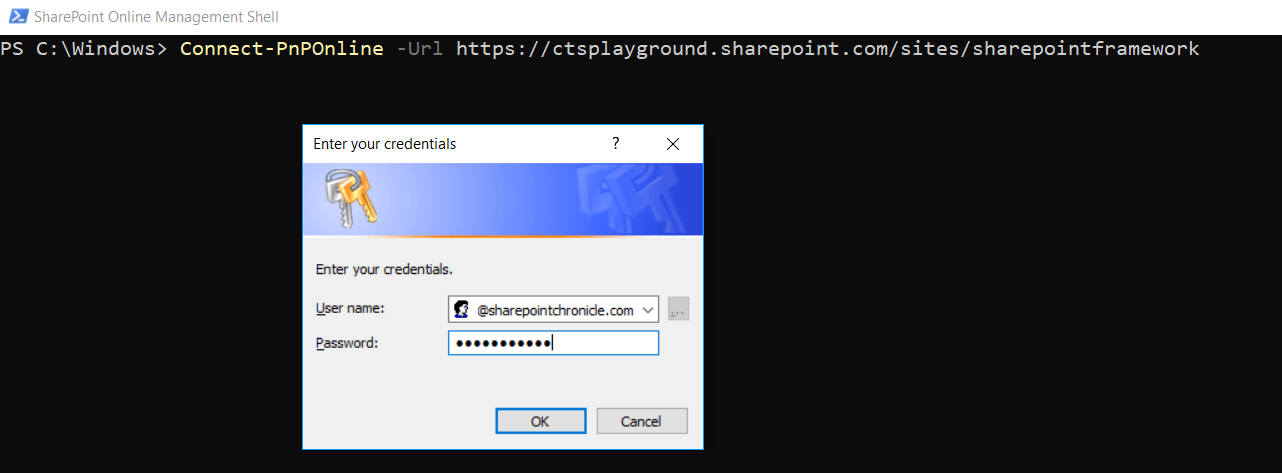
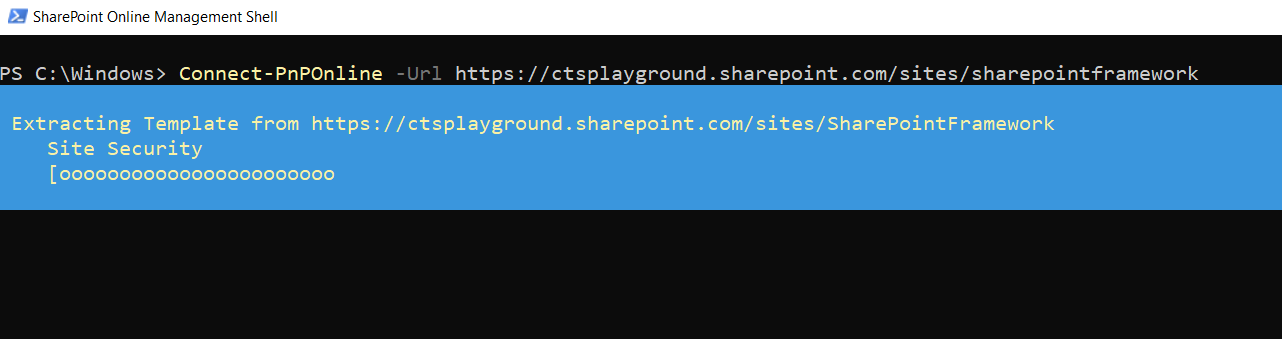
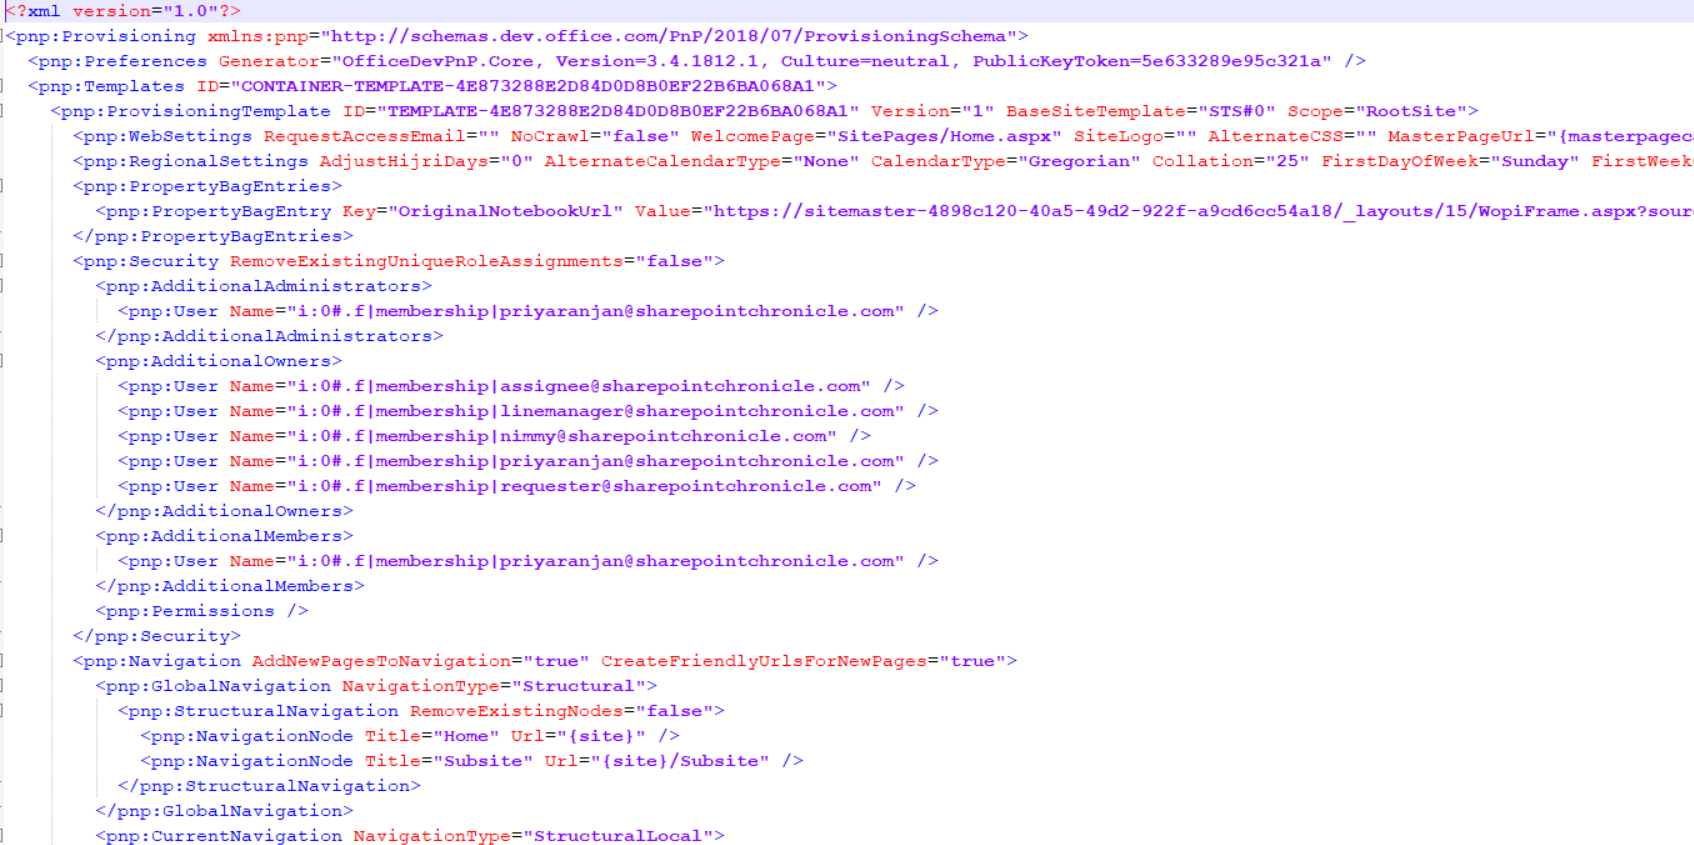
We can use either CSOM/REST or Power Shell API to get the template out of an existing Site. In this demo, we will be extracting the PnP template of an already created site, so that we can use it as a blueprint to provision future sites that share the same design and functionality.
Let see how to extract the PnP Template from a SharePoint Online Site by connecting to it from SharePoint Online Management Shell
Connect-PnPOnline -Url https://ctsplayground.sharepoint.com/sites/sharepointframework
Get-PnPProvisioningTemplate -Out "D:\PnP\PnPTemplate.xml" -PersistBrandingFiles –PersistPublishingFiles
After we get the extracted xml file, we can open it and make the required changes if any :
Once we have the PnP template generated we can use the Apply-PnP ProvisioningTemplate command to apply the template on to the newly created site.
Apply-PnPProvisioningTemplate -Path $templateURL –ClearNavigation
Azure Function
Azure Functions act as the back end for the auto-provisioning demo, it will hold the code that will use the passed in parameters to create the site and apply PnP template.
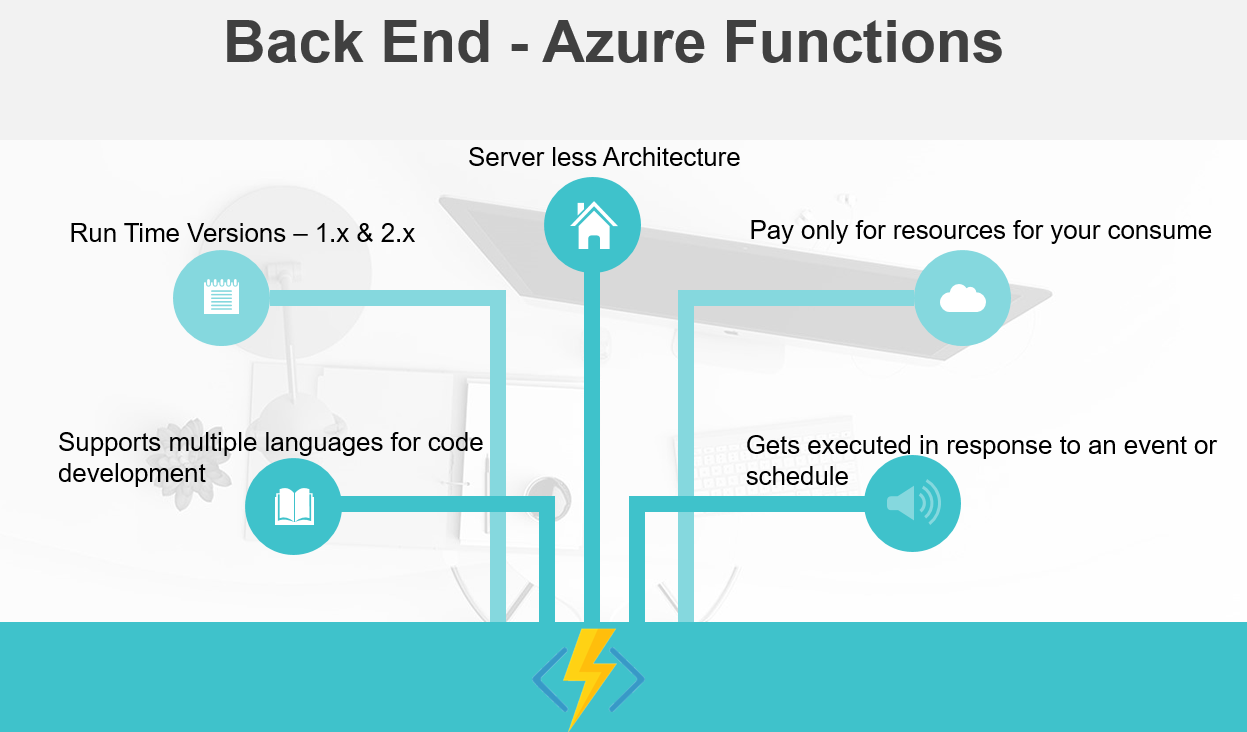
Azure Functions follow a server architecture by which the code gets executed in the server maintained by the cloud provider, which is azure in our case. We can either opt for the App Service Plan or the Consumption plan or decide whether to choose just for the Azure Function up time.
Azure Functions also gives us the power to choose from a wide variety of templates by which we can either choose a timer template or event trigger template so that the azure function runs on a schedule or gets triggered in response to event respectively. In addition to all these, we can choose from a wide a wide variety of languages to build the logic. However, the language selection depends on the run time that we choose i.e : either 1.0 or 2.0 . Runtime 2.0 is the latest version,which is built on top of .NET core for cross-platform compatibility, however, it has some of the languages supported by Runtime 1.0 removed from user selection.
Create Azure Function
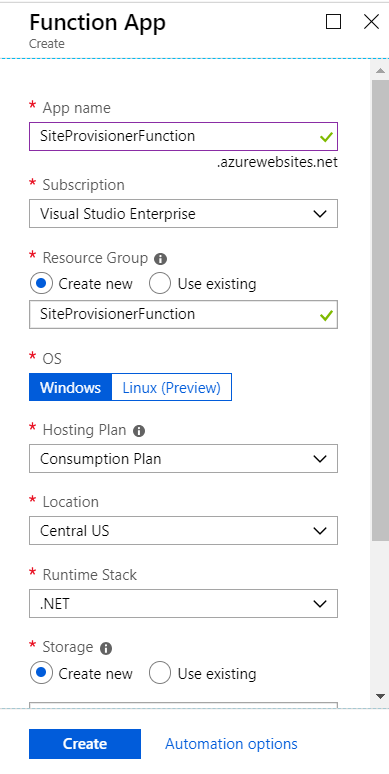
The first step is to create an azure function from azure portal . You can head over and select function app by clicking on “Create a resource” button

Specify the required details for the function app so that it gets created.
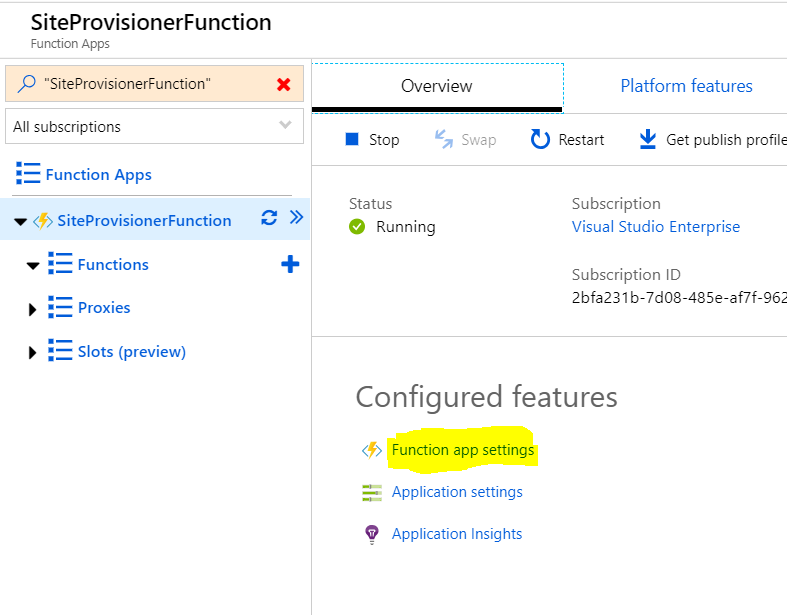
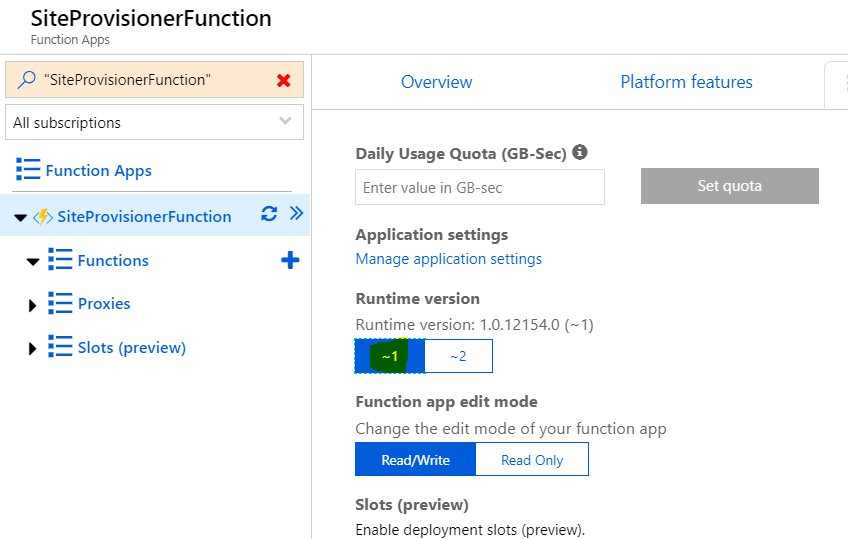
Once it is created, head over to the function app settings.
Change the run time version from 2 to 1 so that PowerShell language is available for use.
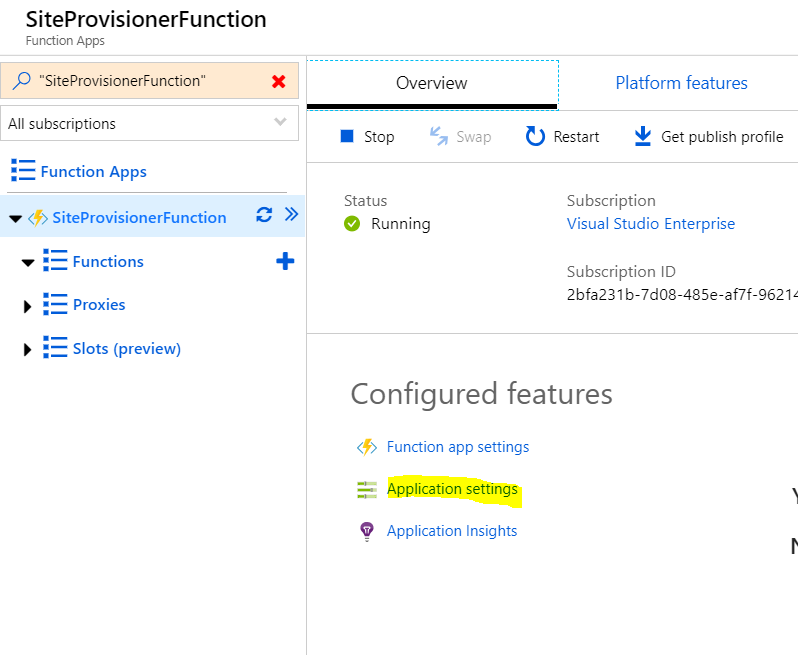
Now select Application settings.
Change the Platform from 32 bit to 64 bit as PowerShell prefers 64 bit.

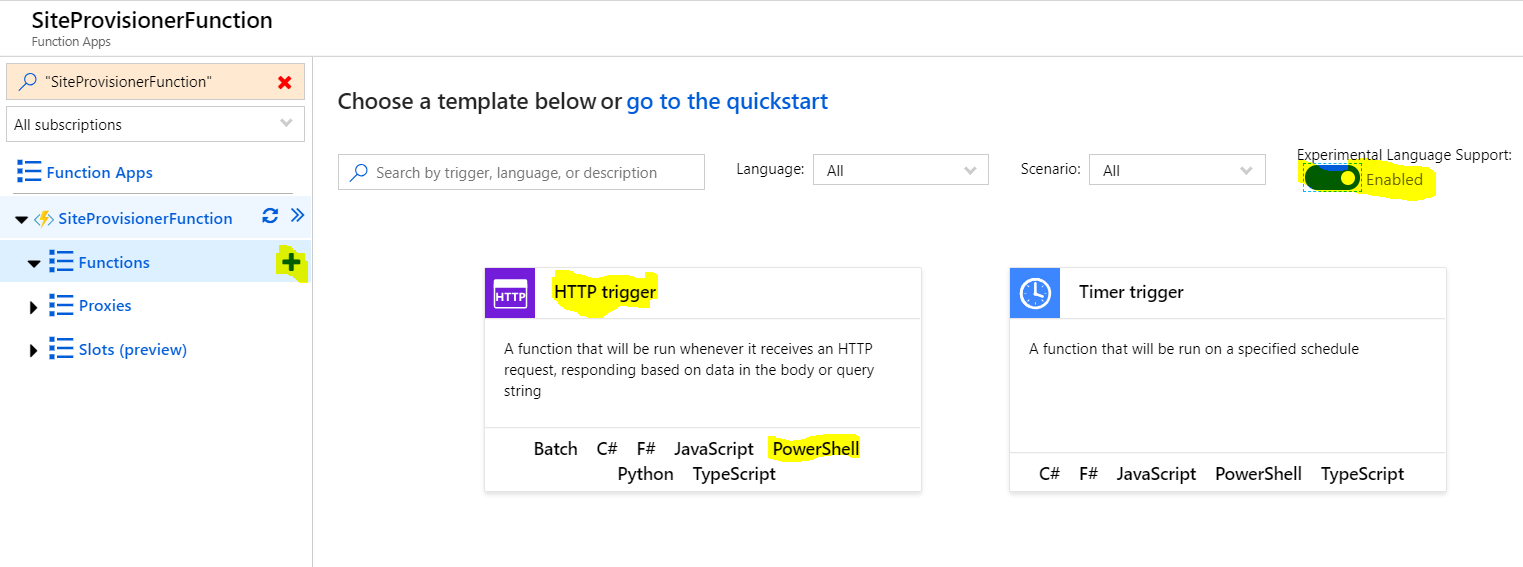
Add Azure Function
Now click on the + button to add Azure Function. For PowerShell to be enabled, toggle Experimental Language Support to ON
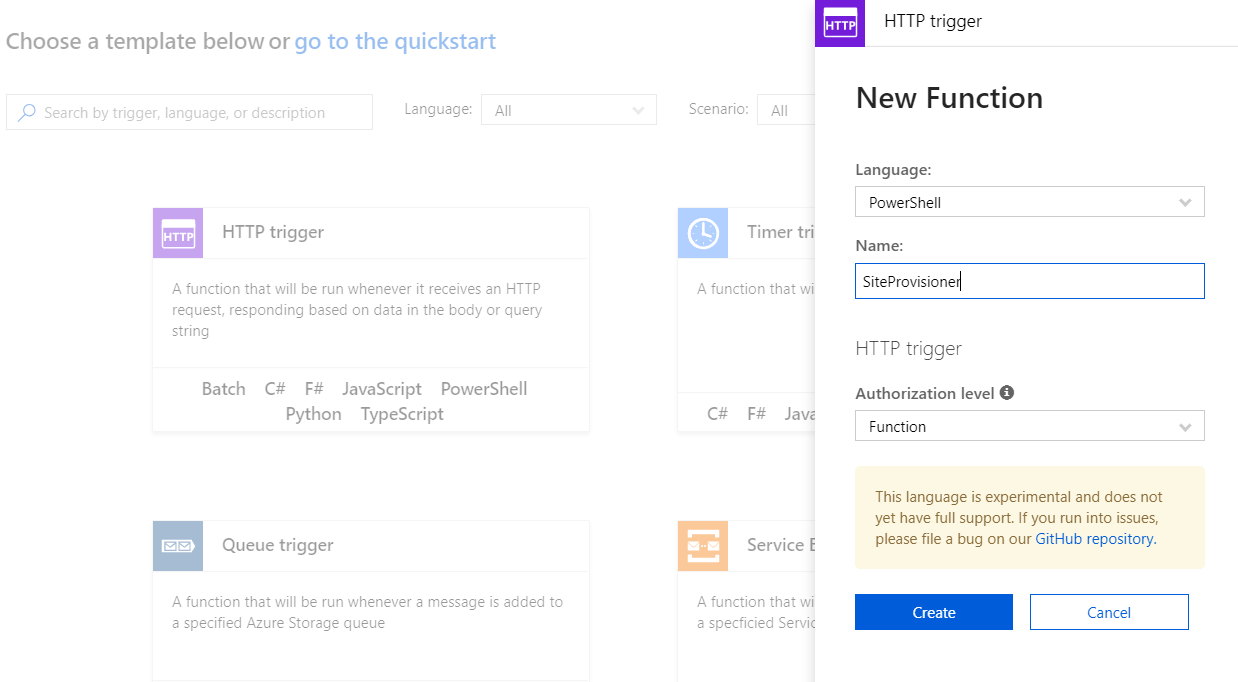
Select PowerShell from HTTP Trigger and create the new function as shown below
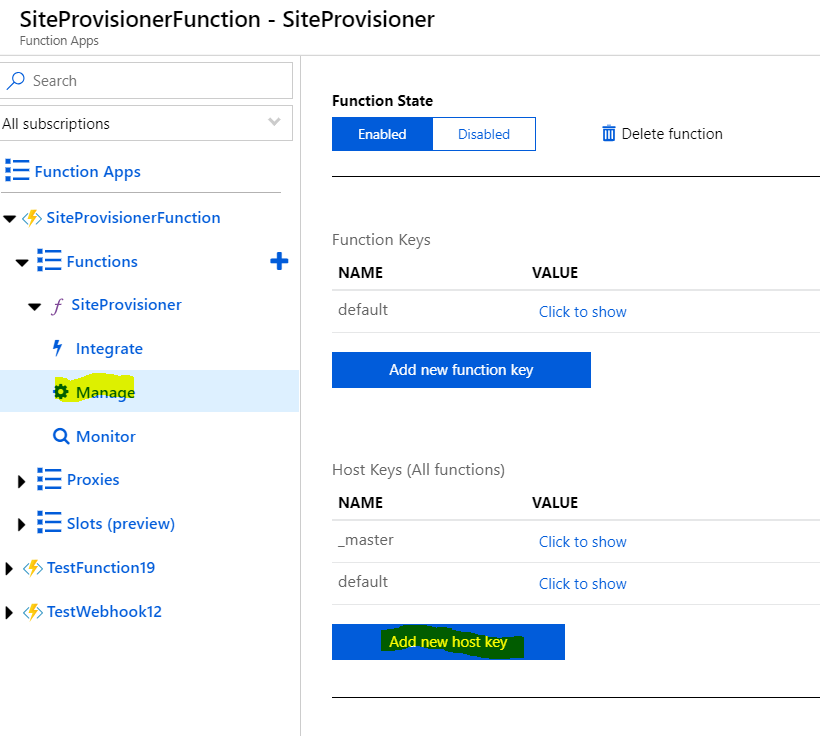
Add Host Key for Azure Function
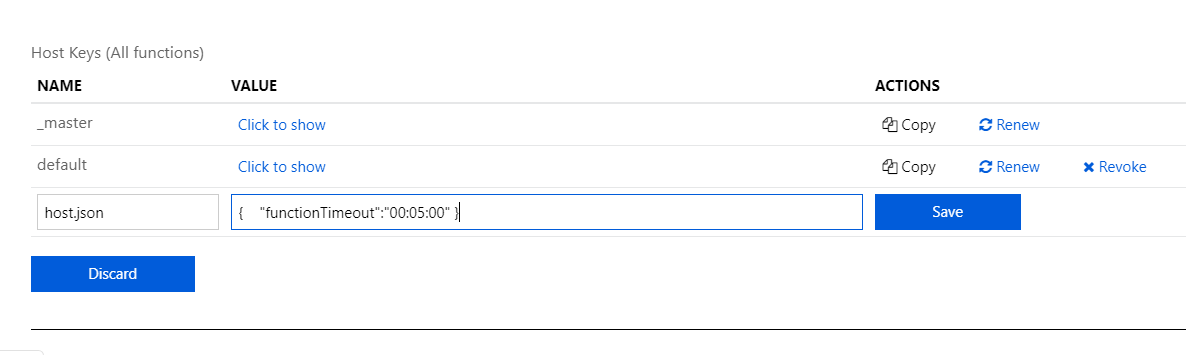
Azure Function has a time out of 5 minutes. Though Site Collection creation completes in less than a minute, applying of PnP template can well span over 5 minutes if there are major customizations. In this case, the azure function will time out. In order to increase the time out value, add host.json key value pair by clicking on “Add new host key”. The key value pair would be :
Host.json |
{“functionTimeout”:”00:15:00”} |
Currently, it is given as 5, please ensure that the time out is above 10.
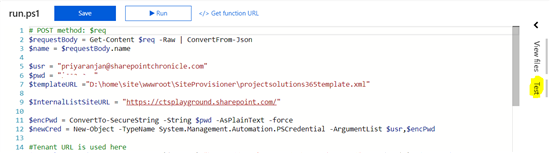
Once the changes are done add the PowerShell code to provision Office 365 groups site collection to the Azure Function. We would be using the below code to provision Office 365 Groups and apply PnP template to the newly created site. Once the operation is completed, we will write back the success status to SharePoint List. In order to create the Site, we are accepting some input parameters which would be passed to the function from Microsoft Flow.
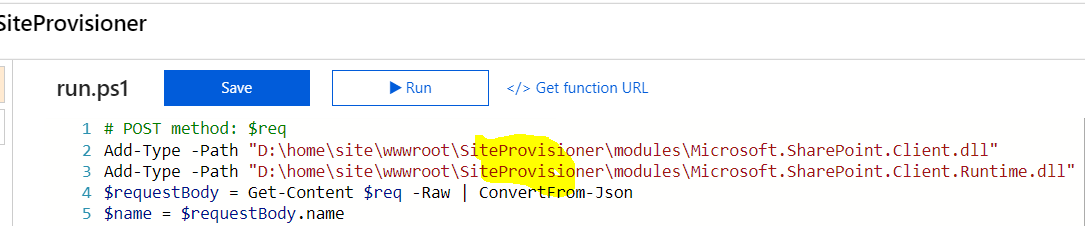
# POST method: $req
Add-Type -Path "D:\home\site\wwwroot\SiteProvisioner\modules\Microsoft.SharePoint.Client.dll"
Add-Type -Path "D:\home\site\wwwroot\SiteProvisioner\modules\Microsoft.SharePoint.Client.Runtime.dll"
$requestBody = Get-Content $req -Raw | ConvertFrom-Json
$name = $requestBody.name

$usr = "<Tenant User Name>"
$pwd = "<PASSWORD>"
$templateURL ="D:\home\site\wwwroot\SiteProvisioner\projectsolutions365template.xml"

$InternalListSiteURL = "https://ctsplayground.sharepoint.com/"
$tenantURL = "https://ctsplayground.sharepoint.com/"


$encPwd = ConvertTo-SecureString -String $pwd -AsPlainText -force
$newCred = New-Object -TypeName System.Management.Automation.PSCredential -ArgumentList $usr,$encPwd

#Tenant URL is used here
$retvalConnection = Connect-PnPOnline -Url $tenantURL -Credentials $newCred
$a = Get-PnPConnection

$ListName = "Internal Project List"
$GroupTitle = $requestBody.GroupTitle
$GroupDesc = $requestBody.GroupDesc
$GroupDisplayName = $requestBody.GroupDisplayName
$callbackUrl = $requestBody.callbackUrl;
$ItemID = $requestBody.ItemID;

Write-Output "Function 'Site Provisioner' started." "Group Details :    $GroupTitle  $GroupDesc  $GroupDisplayName"

$office365GroupURL = New-PnPSite -Type Team -Title $GroupTitle -Description  $GroupDesc -Alias $GroupDisplayName


     Write-Output "Office 365 Group created at : " $office365GroupURL
     Write-Output "Connecting to newly created Office 365 Groups"

     $retvalConnection = Connect-PnPOnline -Url $office365GroupURL -Credentials $newCred

     Write-Output "Applying PnP Template on newly created Office 365 Groups"
         Apply-PnPProvisioningTemplate -Path $templateURL -ClearNavigation


         Write-Output "PnP Provisioning Template Completed"


 #Set up the context
 $creds = New-Object Microsoft.SharePoint.Client.SharePointOnlineCredentials($usr, $encPwd)
$Context = New-Object Microsoft.SharePoint.Client.ClientContext($InternalListSiteURL)
$Context.Credentials = $creds

try{

    #Filter and Get the List Items using CAML
    $List = $Context.web.Lists.GetByTitle($ListName)
     $Context.load($List)
    $Context.executeQuery()
    write-output $List.Title $ItemID
    #Get List Item by ID
    $ListItem = $List.GetItemById($ItemID)

    #Update List Item title
    $ListItem["SiteProvisioned"] = "Yes"
    $ListItem.Update()

    $Context.ExecuteQuery()
    write-Output "$test  Item Updated!"  -foregroundcolor Green
}
catch{
    write-Output "$($_.Exception.Message)" -foregroundcolor red
}


$Body = @{name = 'PnP Provisioning Completed'} | ConvertTo-Json
Invoke-RestMethod -Method Post -Body $Body -Uri $callbackUrl

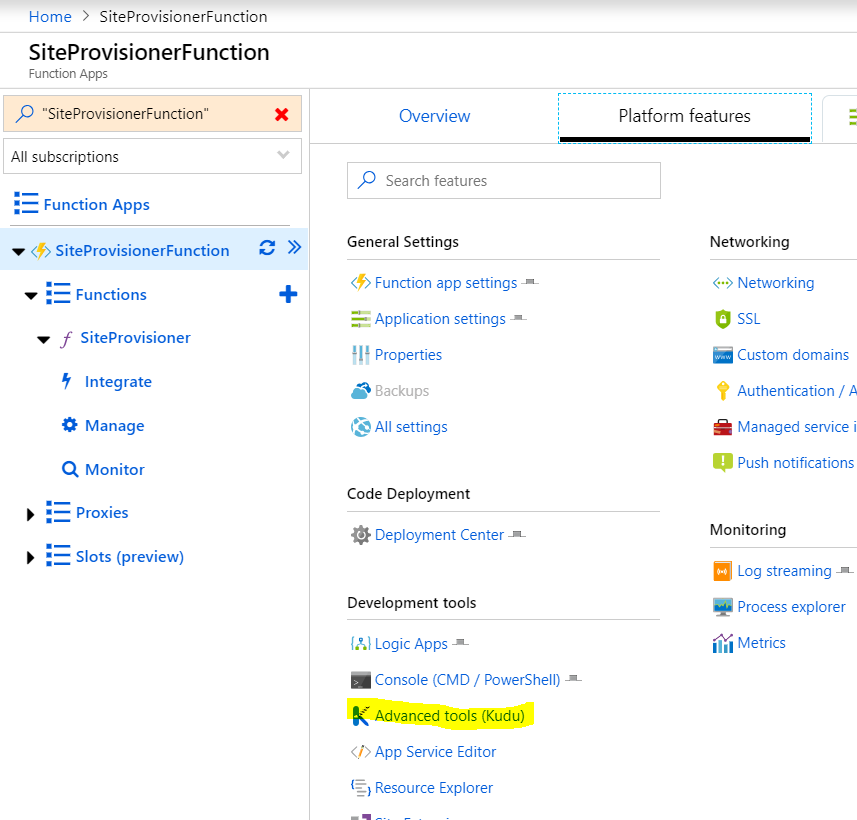
Copy the required DLLs to Azure
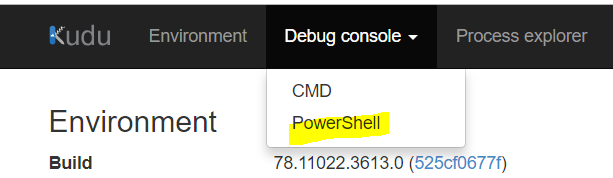
So as to copy the client DLLs, head over to Advanced tools(Kudu)
Select PowerShell option
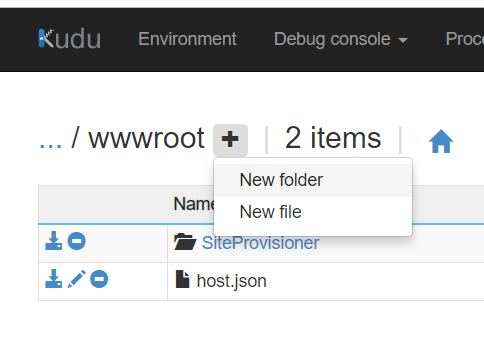
Navigate to Site -> WWWRoot->SiteProvisioner(Can be your function name)

Inside the folder with the function name, create a folder with name ‘modules’
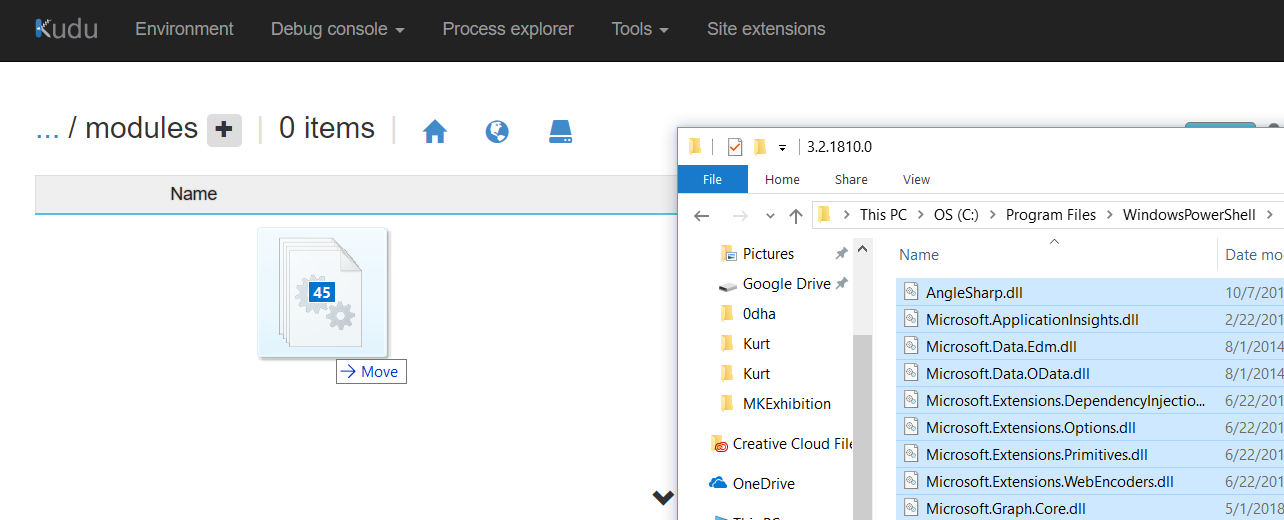
Now head over to the local directory where PnP SPO Module is installed which should ideally be at:
C:\Program Files\WindowsPowerShell\Modules\SharePointPnPPowerShellOnline\3.2.1810.0
The version can vary depending on the SPO PowerShell Module installed.

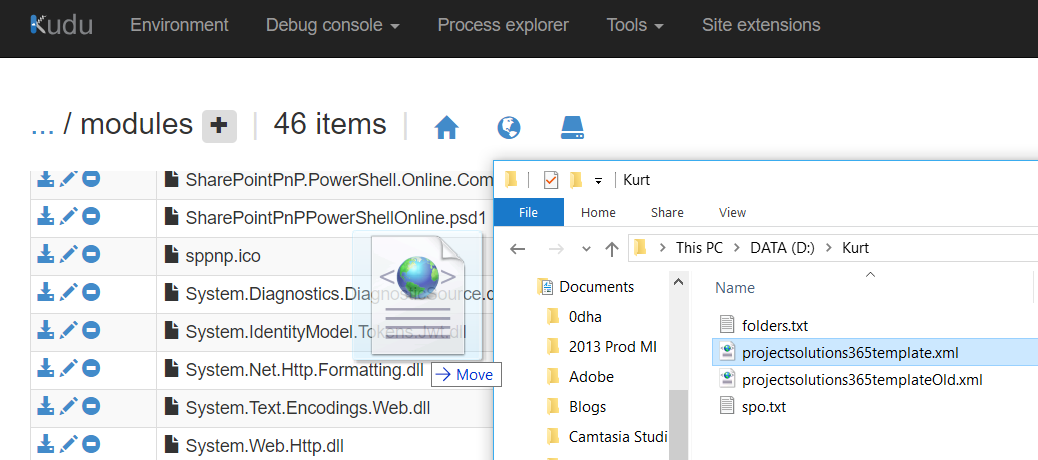
Copy the SharePoint Client Dlls, Microsoft.Sharepoint.Client.dll and Microsoft.SharePoint.Client.Runtime.dll to the newly created folder.
Once it is copied, copy the PnP Template file xml as well to the modules folder.
Note: Ensure that the paths used in the Azure Function have the correct Azure Function Name.
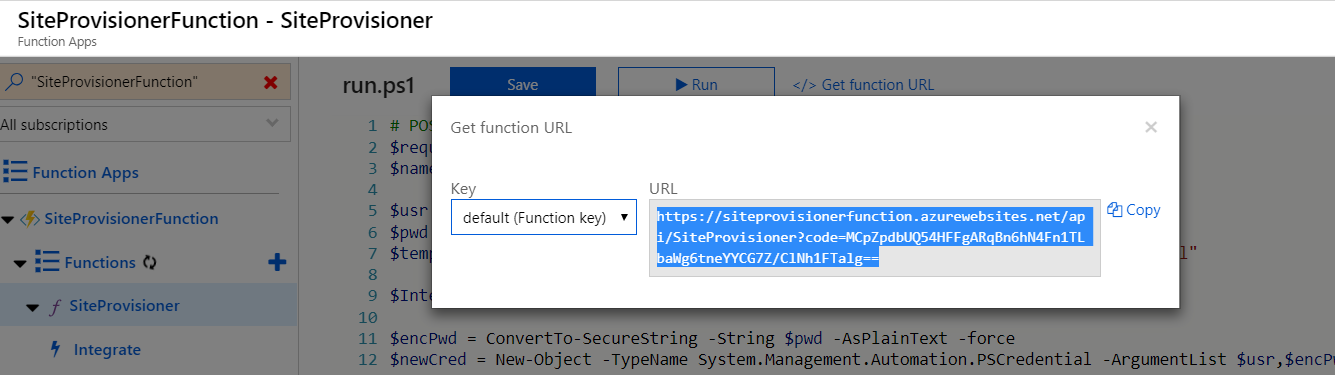
Keep a note of the azure function URL by clicking on Get function URL as we will be using this in Flow.
Testing Azure Function
Select the Test window in the right hand side. This would open up the window where we can specify the parameters which would be ideally coming from Flow. This way we can check if Azure Function is working without Flow being created in first place.
Copy the below text to Test pane. 450 is the name of the Office 365 Group. We will only check Group creation through this testing exercise.
{

 "callbackUrl" :"",

  "GroupTitle": "450",

  "GroupDesc": "450desc",

  "GroupDisplayName": "450",

  "ItemID":"5"

}
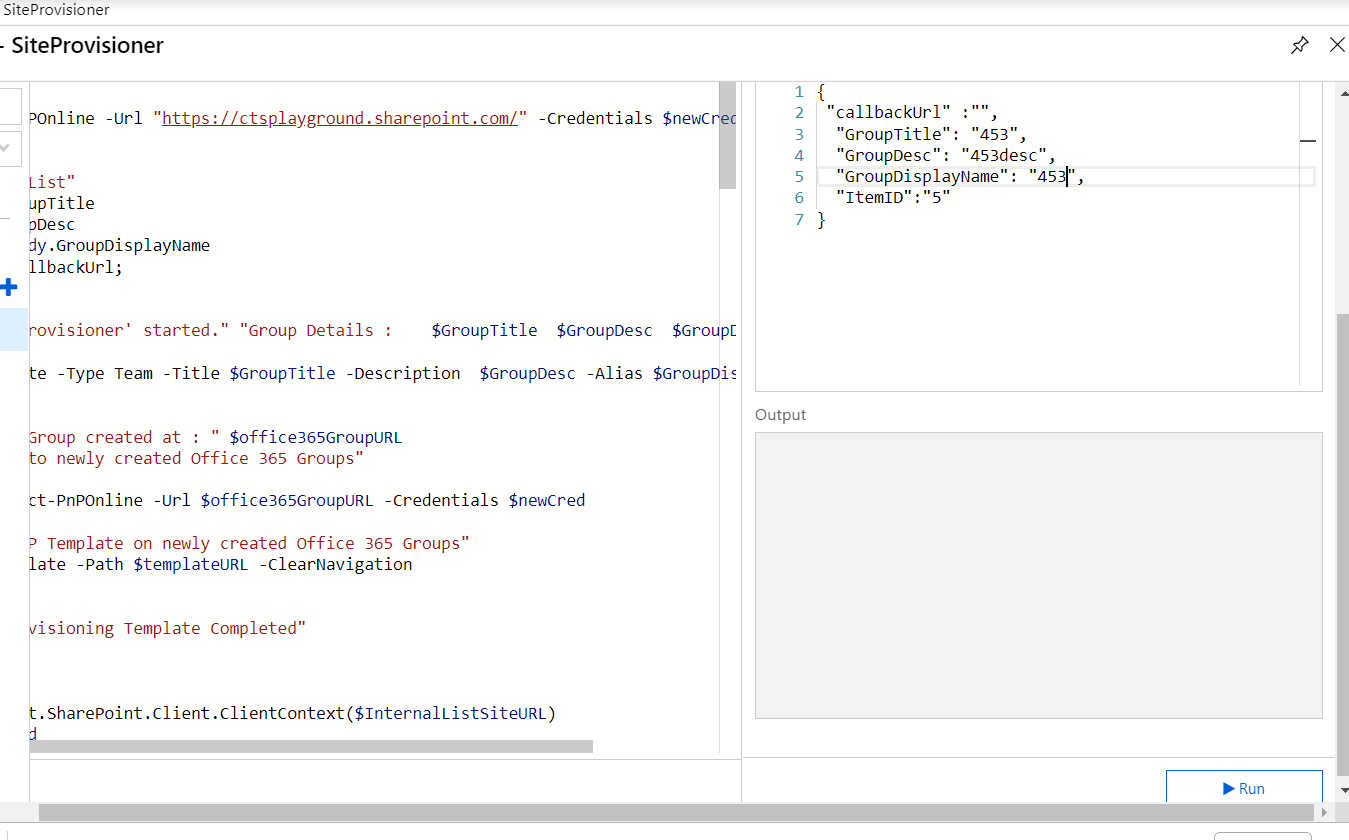
Click on Run and it should start with Office 365 group creation and will apply PnP Template
Microsoft Flow
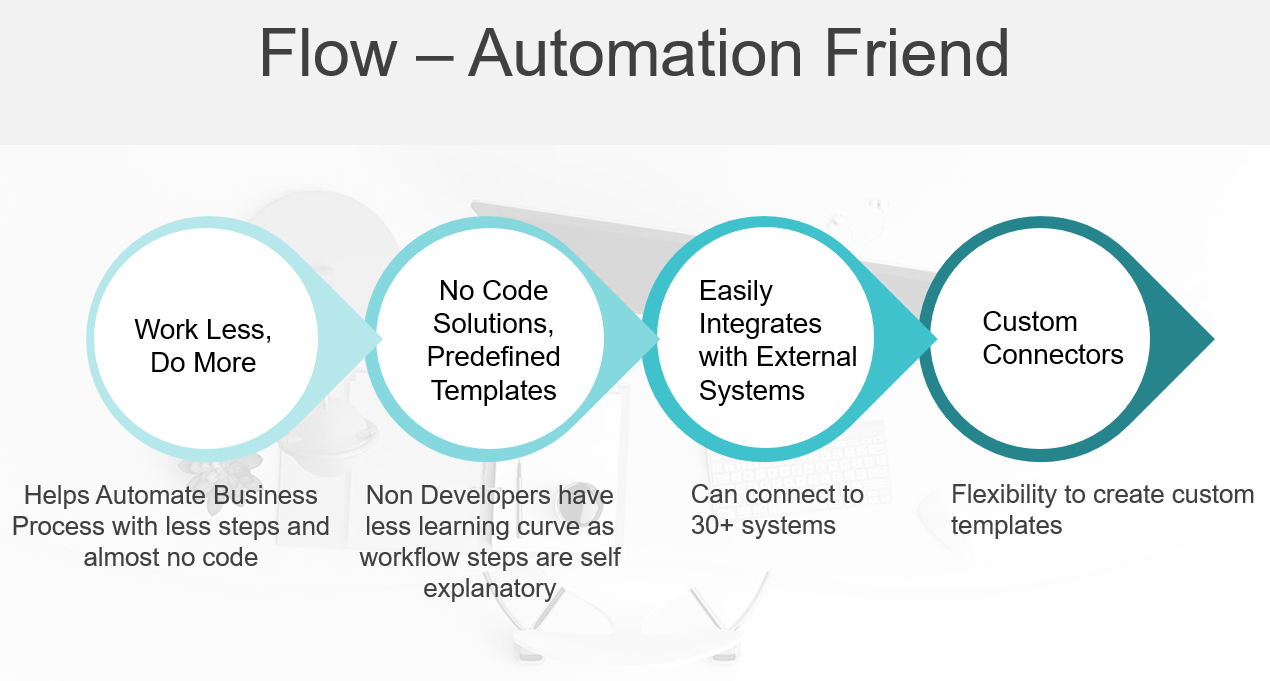
Flow helps in automating business processes with its scalable workflow engine which helps us create no-code solutions by adding actions which implements logic. It also helps non-developers to get started with pre-defined templates thereby reducing the required learning curve.
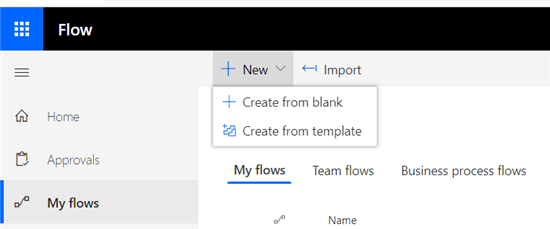
Once the Azure Function is set up and working as expected, we need to create the Flow which will trigger azure function when an item is created in the SharePoint list. Let’s head over to the Flow Subscription and create the flow by selecting Create from blank.
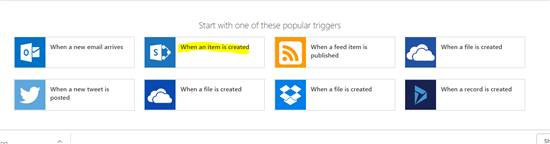
Select When an item is created template.
Specify the SharePoint Site URL and the List Name

Next step is where we mention the azure function call.
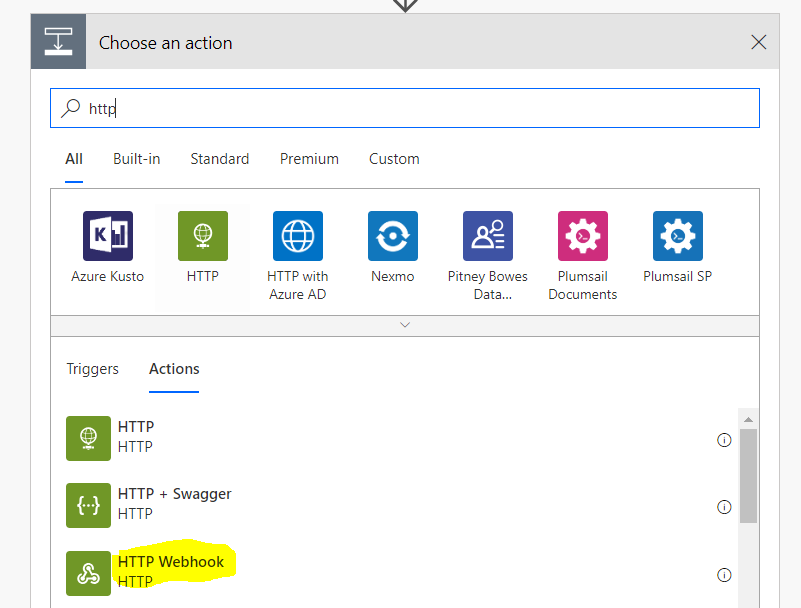
Limitation and Workaround
We could have used the HTTP action but it had an inherent 2 minute time out. So this time we have used HTTP Web hook to circumvent that issue.
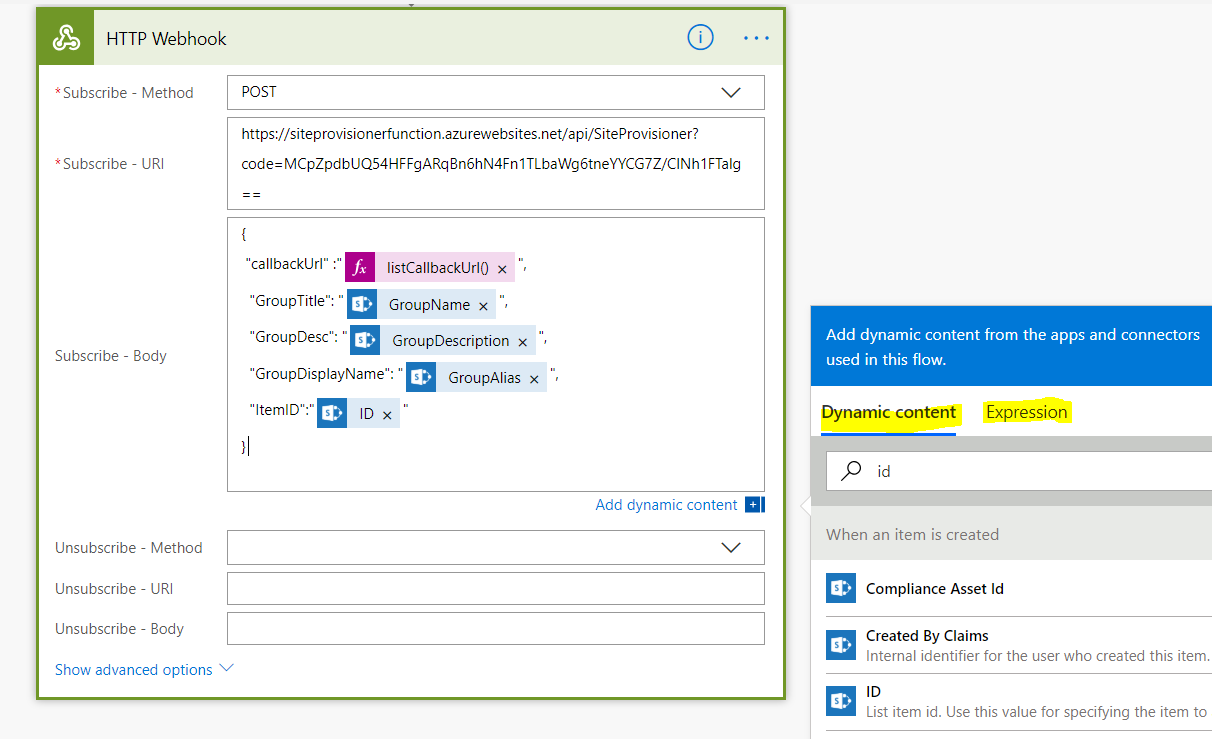
Input the below parameters with values
Subscribe Method : POST
Subscribe – URI : This is the azure function URL which we had noted down previously
Subscribe Body : Copy the below text to the box and add the Dynamic Content.
{

 "callbackUrl" :""

  "GroupTitle": "",

  "GroupDesc": "",

  "GroupDisplayName": "",

  "ItemID":""

}
listCallbackURL() is present in the Expression tab and the remaining are present in the Dynamic Content tab.
Testing the End-End Flow
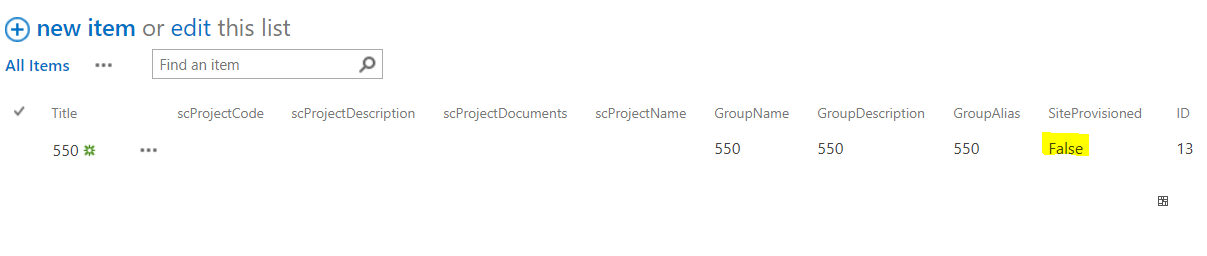
Now Save the flow and test the End to End working by creating an Item in the Internal Project List. Ensure that you have the below text columns already created in the list:
- GroupName
- GroupDescription
- GroupAlias
- SiteProvisioned
Site Provisioned column can be set to have default text value as False. When the Flow has completed, Azure Function will write back the success to this column.
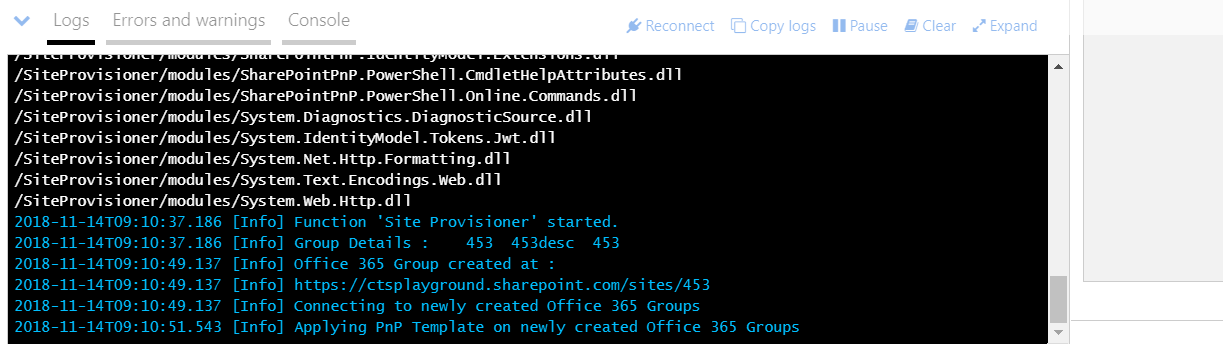
As you can see below we had created an item which triggered the flow which in turn called the azure function, created the site and gave the back the success message in the Flow.
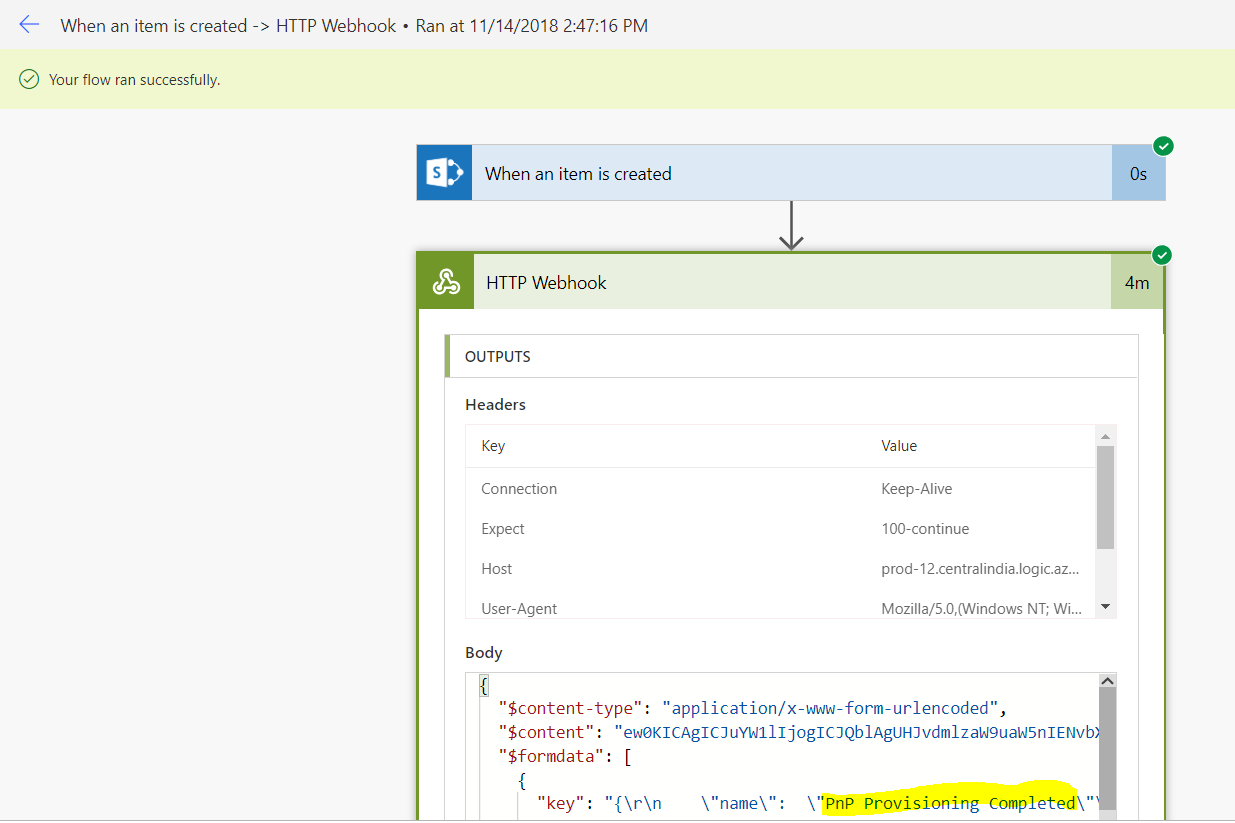
It has also updated the Site Provisioned Column from Azure Function.


Summary
Thus we saw how to automate the provisioning of site assets using PnP Provisioning Engine, Microsoft Flow and Azure Functions. Here we saw how to automate Office 365 groups creation. We can extend this method to any other site assets.