Microsoft Flow: Build a Mobile Power App for Visitor Registration
Introduction
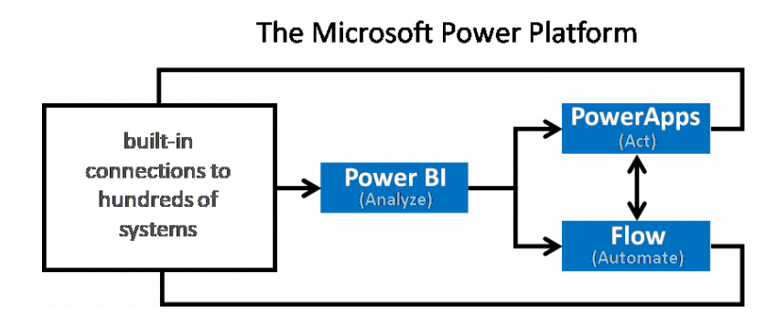
Microsoft’s Power Platform has been making waves very much lately. The Power Platform is today comprised of three services – Power BI, PowerApps and Flow. Though each of them are pioneers in their field of implementation, combination of all three makes a lethal combo for customers. Power Platform is a system that enables users to do three key actions on data that help them drive business: Analyze, Act, and Automate.
We will see how we can leverage the power platform for implementing a Visitor Registration System
Technologies Used
- SharePoint Online
- Power Apps
- Microsoft Flow
- Power BI
- SharePoint Online
This will act as the back end of our system. Whatever data is filled in using PowerApps will be saved as SharePoint Online list item. In order to do that we have to ensure that a List with the below fields are created

Power Apps
PowerApps help customers in building custom business apps with an easy to use designer UI which allows users to drag and drop controls. It also allows users to connect to external data sources or store data directly inside the app.Once the app is ready, we can publish it to the organization. In this demo, we will be using Power Apps to design the UI of the Visitor Management System.
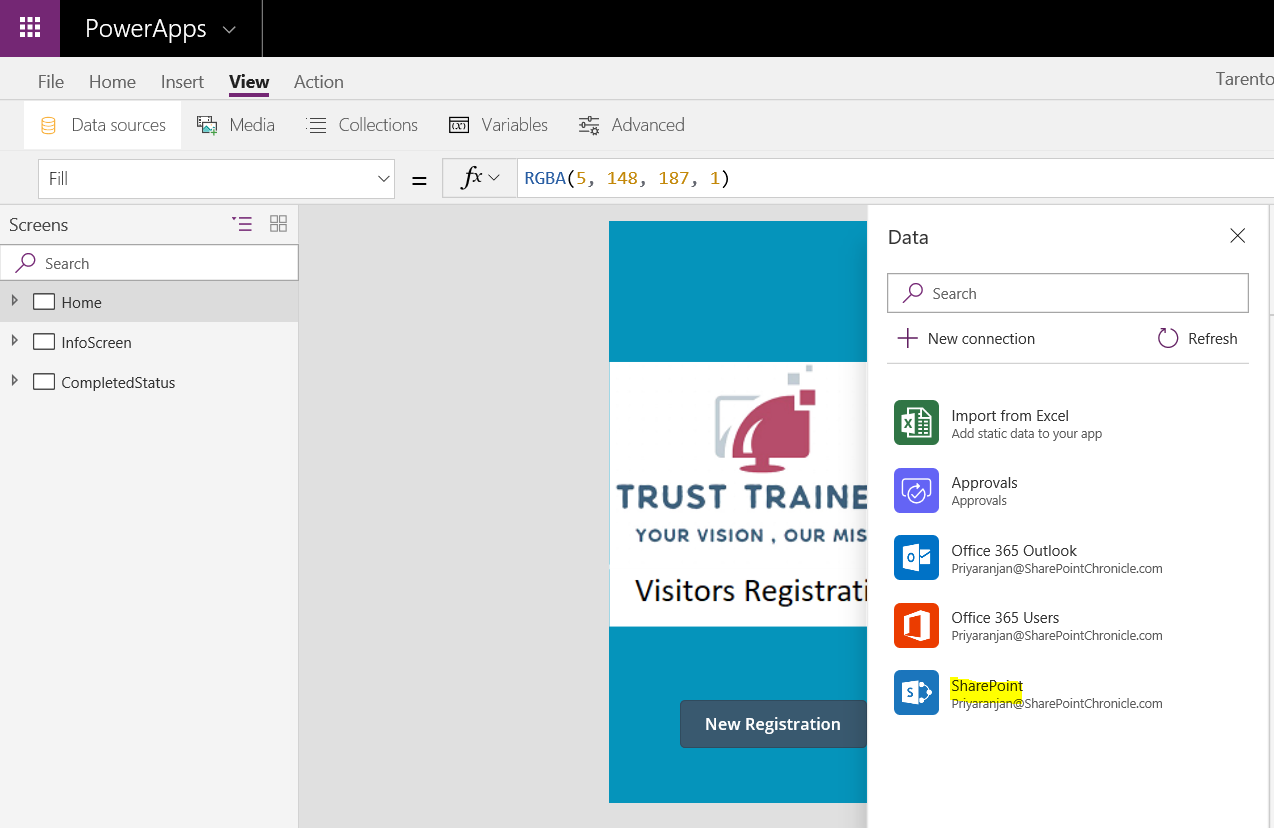
Data Source
We will be connecting to the SharePoint Online list for storing data. So lets make a connection to SharePoint by clicking on Data Source tab
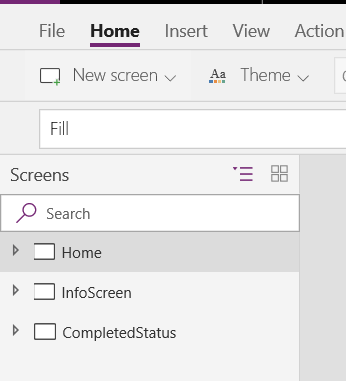
We have 3 screens in the system
- Home Page
- Information Screen
- Completed Status Screen
Home Page
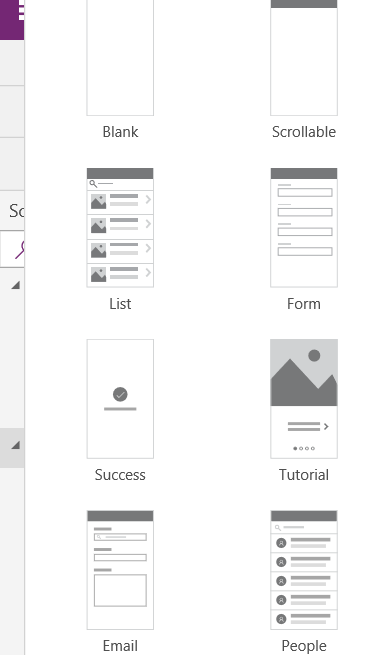
We can add new screen to the designer by clicking on New Screen button.
It gives us multiple templates to start off with
The home page is designed as below with Images and Buttons
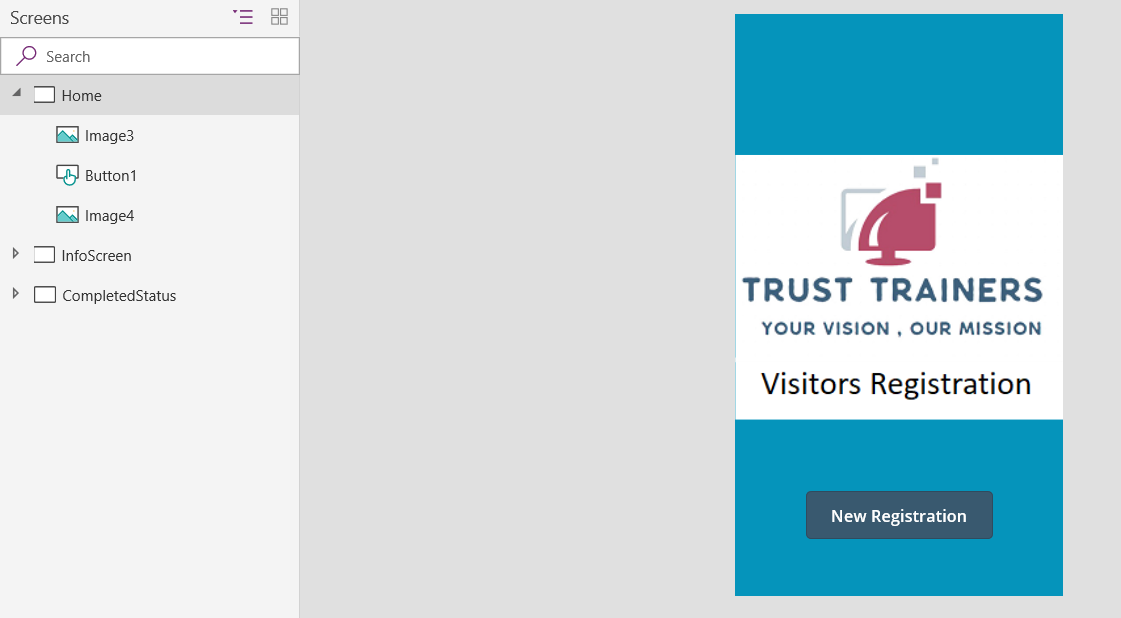
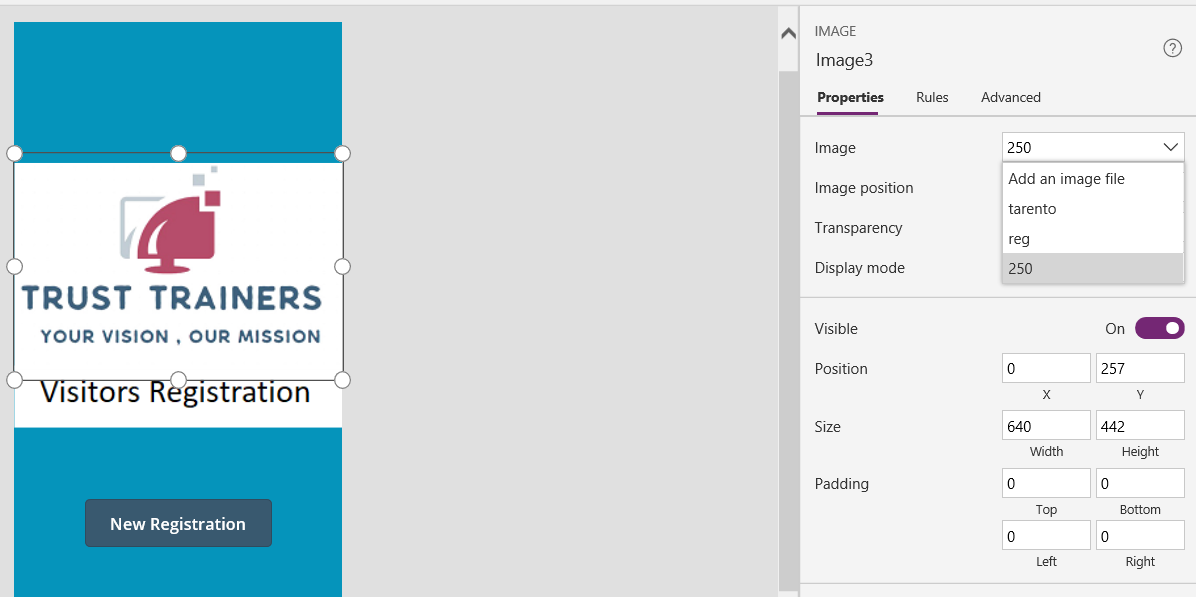
We can add image control to the designer and upload the required images from the local system or else where
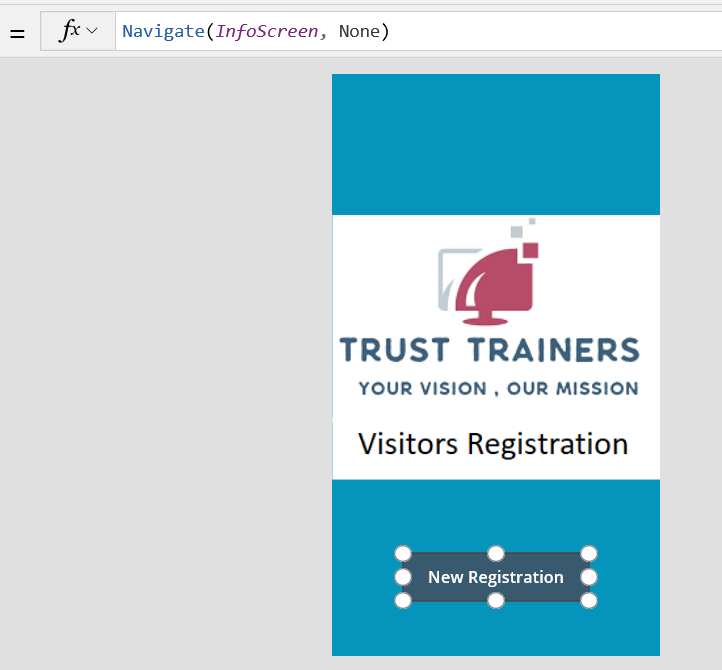
The New Registration Button takes us to the next screen using the Navigate command
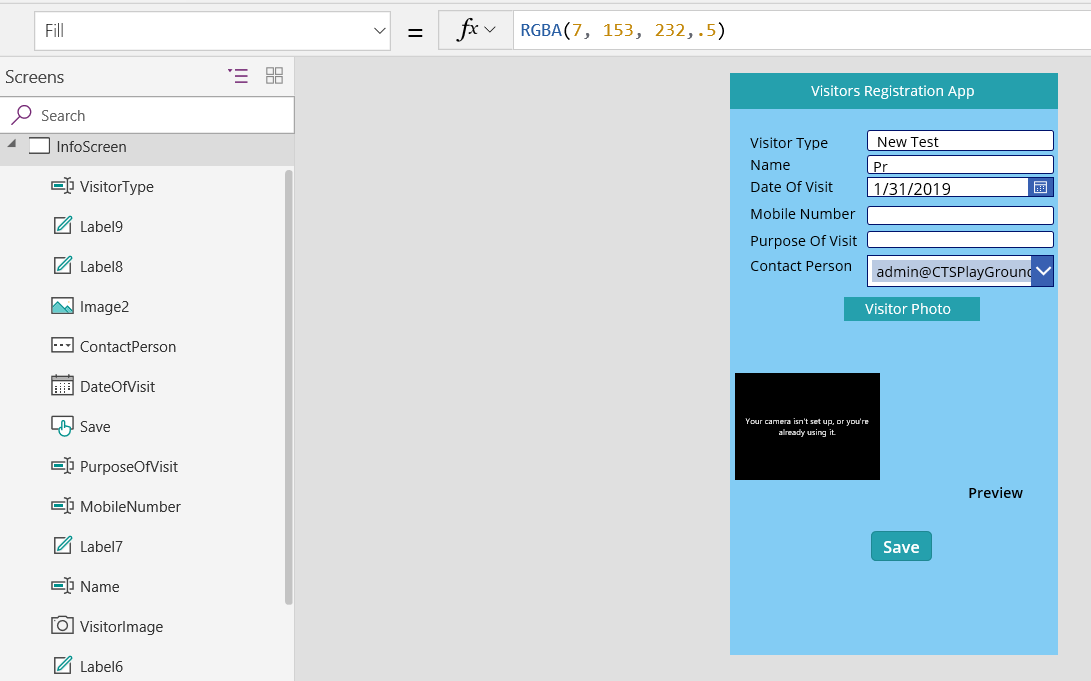
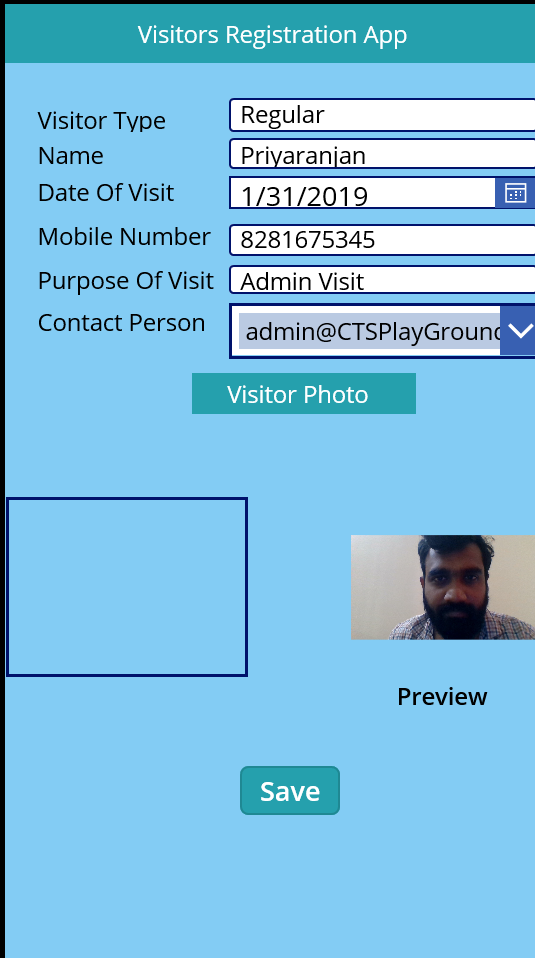
Information Screen

We have designed the information screen with multiple fields that correspond to the SharePoint Online List field, so that the data entered will be saved to the list as item.Most of the Date and Text field work without any additional implementations, except for the Contact Person Drop down and Camera Control.
Camera Control
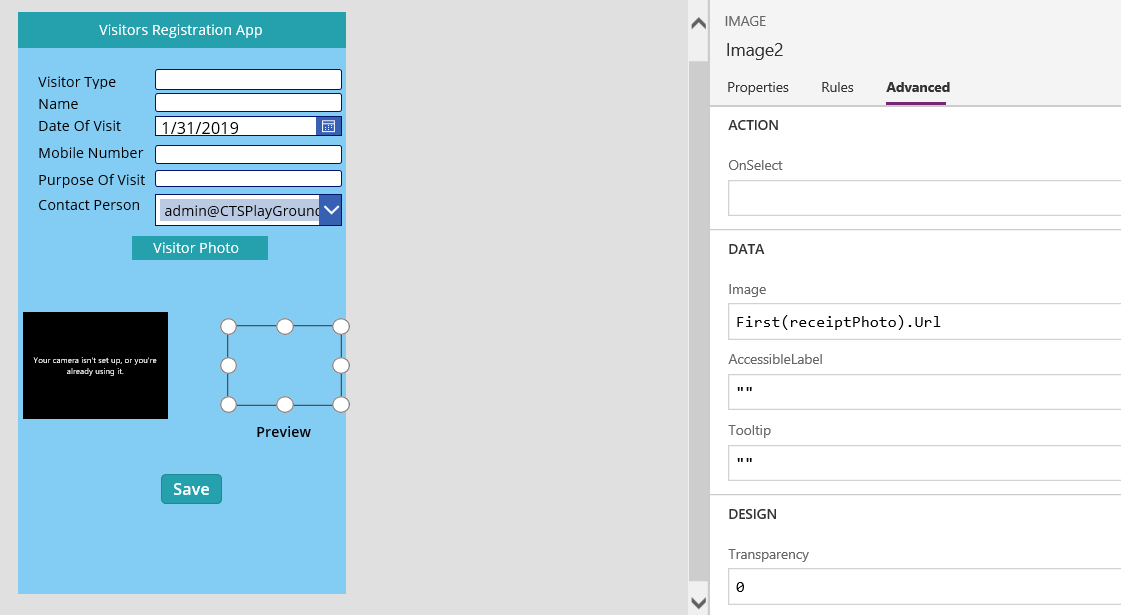
In addition to the camera control, we have a preview section which is an image control so that the image taken from the camera is displayed as picture for the user to decide whether to retake the photo.
The Camera Control is named as recipientPhoto. It has the above OnSelect command which will store the taken photo as a buffer.
ClearCollect(receiptPhoto,VisitorImage.Photo);UpdateContext({receiptTaken:true})
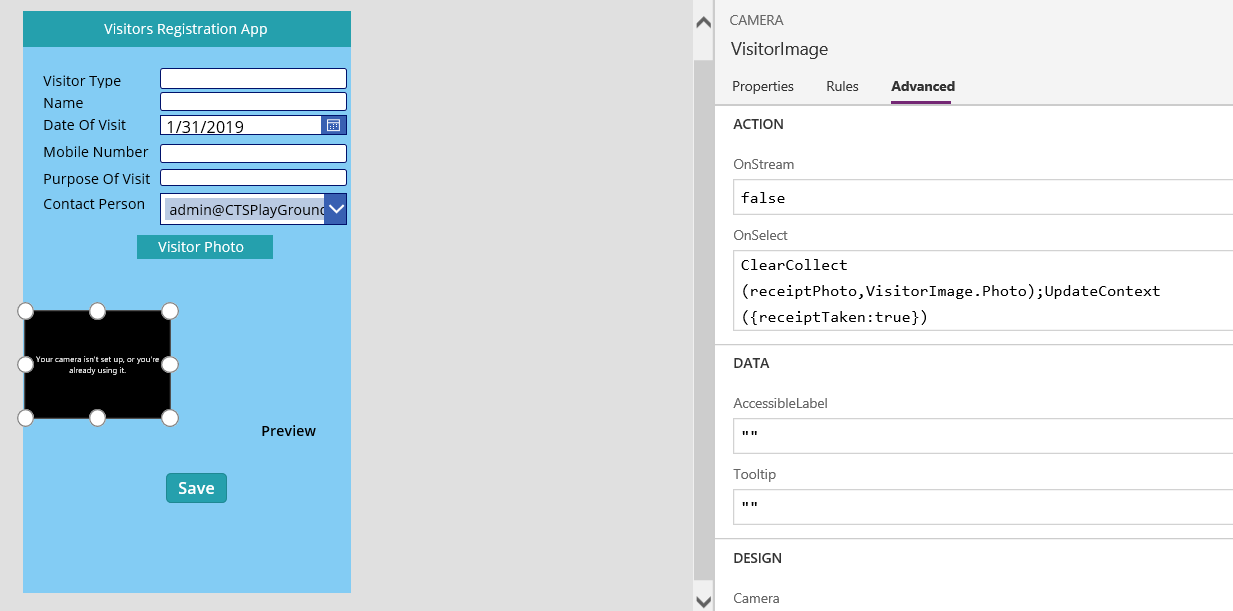
In the image control advanced setting, we are saving the recipentPhoto buffer URL so that it displays the recently taken photo.
First(receiptPhoto).Url
Contact Person Drop down
The contact person drop down has to show the list of all people with the Office 365 directory for the user to choose one among them
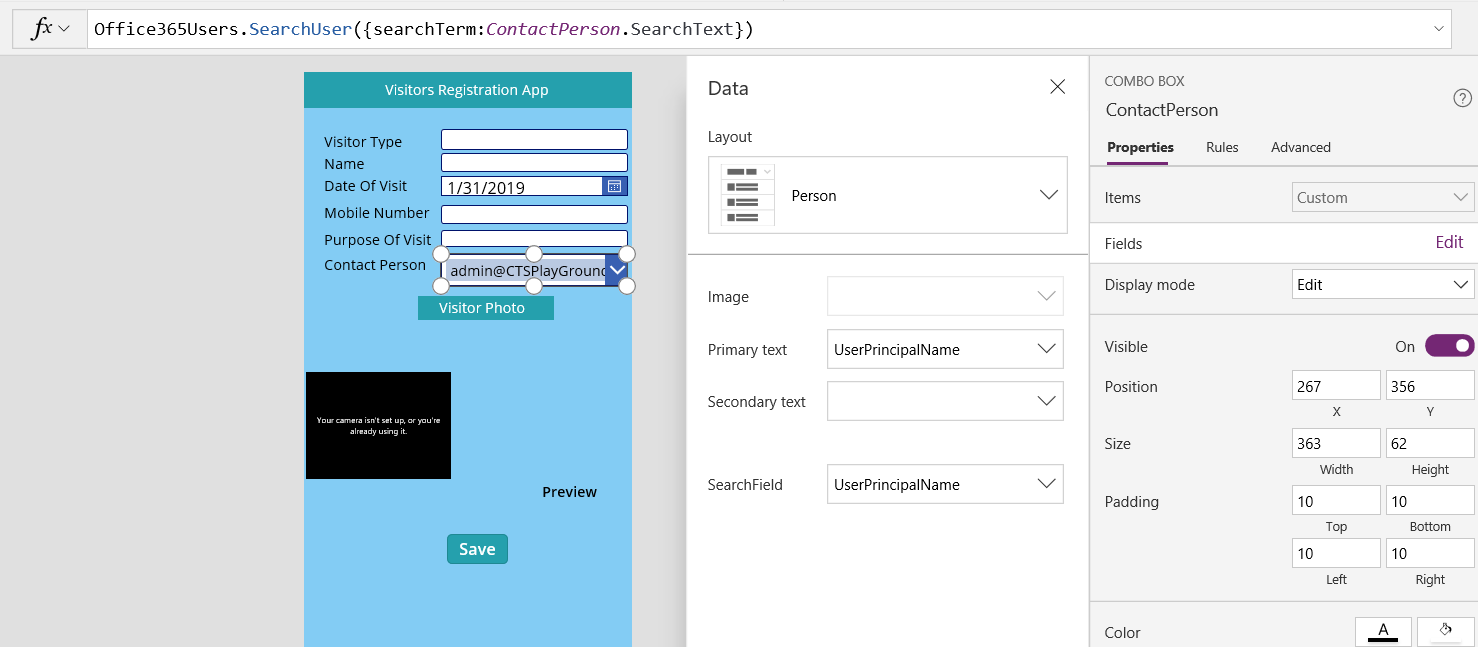
We will use the Office365Users.SearchUser command to search for the users from the directory as the end user starts typing in the text of the contact user name.
Office365Users.SearchUser({searchTerm:ContactPerson.SearchText})
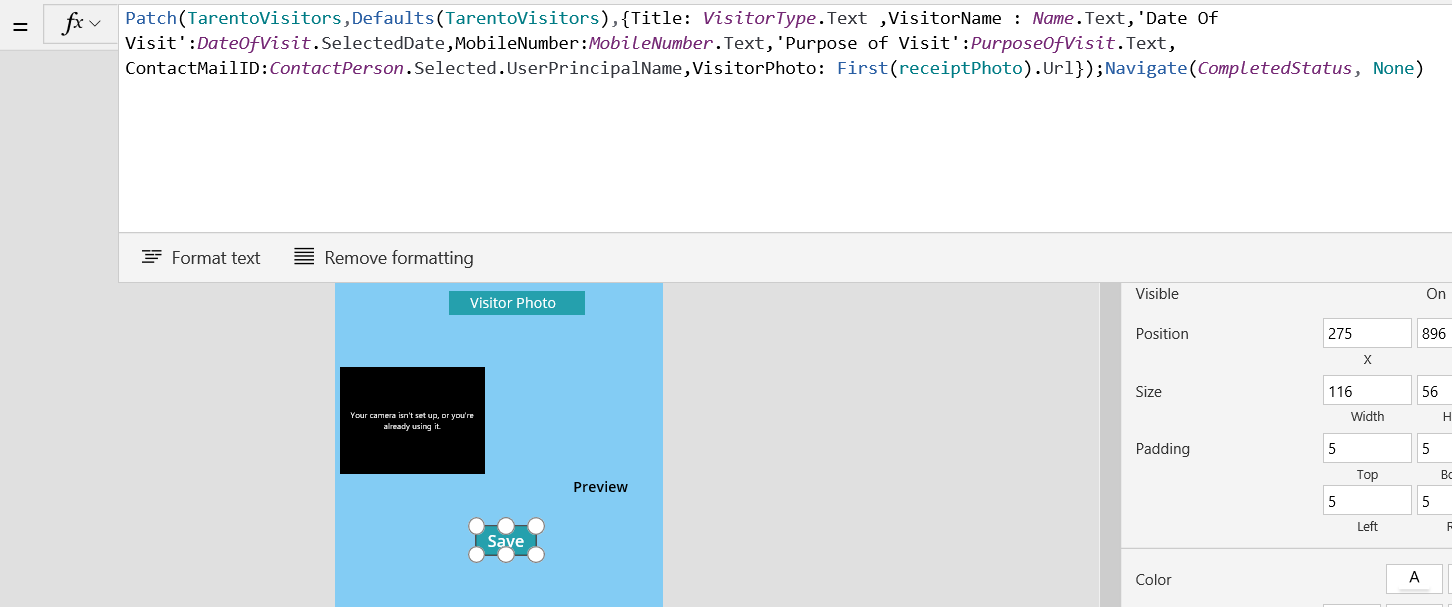
Save Data
The added data will be saved to SharePoint using the Patch command within which we will specify the mapping between the PowerApp and SharePoint List Fields
Patch(TarentoVisitors,Defaults(TarentoVisitors),{Title: VisitorType.Text ,VisitorName : Name.Text,'Date Of Visit':DateOfVisit.SelectedDate,MobileNumber:MobileNumber.Text,'Purpose of Visit':PurposeOfVisit.Text,ContactMailID:ContactPerson.Selected.UserPrincipalName,VisitorPhoto: First(receiptPhoto).Url});Navigate(CompletedStatus, None)
This completes the App design and data submission logic. We will see a demo of how this works and move to the next section
Demo
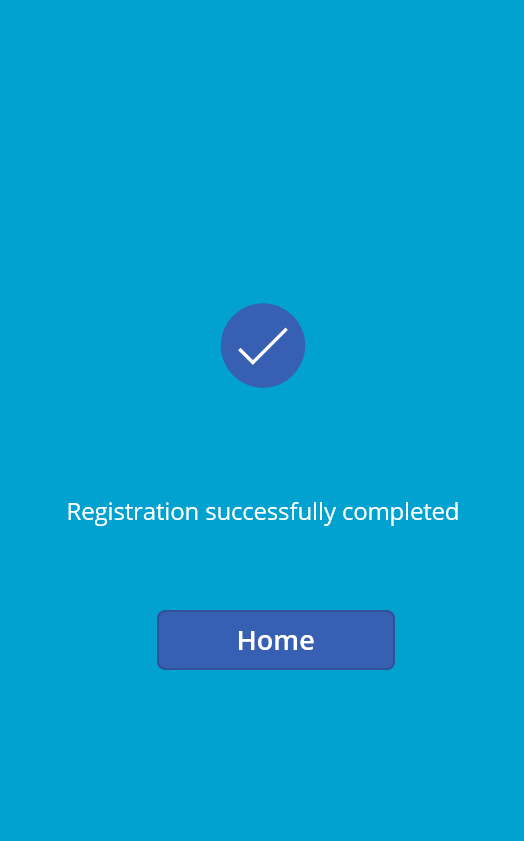
One the App is ready and published, we can run it either from the web or from the mobile app. This will open the home page and clicking on New Registration will lead us to the page where we can add the visitor details and capture the photo.
Save option helps us to save the data.
Once we click on Save, it will create a new SharePoint List item as shown below :
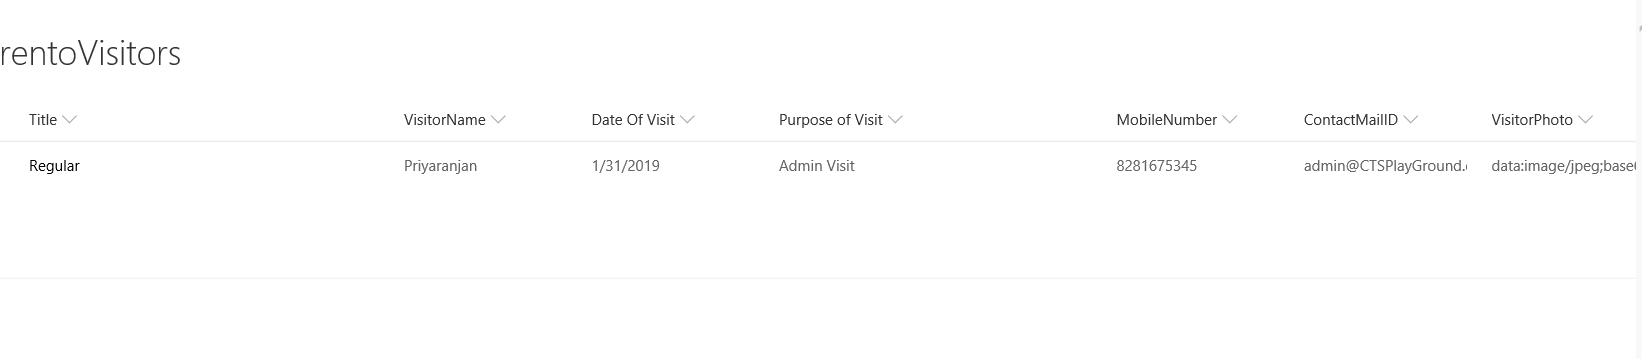
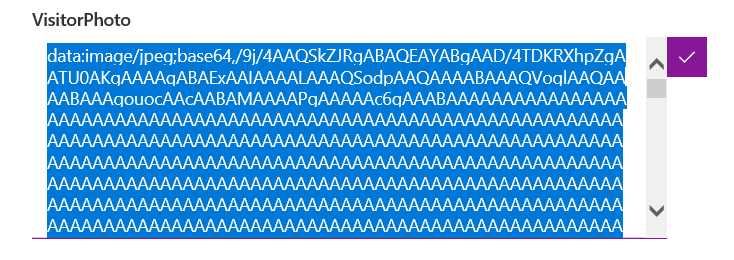
Upon creating the item , we need to have the ability to inform the corresponding contact person about the arrival of the visitor. In order to do this we will be leveraging Flow. More over you can see that the Visitor Photo which was captured using Camera Control us saved as Base64 encoded. We will have to convert it to binary to display it as a picture when we send the mail from Flow.
Microsoft Flow
Flow helps in automating business processes with its scalable workflow engine which helps us create no-code solutions by adding actions which implements logic. It also helps non-developers to get started with pre-defined templates thereby reducing the required learning curve. In this demo, we will use Flow to automate the email sending functionality when an item is created as part of visitor registration and will use image processing to convert Base64 data from Camera Control to Binary.
The first step is to convert the base 64 image content stored in the list to binary data which can be viewable as the actual picture. We will follow a two-step process in Microsoft Flow to achieve this. The overall Flow action is shown as :
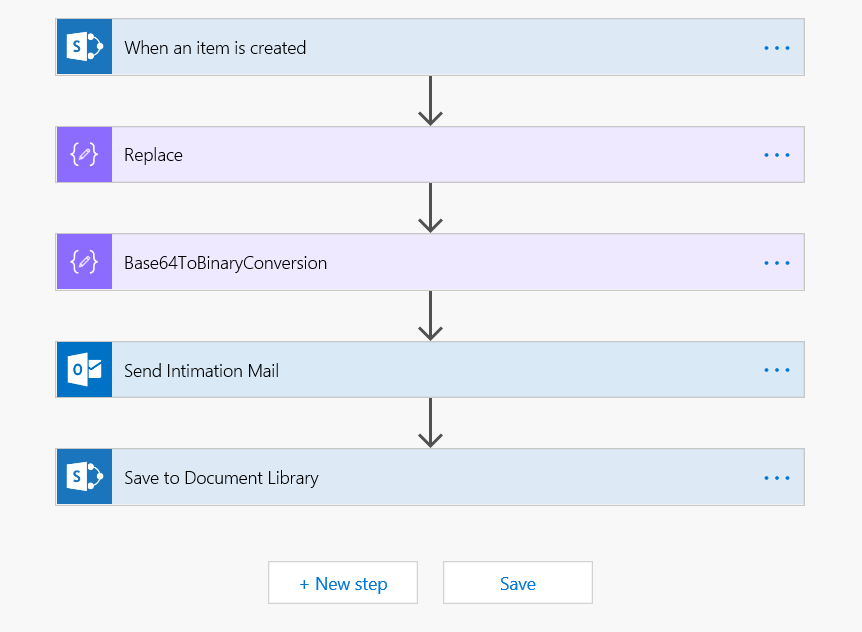
In this Flow, we can see that once the item is created, We have Two actions in place
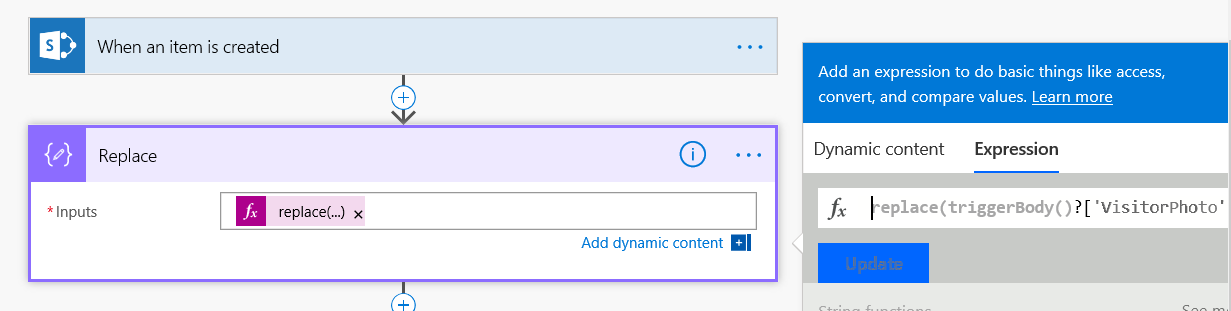
Replace
The Compose Data Operation action with the name Replace will be used to refine the Base64 data in the SharePoint List. It will replace the unwanted ‘:image/jpeg;base64’ metadata info from the raw data so that it will become a proper base 64 which can be taken up for further processing. We can add the Compose action as shown below :
Once we have the action in place we will add the below expression to it:
replace(triggerBody()?['VisitorPhoto'],'data:image/jpeg;base64,/','/')
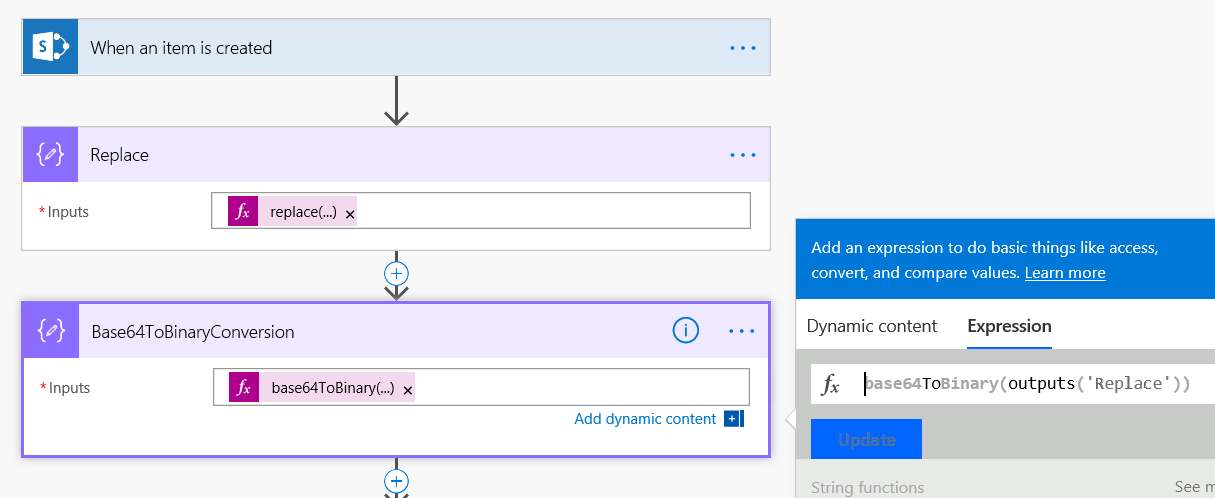
Base64ToBinary
Thus we have formatted the Raw data by removing some of the metadata info. Now we will use the another Compose Data Operation to convert the raw data to Binary using the expression
base64ToBinary(outputs('Replace'))
Send Mail
Once we have the image ready, we will add the send email action and update the body and attachment field as below
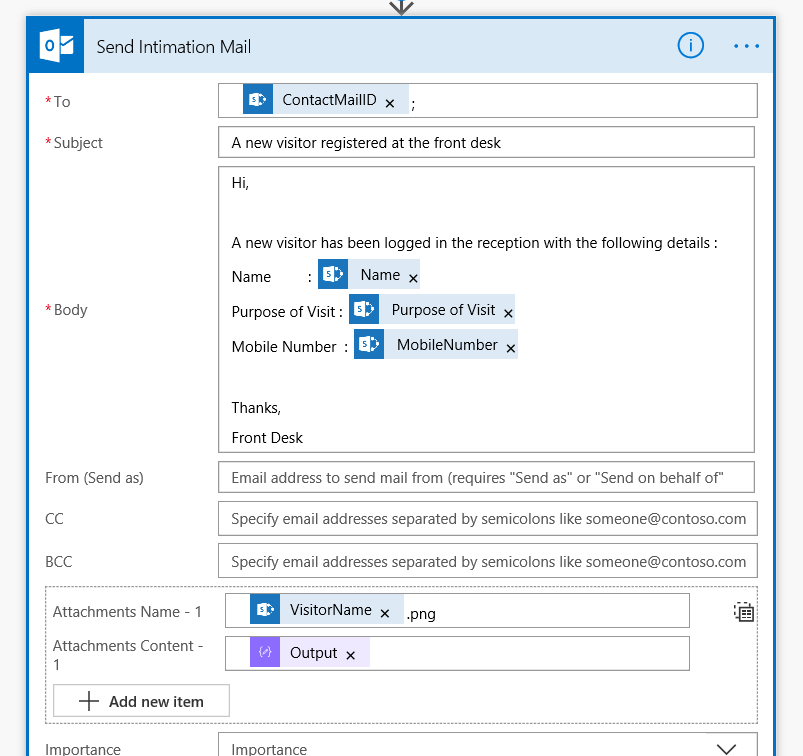
The attachment content field will have the output of the Base64ToBinary action added.
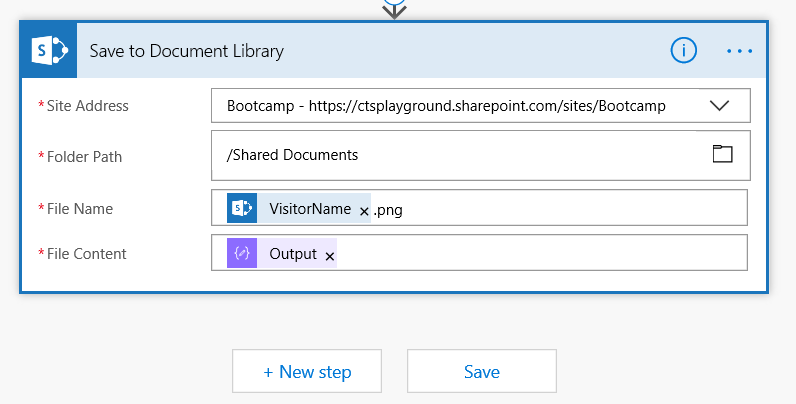
We can also save a copy of the visitor photo to the document library using the Create File action by specifying the library location and the converted data output as the File Content
Test the Flow
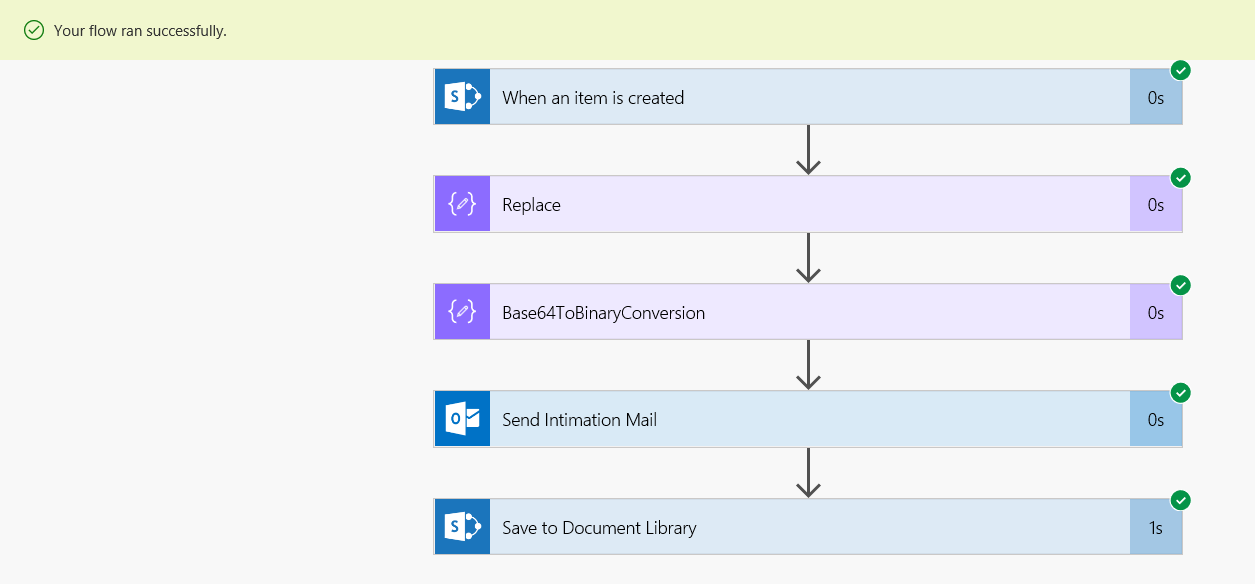
Once we create the item using Power Apps, It will add the item to SharePoint List. This demo we saw in the previous section. Once the item is created, it will kickstart the flow and we can see the Flow in action from the portal as :
If we head over to the Outlook, we can see the intimation mail as :
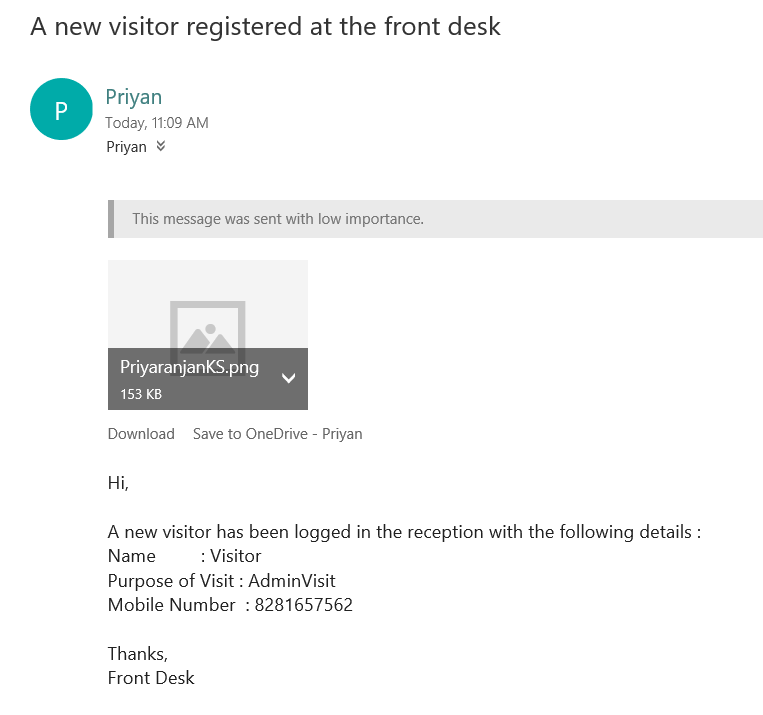
Downloading and viewing the picture yields the Visitor picture :

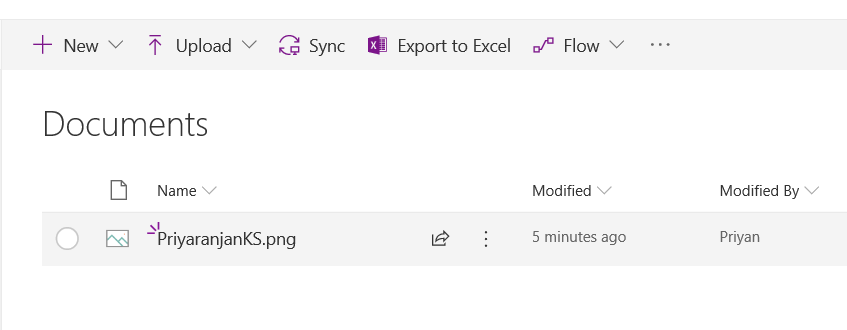
If we head over to the Shared Documents library, we can see the uploaded picture there as well :
Summary
Thus we saw how to create a Mobile Power App to register visitors information and use Microsoft Flow to automate the business logic and image processing of camera data.