Office 365: Register Public Domain
Overview
Office 365 comprises of various software as services including Office suite, SharePoint, Dynamics 365, Teams, Flow, OneNote, OneDrive, Planner, etc. Office 365 Education is free for schools and students with a valid school email address. Office 365 is being widely used for collaboration across various organizations.
In this article, we will explore how we can register public domain with office 365, instead of using default provided domain.
Need for Public Domain
When signed up for Office 365, it provides the default domain in the format of xxx.onmicrosoft.com (where xxx is your tenant name chosen while setting up Office 365). The default domain works fine with no issues. However if you are planning to setup Office 365 for large organization, the necessity arises to have a custom domain representing the organization. There are variety of domain providers available to get the public domain from. The public domain then can be registered with Office 365 in order to refer Office 365 by public domain url. While adding the public domain to Office 365, we have couple of options to go with.
- Buy a new domain and register with Office 365
- Use an existing domain to register with Office 365
Buy a new domain
If you do not have any pre-existing domain with you, buying a new domain from Office 365 might be a good option.
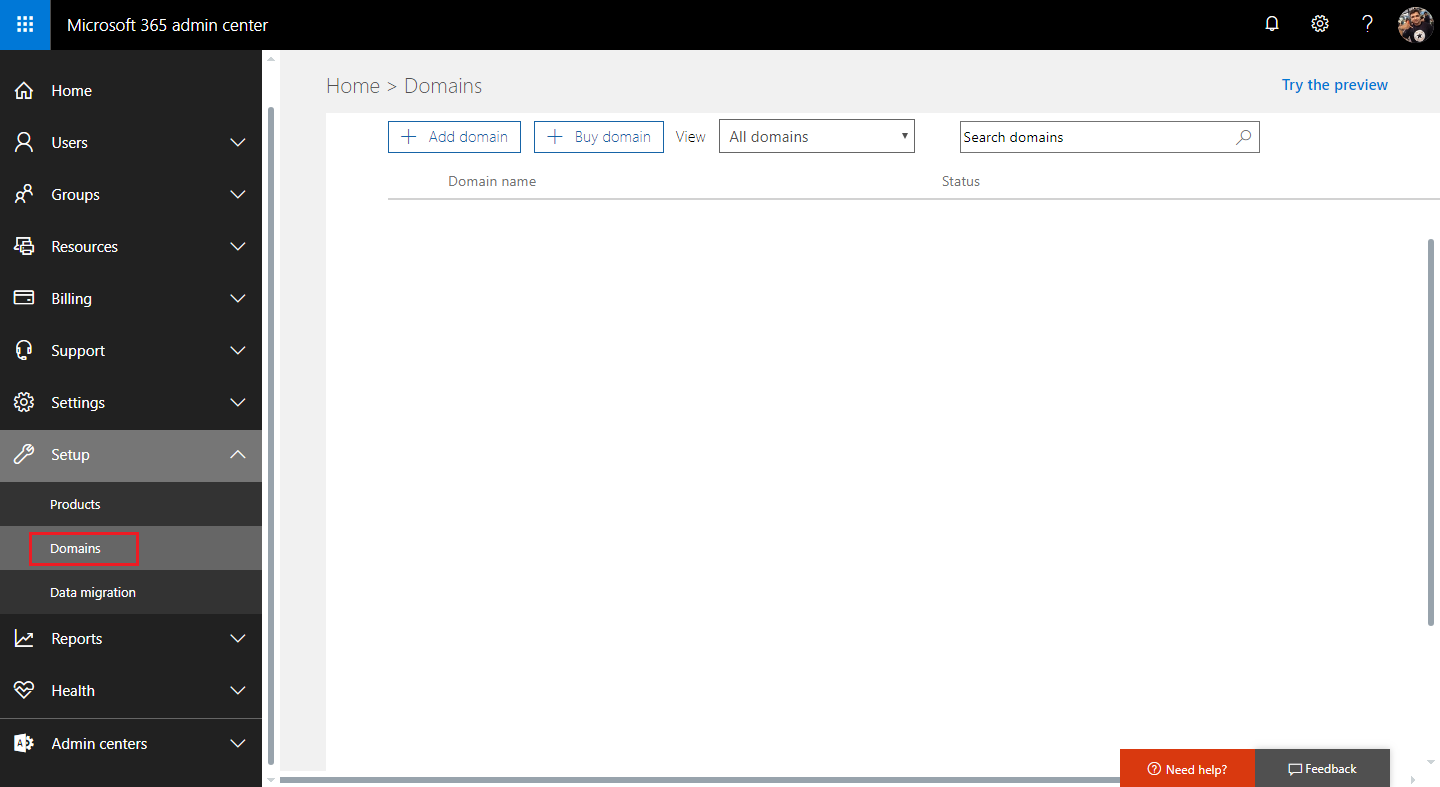
Open Microsoft 365 Admin Center.
Under Setup, click Domains.
Click “Buy domain”.
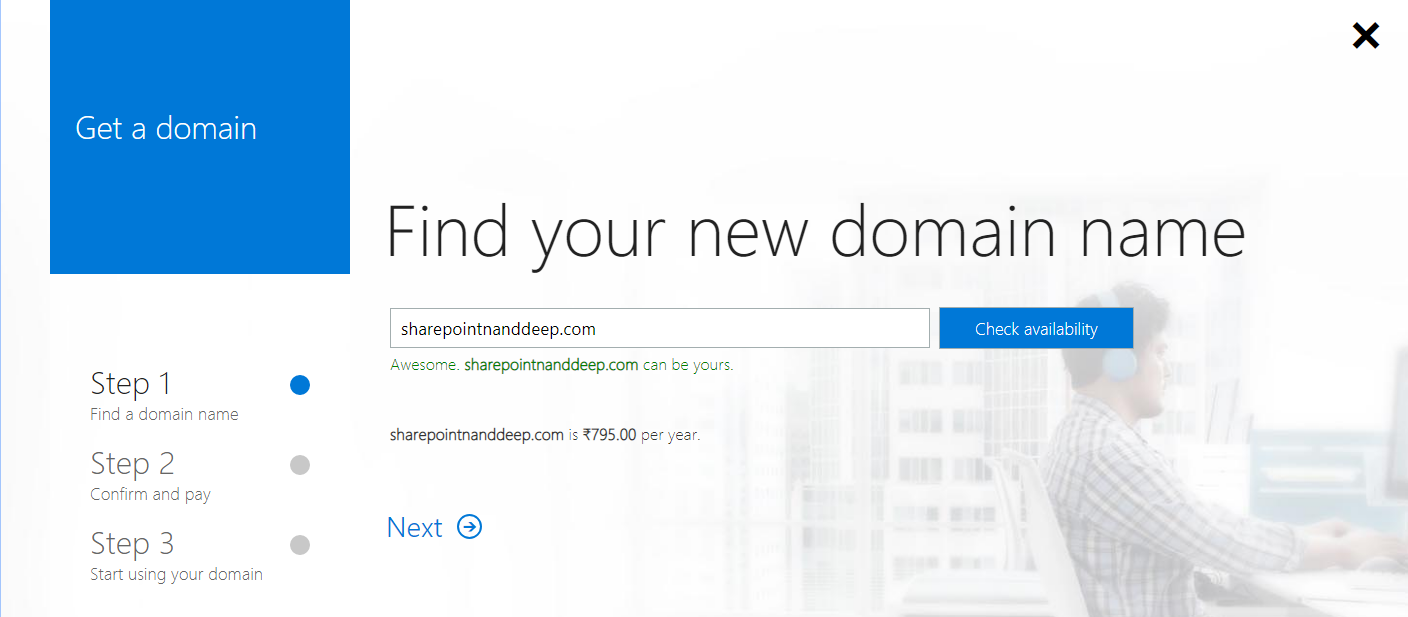
Find your new domain name by checking the availability. Click Next.
Add domain contact information. Click Next.
Confirm your details and make a payment.
After successful payment, click Accept on the dialog box to let Office 365 make domain entries to the GoDaddy domain center.
Use an existing domain
If you already have a public domain, it can be configured in Office 365 to use.
Open Microsoft 365 Admin Center.
Under Setup, click Domains.
Click “Add domain”.
In the dialog box, enter the domain name you own. Click Next.
There are two options to verify the domain. Recommended to use verification email. Click “Send code via email”.
Another option is to use “Add a TXT record”
Copy the values to your domain provider (In my case, I am using BigRock - domain provider)
Once the TXT record is added, navigate back to Microsoft 365 Admin Center. Click Verify. The domain will be verified. Click Next.
Setup your online services by selecting recommended option of Set up my online services for me. ClickNext.
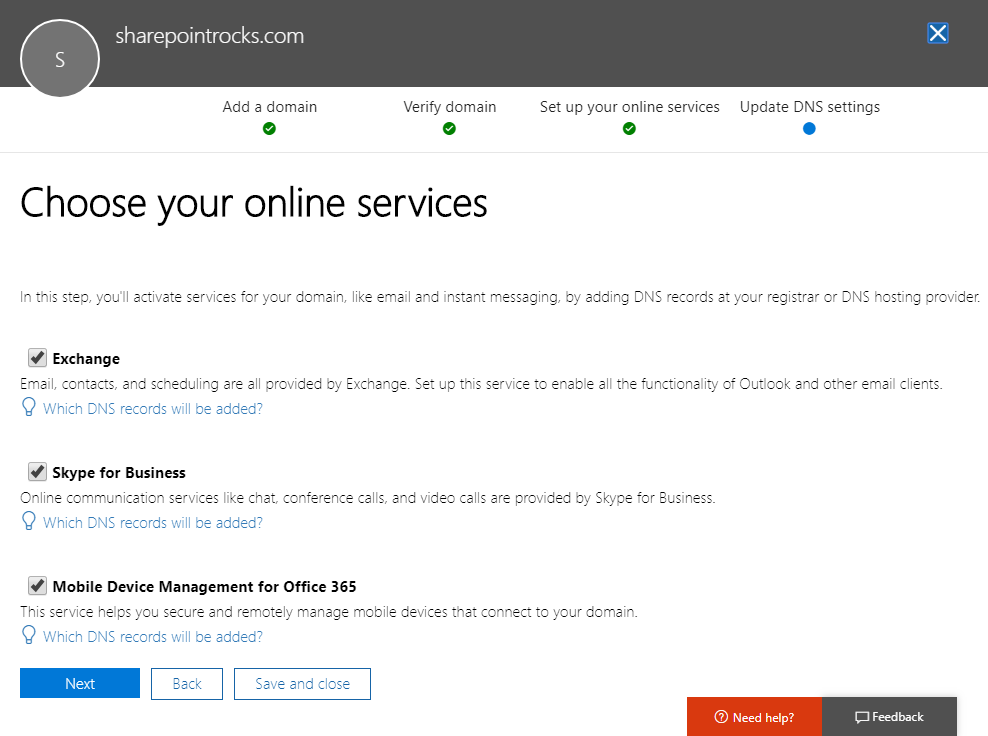
Choose the online services. Click Next.
Click Import DNS records. Office 365 will query your site's existing DNS records and automatically import them. Click Next.
Activate services for your domain, like email and instant messaging, by adding DNS records for your domain at your registrar or DNS hosting provider. Click Verify.
The domain should appear under Office 365 portal.
Set Default Office 365 Domain
Now that we have default and custom domain available in our Office 365 tenant. We will set our custom domain as default one.
- Click our custom domain (e.g. sharepointrocks.com)
- Click “Set as default” to set the custom domain as default.
Edit Active Users
Now, we will have to update the emails of active users to use our custom domain.
Open Microsoft 365 Admin Center.
Under Users, click Active Users.
Select any user.
Edit User name / email aliases.
Enter new domain alias and set as primary.
Click Save.
Sign out of Office 365 portal and sign in with your new email address.
Summary
Office 365 when setup provides the default domain (xxx.onmicrosoft.com). The public domain then can be registered with Office 365 in order to refer Office 365 by public domain url. We may buy a new domain or use an existing domain.


