Azure AD B2C: Secure your ReactJS frontend
Introduction
We will be looking at a ReactJS web application and how to use ReactJS to interact with Azure AD B2C for authentication and authorization.
Prerequisites
Let us assume we already have this list completed:
- Have experience on ReactJS and you don’t know how to connect Azure AD B2C.
- Have an Azure account. Don’t have one? Click on this link: https://azure.microsoft.com/en-us/ and click on the big fat green button that says “Start Free >”
- Have a fully functional Azure AD B2C directory with users. If you have an Azure account and need to create an Azure AD B2C account, have a look on this link: https://bit.ly/2U8X9Ft
Let's get started by creating a brand new ReactJS Project
If you are in Windows, fire up your command prompt or the terminal for other platforms such as Mac or Linux.
Go inside to your working directory.
Type the following command and press ENTER to create a ReactJS project.
$ create-react-app rjaadb2cNow navigate to the newly created project directory by typing,
$ cd rjaadb2cOpen up your favorite code editor (We will be using VS Code) and open up the directory you have created in the previous step.
Your editor should look like this
https://cdn-images-1.medium.com/max/800/1*_5UkwaJX1d6Bi1RFWn4onw.png
VS Code has this nice little feature called terminal window.
This will open a terminal inside the code editor. It’s a very handy feature. Click on Terminal > New Terminal in the menu bar.
Now in the terminal window type
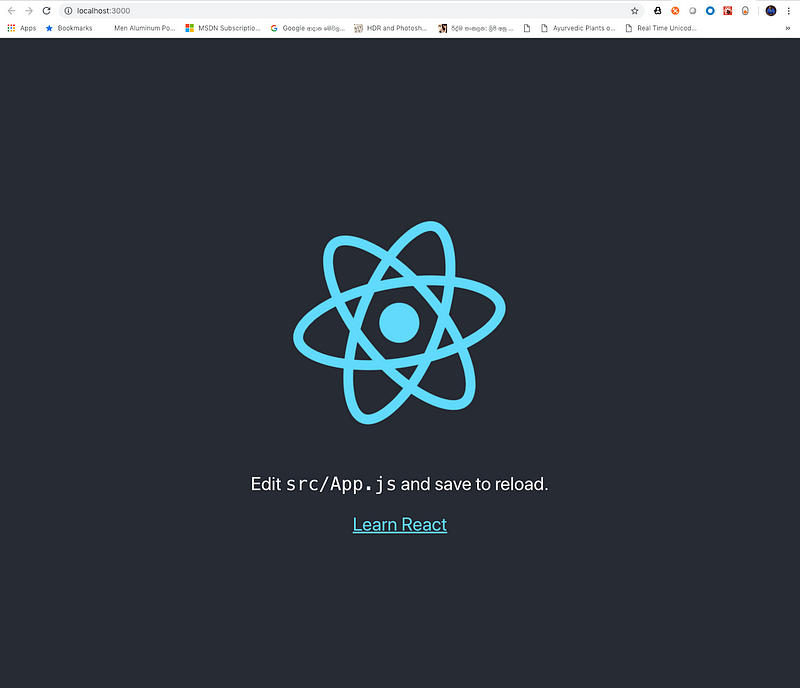
$ npm startThis will execute the ReactJS project. And it should look like this.
https://cdn-images-1.medium.com/max/800/1*k3W7-QemBv9nFuQyGZLCMQ.png
All good to go, let’s prepare our Azure AD B2C environment now.
Preparing Azure AD B2C Environment
In this section, we will be preparing our Azure AD B2C environment for authentication and authorization.
Now login to Azure Portal by clicking on this link: https://portal.azure.com
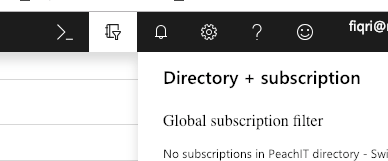
Click on the Filter button in the menu bar and switch to your B2C Directory
https://cdn-images-1.medium.com/max/800/1*K9WZftSWhxcdibNlmp9EeA.png
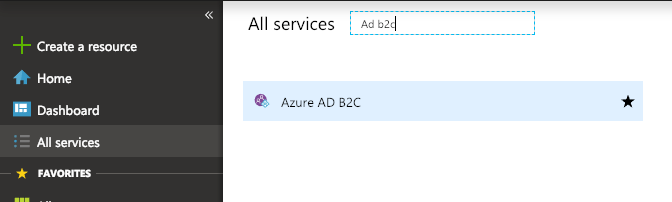
Now click on All Services label in the sidebar menu.
Type “Ad b2c” in the All Services search box.
Click on Azure AD B2C label
https://cdn-images-1.medium.com/max/800/1*H7epcYXCEVs5BcNd99fnKw.png
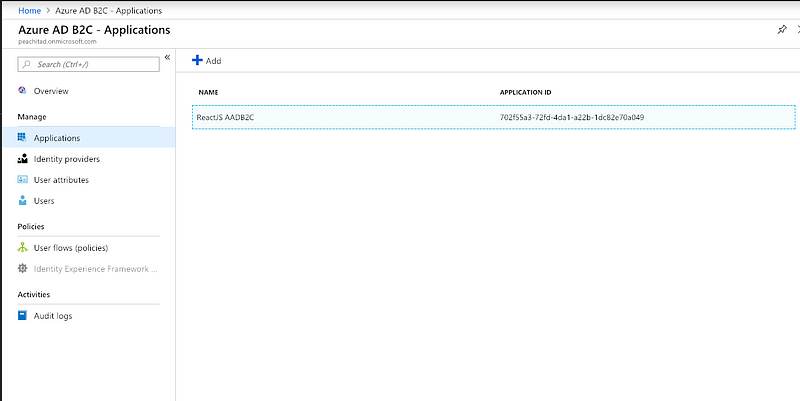
In Azure AD B2C blade, click on the Applications label.
In Applications blade, click Add + button.
Now fill in the information required to create a new Azure AD B2C Application, as shown below
https://cdn-images-1.medium.com/max/800/1*31h217g6w0VKmNIrxbgywQ.png
As we see it’s clear. Give a unique “Name” to your application.
And then select Yes to “Web App / Web API” since we are creating a web application.
And leave Yes as the default for “Allow implicit flow”
Type the “Reply URL” in this case it's our local host address. Type “api” or any identifier of your choice to “App ID URI (optional)”.
Using this URI, you will allow the permission to your application to access certain features in your directory. As an example, this could be reading user profile information.
We have specially marked this because if we don’t give an identifier in this location, we won’t see any scopes under “Published scopes”. Not sure its a bug or not but without it, we won’t get default scopes here neither can create new.
Now click Create button to create the new application.
https://cdn-images-1.medium.com/max/800/1*Dokawk5OjoQxcKXoFnLifA.png
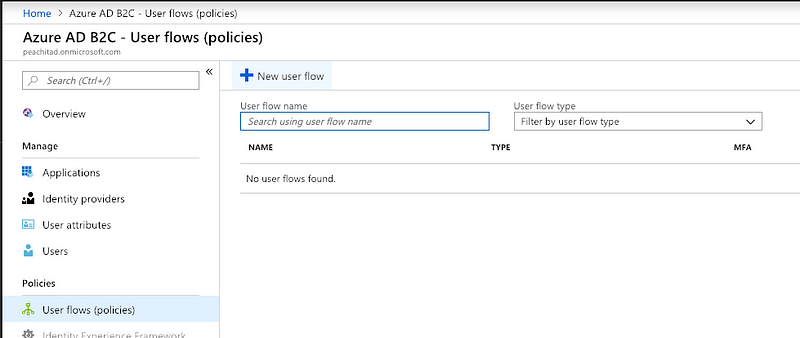
Now click on the User flows (policies) label in the Azure AD B2C — Applications blade.
Click on + New user flow button.
https://cdn-images-1.medium.com/max/800/1*6uMIDu4MwsY9If9akBysdA.png
In the Create User Flow blade under Recommended tab click on the “Sign up and sign in” link.
https://cdn-images-1.medium.com/max/800/1*V2WuSQwcNyRFedHZj6o_qw.png
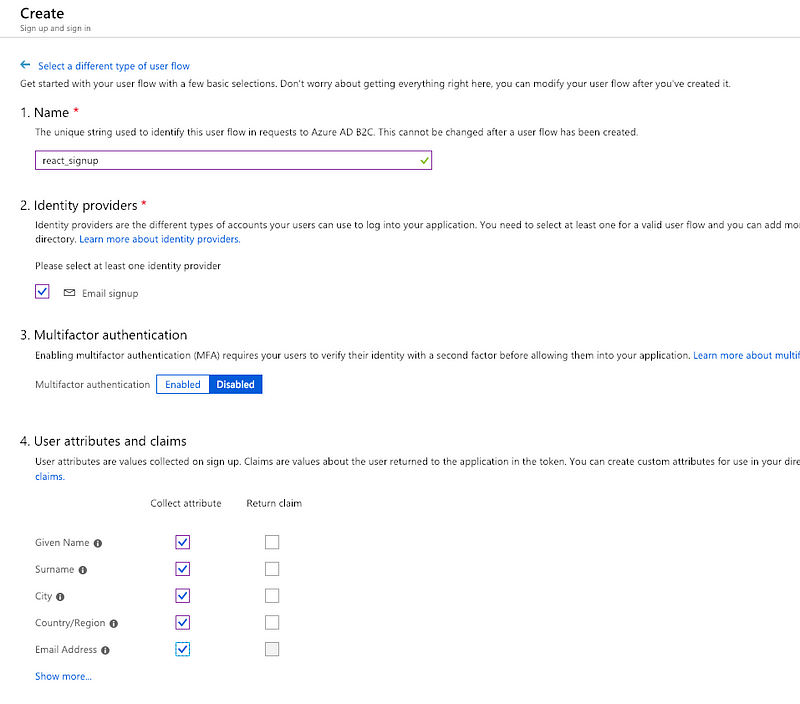
In the Create blade make sure to fill the form as per the picture below. We have given all the instructions and information we need in the blade itself.
https://cdn-images-1.medium.com/max/800/1*qD_wBquKPa6JsrAfbnwe7g.png
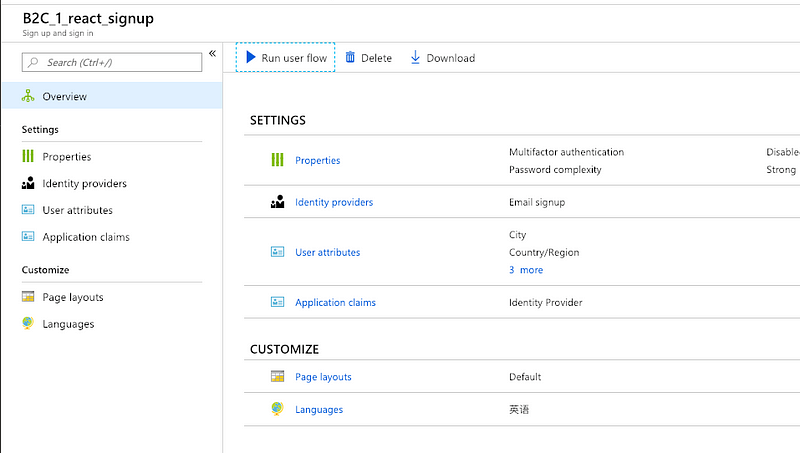
Now we have successfully created a Sing up and sign in user flow. By clicking the Run user flow button we will be able to test this flow.
https://cdn-images-1.medium.com/max/800/1*77uZos-4n1WOUzSczJJn6w.png
This is all we need at Azure AD B2C end. Let’s do a checklist.
- Azure Account [✔️]
- Azure AD B2C Tenant [✔️]
- Azure AD B2C Application [✔️]
- A user flow to sign up and sign in [✔️]
Excellent, now the setup is done. Let’s go back to our react application and do some coding.
Installing the library
Now, go back to our ReactJS application. In the terminal type the following command to install the library. Remember we were using VSCode terminal window.
$ npm install react-azure-adb2c --save
react-azure-adb2c is a library that will help you to get the functionality or Azure AD B2C to your ReactJS application. By clicking here you will get brief documentation of how to use it in your ReactJS application.
Now we have successfully installed the library. In your ReactJS application click on the index.js file, at the top of the file add the following line of code.
import b2cauth from 'react-azure-adb2c';
Add this line of code after the import to initialize.
b2cauth.initialize({
  instance: 'https://login.microsoftonline.com/tfp/',
  tenant: '<YOUR-B2C-TENANT>',
  signInPolicy: '<SIGNIN-POLICY>',
  applicationId: '<APPLICATION_ID>',
  cacheLocation: 'sessionStorage',
  scopes: [<SCOPE_ARRAY>],
  redirectUri: 'http://localhost:3000',
  postLogoutRedirectUri: window.location.origin,
});
Now you need to replace the items marked in “<>” from the values at your Azure AD B2C Application.
Now go back to the Azure portal and grab the following information.
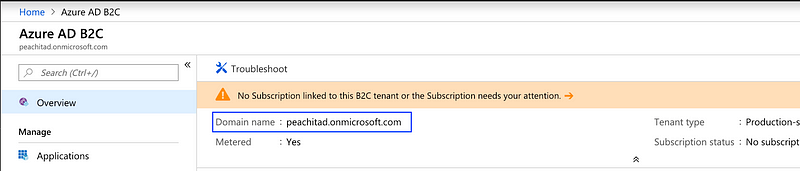
To grab the value for the tenant, go back to your Azure AD B2C directory. Under overview, copy the value in “Domain name” field.
https://cdn-images-1.medium.com/max/800/1*OHfmnLZd2-UuSWvrqjfEtA.png
Now, to grab the applicationId, click on the Applications label, and copy the id from the newly created application, in this case, “ReactJS AADB2C” and replace the value at applicatoinId field.
https://cdn-images-1.medium.com/max/800/1*KmkUkD3zVYBvvPrVwNyCXw.png
Now click on the User flows (polices) label and copy the name of the policy and replace the value at the signInPolicy field.
https://cdn-images-1.medium.com/max/800/1*Bp-6_BJfrX-_JXQUSxd67w.png
Now the scopes array field. This array will give the necessary permissions to your application. These permissions will allow our ReactJS application to access functionality at Azure AD B2C.
To grab this information:
Click on Applications label.
Click on your application “ReactJS AADB2C”.
Click on Published scopes label
Grab the value at FULL SCOPE VALUE column for user_impersonationscope.
Replace the value at scopes array (Remember this is an array, for each scope you need to add an element in this array)
Visit this link to get full detailed documentation on scopes.
Excellent, we are almost done. Now, your initialize code should look like this.
b2cauth.initialize({
  instance: 'https://login.microsoftonline.com/tfp/',
  tenant: 'peachitad.onmicrosoft.com',
  signInPolicy: 'B2C_1_react_signup',
  applicationId: '702f55a3-72fd-4da1-a22b-1dc82e70a049',
  cacheLocation: 'sessionStorage',
  scopes: ['https://peachitad.onmicrosoft.com/api/user_impersonation'],
  redirectUri: 'http://localhost:3000',
  postLogoutRedirectUri: window.location.origin,
});
One more thing to add. Let's replace the default ReactDOM.render() code with this.
b2cauth.run(() => { ReactDOM.render(<App />, document.getElementById('root')); serviceWorker.unregister();});After all these changes, your index.js file should look like this.
import React from 'react';import ReactDOM from 'react-dom';import './index.css';import App from './App';import * as serviceWorker from './serviceWorker';import b2cauth from 'react-azure-adb2c'; b2cauth.initialize({ instance: 'https://login.microsoftonline.com/tfp/', tenant: 'peachitad.onmicrosoft.com', signInPolicy: 'B2C_1_react_signup', applicationId: '702f55a3-72fd-4da1-a22b-1dc82e70a049', cacheLocation: 'sessionStorage', scopes: ['https://peachitad.onmicrosoft.com/api/user_impersonation'], redirectUri: 'http://localhost:3000', postLogoutRedirectUri: window.location.origin,}); b2cauth.run(() => { ReactDOM.render(<App />, document.getElementById('root')); serviceWorker.unregister();});
10.
Almost there. Let's do a test run. In our terminal window type and execute the following command.
$ n$ npm start
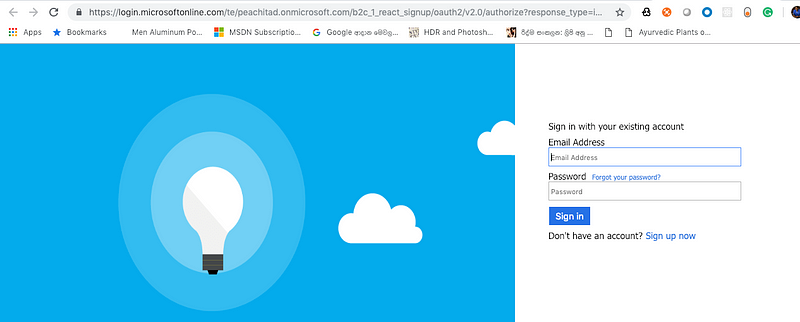
11. We should see this screen.
https://cdn-images-1.medium.com/max/800/1*TezMdouaybbg1CADnrLZSA.png
Now use the login details for the Azure portal or we can create a new account by clicking on “Sign up now”. Remember? we have created a user flow for both sign-in and sign-up. Cool isn’t it.
https://cdn-images-1.medium.com/max/800/1*TezMdouaybbg1CADnrLZSA.png
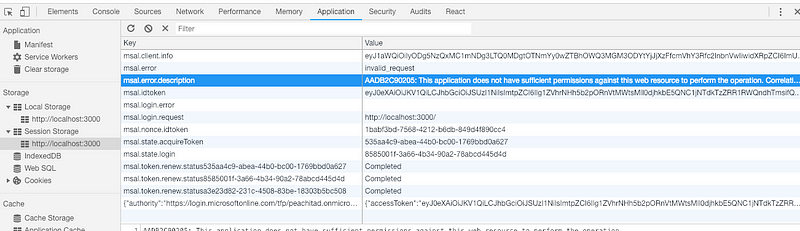
After creating a new account or using an existing account, we can log in to the application. But, we might not see the default ReactJS page. This might happen due to insufficient application permissions.
https://cdn-images-1.medium.com/max/800/1*EByQzaqQRWqmhlRnjTiS3A.png
To fix this,
Go back to the Azure Portal
Goto the Azure AD B2C directory
Click on the Applications label
Click on the application ( “ReactJS AADB2C”) .you just created.
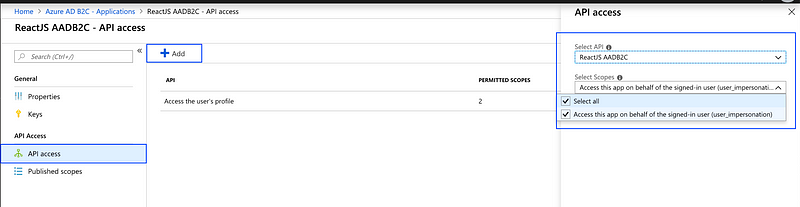
Click on API access label
Click + Add
Select the application in step 4 from the Select API drop down.
Select “Access this app on behalf of the signed-in user…”
Click OK
https://cdn-images-1.medium.com/max/800/1*hQlt2sxT4Sh8Qsppuutqag.png
Lets’ go back to our ReactJS application and refresh or rerun it.
Congratulations !!! You are done.
https://cdn-images-1.medium.com/max/800/1*duqrZh8vkqK-JkT6yNoTsQ.png
Getting information from Azure AD B2C
Let’s grab some information from Azure AD B2C and display it under the react logo.
Go back to the terminal and install the following package.
$ npm install jwt-decode --saveThis package will allow you to decode the JWT token from Azure AD B2C and grab information inside it.
Now you need to visit back to Azure portal and let Azure AD B2C send you this information. To do this,
Go back to the Azure portal.
Go to your Azure B2C Directory.
Click on User flows (policies) label.
Click on the sign-in policy you have created.
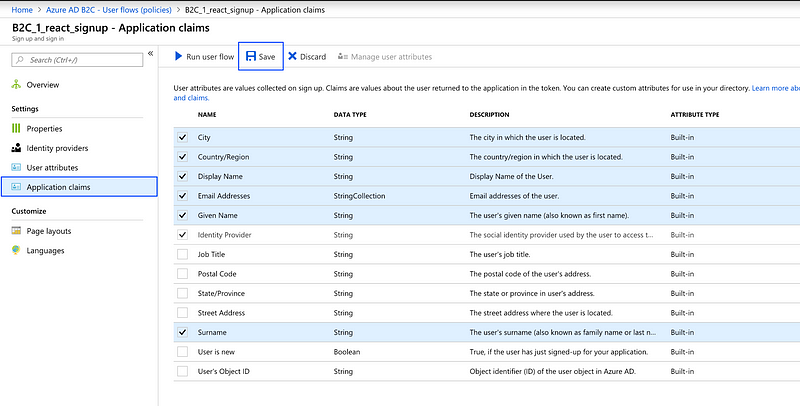
Click on the Application claims link
Select the fields you need, in this case I have selected City, Country/Region, Email Addresses, Display Name, Given Name (this will be the First Name), Surname (this will be the Last Name).
Click Save.
https://cdn-images-1.medium.com/max/800/1*gpbqAfLUeOXXTQHUk3hQ9w.png
Go back to your ReactJS application and click src directory. Add a new file. Name it as Auth.js. Copy and paste the following code inside the file.
import b2cauth from 'react-azure-adb2c';
import decodeJWT from 'jwt-decode';

class Auth {
  isLoggedIn() {
    if (b2cauth.getAccessToken()) {
      return true;
    }

    return false;
  }

  logout() {
    b2cauth.signOut();
  }

  getToken() {
    return b2cauth.getAccessToken();
  }

  currentUser() {
    const decoded = decodeJWT(b2cauth.getAccessToken());
    return {
      name: decoded.name,
      firstName: decoded.given_name,
      lastName: decoded.family_name,
      emails: decoded.emails,
      city: decoded.city,
      country: decoded.country,
    };
  }
}

export default Auth;</pre>
Now open the App.js and replace with this code.
import React, { Component } from 'react';
import logo from './logo.svg';
import './App.css';
import Auth from './Auth';

class App extends Component {

  displayUserInformation() {
    const auth = new  Auth();
    if (auth.isLoggedIn()) {
      console.log(auth.currentUser());
      return (
        <div>
          <p>
            Welcome, {auth.currentUser().firstName} {auth.currentUser().lastName} from {auth.currentUser().city}, {auth.currentUser().country}
          </p>
          <a
            className="App-link"
            href="/abc" onClick={() => auth.logout()}
          >
            Sign Out
          </a>
        </div>
      );

    }
  }

  render() {
    return (
      <div className="App">
        <header className="App-header">
          <img src={logo} className="App-logo" alt="logo"  />
          {this.displayUserInformation()}
        </header>
      </div>
    );
  }
}

export default App;
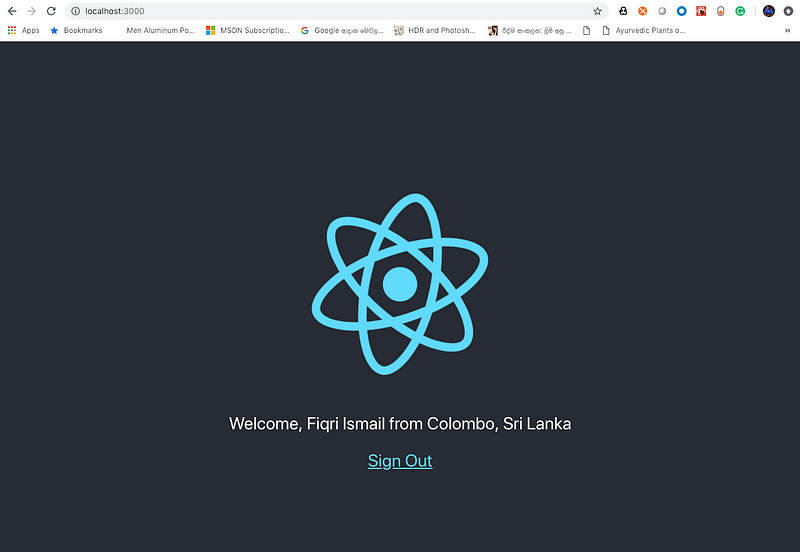
We are all done. Let's rerun our ReactJS application.
$ npm start
We will be prompted with the Microsoft login screen, after a successful login we should see this screen.
https://cdn-images-1.medium.com/max/800/1*AOehApDWiE8booVUMXkupg.png
Conclusion
In this article, we looked at how to create a ReactJS frontend and then we have created the Azure AD B2C application. Finally, we have successfully used the ReactJS application to log in using Azure AD B2C.