Azure Databricks: How to Create Cluster
In this short article explains how to create an Azure Databricks cluster. Before that, we need to create an Azure Databricks Workspace environment using the Azure Portal. If you haven’t created already, please refer this article https://social.technet.microsoft.com/wiki/contents/articles/52605.how-to-create-a-azure-databricks-workspace.aspx
In Azure Databricks we can create various resources like, Spark clusters, Jupyter Notebooks, ML Flows, Libraries, Jobs, managing user permissions etc. In this article we are only focused on How to create a Spark Cluster and what are the key areas need to know.
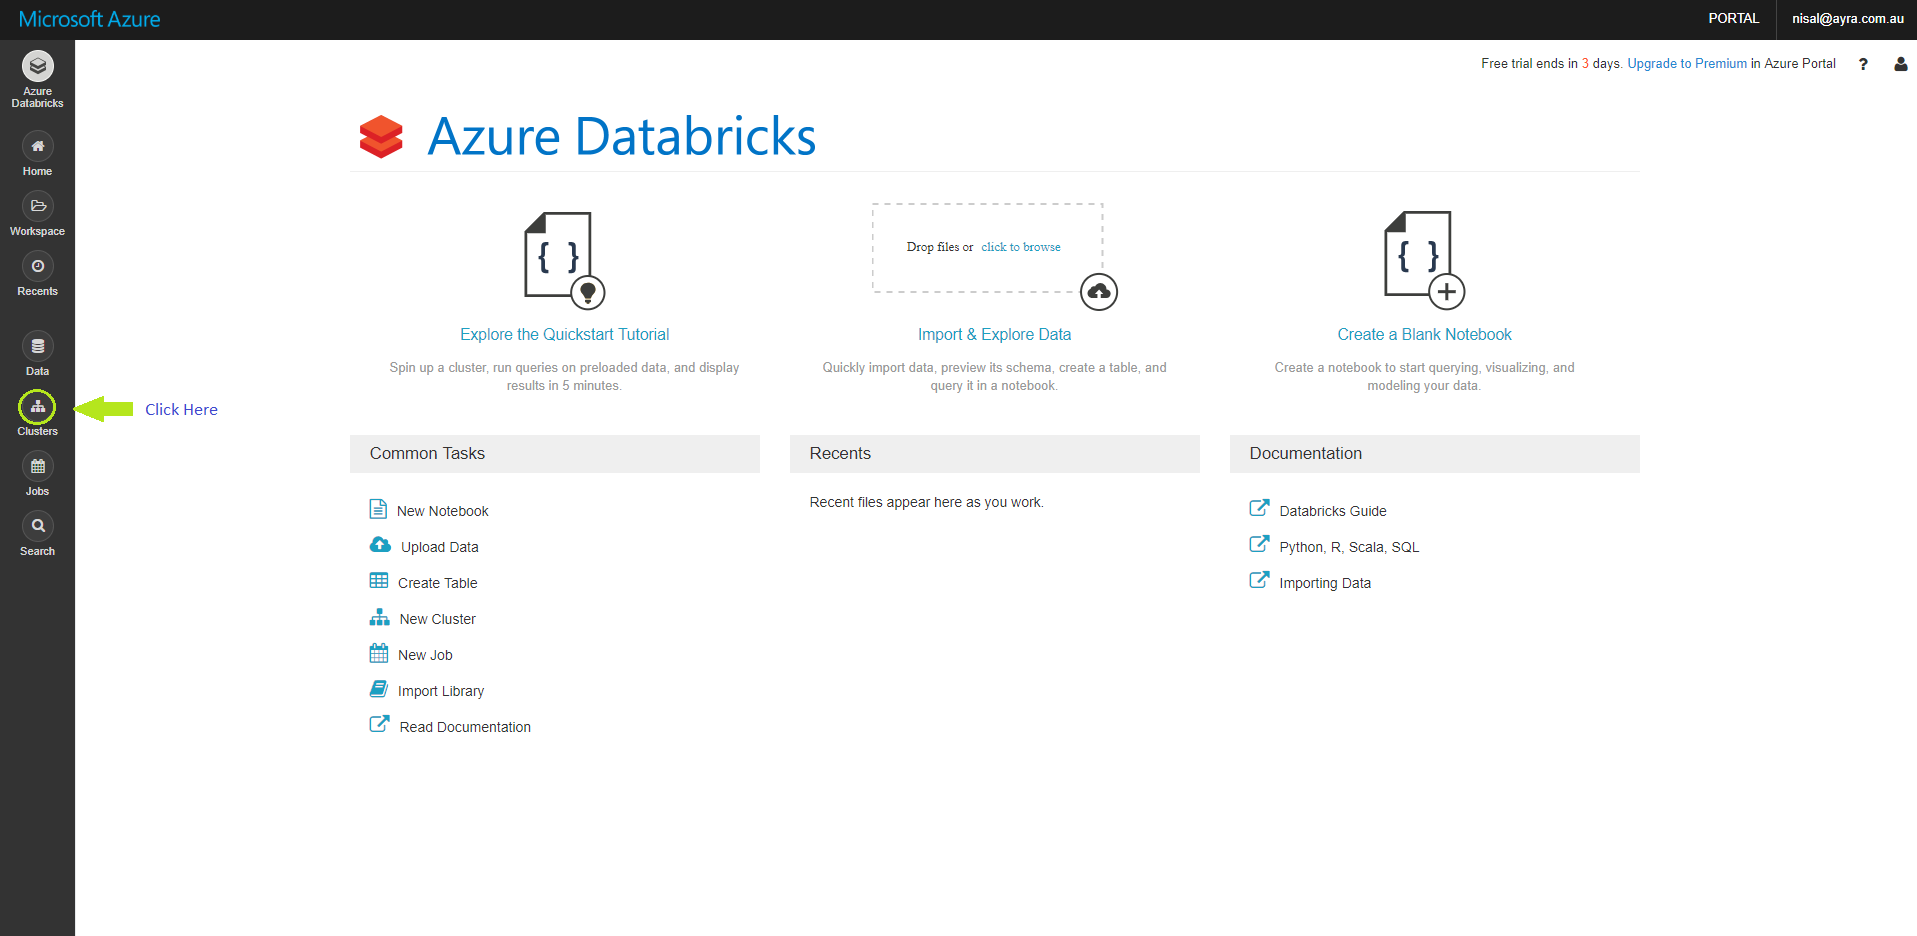
Once we login to the Databricks Workspace we created earlier, in the home page we can see the left menu, over there you have to click, Clusters icon, in order to create a spark cluster. (see the below image)
Once you clicked the Clusters icon as the above image you will redirect to this below screen. We have to click Create Cluster icon as highlighted below.
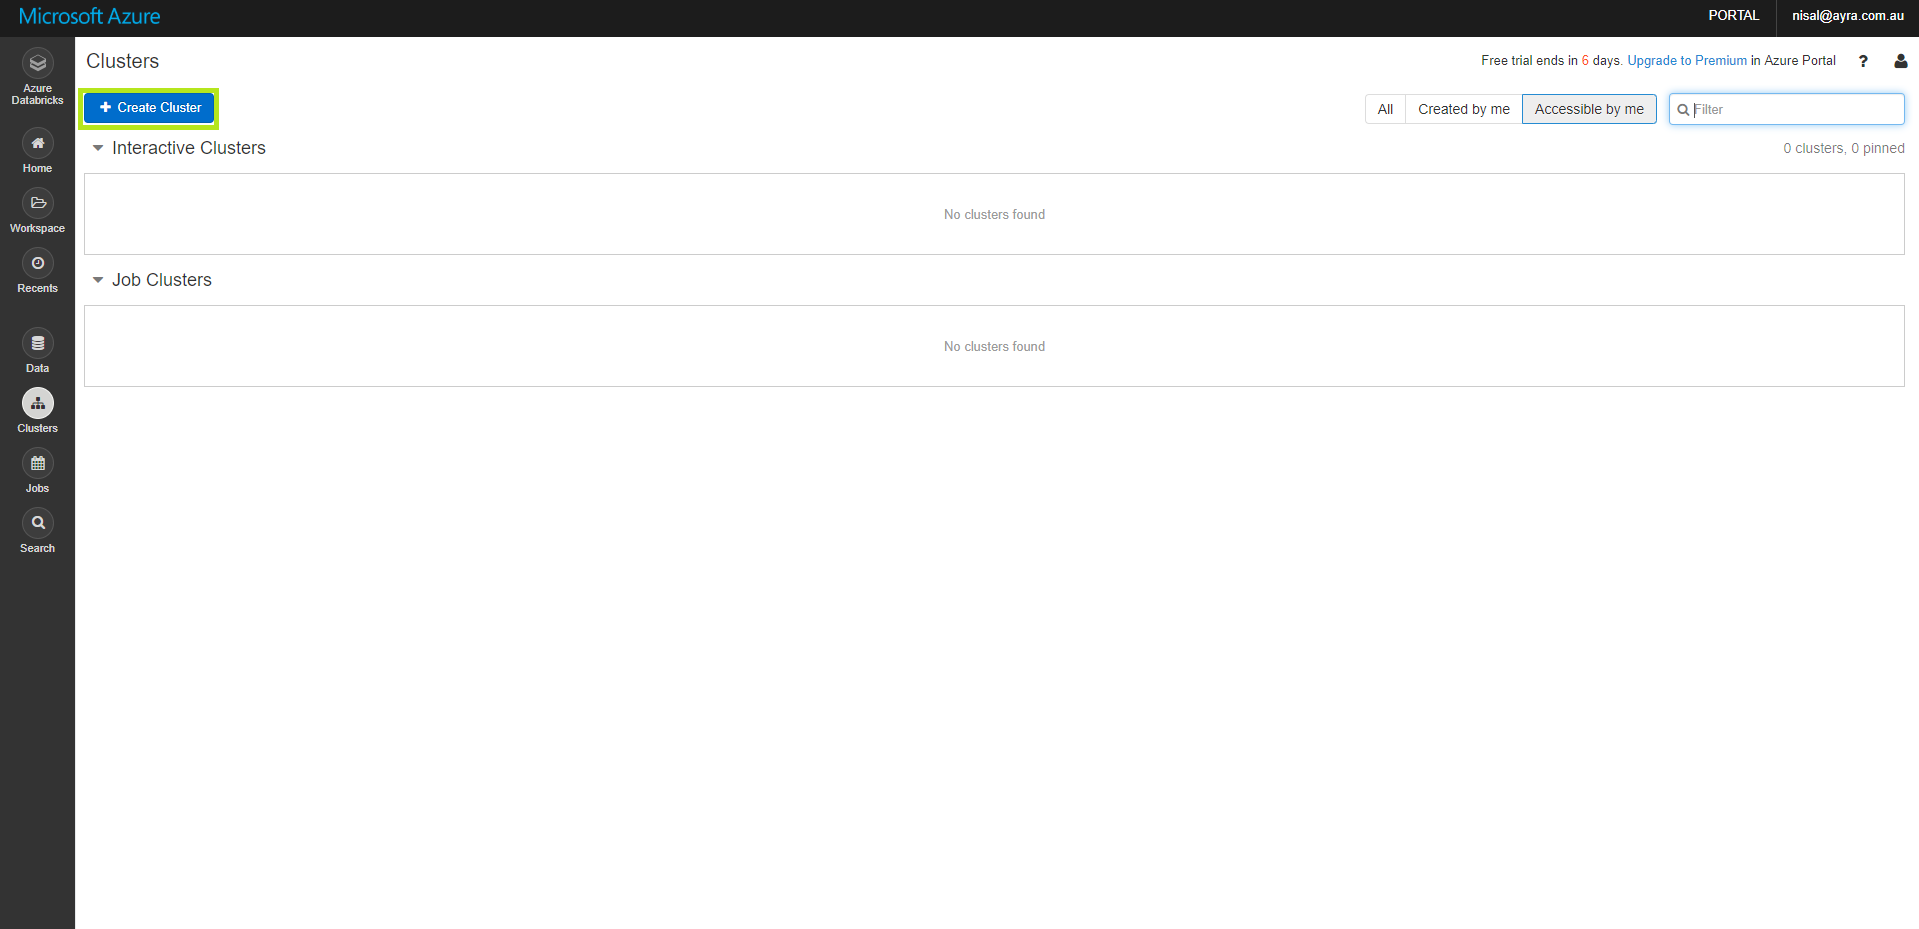
You would noticed there are two type of clusters, interactive clusters and Job clusters
Interactive clusters: are the clusters use to analyze data collaboratively using interactive notebooks. (we are going to create this type of cluster)
Job clusters: in order to run automated using UI or a API
Once you clicked, Create Cluster button you will redirect to Create Cluster Page. There are few configurations to do in order to create a cluster. 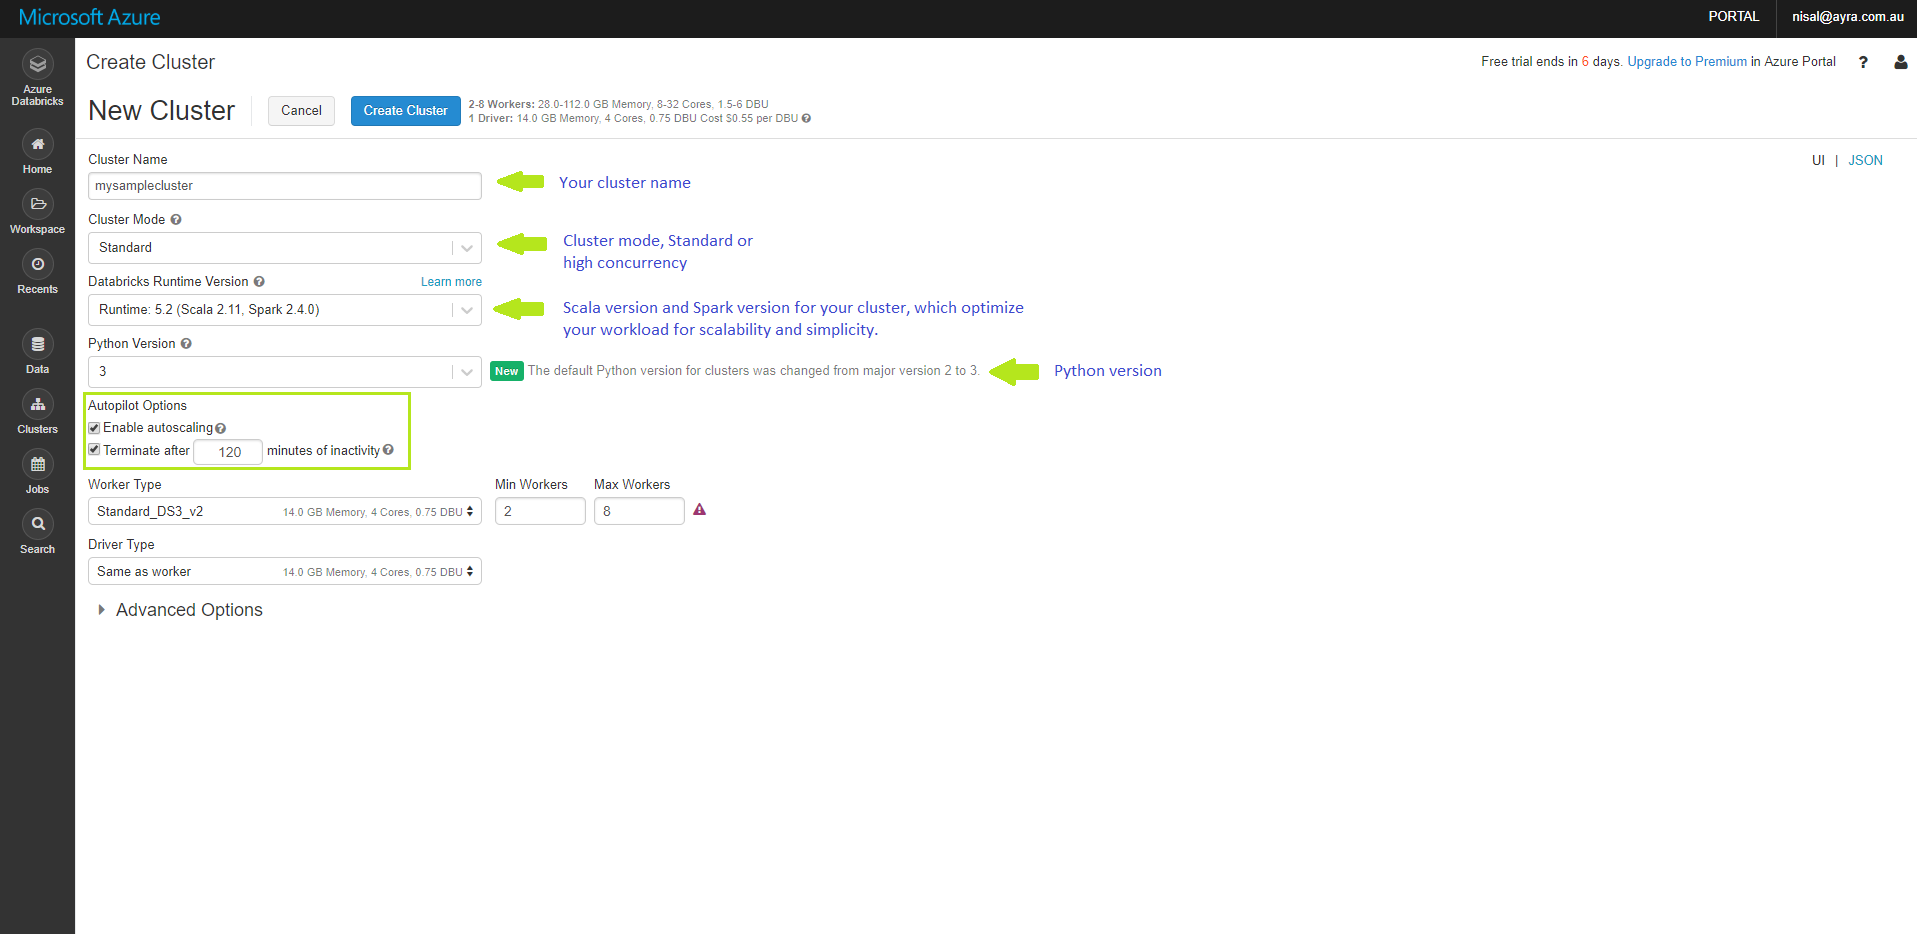
Cluster Name: We can name our cluster. We’ve given the cluster name as ‘mysamplecluster’
Cluster Mode: We have to select Standard or High concurrency
Databricks Runtime Version: Scala version and Spark version for our cluster, which optimize our workload for scalability and simplicity
Python Version: Best to choose version 3 over version 2. Unless you are suppose to code with older libraries.
Autopilot Options
Enable autoscaling: The cluster will automatically scale between min nodes and maximum nodes on demand.
Terminate after n minutes of inactivity: This is really helpful to stop your cluster when not using. After configured number of minutes, it will automatically shutdown.
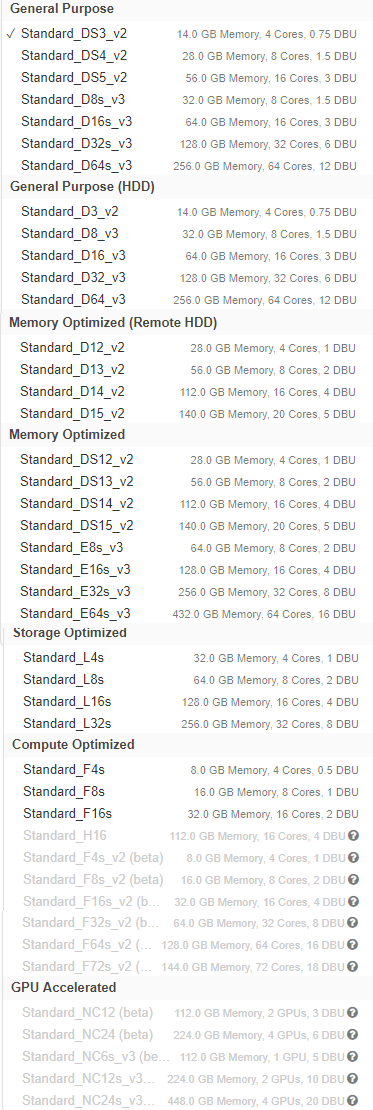
Worker Type: Configuration of your Worker Nodes. You can configure Minimum number of Workers and Maximum number of Workers based on your requirement.
Driver Type: Configuration of your Driver Node
Node configurations
If you are familiar with the Big Data concepts and how processes works, the Driver Nodes and Worker Nodes will be familiar terms. See the below diagram.
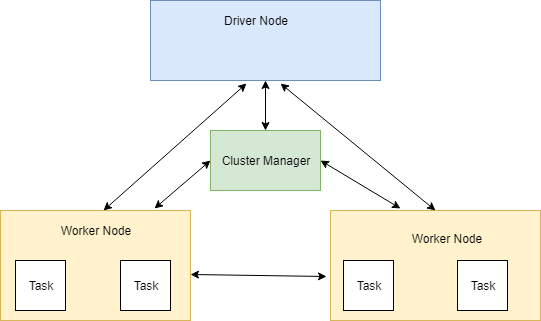
See more details in this link: https://spark.apache.org/docs/latest/cluster-overview.html
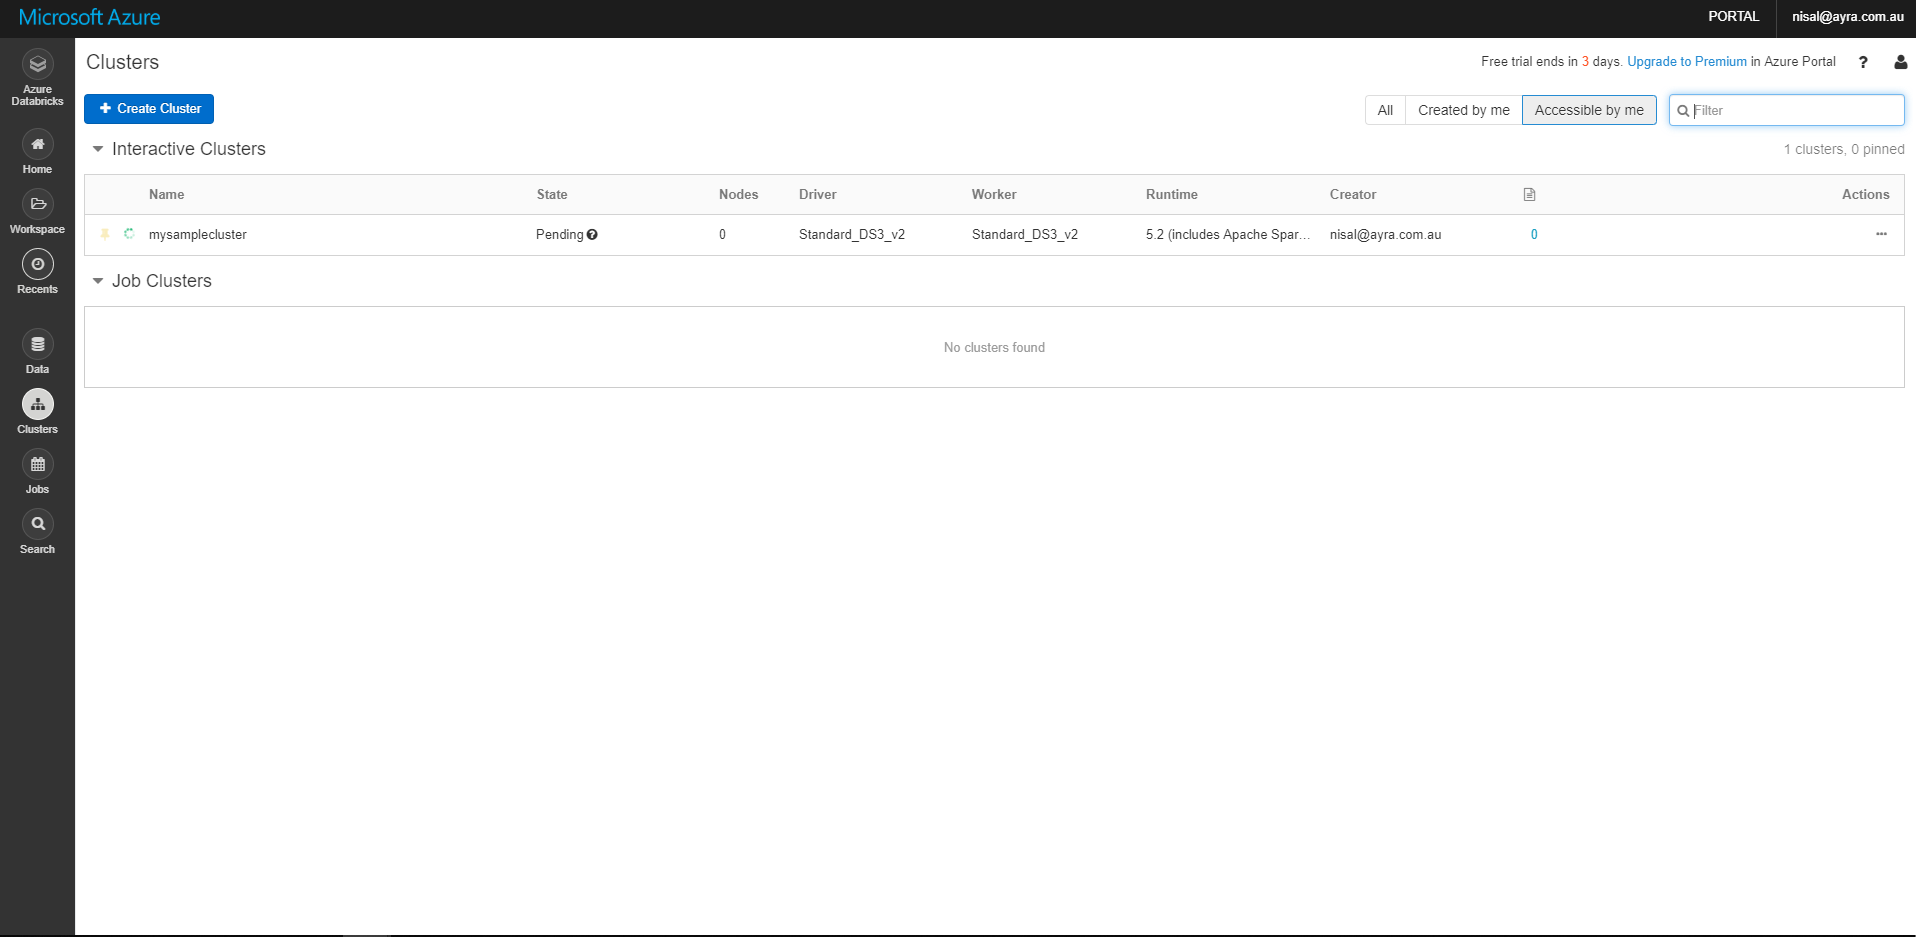
Once you provided necessary details, click Create Cluster button, in order to create your spark cluster. It will redirect you to below page and you can see the status of the cluster.
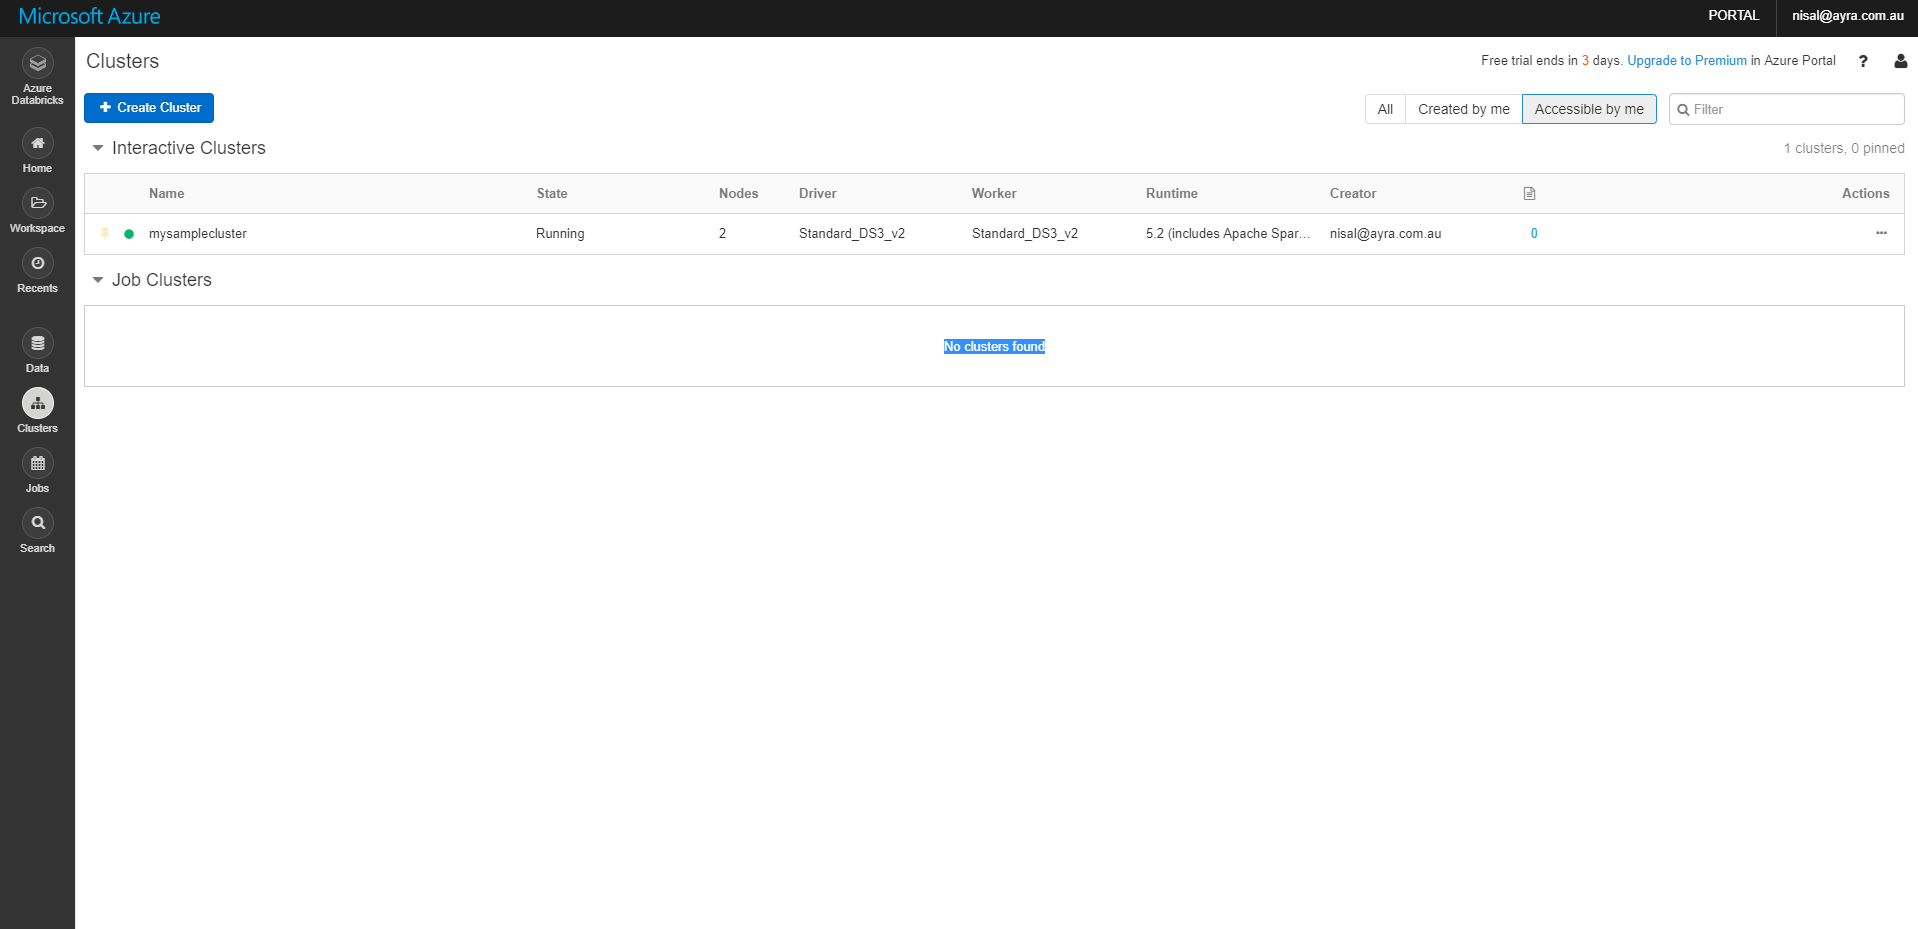
After your cluster started, you can see the status of the cluster in green color.
Summary
In this short article, walked through how to create a spark cluster after you created a Azure Databricks environment. Reference: https://spark.apache.org/docs/latest/index.html https://docs.databricks.com/user-guide/clusters/index.html