Azure Databricks: Walkthrough
Introduction
In order to create Azure Databricks workspace, please follow this tutorial if you haven’t done already.
Azure Databricks Workspace Home
This is the first page you can see when you sign into Azure Databricks Workspace. As in below image, it is kind of a dashboard you can click and perform various activities. In this article I’ll go through one by one.
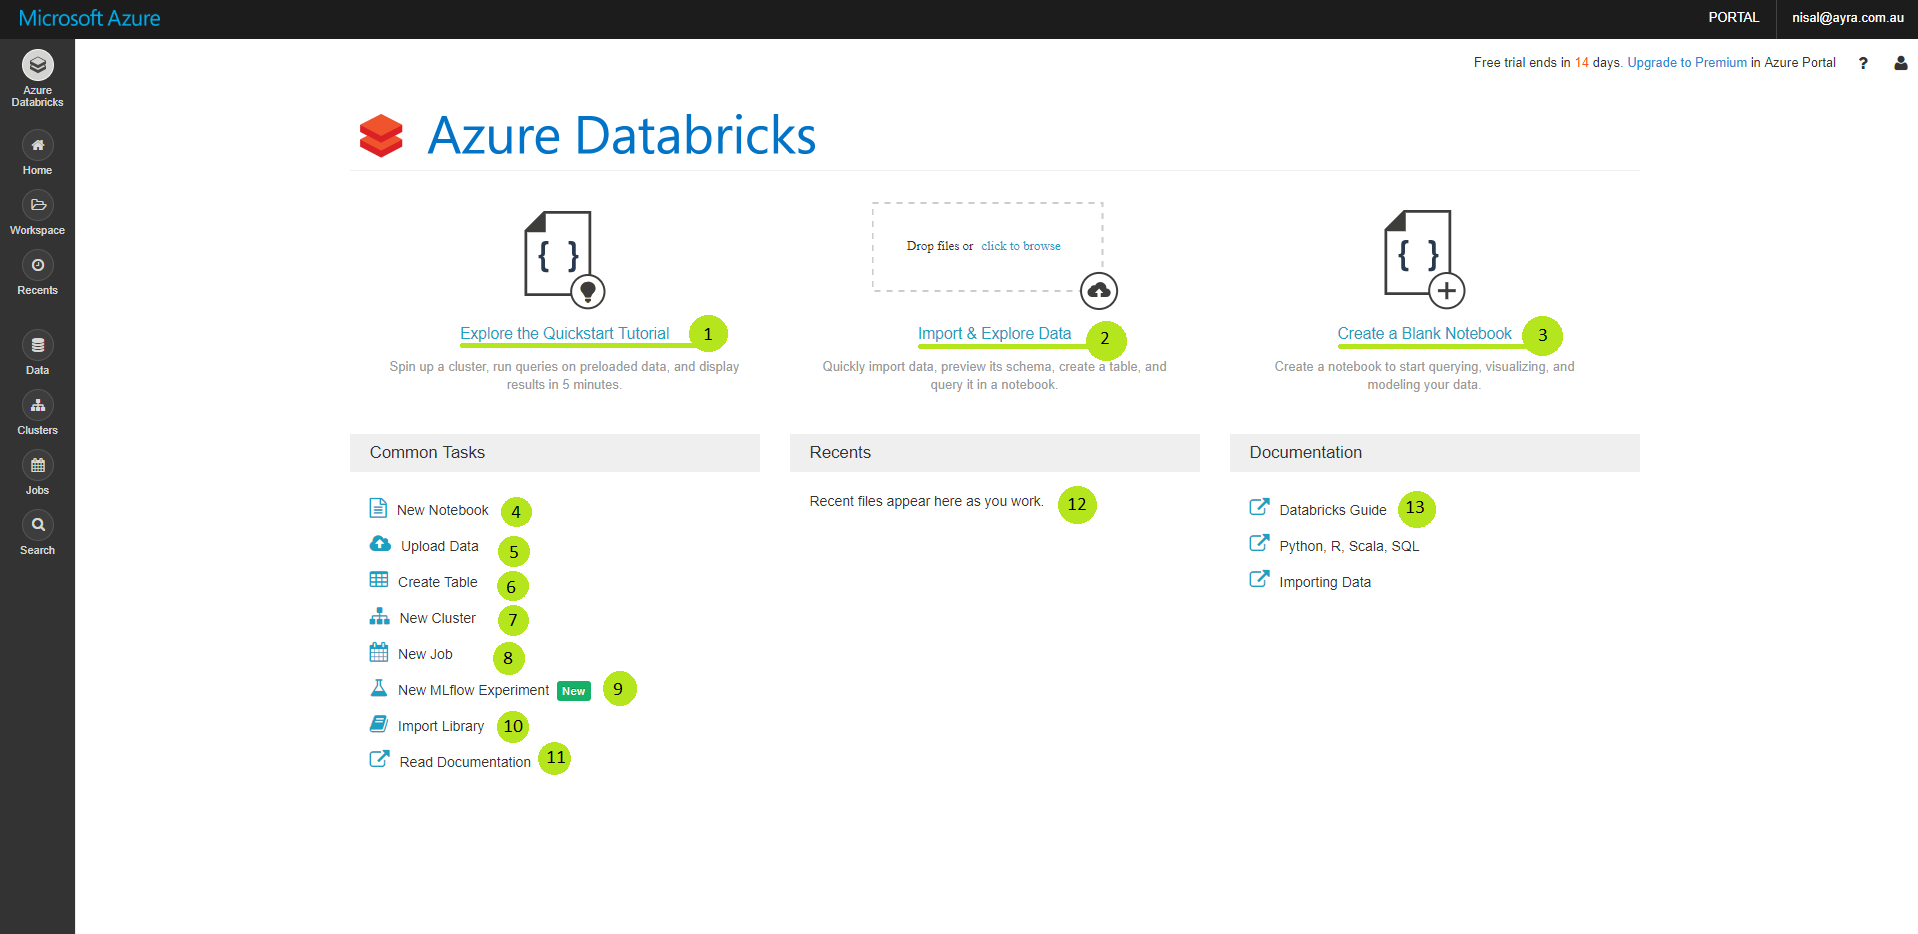
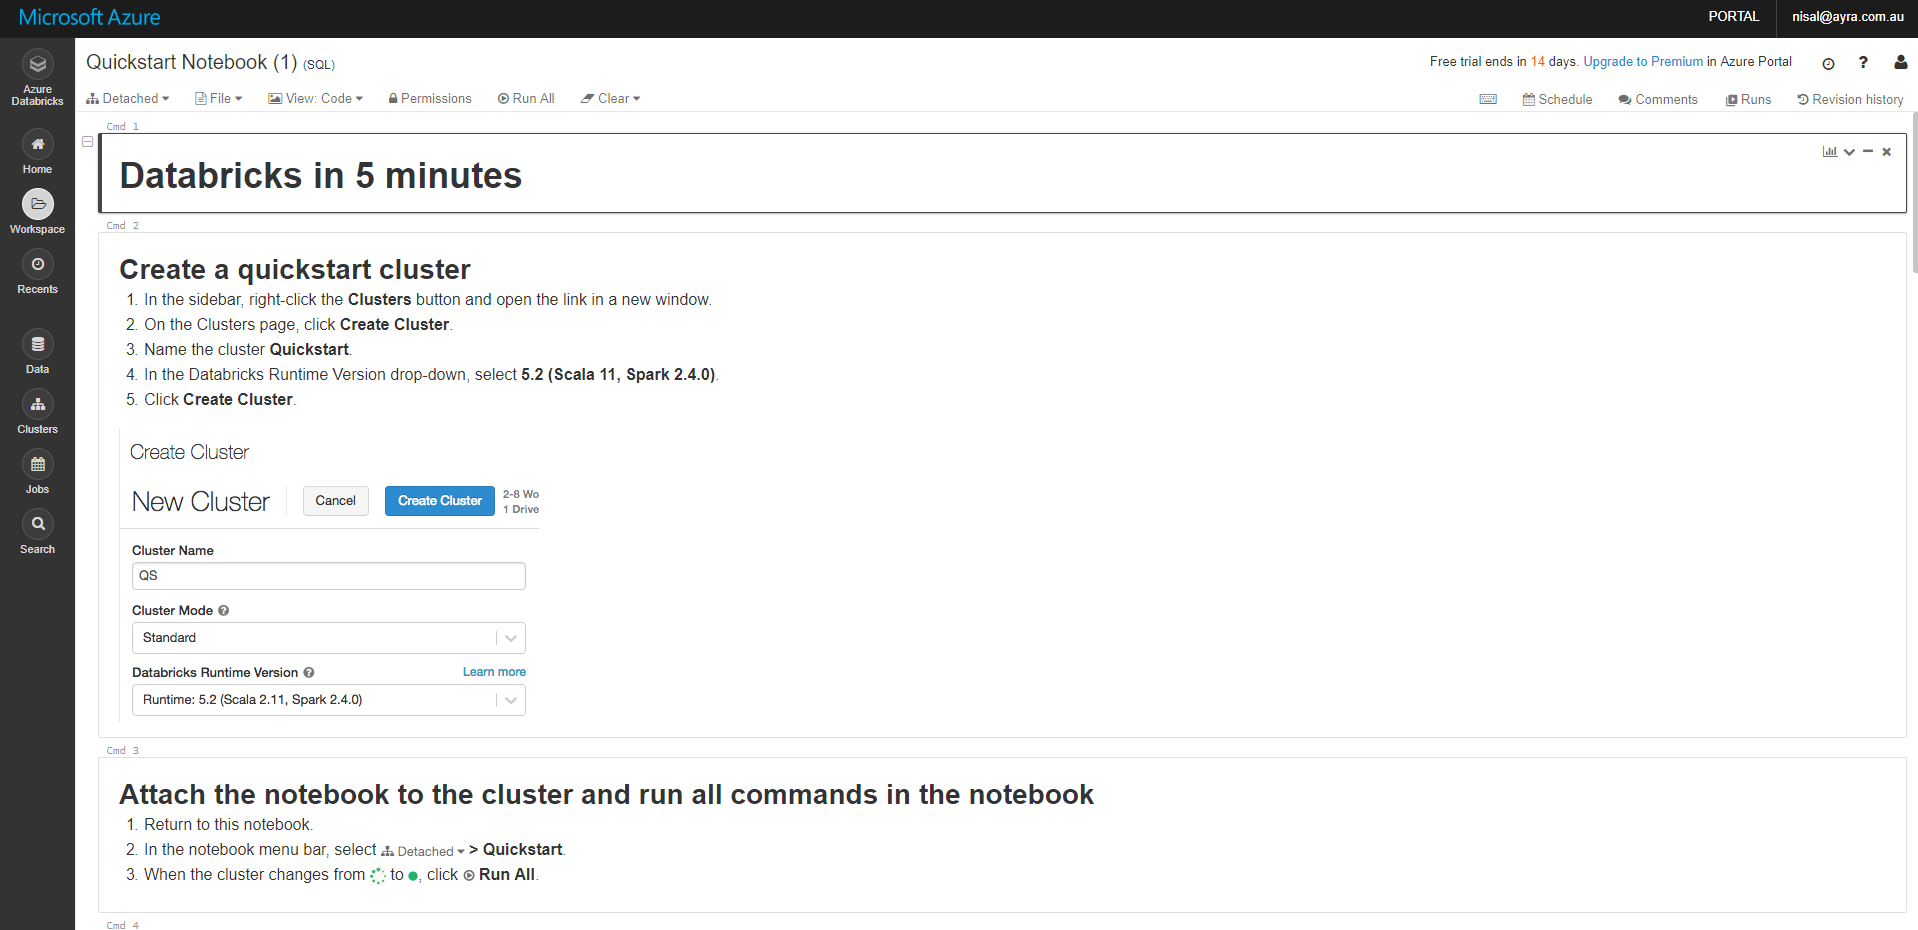
1. Explore the quickstart tutorial
If you are using the Azure Databricks for the first time or new to Apache Spark, this would be the ideal place to start and see what kind of data engineering and analytics you can perform on Big Data using Azure Databricks
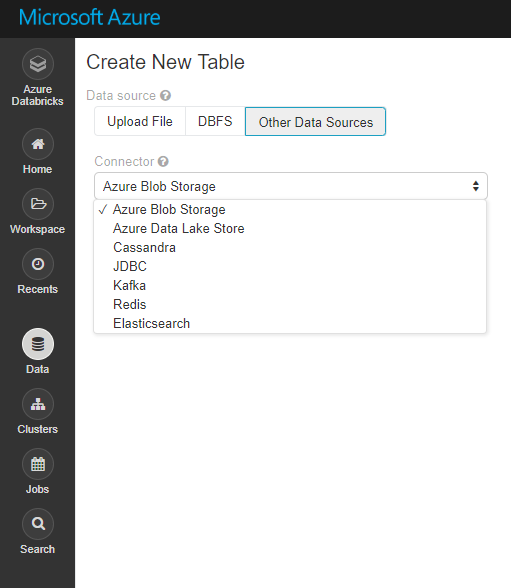
2. Import and Export Data
In here you can simply upload files in to DBFS (Databricks File System). Once you specify the path, all users will be able to access these data files using the path.
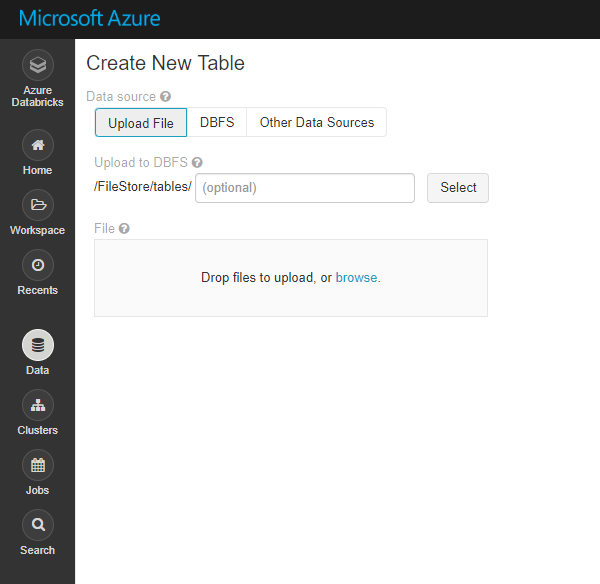
In the second tab you can browse the DBFS and at the below two buttons. Using the data files you can straightaway create Table in Notebook for analysing data.

Then again if you try to run cells you will be asking to attach the notebook into a cluster. Since you don’t have a cluster created, first you need to create a one. Will discuss this in next tutorial.

In the third tab for other Data Sources like Azure Data Lake Store, Kafka, Cassandra, Elasticsearch etc..
3. Create a Blank Notebook
By clicking this button you can create and start with a blank notebook.
![]()
Common Tasks
4 New Notebook
Again as previously you can create a New Notebook in Databricks
5 Upload Data
In here also you will be redirect to the view where you can upload/connect new data sources and move to DBFS.
6 Create Table
Which is quite similar to the Upload Data,
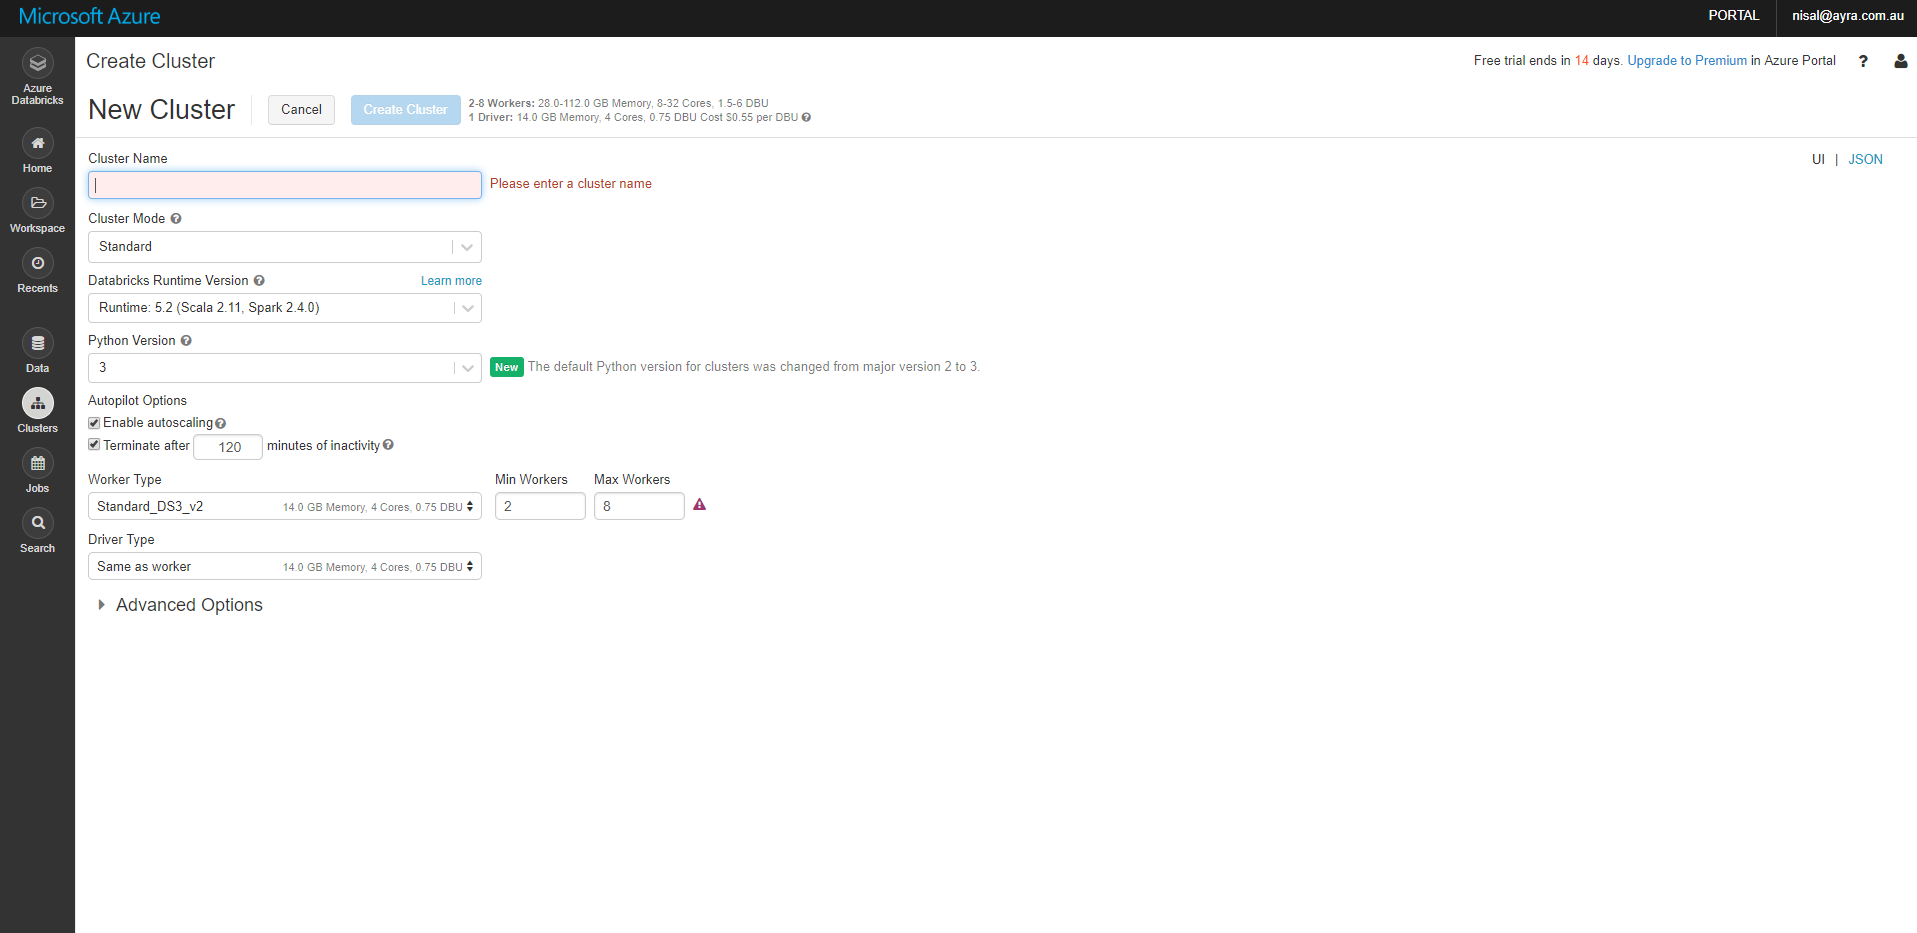
7 New Cluster
In this link you will be redirect to a page where you can create a new spark cluster
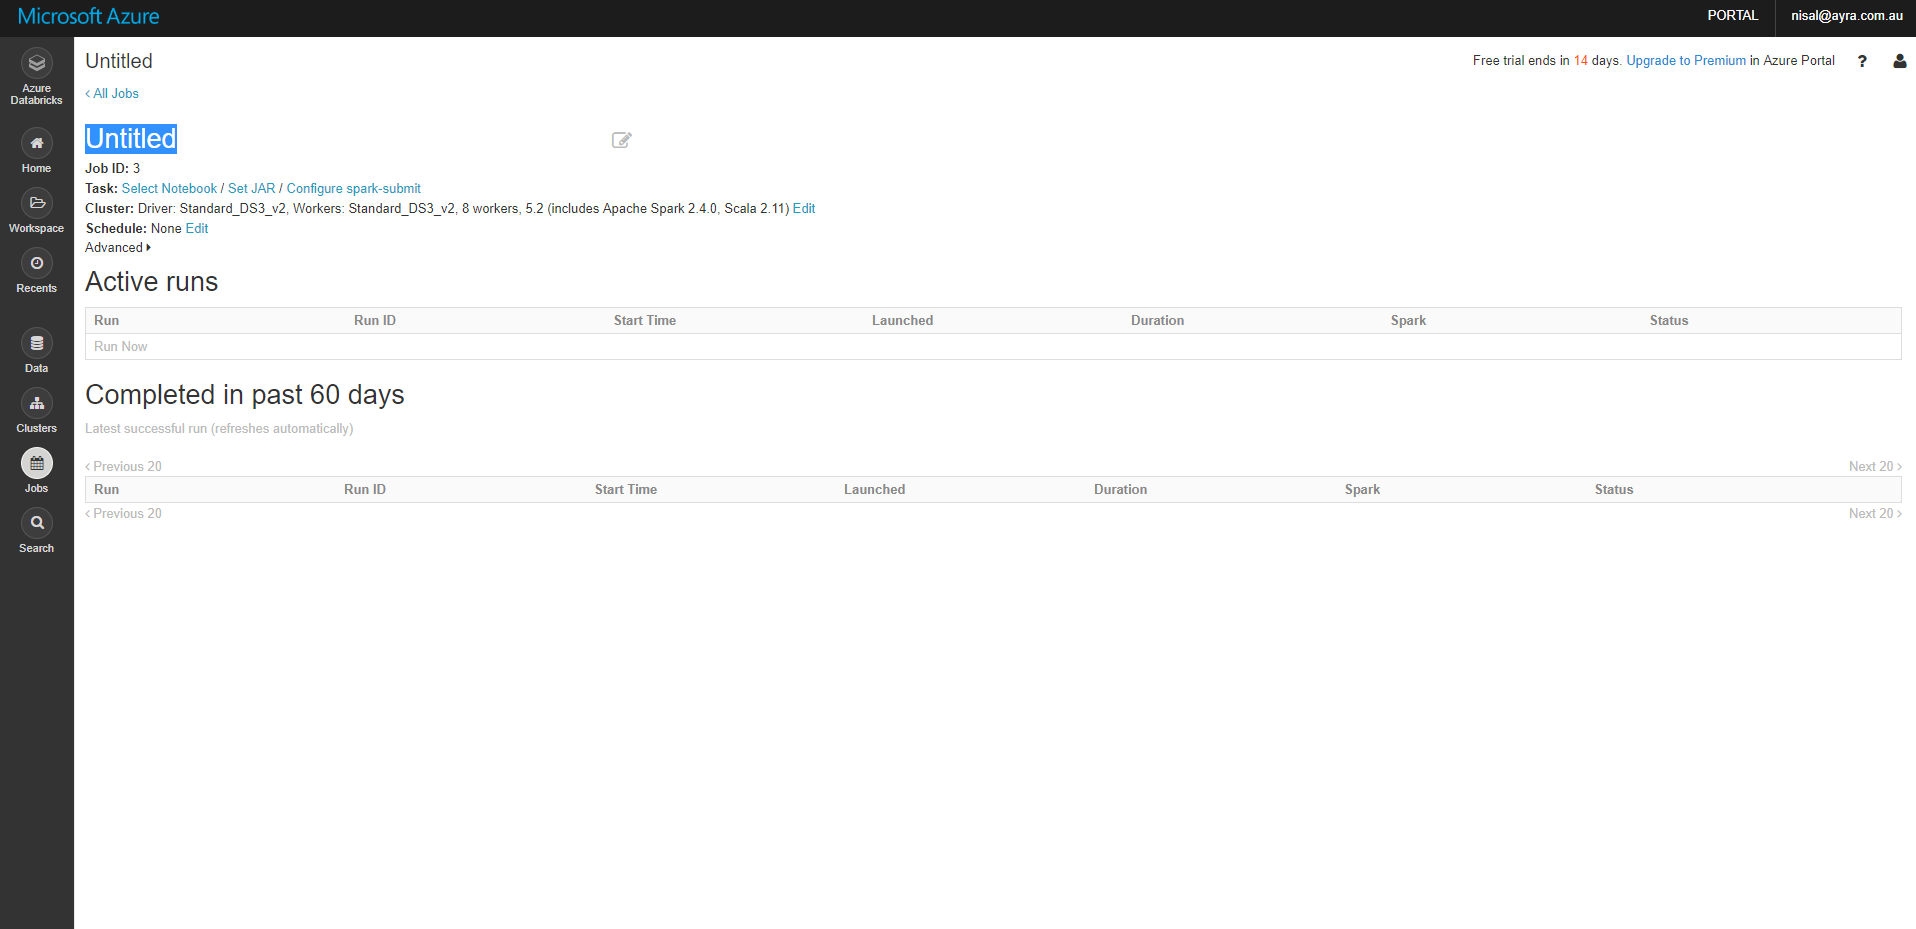
8 New Job
You can create a Job in order to run a Notebook immediately or scheduled basis manner
9 New ML Flow Experiment
This is a new feature added, you can create Machine Learning Flow experiment in Databricks. You can learn more about this in here https://docs.azuredatabricks.net/applications/mlflow/index.html

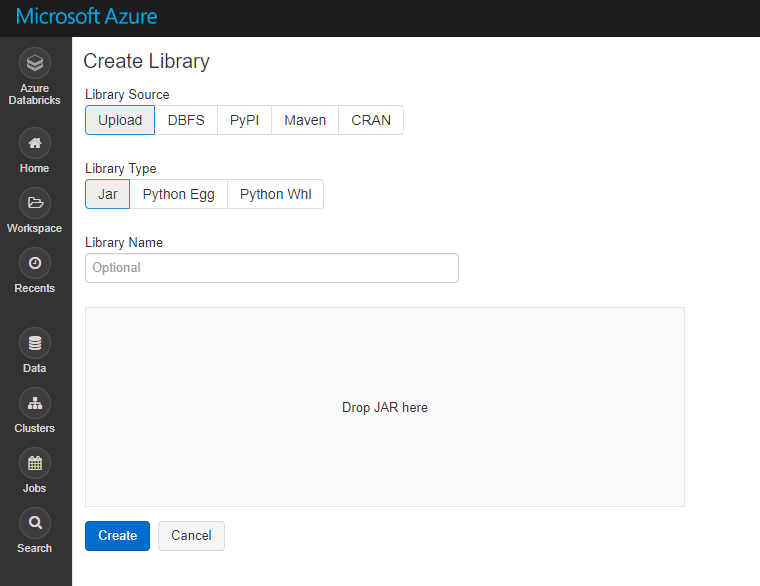
10 Importing Library
In the notebooks when you working with coding with Python and other languages, you may require certain necessary libraries to refer. This is the place where you can import libraries
11 Read Documentation
To read complete azure databricks documentation, you can click this link and go through
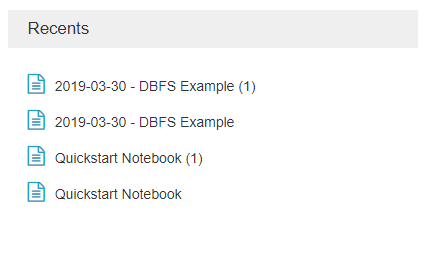
Recents
It will list down the most recent files and resources you have been used. So you can quickly access those by clicking here.
Documentation
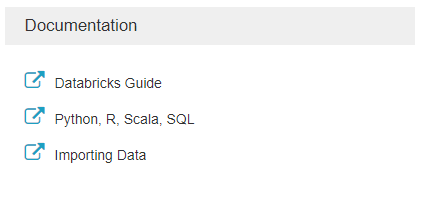
Databricks Guide:
Again you will redirect to databricks documentation.
Python:
Gentle introduction to Spark https://docs.azuredatabricks.net/_static/notebooks/gentle-introduction-to-apache-spark.html
R:
SparkR Overview https://docs.azuredatabricks.net/spark/latest/sparkr/overview.html
Scala:
Databricks for Data Scientists https://docs.azuredatabricks.net/_static/notebooks/databricks-for-data-scientists.html
SQL:
This also redirect to Databricks for Data Scientists. I believe this must redirect to SQL Guide. https://docs.azuredatabricks.net/spark/latest/spark-sql/index.html
Import Data:
This contains guideline for whole range of data sources which you can connect with Azure Databricks https://docs.azuredatabricks.net/spark/latest/data-sources/index.html

Azure Databricks
This will always redirect to workspace home.
Home
This will open up resources created under your account. Also it is a path to create new resources.
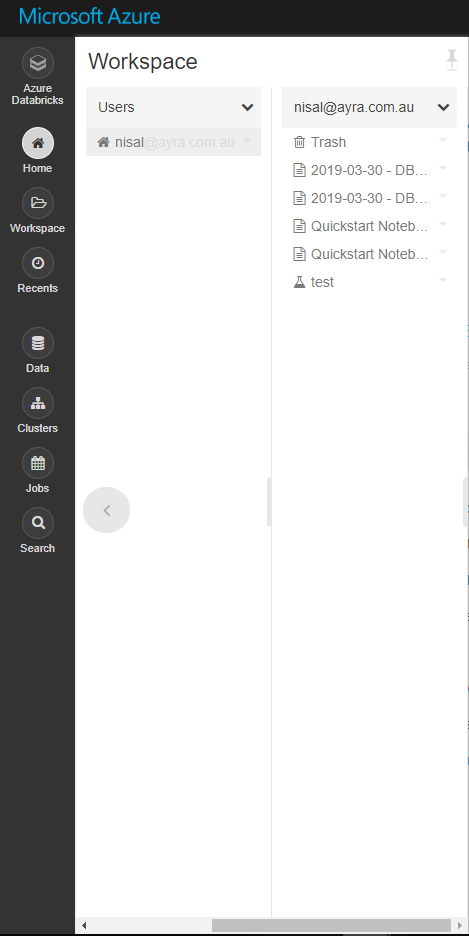
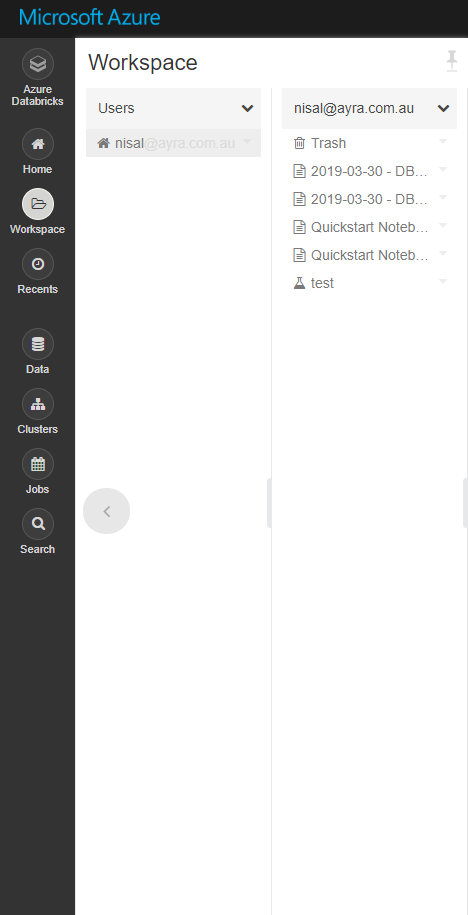
Workspace
This is also very similar to the Home, you can access existing resources and create new ones like, Notebooks, Library, Folder etc
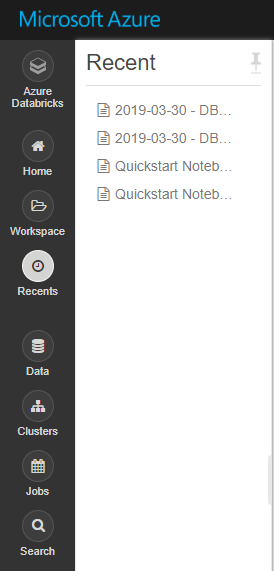
Recent
Shows recent files you accessed
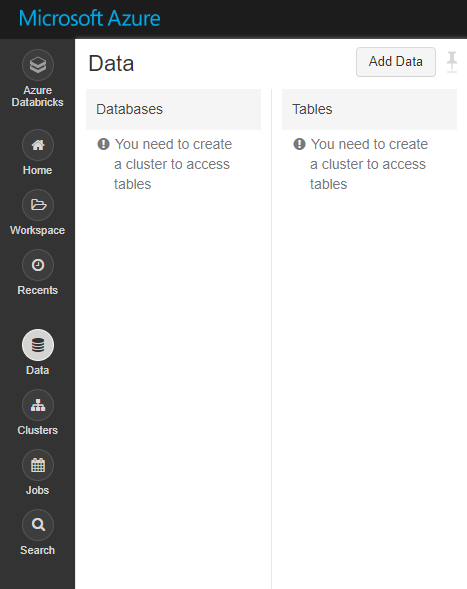
Data
In here you can see the Databases and tables you already created and also you can add new Data using the button at top right corner.
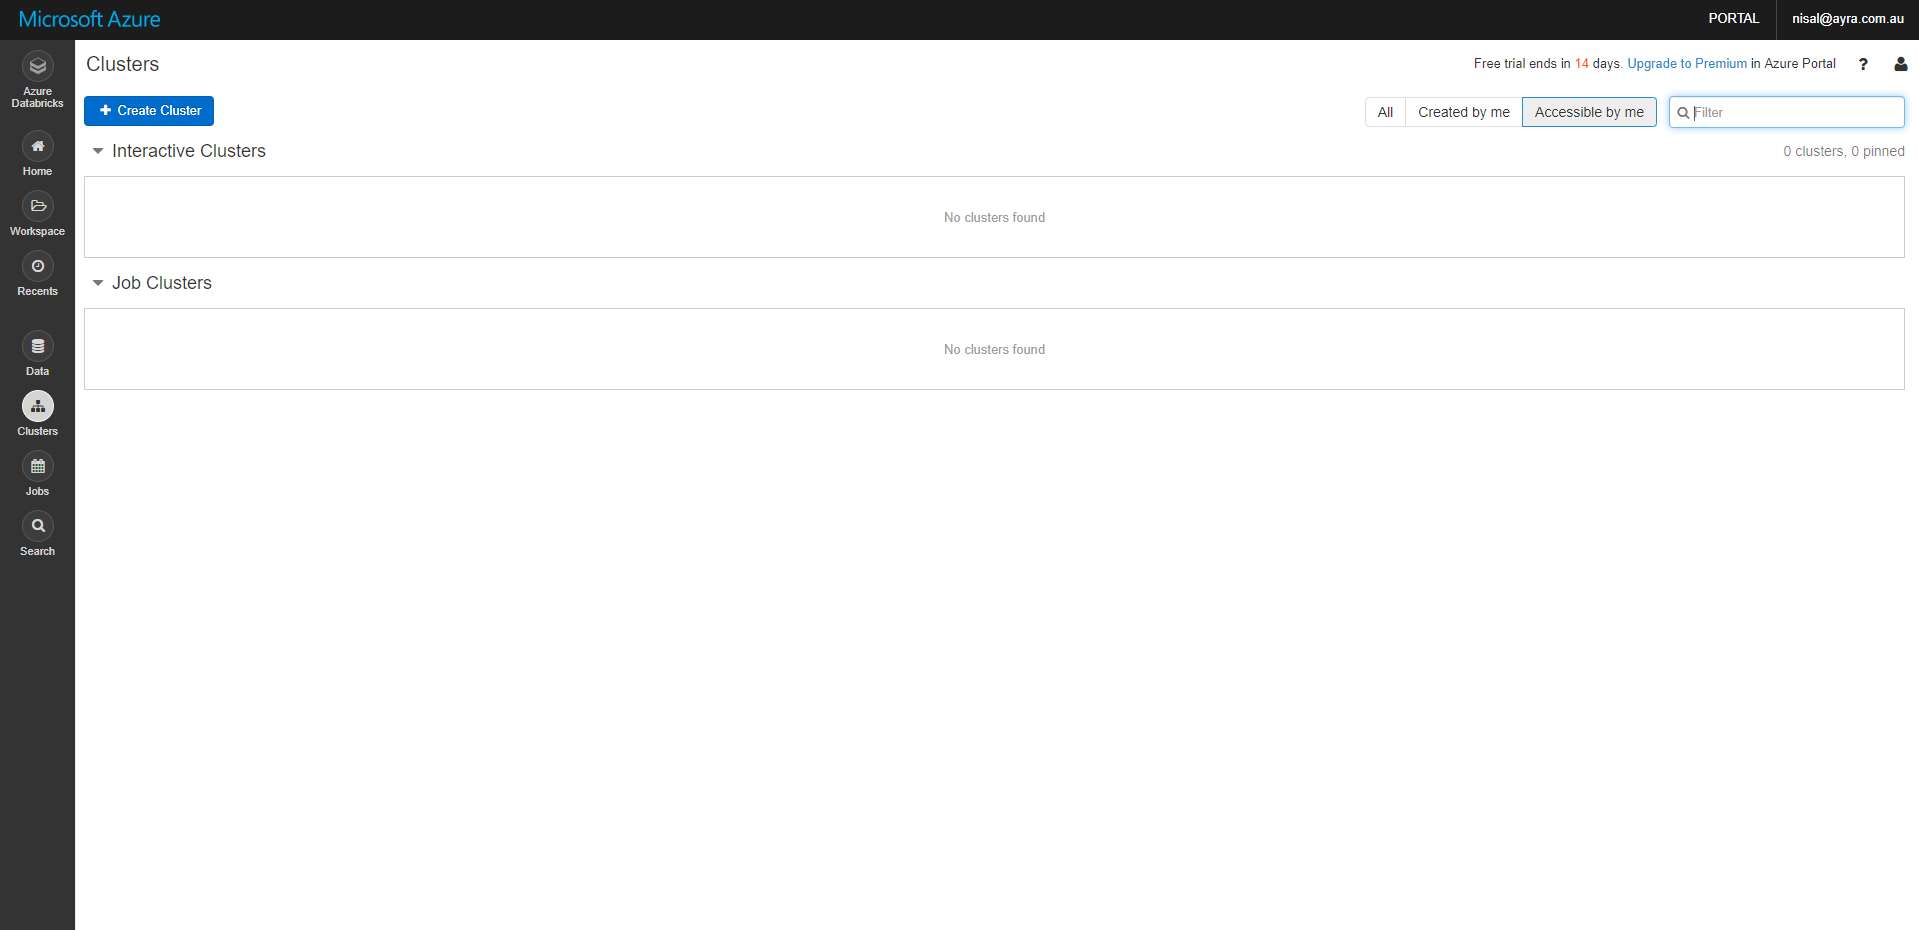
Clusters
Clusters button allow you to view the clusters page. It shows existing clusters, and state of cluster also you can create a new cluster using that.
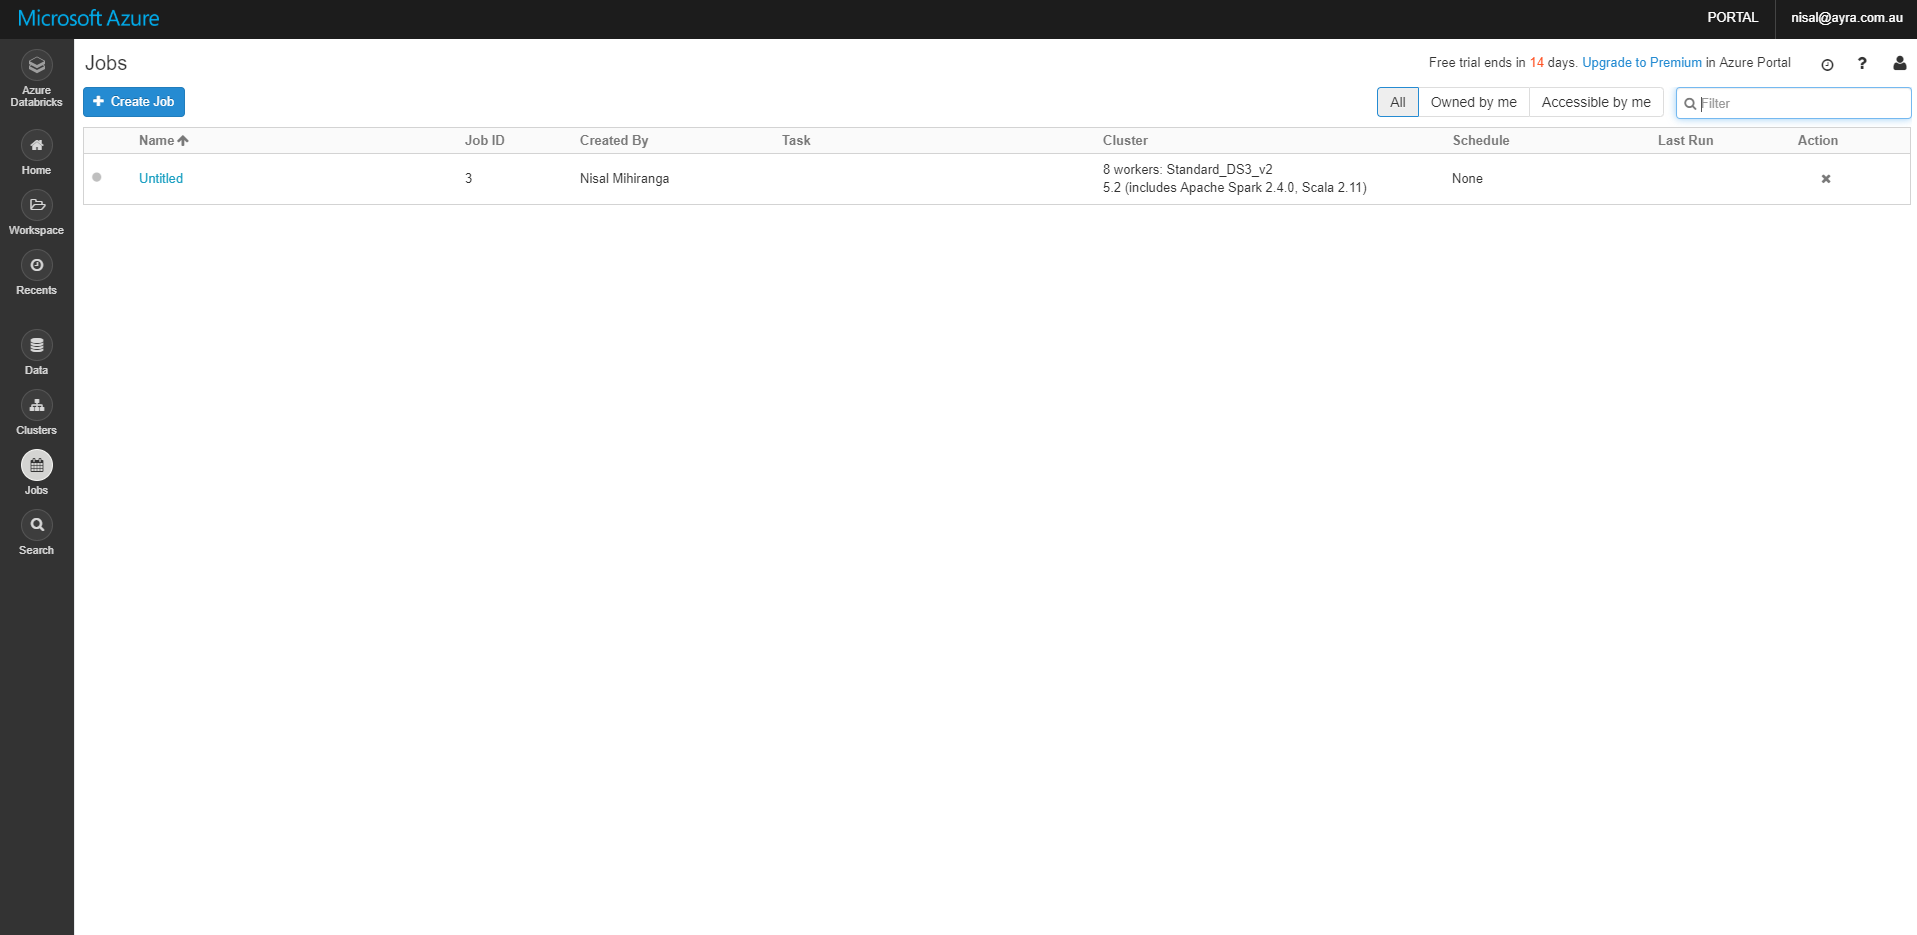
Jobs
As above you can create a new job to schedule Notebooks
Search
You can search workspace items using Search option.

Top Menu
PORTAL: this button will redirect you to azure portal. https://portal.azure.com/#home
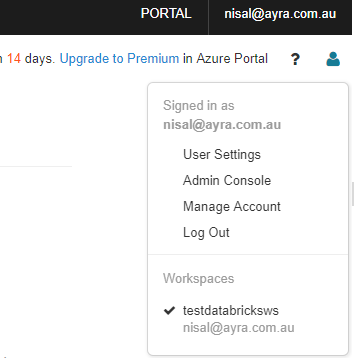
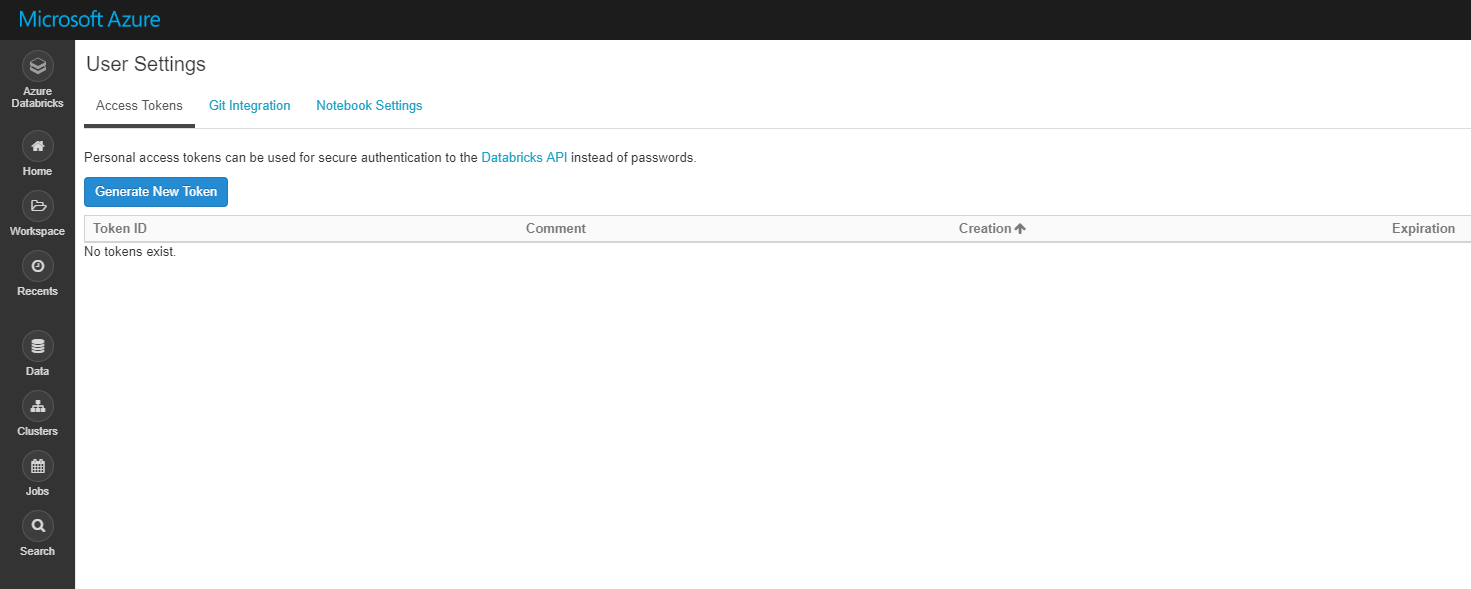
User Settings
Here you can generate tokens to secure access to Databricks API instead of passwords, integrate your project with Git repo and configure notebook settings.

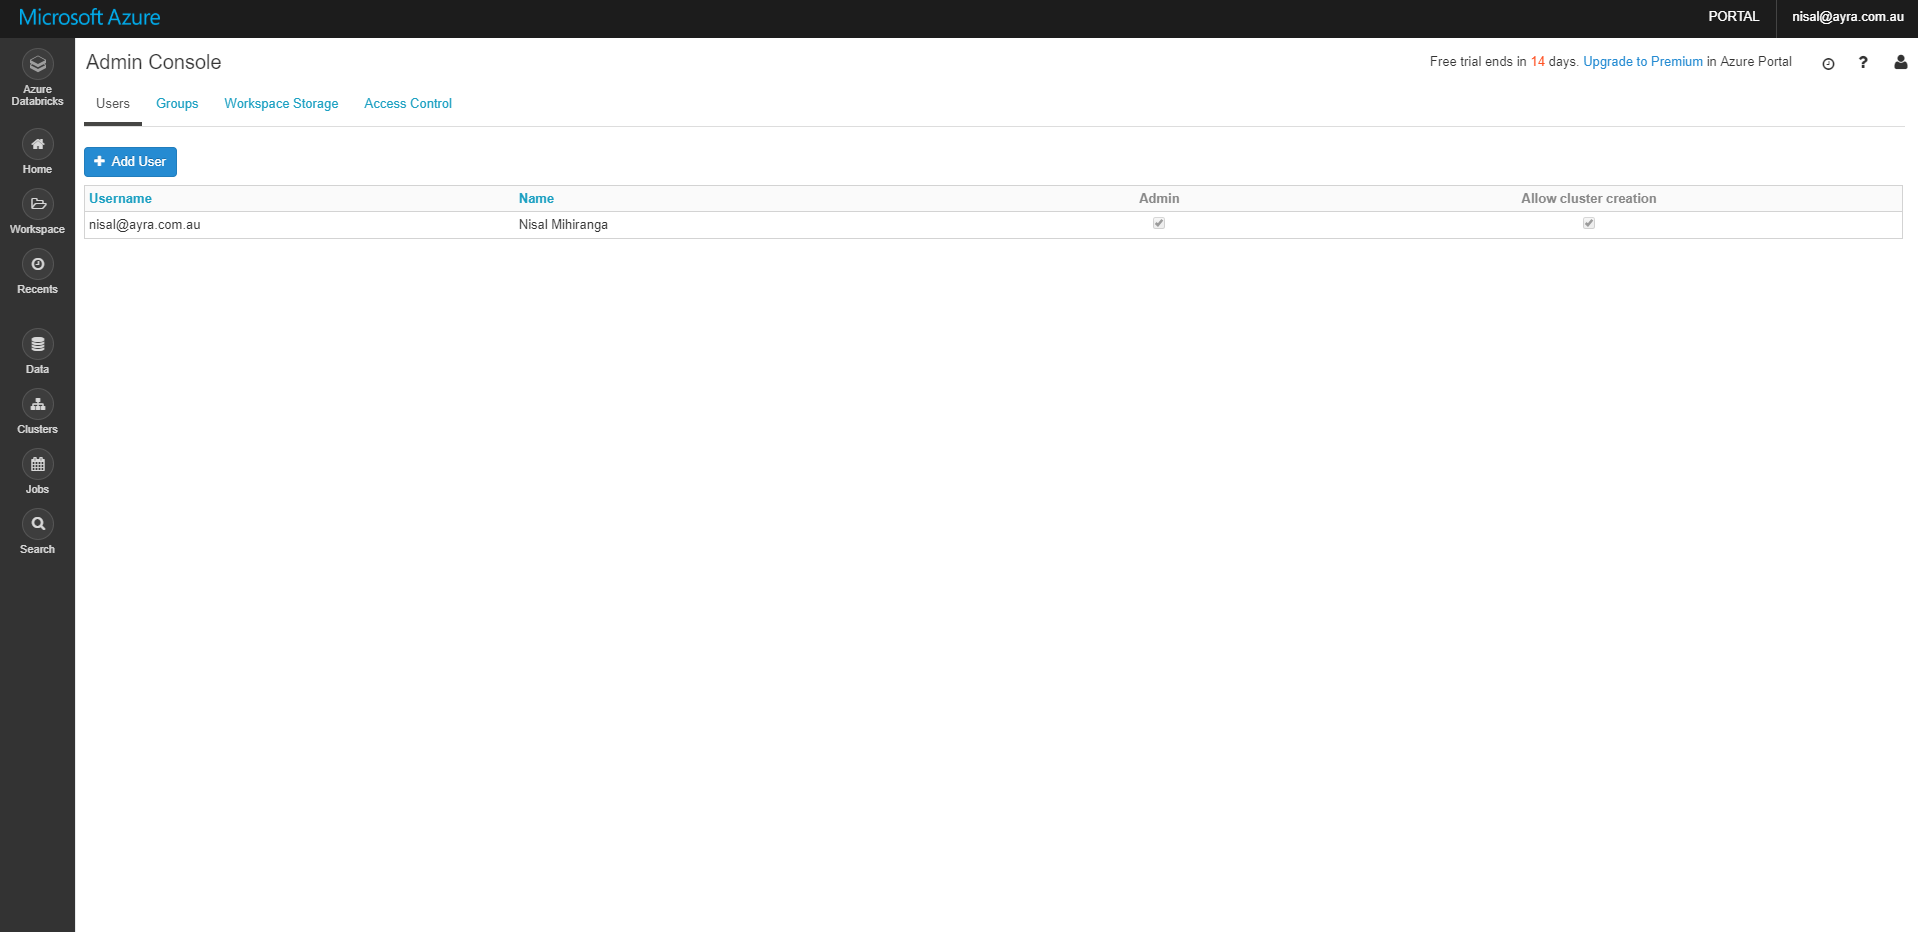
Admin Console
This admin panel allow you (administrator) to perform administrative tasks like, create user groups, manage access control, manage storage etc