AzureDevOps: CICD for PowerBI Reports
Introduction
Power BI is a business analytics service by Microsoft. It aims to provide interactive visualizations and business intelligence capabilities with an interface simple enough for end-users to create their own reports and dashboards. Currently, there is no direct way of Implementing CICD in PowerBI. Using the Publish menu from the PowerBI Desktop is the easiest way to deploy/publish a report as of now. In this article, we are going to see how we can implement source control and CICD for PowerBI using Azure DevOps.
Disclaimer
Note
All the information below is only provided for reference. This article is basically provides an overview on how to implment CICD for PowerBI using Azure DevOps.
The provided best Practices,approaches and solutions are not exactly given by microsoft.This solution is not supported under any Microsoft standard support program or service. It is provided AS IS without warranty of any kind. Microsoft or the author disclaims all implied warranties including, without limitation, any implied warranties of merchantability or of fitness for a particular purpose. The entire risk arising out of the use or performance of the sample script remains with you. In no event shall Microsoft, its authors, or anyone else involved in the creation, production, or delivery of the scripts be liable for any damages whatsoever (including, without limitation, damages for loss of business profits, business interruption, loss of business information, or other pecuniary loss) arising out of the use of or inability to use the sample script, even if Microsoft has been advised of the possibility of such damages.
Difficulties using direct publishing from PowerBI Desktop
There are some difficulties of publishing a PowerBI Report directly from PowerBI Desktop, that includes
- PowerBI Desktop (Client Tool) needs to be installed in all the Environment (Production,Dev,QA Servers)
- Without having a proper Source Version Control, the changes couldn't be tracked.
- The developer needs access to all the data sources across every environment. For E.g, if we have 2 environments say Dev and PROD and the data source is SQL server, then the developer needs access to both Dev SQL Server and PROD SQL Server.
- The developer needs to manually change the data source settings for every environment
Environments in PowerBI
Here whenever we are saying environment with respect to PowerBI, there are two ways it's possible depends on the users/organization
- Different PowerBI Tenant itself for each environment
*E.g, *
Dev Environment => Dev Azure Tenant
UAT/QA Environment => UAT/QA Azure Tenant
PROD Environment => PROD Azure Tenant
- Different PowerBI Workspaces with-in the Same/Common Tenant
E.g
Dev Environment => Dev Workspace
UAT/QA Environment => UAT/QA Workspace
PROD Environment => PROD Workspae
Best Practice
- If you are using Cloud Data sources you don't need a gateway, but for on-premises data sources, we should use the gateway. Another Advantage of using the gateway for cloud data sources is your credentials were encrypted and stored in the gateway server and not with PowerBI
- Try to reduce hardcoding your datasources in your reports (or) In other words, try to use Parameters for your data source as much as possible, Also keep in the mind updating parameter using PowerBI REST API don't support for the datasources like SQL,Oracle,Teradata & SapHana Direct Query
- Organize your Source Control folder structure based on your requirements/client-specific /data sources.
CICD Process for PowerBI Reports
As soon as we say the automation(CICD) the things that would come to mind be like using API / Cmdlets. Likewise, we can use PowerBI Rest API / PowerBI cmdlets for automating PowerBI reports.
Maik van der Gaag created a great (Azure DevOps) extension called PowerBI Actions, which makes things easier to handle the CICD for PowerBI. We are going to see how this extension would be helpful for us in the CICD process., This extension will be handly in most way but in sometimes we need to do some additional steps that won't support by this extension for now,so we also going to use some PowerShell Scripts.
Sample PowerBI Reports and Environment Specification
For the demo purpose here you will see two different powerbi reports deploying in two different environments (workspace), keep this as a reference you can do use your own reports.
**Dev Environment Workspace ** : PowerBI_CICD
Prod Environment Workspace : PowerBI_CICD_PROD
| PowerBI Report Name | Data Source Type | Dev data source | PROD data source |
| AdventureReports.pbix | Azure SQL Database | devenvironment.database.windows.net;devdb | prodenv.database.windows.net;proddb |
| Products.pbix | Odata | https://services.odata.org/V3/OData/OData.svc/ | https://services.odata.org/V3/(S(2z5tfelmekddgffwed3sq4ve))/OData/OData.svc/ |
PowerBI Reports in Azure Repo
The initial step here is to set up a source control version for our PowerBI Reports (.pbix files). In this article, we will see on how to setup the Azure Repo as version control for our PowerBI Reports. Here you can also use Version control like BitBucket,TFVC,GitHub ,SubVersion etc., instead of Azure Repo.
See the Reference section on how to use TFVC for PowerBI Reports
- Create a new Azure Repo

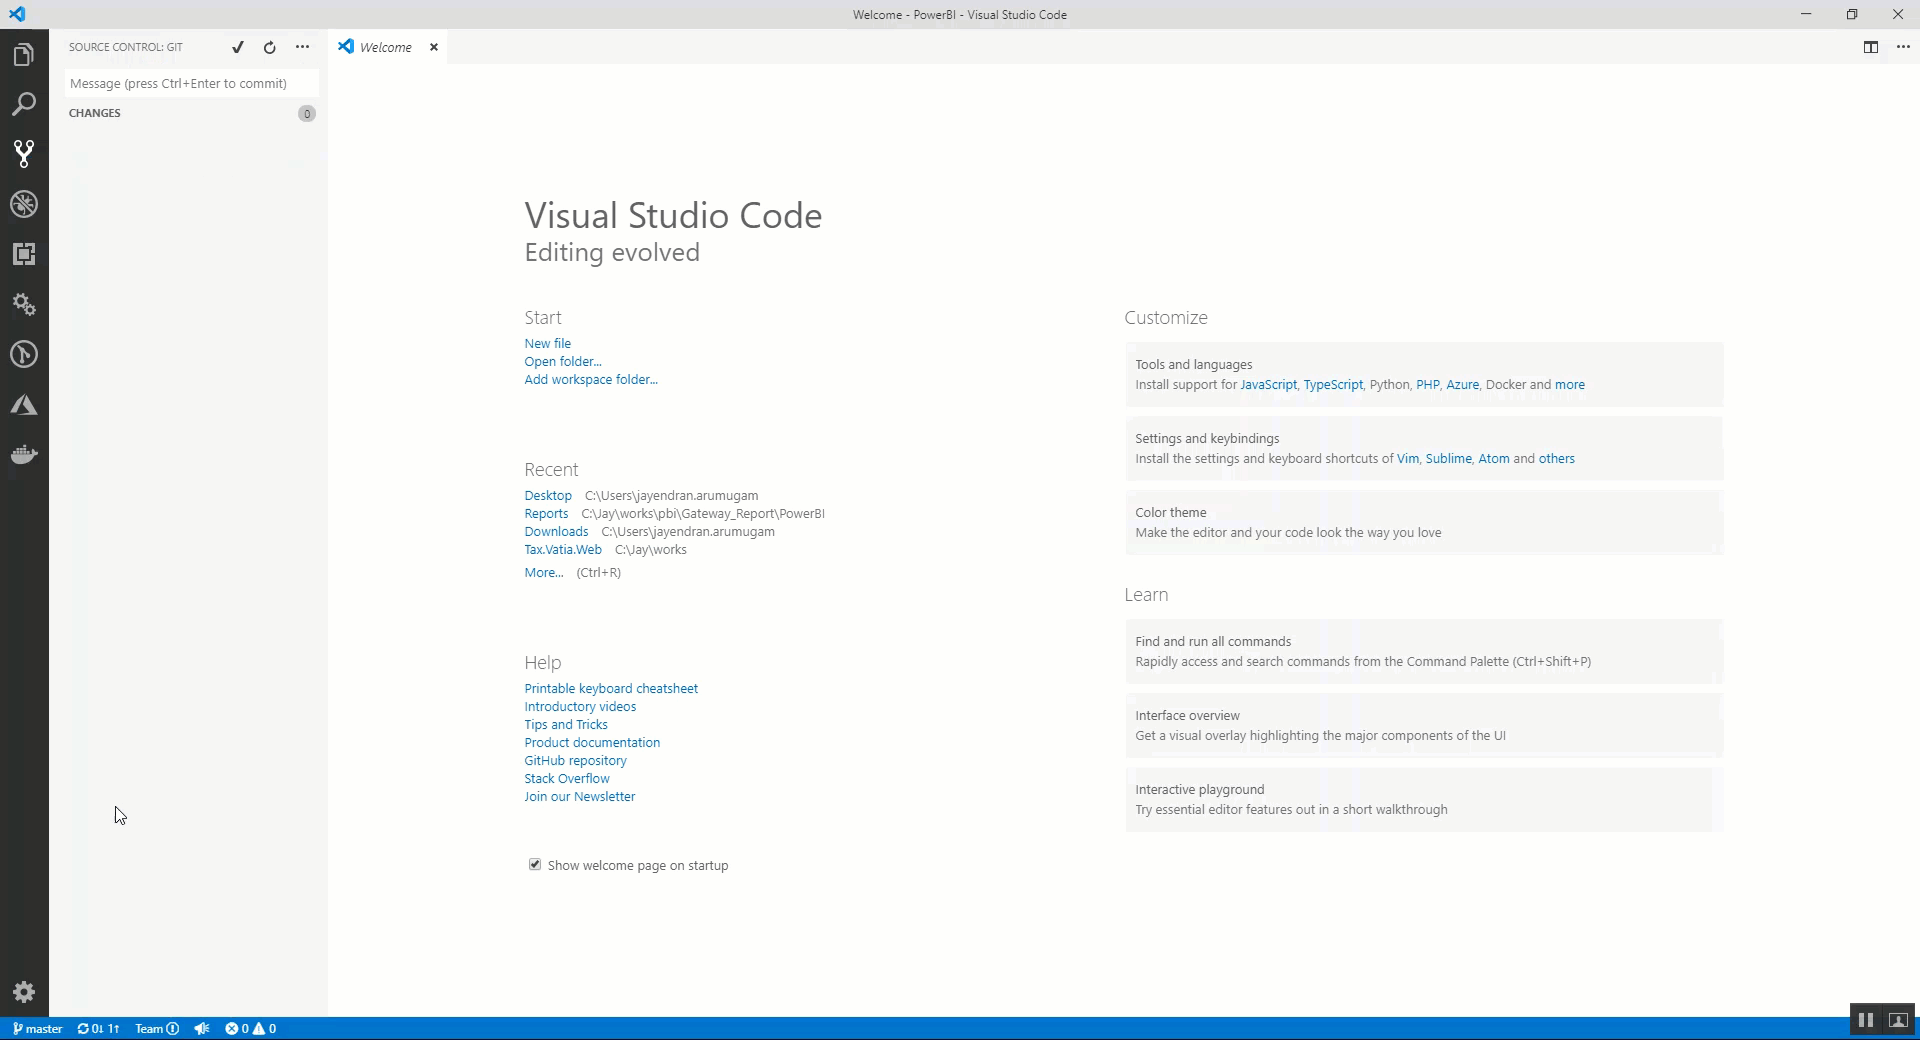
- Clone the repo in your local and commit your pbix files in the Azure Repo. Here you can see how you can do that using VS Code
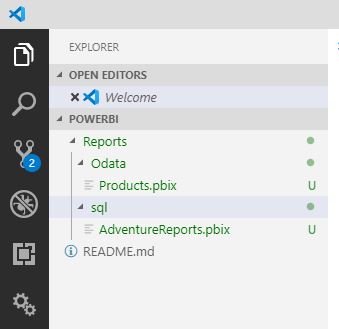
Commit the changes

Push the Commit
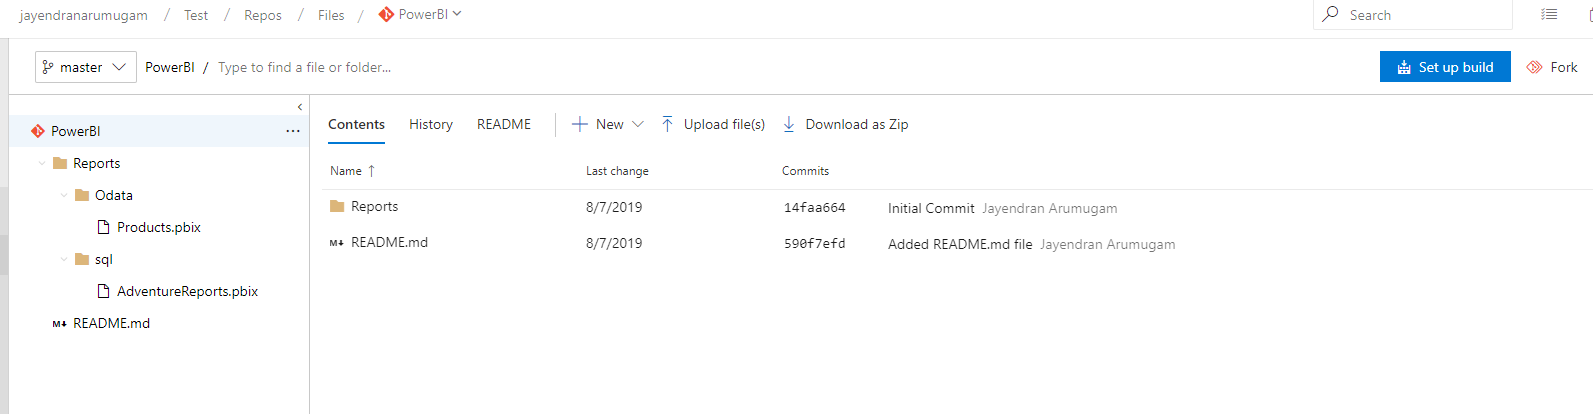
- Once you pushed the commit, you will see your commit in the azure repo (like below)
Azure Build Pipeline (CI) for PowerBI
Now we had our PBI reports in the Azure Repo's. It's time to setup the CICD.Let see how we can setup the Continous Integration
Setup the CI is actually very easy, We just need to include 2 task in the Build pipeline
- Copy Task
- Publish Task
Classic Editor with-out YAML
Copy Task to Staging Artifact

Publish Task

Using YAML
# Starter pipeline
# Start with a minimal pipeline that you can customize to build and deploy your code.
# Add steps that build, run tests, deploy, and more:
# https://aka.ms/yaml

trigger:
- master

pool:
  vmImage: 'ubuntu-latest'

steps:
- task: CopyFiles@2
  displayName: 'Copy Files to: Staging Artifact'
  inputs:
    SourceFolder: Reports
    TargetFolder: '$(Build.ArtifactStagingDirectory)'
    OverWrite: true

- task: PublishBuildArtifacts@1
  displayName: 'Publish Artifact: drop'
Azure Release Pipeline (CD) for PowerBI
This release pipeline is just a demo purpose, actual release pipeline and tasks may varies depends on the various use-cases based on the end-user.So this section is just gives you a basic understanding on how you can use the existing features in azure devops to implement the Continous deployment of PowerBI Reports.
Autentication for PowerBI
The autentication for PowerBI can be done in 2 ways
- Master Account : This basically username and password autentication along you need to reg an application in AAD to access Powerbi API's
- SPN (Service Principal): This is basically reg you application in AAD and add your app in powerbi portal. Read more
Kindly do remember that there are many difference between master account vs service principal autentication

Using PowerBI Action Extension (Master Account Autentication/SPN Autentication)
As a first step you need to install this extension from marketplace(https://marketplace.visualstudio.com/items?itemName=maikvandergaag.maikvandergaag-power-bi-actions).Using PowerBI Action Extension we can easily do the operations like below from Azure Pipeline,
- Create Workspace
- Delete Workspace
- Add a new Admin User to worksapce
- Refresh a Dataset
- Update DataSource Connection
- Upload PowerBI Report
For this demo we are planning to implement the CD for 2 Environments 1. Dev and 2. PROD
DEV Environment
After adding the PowerBI Action Task into our Release Task, we need to configure the PowerBI Service connection, as this is using master account approach, we need to provide username,password and clientid


PROD Environment
For the Production Environment we need to deploy the reports as well as need to change the datasources.
Deploy Reports


**Update SQL DataSource **

Update Odata DataSource
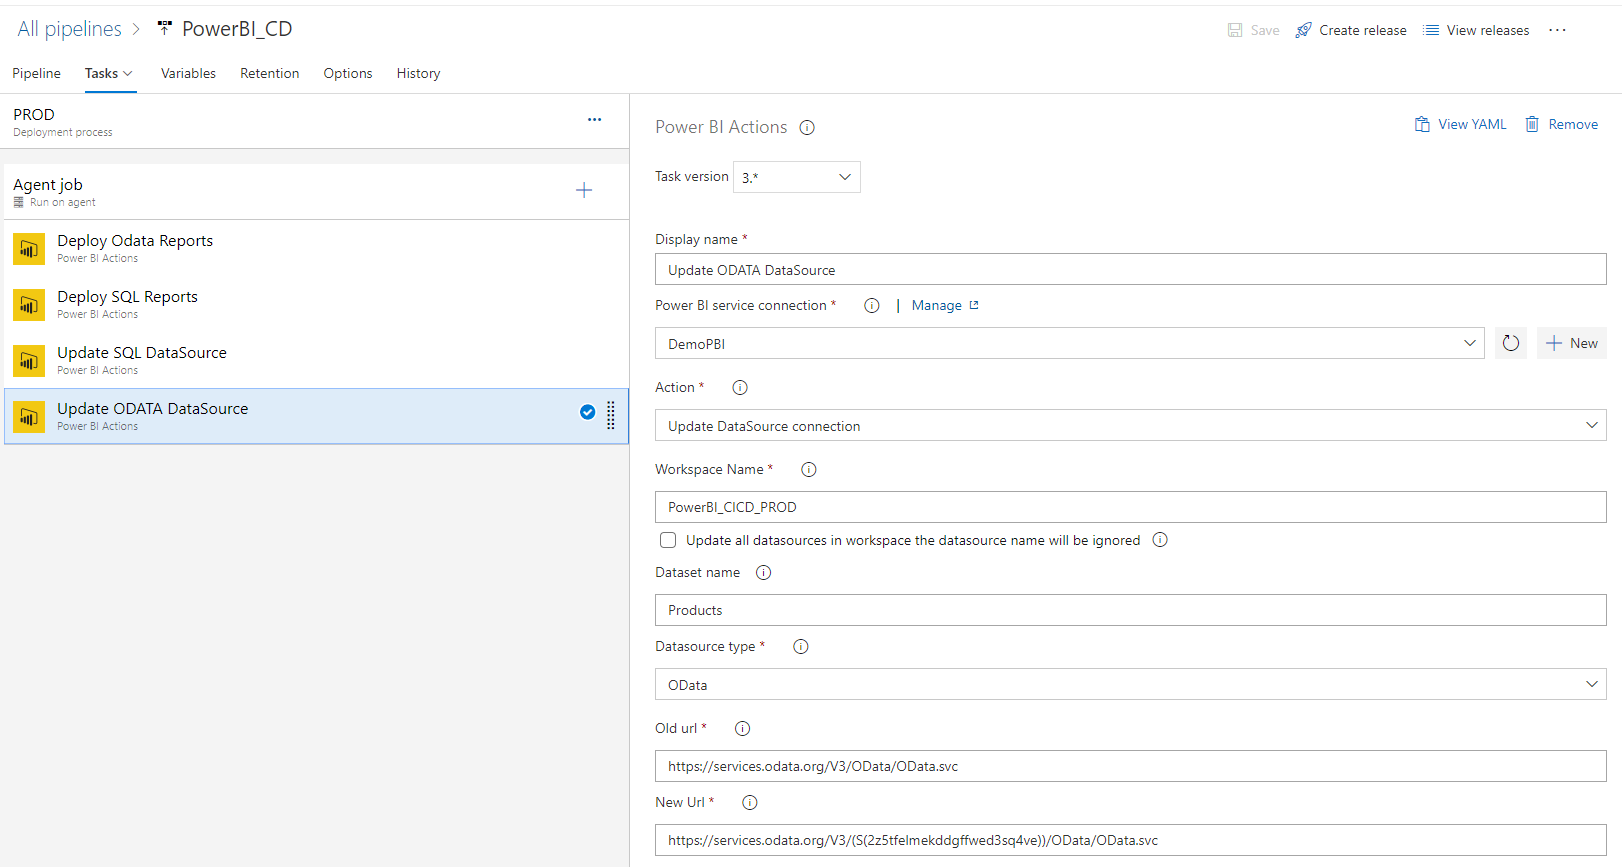
With this you can able to deploy the reports and update the datasource, but the restriction is you couldn't able to update the credentials for the updated datasource
Current limitation of this extension: (As of 1st Dec 2019)
The following features are not yet supported by this extension, but we can expect to include in near future.
- Parameter updation
- DataSet TakeOver
- Update Credentials for the datasource
Using PowerShell Scripting in Azure DevOps (SPN Autentication)
Using Powershell scripts we can do all the possible deployments and break the limitations of the PowerBI Action Extension.
Here we are not going to see all the possbile actions from PowerBI instead we will see how we can use Powershell script to overcome the limitations of the above extension
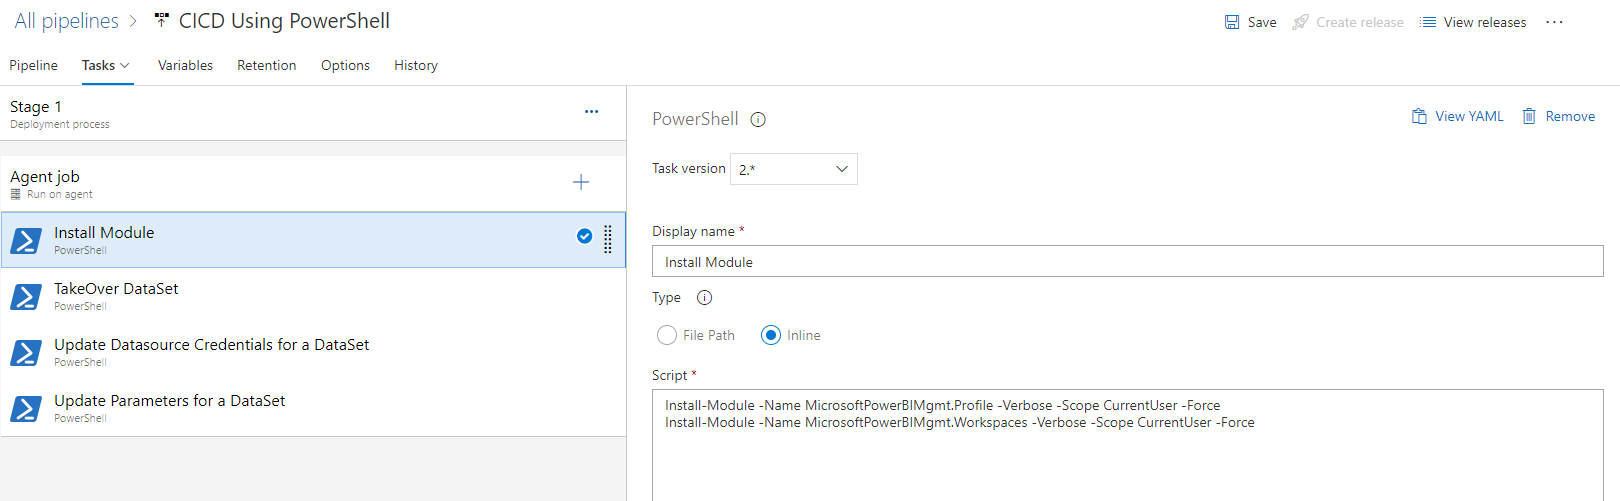
Install the Required Modules (For Azure DevOps Hosted Agent)
If you are using hosted agent then you should install the required modules, if you already have a self-hosted agent which already having the required modules then you can skip this step
TakeOver DataSet

Update Datasource Credentials for a DataSet

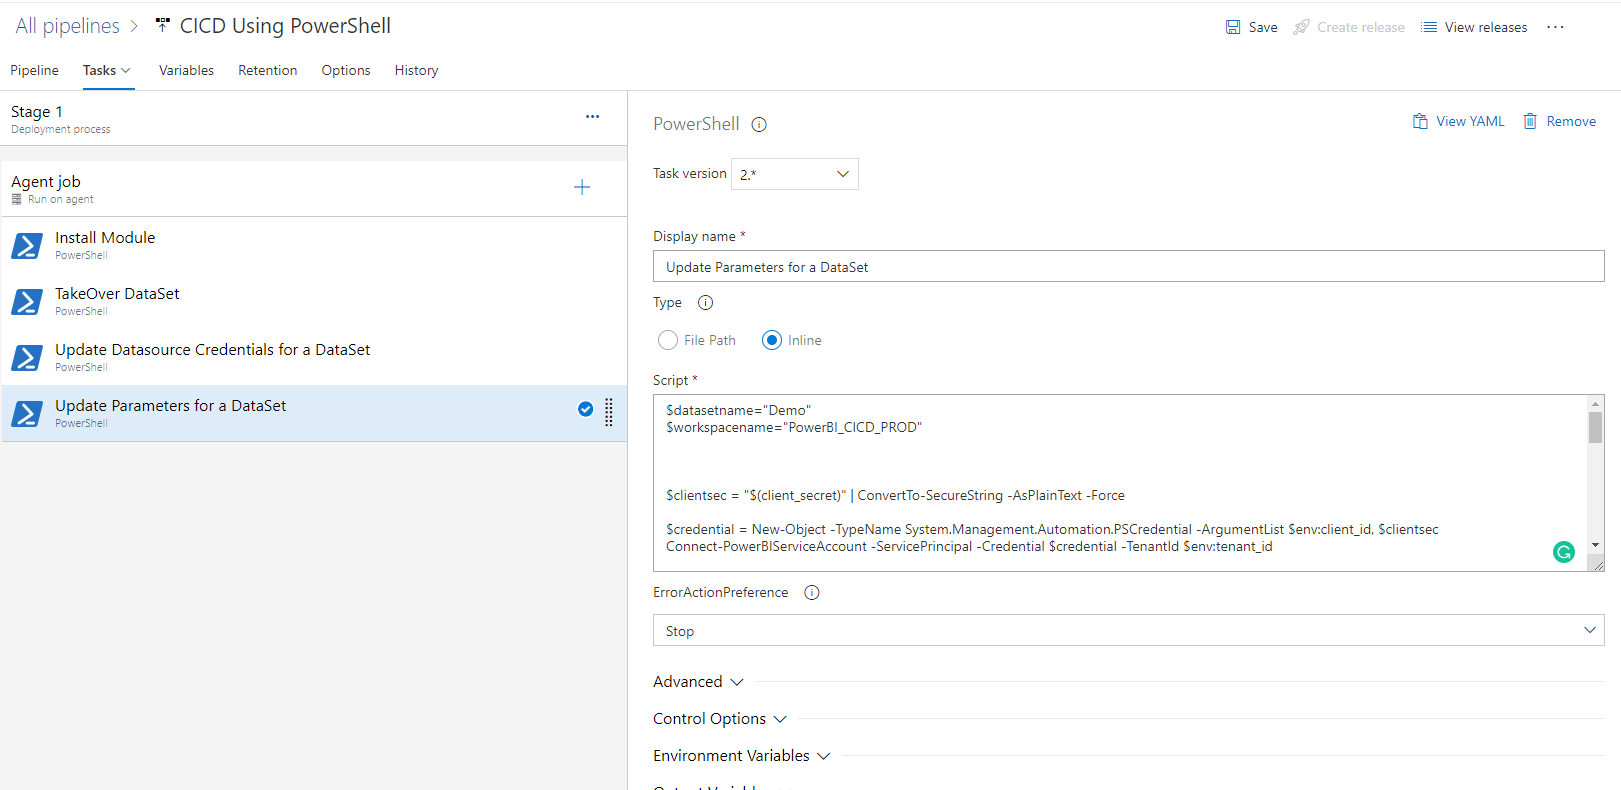
Update Parameters for a DataSet
Variables Used from Azure DevOps

Download Full Script
You can download the full script from https://gallery.technet.microsoft.com/AzureDevOps-CICD-for-fefd58b8
Conclusion
PowerBI is still an unmature product which will always keep updating, so we need to try to utilize PowerBI API's and PowerShell scripts to automate the CICD. This article has been gave an overview of how you can implement CICD, using this as a reference you can enhance it much more depends upon your needs.
References
- https://automationsynd.github.io/powerbi/2019/01/02/invoke-powerbi.html
- https://github.com/maikvandergaag/msft-extensions/tree/master/azuredevops/powerbiactions/powerbiactions
- https://msftplayground.com/2018/12/administrating-and-publishing-power-bi-resources-via-azure-devops/
- https://www.fourmoo.com/2019/07/23/setting-up-version-control-for-my-power-bi-desktop-files-pbix-with-no-additional-cost-part-1/
- https://www.fourmoo.com/2019/08/06/using-version-control-with-power-bi-desktop-files-check-in-check-out-view-or-revert-to-previous-versions-part-2/
- https://data-marc.com/2019/11/12/versioning-and-ci-cd-for-power-bi-with-azure-devops/