ASP.NET Core: Getting Started (Part 3)
Introduction
This article explains about the ASP.NET core Basic, Project modification, Advance commands and create, build and run the console application using CLI commands. Reading the ASP.NET Core previous part of this articles using the below link before reading this article.
Definition
ASP.NET Core is a cross-platform and open-source framework. ASP.NET Core supports Windows, Mac or Linux operation system. It is used to developing with modern, cloud-based and high-performance web application.
ASP.NET Core CLI Commands
ASP.NET Core command-line interface is a cross-platform tool for creating, restore packages, building, running and publishing ASP.NET Core application.
ASP.NET Core Command Line Interface Installed with .NET Core SDK so we do not need to install for separately for developing application. Read the first part of this article using above link, and it explained how to install .NET Core SDK for development.
We can verify whether CLI is installed or not using the command prompt. Open the command prompt and type “dotnet” and press enter then we will be getting the output like below screenshot.

If we entered the wrong command or not installed the CLI then will be getting the error like below screenshot.

We can get the help for all command through .NET core CLI. If using “dotnet --help” command we can get all list of commands. Type “dotnet --help” and press enter in the command prompt we will be getting following output.

There are following three different types of commands are in ASP.NET core.
- Basic Commands
- Project Modification Commands
- Advanced Commands
Basic Commands
Basic commands are very important commands in ASP.NET Core and we are using basic commands often. There are following commands are available in the basic commands.

Project Modification Commands
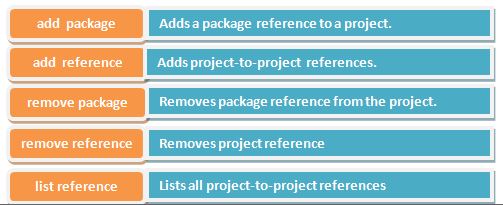
We can add and remove the packages, references and list all project references so simply can modify our projects using following commands.
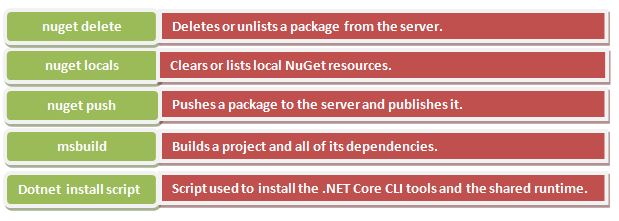
Advanced Commands
Advance commands are using for delete, clear, push, build, and install the script in the out application. Those commands are using at the advanced level. There are following commands using in the advanced.
Creating New Project Using .NET Core CLI Commands
We are going to create the new ASP.NET Core application using .NET Core CLI Commands step by step.
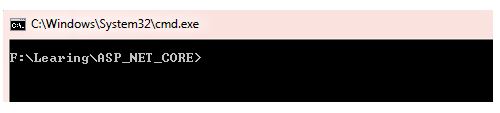
Step 1
First, choose your application path that where we are going to save the application. Go to your path in the command prompt.
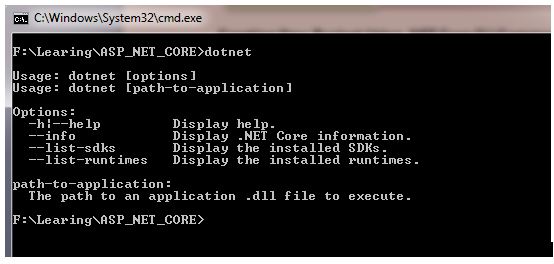
Step 2
Check the .NET Core CLI command is whether working or not. We can check using “dotnet” command in the specified path.
Step 3
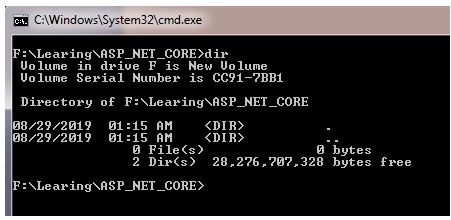
Type the “dir” in the specified path in the command prompt and check the count of files and its size. Noe we do not have any files in the directory.
Step 4
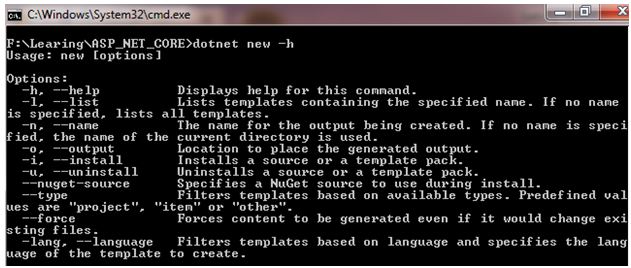
We are going to create the console application using CLI command. Creating a new console using CLI so type “dotnet new console” command in the command prompt. Before creating new console we need to know about “new” command so type “dotnet new -h” then we will get the detailed description with new command for creating different type of application.

We are going to create Console Application and it is short name is a console, console support the C#, F#, and VB languages and it is to tag is Common/Console. Now create the console application using CLI command “dotnet new console”

Once run the above command and get the message as “The template ‘Console Application’ was created successfully”. After creating the console application restore command will execute automatically for restores the dependencies and tools of a project.
Step 5
We can check the count and size files in the specified directory. Again type “dir” command for checking the file count and size.

Step 6
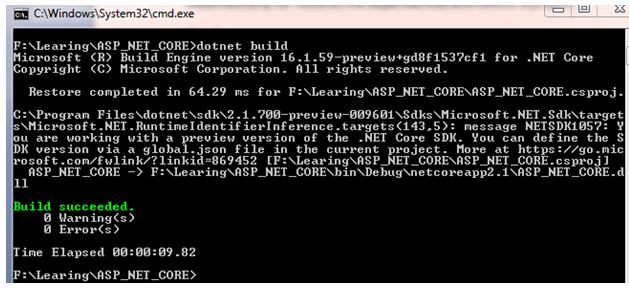
We are going to create run the console application which we have created. Type “dotnet build” in command prompt to build the application. We will get the below message after build the console application successfully.
We are going to run the application using “dotnet run” after building the application successfully. Once run the application, we are getting the output looks like below screenshot.

Step 7
We can edit the code using any IDE (Integrated Development Environment) like Visual Studio Code, Visual Studio, Notepad++ or Notepad.
We can open the class file using the command “notepad FileName.Extension .”, for example type the command in the specified path like “notepad Program.cs .” and press enters then “Program.cs” file will open in notepad file.

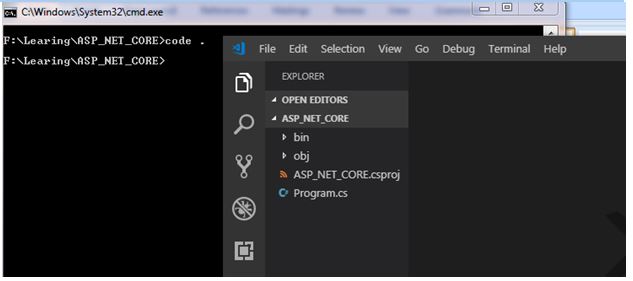
We can open the entire console application in Visual Studio Code using the command “code .”.
We can open the console application from the Visual Studio. Go to file choose the application location and open the console application.

Conclusion
This article explained the ASP.NET core Basic, Project modification, Advance commands and create, build and run the console application using CLI commands. I hope this really helps to new learners, students, and freshers.