Azure Cognitive services: Read sentiments in emails
Introduction
In this article, we will see how to check the sentiments of the email we have received or composed using Azure cognitive services - sentiment analysis & Outlook add-ins.
Theory
Using Azure cognitive services - Sentiment analysis, on can check whether the sentiments of a text / paragraph are Positive, Negative or Neutral. Once we send the text to the sentiment analysis API, we receive a score in response which can range from 0 to 1. 0 being negative, 1 being positive & 0.5 is considered as Neutral.
Architectural Overview
Outlook add-in reads the email body and post it to the Cognitive services - Text Analytics (Sentiment analysis) API and receives a score in return.

Getting Started
The overall topic is divided into two main subsection
1) Create Azure Cognitive Service Text Analytics - To check the sentiment of the text passed.
2) Create Outlook Add-in - To read the email body and call the Text analytics API.
Create Azure Cognitive Service Text Analytics
Follow the below steps to create Azure cognitive service - Text analytics using Azure portal.
1) Open Azure Portal by following the url https://portal.azure.com
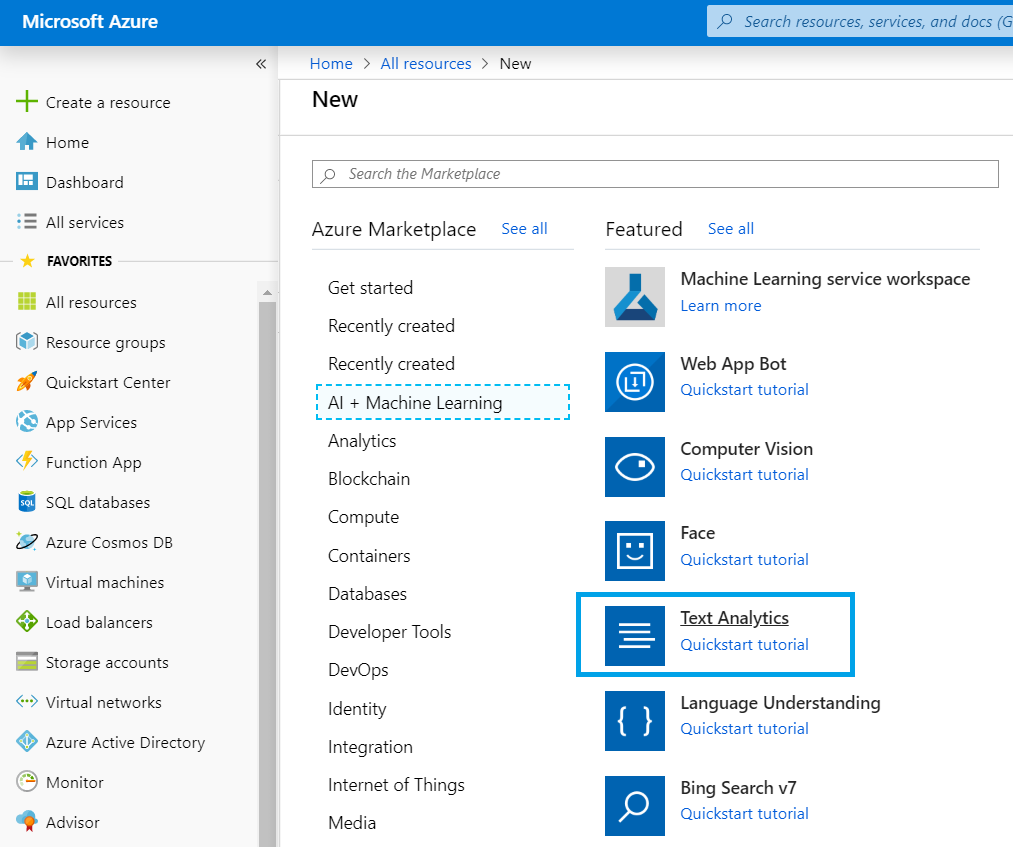
2) Go to All resources & select AI + Machine learning and click Text Analytics.
3) Provide the a name,location, pricing tier (Based on the usage) & resource group. Click on Create.
4) After the service is successfully created, go to all resources and click on the the services which is created.
Make note of the client id and service end point.
Create Outlook Add-in
To proceed with creating Outlook Add-in, we need to install yeoman generator for office Add-in.
Run the below command in powershell.
npm install -g yo generator-office
After the generator is successfully installed, Run the below command to create a Add-in Project in a specific folder.
yo office
Provide the information as specified in the image below.

Open the project in visual studio code by entering the below command
code .
Replace the code present inside body tag of taskpane.html file with below code. Here we are specifying an element with id "item-subject" which we will utilize to append the text based on the score that we will receive from text analytics. taskpane.html file can be located in src > taskpane folder.
<header class="ms-welcome__header ms-bgColor-neutralLighter">
        <img width="90" height="90" src="../../assets/logo-filled.png" alt="Contoso" title="Contoso" />
    </header>
    <section id="sideload-msg" class="ms-welcome__main">
        <h2 class="ms-font-xl">Please sideload your add-in to see app body.</h2>
    </section>
    <main id="app-body" class="ms-welcome__main" style="display: none;">
        <h2 class="ms-font-xl"> You can now check your email sentiments! </h2>
        <h2 class="ms-font-su"><label id="item-subject"></label></h2>
        <div role="button" id="run" class="ms-welcome__action ms-Button ms-Button--hero ms-font-xl">
            <button class="ms-Button">
                <span class="ms-Button-label">Check Now</span>
            </button>
        </div>
    </main>
Insert the below script inside taskpane.ts file. Here, we are calling the text analytics api and passing the email content to it in order to receive the score.
Note: Replace the URL and the subscription key that were noted in previous section.
function getSentiments(oEMailBdy) {
  return new  Promise((resolve, reject) => {
    checkmailSentiment(oEMailBdy).then((data: any) => {
      // let sentiments = data.documents[0].score;
      resolve(data.documents[0].score);
    });
  });
}


function checkmailSentiment(mailbody) {
  console.log(mailbody);
  return new  Promise((resolve, reject) => {
    var params = {
      // Request parameters
      "showStats": "true",
    };

    $.ajax({
      url: "https://<<API URL>>.cognitiveservices.azure.com/text/analytics/v2.1/sentiment?" + $.param(params),
      beforeSend: function  (xhrObj) {
        // Request headers
        xhrObj.setRequestHeader("Content-Type", "application/json");
        xhrObj.setRequestHeader("Ocp-Apim-Subscription-Key", "<<subscription key here>>");
      },
      type: "POST",
      async: false,
      // Request body
      data: JSON.stringify({
        "documents": [
          {
            "language": "en",
            "id": "1",
            "text": mailbody
          }
        ]
      }),
    })
      .done(function (data) {
        resolve(data);
      })
      .fail(function (error) {
        reject(error);
      });
  });
}
Insert the below script inside run function which is predefined in the project. Here, we are calling the function specified in the previous step and passing the parameters
Office.context.mailbox.item.body.getAsync(
    "text",
    function callback(result) {
      getSentiments(result.value).then((oSentiments: number) => {
        if (oSentiments > 0.4 && oSentiments < 0.6) {
          document.getElementById("item-subject").innerHTML = "<b>Sentiments in the email are Neutral</b><br/>";
        }
        else if  (oSentiments <= 0.4) {
          document.getElementById("item-subject").innerHTML = "<b>Sentiments in the email are Negative</b><br/>";

        }
        else {
          document.getElementById("item-subject").innerHTML = "<b>Sentiments in the email are Positive</b><br/>";
        }
      })
    });
Since we are using ajax call using jquery, we need to refer it in the taskpane.html file. Add the below tag in head tag.
<script src="https://code.jquery.com/jquery-3.4.1.min.js"></script>
Also declare $ inside taskpane.ts by adding below line on top.
declare const $;
Save all the files.
Follow below steps to add manifest file to Outlook for the option to check the sentiment be available in the task pane.
1) Open Outlook and click on Get Add-ins.

2) Click on My Add-ins. Then click on Add a custom add-in under Custom add-in category.

3) Select Add from file and select Manifest.xml file located in the root directory of the project. Click on Install if warning message pops up.
Run the below command in powershell to host of add-in locally.
npm start
Now, open and email in the outlook and select show task pane. To check the sentiment of the email, click Check now. Result should appear on the screen.
For more information on the code or add-in, refer the Download this solution and Glimpse of the Outlook Add-in section.
Conclusion
Thus, in this article, we saw how to create an outlook add-in and use it to call Azure Cognitive service to check sentiments of the email received.
Glimpse of the Outlook Add-in