ML.NET Model Builder: Getting Started (using ASP.NET Core)
Introduction
In this article we will see in detail on how to create ML.NET Application using ML.NET Model Builder and use the trained model to predict the result in ASP.NET Core.
ML.NET Model builders makes our work easier on developing ML.NET application as to build, train and deploy the models more easily for all kind of ML .NET Supporting models as well us for developing the custom models. If you are new to ML.NET means kindly read my previous articles related to ML.NET. The latest version of ML.NET also established to develop easy custom ML using AutoML and with ML.NET Model builders.
Before getting started with the ML.NET, lets understand the basic concept of the ML.NET which need to be used to develop our Machine learning applications.
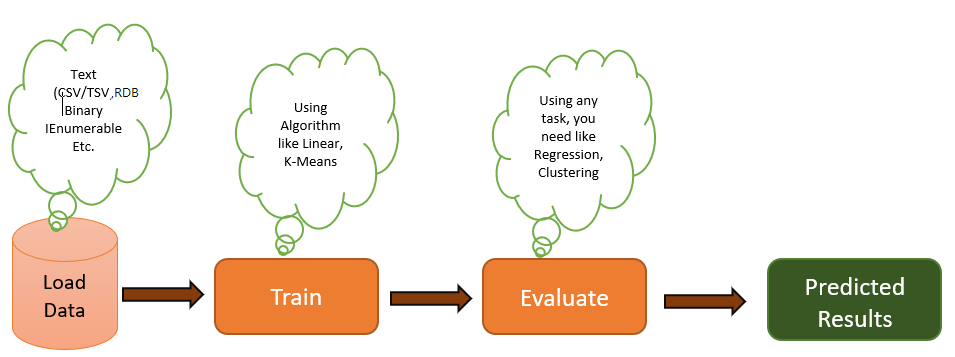
Load Data: For the perfect prediction of results we need to give lot of data to train the model. In ML.Net we can give the data for both train and test by Text (CSV/TSV, Relational Database.
Train: We need to select the right algorithm to train the model. depend on our need we need to pick the correct algorithm to train and predict the results.
Evaluate: Select the Machine learning type for our model training and prediction. If you need work with segment then you can select the Clustering model, if you need to find the price of stock prediction you can select the Regression and if you need to find the sentiment analysis then can select the Classification model.
Predicted Results: Based on the train and test data with trained model the final prediction will be displayed using the ML.NET application. Trained model will be saved as the binary format which can also be integrate with our other .NET applications.
Now using ML.NET model builder its easy to Load the data either from CSV, excel or from the Database, Select and train our preferred available ML.NET Models or go with Custom model training. Evaluate the model and finally predict and display the trained model result to any of our .Net applications now in this article lets see on trained and predicted results we will be displaying in our ASP.NET Core application.
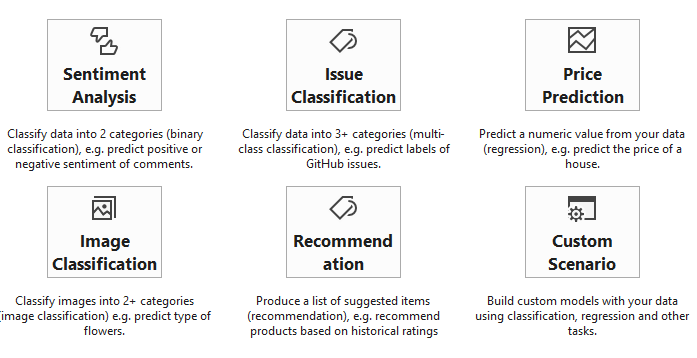
In ML.NET Mode builder we can see the following scenario (Note Microsoft can add more scenario as it might be different from each version )
In this sample program, we will be using ML.NET Model builder to predict the Item Stock using the Custom Scenario.
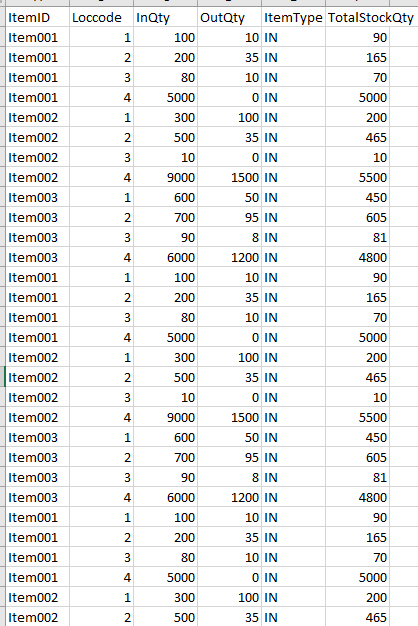
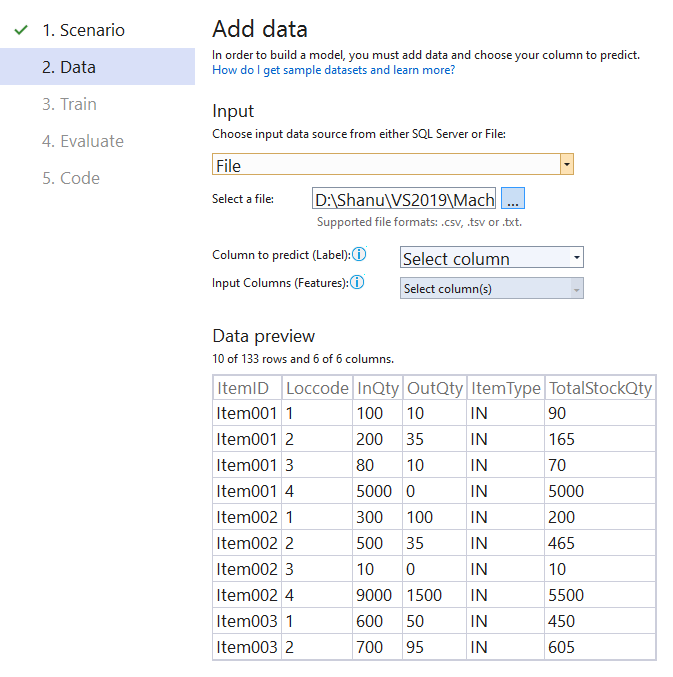
Item Stock data will be look like this and here we have the columns as Item Code, Location Code, Warehouse in Quantity, Warehouse Out Quantity, Item Type and finally Remaining Item total Stock quantity of each item in each location. We will use the below dataset to train ,evalvuate and predict the result using the ML.NET Model builder.
Prerequisites
Visual Studio 2017 15.9.12 or later
Code Part
Step 1 - Create ASP.NET Core Application
(Note I have used the Visual Studio 2019)
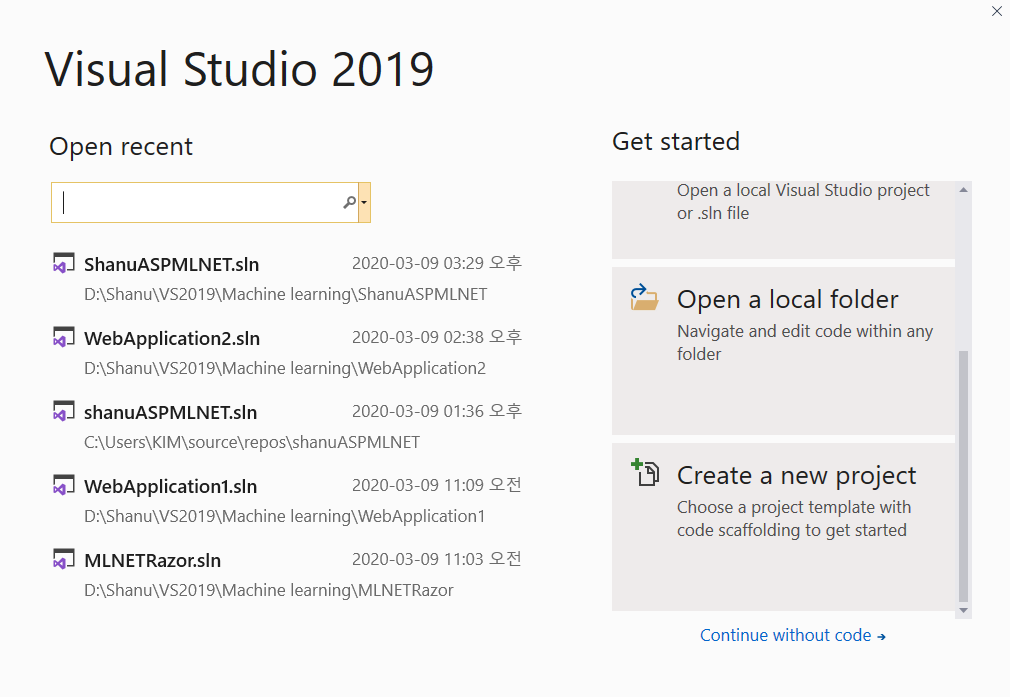
After installing the prerequisites, click Start >> Programs >> Visual Studio 2019 >> Visual Studio 2019 on your desktop. >> Click Create a Project. Click continue.
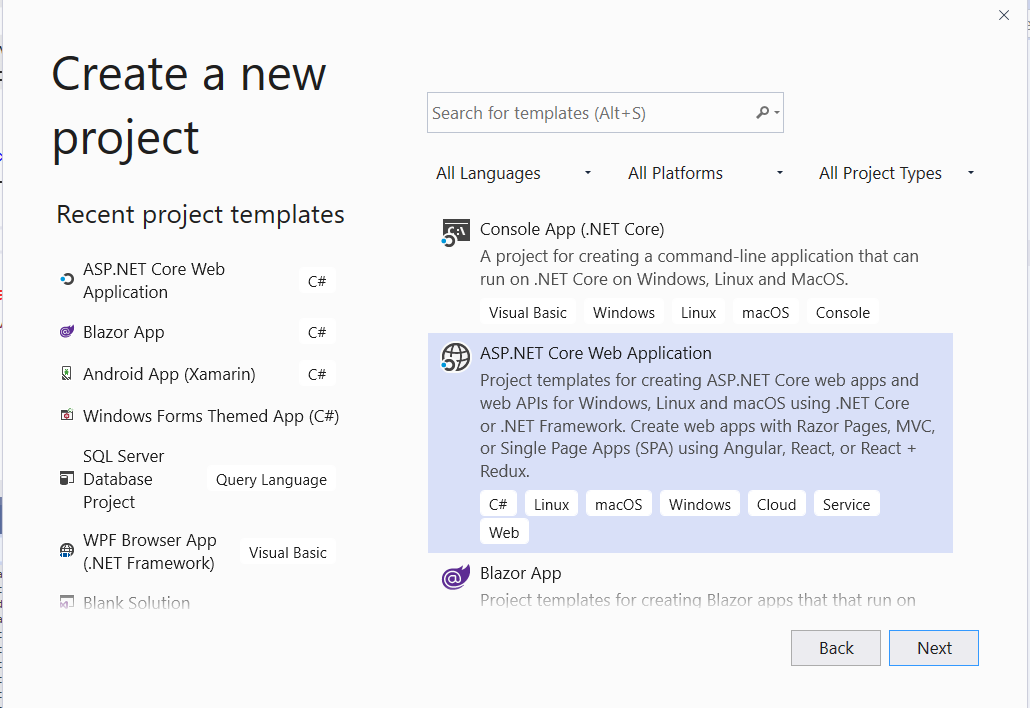
Select ASP.NET Core Web Application and click Next
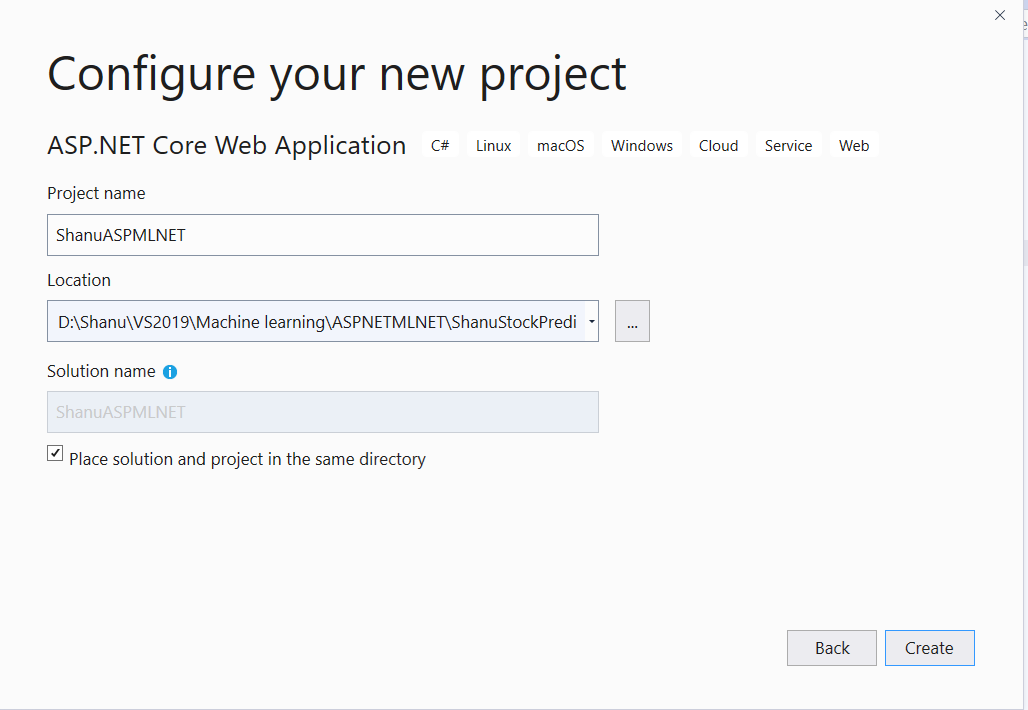
Select the Project Folder and check the Place solutions in the same directory and on create button.
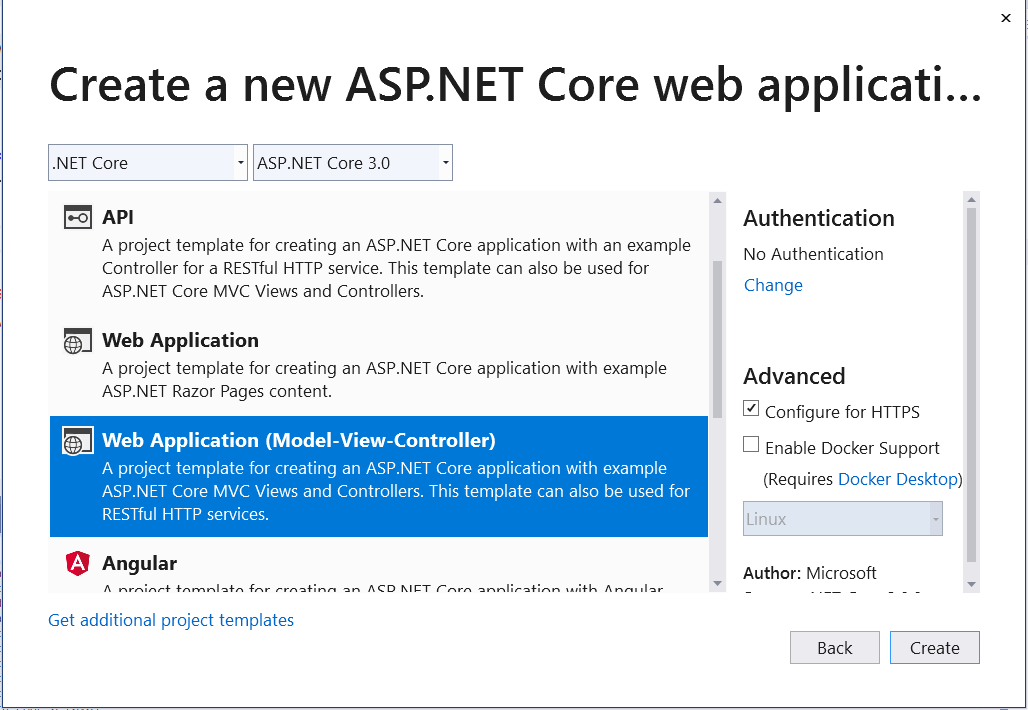
Now select Web Application (Model-View-Controller) and click Create button.
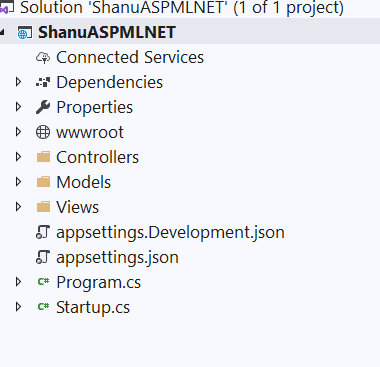
We can see our ASP.NET Project has been created with Controllers/Models and Views.
Step 2: Working with ML.NET Model Builder
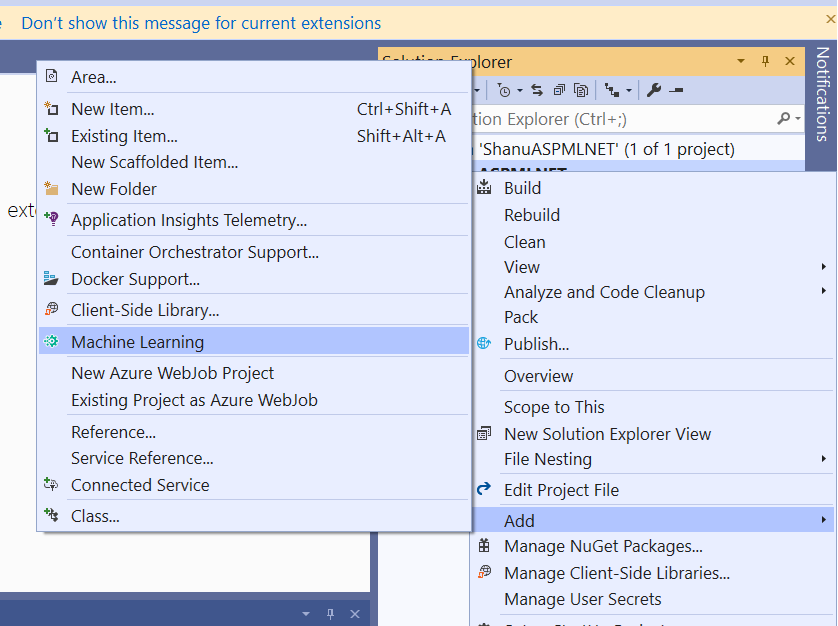
Right click on the project and select Add and click on the Machine Learning.
We can see as the ML.NET Model Builder

In ML.NET Model Builder left side we can see the menu like Scenario, Data, Train, Evaluate and Code
Scenario: From the Scenario you can see the available ML.NET Models for the development example like Binary classification, Image Classification and etc. also you can see the Custom Scenario to build our own custom models. In our demo we will be using the custom model.
Data: You can load the data for training from the file or from the Database.
Train: Select the model to be trained
Evaluate: Evaluate will be performed after the model training completed. In evaluate, the trained model will be compared with the test data to compare and predict the final result to be produced.
Code: Finally, the code will be used to create for the trained model and use it to our any application we will be using final trained and evaluated model code for our ASP.NET Core application to predict and disp0lay the result for Total Item stock Quantity available per location.
Custom Scenario:
Here we have selected the Custom scenario of our demo application in order to predict the Stock quantity.

Data:
After selecting our Scenario, we can see the next menu will be displayed as here we have selected the Custom Scenario and next the Data menu has been displayed and from here, we have the option to load the data to be trained as from the file or from the Database. Here we will be using the file to load the data.
Click on the Select a file and load the file.We can see here as we have loaded the file to be trained.
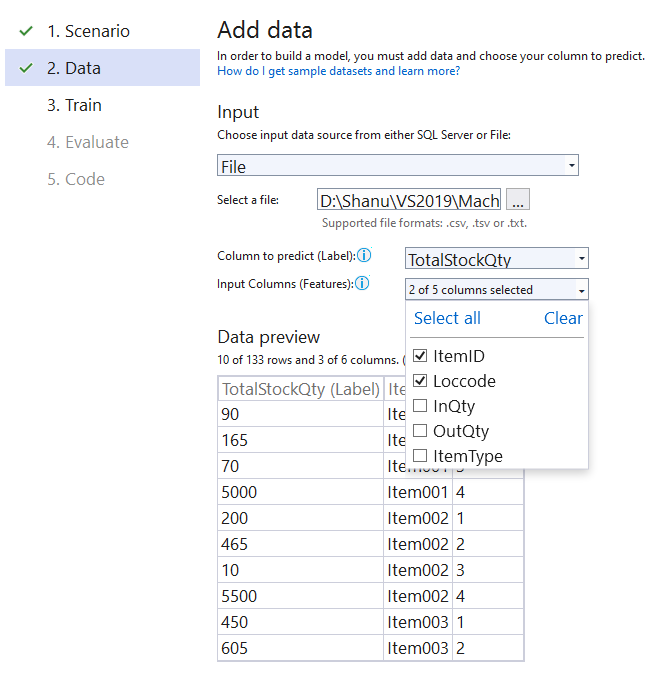
Next we need to select the column to be predict (In Machine Learning the prediction column is called as the Label).In our demo we are going to predict the TotalStockQty Also we need to select the Input column given b y us to predict the result, Here for our demo we need to predict the Stock Qty based on the Item and by the Location. So here we have selected Input columns (Feature) columns as ItemID and Loccode.
Train:
After that click on the train button to train the model with the loaded data.
In the train screen we can see the Machine Learning tasks to be selected for training our model and also we can see the time to train the model in seconds to be selected.
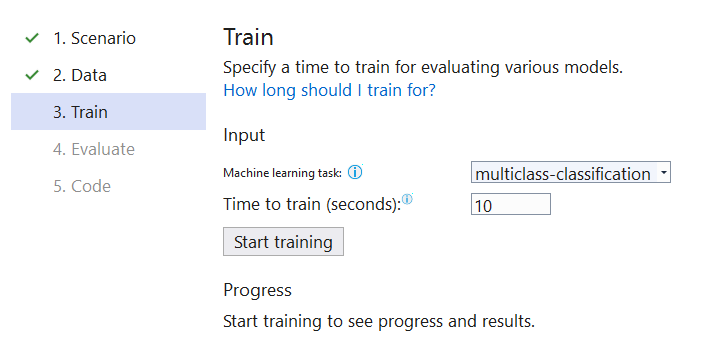
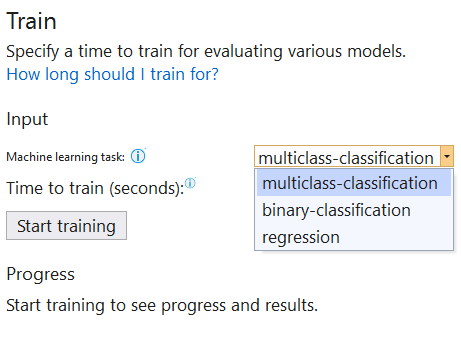
Machine Learning Task:We can see for the custom scenario the task available for ML.NET is multiclass-classification, Binary-classification and regression ,Here for our demo we have selected the multiclass-classification.
Here our file size is very less and up to 10mb data size we can select approximate 10 seconds to train the model.
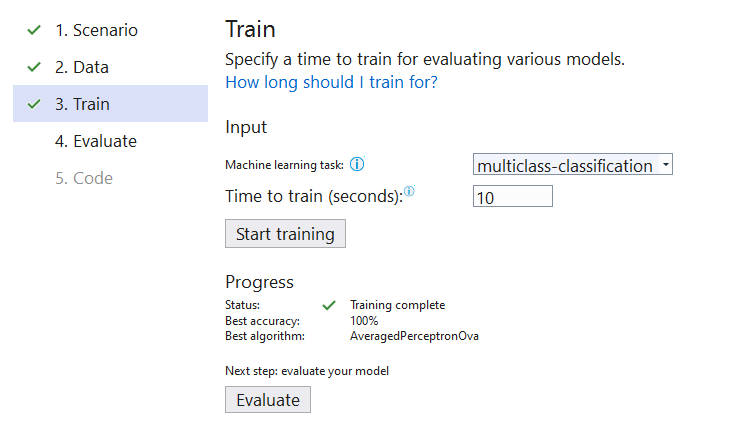
After selecting the Machine learning task and training time click on the Start training button and wait for few seconds to complete the training.

Now we can see the training is completed and also best algorithm used and next we need to click on the Evaluate button to evaluate our training model.
Evaluate and Code:
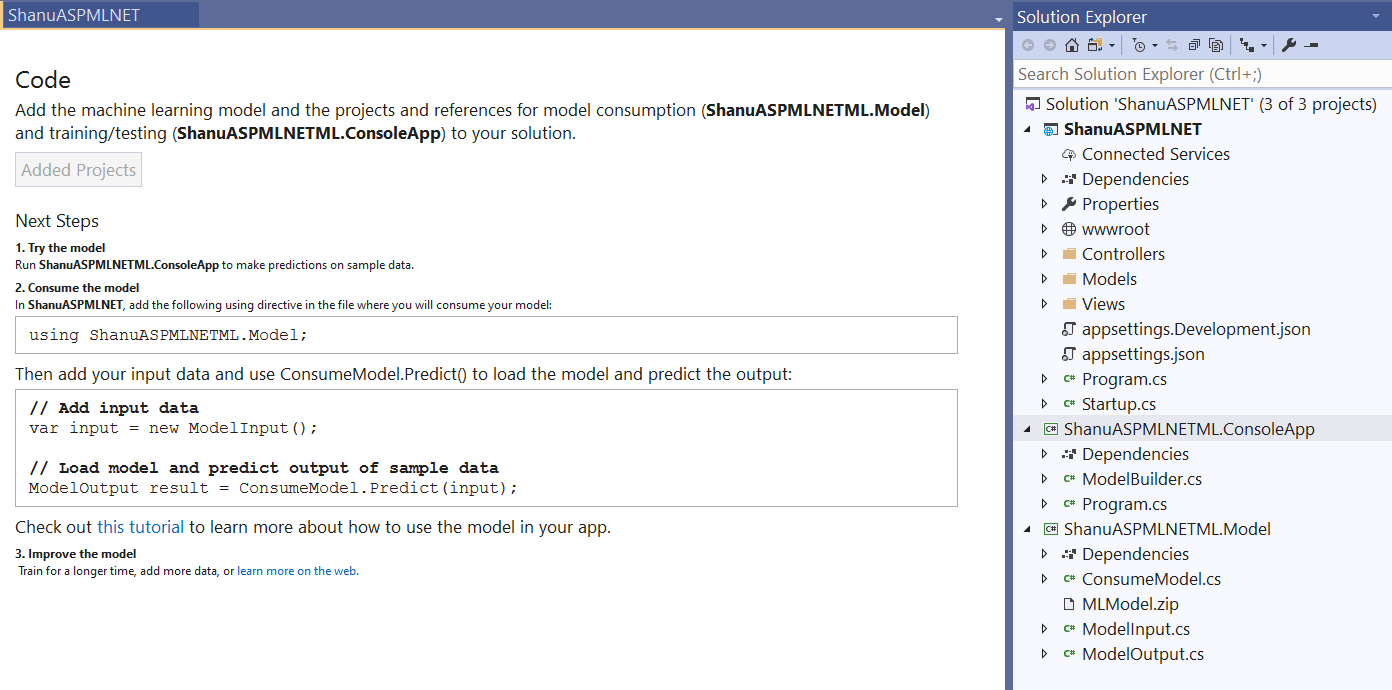
In evaluate screen we can evaluate the trained model and finally click on the code button to get the code.
We can see as the ML.NET Model ,training and testing project can been added to our solutions ,We will add this models to our ASP.NET Code project solution for that we need to click on the Add to projects button.

We can see as the both Model and the console project has been added to our ASP.NET Core solution. Now let’s see on how to import the model to our ASP.NET core and display the predicted result to the users.
Step 3: Add the ML.NET to ASP.Net Core project for prediction
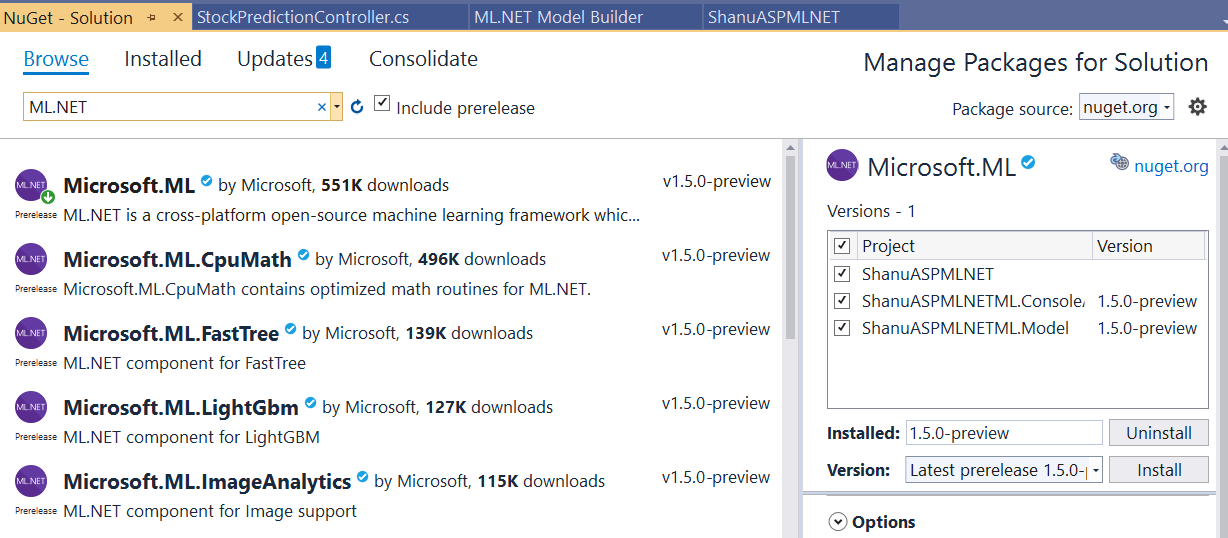
Select Tools from the menu ,Select NuGet Package Manager and click on Manage NuGet Packages for Solution .
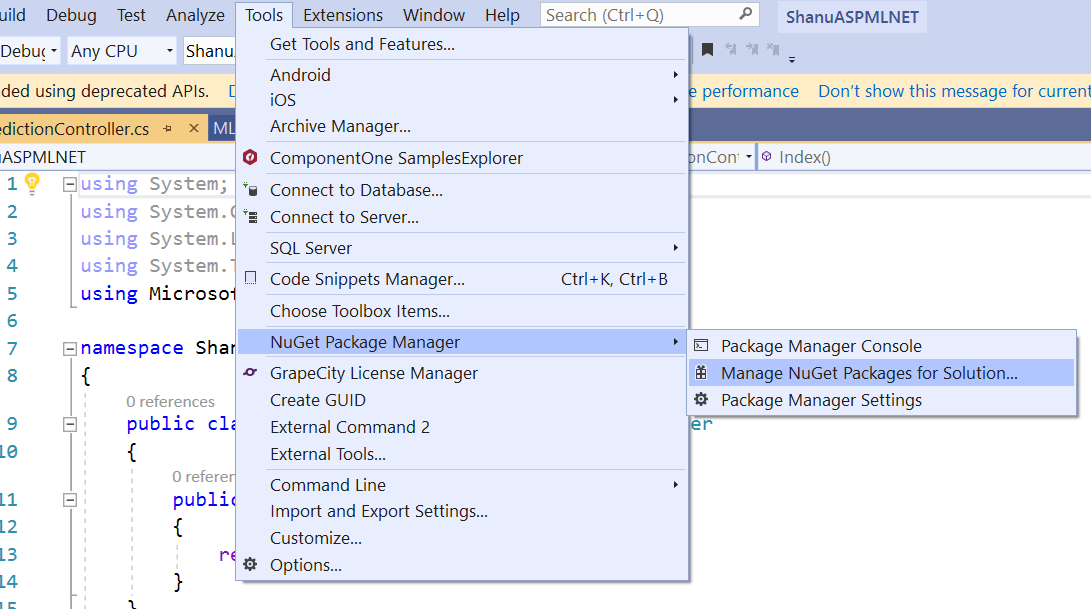
Select Browse and enter ML.NET in search and select the Microsoft.ML also in the right side we can see our ML.NET model projects will be displayed select the project and click on Install.
Step 4: Create new ASP.NET Core Controller
Right click on the Controller Class and click new Empty control and give the controller name as the StockPrediction add the controller to the controller folder.
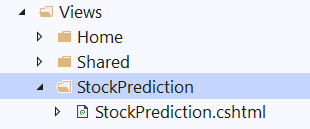
Step 5: Create new ASP.NET Core View
Next create a new folder inside the View folder as StockPrediction and also add a view as the name of StockPrediction.cshtml
Controller Code:
In the StockPredictionController Controller add the below code.
In the import part add the model
using ShanuASPMLNETML.Model;
After import that add the below code.Here we change the default view with our new View name also we have created one more post Action result and return the predicted result to the view to bind the results.
public class  StockPredictionController : Controller
    {
        [HttpGet]
        public IActionResult StockPrediction()
        {
            return View();
        }

        [HttpPost]
        public ActionResult StockPrediction(ModelInput input)
        {
            ViewBag.Result = "";
            var stockPredictions = ConsumeModel.Predict(input);
            ViewBag.Result = stockPredictions;

            ViewData["ItemID"] = input.ItemID;
            ViewData["Loccode"] = input.Loccode;
            return View();

        }
    }
View Code:
In the StockPrediction View add the below code.Here we have added 2 textbox as one for the item Code input and one for the Location code input and we have set the same name as our model name so that the data will be pass to our Trained model and return the predicted results and finally we bind the predicted results to the users.
@model ShanuASPMLNETML.Model.ModelInput
@{
    ViewData["Title"] = "item Stock Predicti0n";
    Layout = "~/Views/Shared/_Layout.cshtml";
}

<h2>Welcome to Shanu Stock Prediction for the Item by Warehouse Location</h2>
<h3>using ML.NET in ASP.NET Core</h3>
<hr />


<div class="row">
    <div class="col-md-12">
        <form asp-action="StockPrediction">
            <div class="row">
                <div class="form-group col-md-4">
                    <label asp-for="ItemID" class="control-label">Item ID</label>
                    <input asp-for="ItemID" class="form-control" />
                </div>
                <div class="form-group col-md-4">
                    <label asp-for="Loccode" class="control-label">Warehouse Locatoin Code:</label>
                    <input asp-for="Loccode" class="form-control" />
                </div>

            </div>
            <div class="form-group col-md-4 text-left">
                <label class="control-label"></label>
                <input type="submit" value="Stock Prediction" class="btn btn-primary" />
            </div>
        </form>
        <hr />
    </div>

</div>


@if (ViewBag.Result != null)
{
    <div class="row">
        <div class="col-md-12">
            <h2 style="color:#103f62">Here is the Test result for Item : <span style="color:#a50f0f"> @ViewData["ItemID"]  </span> for the Warehouse location <span style="color:#a50f0f">@ViewData["Loccode"] </span>  </h2>
            <h1 style="color:#a50f0f">Final Predicted Stock Quantity is :@ViewBag.Result.Prediction  </h1>
        </div>
    </div>
    <hr />
}
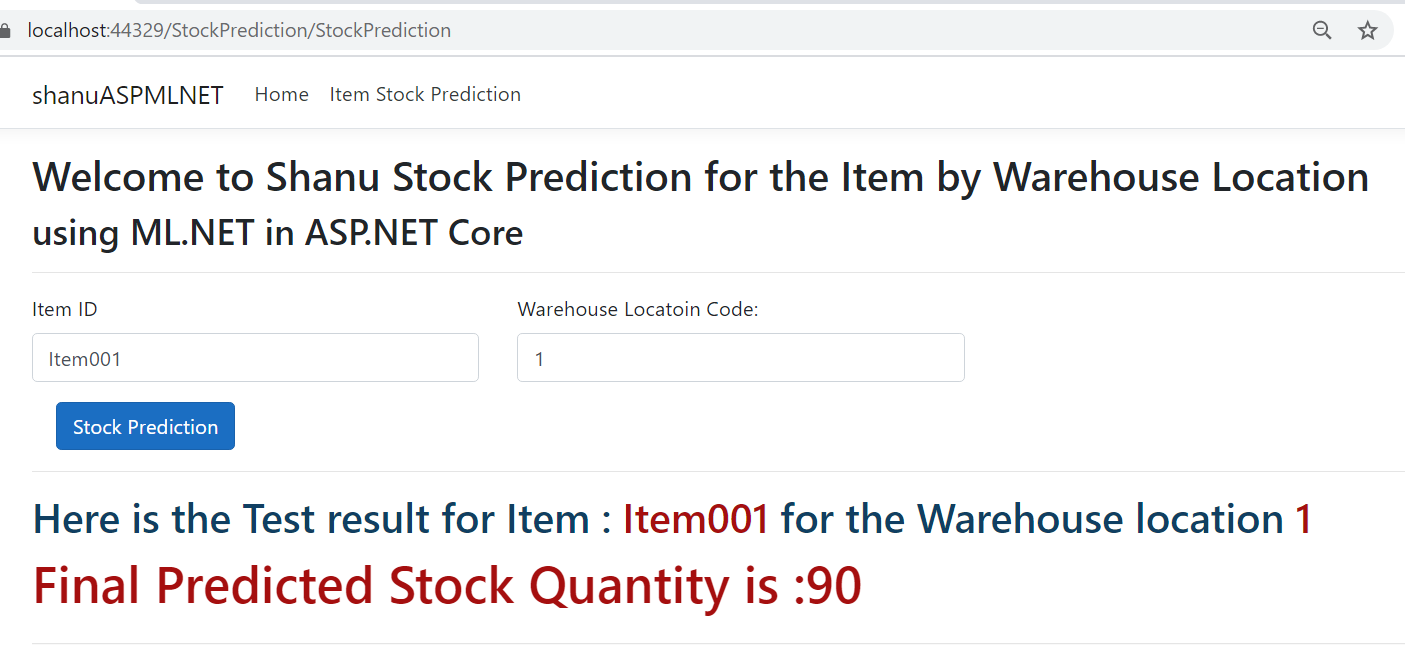
Build and run the project
We can enter the Item code and Location code to be predicted and display the Stock Quantity.
Here we have enter the Item code as Item001 and Location code as 1

We can see the Predicted result as :90
Conclusion
ML.NET (Machine Learning DotNet) is a great framework for all the .NET lovers who are all looking to work with machine learning. Now only preview version of ML.NET is available and I can’t wait till the release of the public version of ML.NET. If you are .NET lovers, not aware about Machine Learning and looking forward to work with machine learning, then ML.Net is for you all and it's a great framework to getting started with ML.NET. Hope you all enjoy reading this article and see you all soon with another post.
See Also
- Introducing ML.NET: Cross-platform, Proven and Open Source Machine Learning Framework
- Regression
- Taxi fare predictor (regression)
- /en-us/azure/machine-learning/studio-module-reference/machine-learning-modules
Download
Getting Started with ML.NET Model Builder for using in ASP.NET Core