Azure DevOps/SharePoint Online: CI/CD case study
Introduction
Azure DevOps is a very powerful tool for end-to-end project / development / testing and Deployment management.
- 'Azure Boards' is for Project Management.
- 'Azure Repos' for Development.
- 'Azure test Plans' helps in Testing
- 'Azure Pipeline' , Releases' , 'Azure Artifacts' helps in Deployments. (CI / CD)
Its common misunderstanding that DevOps is specific to code automated build ( Continuous Integration) and automated deployment (Continuous Deployment), but DevOps covers all prospects of a Project. But, most used and most discussed functionality of Azure DevOps is CI and CD.
In this article we will explore one case study of using DevOps for SharePoint deployments.
Requirements
For our DevOps process we have following requirements,
- Code Repository: Git.
- Develop branch has BASE code and 'Forward' branch has NEW updated code
- We have 2 types of code files
- Some part of code ( 'scss' , 'js' etc ) get bundled using 'gulp build' function present in 'gulpfile' of our project.
- There are static files (page layout, code, images, etc) which will get pushed to different libraries in SharePoint.
- These files will get deployed to SharePoint 'Style Library' / 'Page Layouts' etc.
Azure DevOps setting and Configuration
First task will be Creation of Azure Pipeline which will create Release 'Artifact'. This 'Release' artifact will contain only our modified code which we need to push to SharePoint environment.
Azure Pipeline
- Create a 'New Project' in Azure DevOps site and go to Pipeline and Create a new 'Pipeline'
- Connect to your git repository which is 'Bigbucket' for our project.
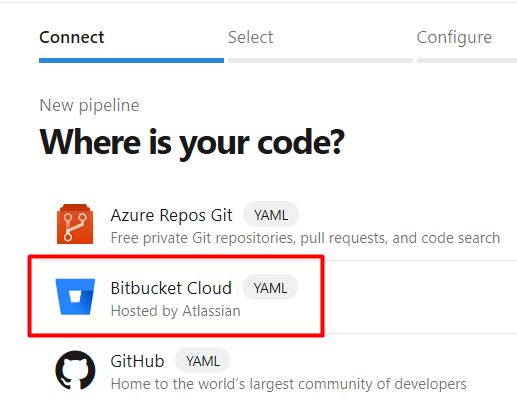
- Connected to Repository and select the 'Forward' branch (DevOpsDeploy) . Azure DevOps will create a 'azure-pipeline.yml' (YML file) for Pipeline tasks.

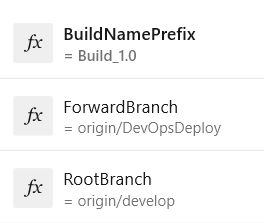
By click on 'Variables' create 3 variables
- ForwardBranch : Branch name which will contain our latest code.
- RootBranch : Root Branch name, of which the code is already deployed.
- BuildNamePrefix : Prefix of Build
- Click 'Let user override this value when running the pipeline' checkbox while creating the Variable. This will allow to provide variable values as runtime.
- Our YML file look as follows
# Node.js
# Build a general Node.js project with npm.
# Add steps that analyze code, save build artifacts, deploy, and more:
# https://docs.microsoft.com/azure/devops/pipelines/languages/javascript
trigger:
- $FORWARDBRACH

pool:
  vmImage: 'ubuntu-latest'
name: $(BuildNamePrefix)_$(Rev:.r)

steps:
- task: UseNode@1
  displayName: Set Node to 8.x for node-scss
  inputs:
    version: '8.x'

- task: Npm@1
  displayName: 'npm install' to install all Dependencies
  inputs:
    command: 'install'

- task: Gulp@1
  displayName: Run 'gulp build' for all libs and SCSS to build
  inputs:
    gulpFile: 'gulpfile.js'
    targets: 'build'
    enableCodeCoverage: false

- task: CmdLine@2
  displayName: Setup Release Folder and Run 'git diff' to get differences between branches
  inputs:
    script: |
      mkdir Release
      mkdir Release/dist
      git diff --name-only $ROOTBRANCH $FORWARDBRANCH > Release/changed-files.log

- task: Bash@3
  displayName: List all files ready for 'Release' folder
   inputs:
    targetType: 'inline'
    script: |
      egrep -v "gitignore" Release/changed-files.log > Release/release_fil.txt

- task: Bash@3
  displayName: Copy Files to 'Release' Folder
  inputs:
    targetType: 'inline'
    script: |
      while IFS= read -r line; do
        home1=Release
        string=$line
        dir=${string%/*}
        if [ $string != $dir ];then
          if [ ! -d "$home1/$dir" ]; then
          mkdir -p $home1/$dir ;
          fi
        fi
        cp "$line" $home1/$dir;
        echo "copied" $line " to -" $home1/$dir
      done < Release/release_fil.txt
      cp -a deploy_az.js Release/
      cp -a package.json Release/
      cp -a package-lock.json Release/

- task: PublishBuildArtifacts@1
  displayName: Publish all Artifacts
  inputs:
    PathtoPublish: '$(Build.SourcesDirectory)/Release'
    ArtifactName: 'Release'
publishLocation: 'Container'
Steps:
- First step is to download latest code from 'ForwardBranch' [ Variable ]
- Start 'Ubantu' latest serve
- Set the name of build using 'BuildNamePrefix' [Variable]
Tasks:
- Install 'Node' . We are using 8.x version of Node which is needed for our SCSS to build.
- Run 'npm install' : 'package.json' / 'package-lock.json' is present in our downloaded codebase.
- Run 'gulp build' : 'gulpfile.js' is present in our downloaded codebase and it has a 'build' function which create the Build.
- Setup Release Folder : Create directory 'Release' to keep all release files.
- Run git command : git diff --name-only $ROOTBRANCH $FORWARDBRANCH > Release/changed-files.log. This will get the different between 2 branches [ROOTBRANCH] and [FORWARDBRACH] and save it to 'changed-files.log'
- Run a BASH command : This step will list down only files we need to push from 'changed-files.log' to 'Release_filter.txt'. Removing all unnecessary files.
- Run a BASH command : This step will read 'Release_filter.txt' file and copy files from downloaded codebase -> Release folder
- Final Step is publish all the files in 'Release' folder to 'Code_Artifect'
In our Release folder, we are copying few extra files which will get used for Deployment process.
- Chanaged-files.log : This file contain list of all modified files which we need to push to SharePoint.
- Deploy_az.js / gulpfile.js : We have written gulp function using npm module 'spsave' (https://www.npmjs.com/package/spsave ) . These function will read changed-files.log and push one by one each file to SharePoint at there correct location.
- Package.json / package-lock.json : These files are needed to install gulp / spsave and other npm modules.
Save and Publish 'azure-pipeline.yml' to the repository.
This will complete our Pipeline creation. Now we can run this Pipeline and it will create artifacts.
Azure Release
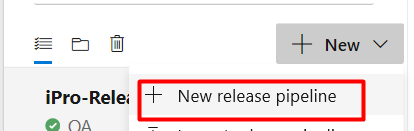
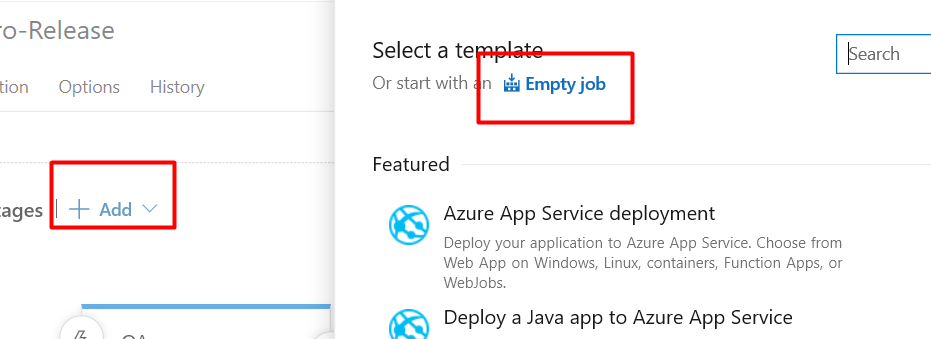
- Go to 'Releases' section in Azure DevOps and create a 'New release pipeline'
- Click on '+Add' in Artifacts and connect to the Artifacts created from Pipeline
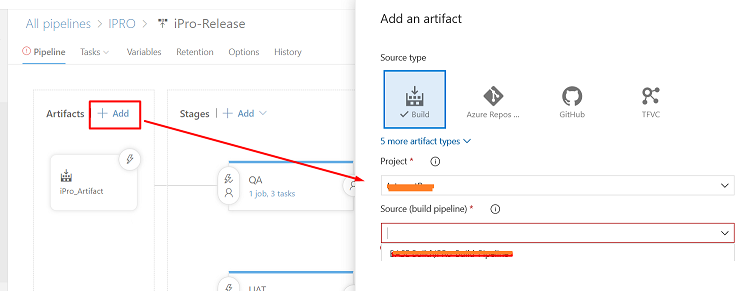
- Select the Project and Build Pipeline name.
- Select '+ Add' in Stage and select a 'Empty stage'
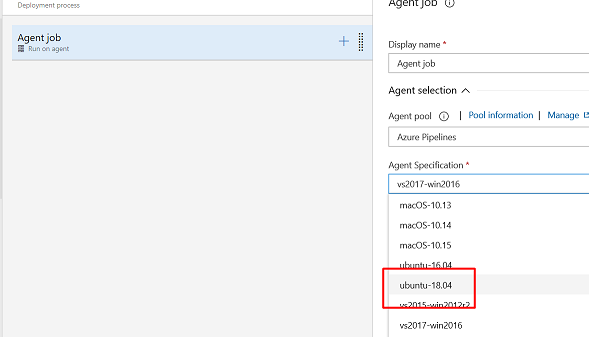
- Click on 'Job' under that start and select 'Agent Job'
- Choose latest Ubantu as our Agent
- If we scroll down it will show the 'Artifact' from our previous Pipeline
- Add following Variables to 'Release'
URL : SharePoint Site URL
Username / Password : To connect to SharePoint site.
-

- Using '+' sign the Agent job - add 3 Jobs
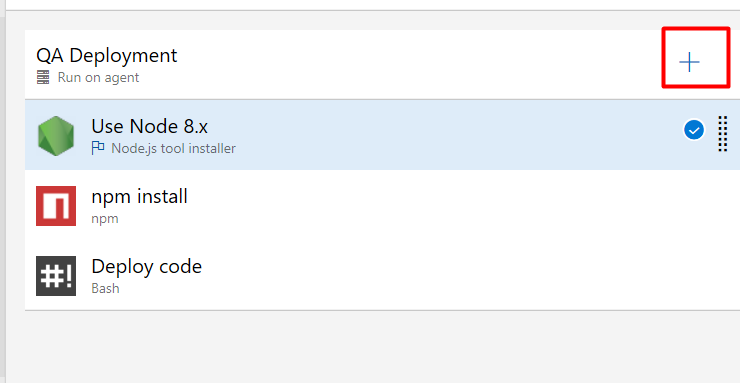
- Install 'Node' for Deployment of code. For our project we are using 8.x version of Node.
- Run NPM command 'npm install'. As mentioned during 'Pipeline' process, Release folder contain 'Package.json' /'Package-lock.json' - so this command will install all dependencies which we need for deployment. Specify the directory where these files are present

Last step is BASH command which will use 'gulp' function defined in 'gulpfile.js' / 'deploy_az.js' and push files to SharePoint.
- Following parameter are passed to the file
- Location of 'deploy_az.js' file
- Build display name
- Release folder location
- SharePoint site URL
- Username / Password (encrypted )

After running this 'Release' pipeline, it will take the Artifacts and deploy it to SharePoint at appropriate location.