Unit Test SharePoint Framework Solutions with Jest And Enzyme
Overview
Testing is an important phase of the software life cycle. It should be a part of continuous development and deployment to achieve better results. SharePoint Framework is no exception to this. As a part of SPFx solution development, we should have supporting test cases to test the functionality independently or as regression testing. Having significant test cases help to develop new functionalities by ensuring the integrity of the existing functionality.
Importance of unit testing
Unit testing is important because of the following reasons:
- Early bug detection
- Makes the process agile
- Improves the quality of code
- Facilitates changes and simplifies integration
- Provides documentation of the system
- Simplifies debugging process
Develop SPFx Web Part
- Open a command prompt. Create a directory for SPFx solution.
md spfx-jest-test
2. Navigate to the above-created directory.
cd spfx-jest-test
3. Run the Yeoman SharePoint Generator to create the solution.
yo @microsoft/sharepoint
Yeoman generator will present you with the wizard by asking questions about the solution to be created.
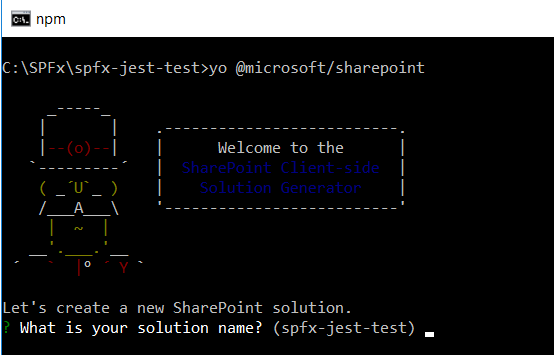
Solution Name: Hit Enter to have default name (spfx-jest-test in this case) or type in any other name for your solution.
Selected Choice: Hit Enter
Target for the component: Here we can select the target environment where we are planning to deploy the client web part i.e. SharePoint Online or SharePoint On-Premises (SharePoint 2016 onwards).
Selected Choice: SharePoint Online only (latest)
Place of files: We may choose to use the same folder or create a sub-folder for our solution.
Selected Choice: Same folder
Deployment option: Selecting Y will allow the app to deployed instantly to all sites and will be accessible everywhere.
Selected Choice: N (install on each site explicitly)
Permissions to access web APIs: Choose if the components in the solution require permissions to access web APIs that are unique and not shared with other components in the tenant.
Selected choice: N (solution contains unique permissions)
Type of client-side component to create: We can choose to create a client-side web part or an extension. Choose web part option.
Selected Choice: WebPart
Web part name: Hit enter to select the default name or type in any other name.
Selected Choice: SPFxTest
Web part description: Hit enter to select the default description or type in any other value.
Selected Choice: Unit test SPFx with Jest
Framework to use: Select any JavaScript framework to develop the component. Available choices are (No JavaScript Framework, React, and Knockout)
Selected Choice: React
4. Yeoman generator will perform a scaffolding process to generate the solution. The scaffolding process will take a significant amount of time.
5. Once the scaffolding process is completed, lock down the version of project dependencies by running the below command.
npm shrinkwrap
On the command prompt type the below command to open the solution in the code editor of your choice.
code .
Code the web part
Update render method of the React component “src\webparts\spFxTest\components\SpFxTest.tsx” to execute the test cases against.
public render(): React.ReactElement<ISpFxTestProps> {
  return (
    <div className={ styles.spFxTest } id="spfxTest">
      <div className={ styles.container }>
        <div className={ styles.row }>
          <div className={ styles.column }>
            <span className={ styles.title }>Welcome to SharePoint!</span>
            <p className={ styles.subTitle }>Customize SharePoint experiences using Web Parts.</p>
            <h1 className={styles.title}>SPFx Test webpart</h1>
            <p className={ styles.description }>{escape(this.props.description)}</p>
            <a href="https://aka.ms/spfx" className={ styles.button }>
              <span className={ styles.label }>Learn more</span>
            </a>
          </div>
        </div>
      </div>
    </div>
  );
}
NPM Packages Used
Enzyme
Developed by Airbnb, it represents test utilities for React. On the command prompt, run the below command.
npm install enzyme enzyme-adapter-react-16 react-test-renderer @types/enzyme --save-dev --save-exact
Jest
It supports asserts, mocking, code coverage, coverage threshold for continuous deployment, and summary report.
npm install jest jest-junit ts-jest @types/jest --save-dev --save-exact
identity-obj-proxy
Allows to test SASS / LESS / CSS imports.
npm install identity-obj-proxy --save-dev --save-exact
Setup Jest with SPFx
We will use Jest to install npm packages in our SPFx solution.
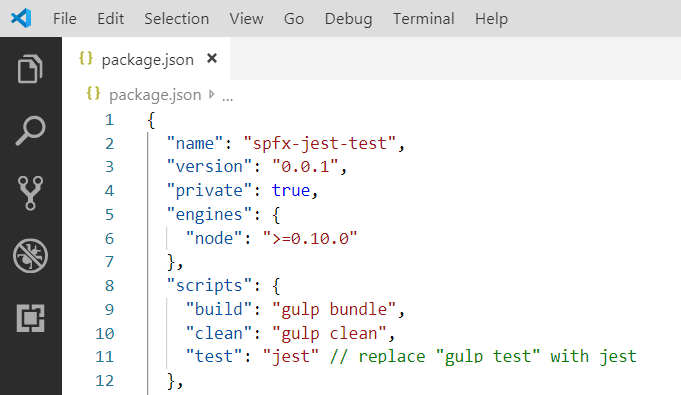
Open the package.json file.
Under the “Scripts” section for “test” configuration, replace “gulp test” with “jest”.
Add “jest” configuration after “devDependencies”.
"jest": {
  "moduleFileExtensions": [
    "ts",
    "tsx",
    "js"
  ],
  "transform": {
    "^.+\\.(ts|tsx)$": "ts-jest"
  },
  "testMatch": [
    "**/src/**/*.test.+(ts|tsx|js)"
  ],
  "collectCoverage": true,
  "coverageReporters": [
    "json",
    "lcov",
    "text",
    "cobertura"
  ],
  "coverageDirectory": "<rootDir>/jest",
  "moduleNameMapper": {
    "\\.(css|less|scss|sass)$": "identity-obj-proxy"
  },
  "reporters": [
    "default",
    "jest-junit"
  ],
  "coverageThreshold": {
    "global": {
      "branches": 100,
      "functions": 100,
      "lines": 100,
      "statements": 100
    }
  }
},
"jest-junit": {
  "output": "./jest/summary-jest-junit.xml"
}
Add Tests to SPFx Solution
In Visual Studio Code, follow below steps to add some tests to our SPFx solution.
Add “test” folder under “src\webparts\spFxTest\.
Under “test” folder, add a file “basic.test.ts”.
/// <reference types="jest" />

import * as React from 'react';
import { configure, mount, ReactWrapper } from 'enzyme';
import * as Adapter from 'enzyme-adapter-react-16';

configure({ adapter: new  Adapter() });

import SpFxTest from '../components/SpFxTest';
import { ISpFxTestProps } from '../components/ISpFxTestProps';

describe('Enzyme basics', () => {

  let reactComponent: ReactWrapper<ISpFxTestProps, {}>;

  beforeEach(() => {

    reactComponent = mount(React.createElement(
      SpFxTest,
      {
        description: "SPFx Test"
      }
    ));
  });

  afterEach(() => {
    reactComponent.unmount();
  });

  it('should root web part element exists', () => {

    // define the css selector
    let cssSelector: string = '#spfxTest';

    // find the element using css selector
    const element = reactComponent.find(cssSelector);
    expect(element.length).toBeGreaterThan(0);
  });

  it('should has the correct title', () => {
    // Arrange
    // define contains/like css selector
    let cssSelector: string = 'h1';

    // Act
    // find the element using css selector
    const text = reactComponent.find(cssSelector).text();

    // Assert
    expect(text).toBe("SPFx Test webpart");
  });
});
Run Test Cases
On the command prompt and run the below command to execute the test cases.
npm test

Conclusion
Unit test helps to develop new functionalities by ensuring the integrity of the existing functionality. Unit tests for SPFx solutions can be developed using Jest JavaScript Testing Framework.