Azure VM – Recreate an Azure VM by using the same OS disk
Introduction
In this quick post, I'll walk you through the steps to build a new Azure VM by using an existing OS disk. It may be required sometimes to rebuild a virtual machine hosted in Azure for a variety of reasons.
- The VM is no longer required and therefore should be deleted, but the OS disk must be left untouched for future usage.
- Change the size of the VM to an unsupported by its current size, i.e. (resize a Standard D2s v3 to a Standard_B8ms, which is not compatible with enabling accelerated networking on the network interface(s) on the VM.
How to recreate the Azure VM
Assuming we've previously deployed an Azure VM, let's go through the procedures below to establish a new VM with a different name for our resources (VM, NIC, compute size) but in the same Vnet and with the same Public IP.
Note
The deployment duration is about 10' minutes.
First deallocate the Azure VM On the left-hand side blade, select Overview and click the Stop button.

Select to delete the VM without selecting any other associated resources

After a few minutes, the VM was deleted.
Now,let us deploy a new VM using the same OS disk.
Note
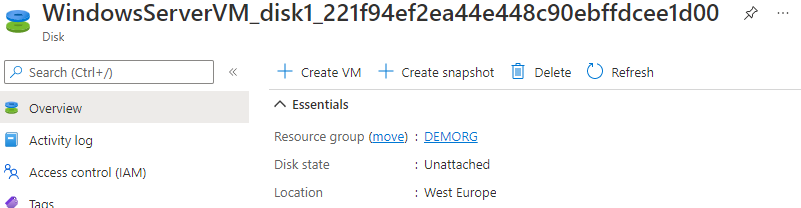
In order to enable the + Create VM button, the Disk state must be "Unnatached"
First, select the +Create VM button
Fill in the required values on the tab Basics, as shown in the figure below.

| Setting | Value |
| Virtual machine name | Type the VM name |
| Image | In this step, the image would be pre-selected |
| Size | Select the Standard B8ms size that we were unable to select previously |
As seen in the image below, specify the appropriate settings under the Networking tab.

| Setting | Value |
| Virtual network | Choose the existing Vnet |
| Public IP | Select None |
| NIC network security group | Select Advanced |
| Configure network security group | Choose the existing NSG |
The figure below depicts the remaining resources after deleting the Azure virtual machine earlier.
Note
When a new VM is deployed, a network interface is created for it automatically.

Check the validation and hit the Create button.

The last step is to associate the same public IP address the VM used before being deleted.
That's simple: go to the VM NIC, choose the Network Interface from Settings - Networking, and then go to Settings - IP settings.
Select the network interface ipconfig1, select Associate, choose from the drop-down the Public IP address and click the Save button.

As a result, the VM is now running on the same Vnet, with the same OS disk and the same Public IP address.

Summary
To summarize this post, I can state that Microsoft gives us numerous tools and multiple methods to get answers to our daily business challenges on a regular basis. In less than 15 seconds, I built a new VM with identical applications and Public IP. Consider how much more difficult the same scenario is with an on-premise server.