Optimizing the Write to Excel from Power Automate

- Introduction
- Problem Statement
- Workaround
- Configure Graph Application in Azure
- Format JSON Payload
- Setting up the excel in the destination
- Call the Graph API
- Test the flow
- Summary
Introduction
A common use case is to connect to excel from power automate and make updates to a worksheet. There are multiple ways to do this and in most cases when we are working with smaller datasets, we can use the Out of the box excel actions to get this done. However with large datasets , excel actions will prove to be insufficient. In this article we will see how to write large datasets to excel from Power Automate in the most efficient way.
Problem Statement
Though we have the option to use the Excel Specific Action “Add a row into a table”, the performance degrades over large data sets.
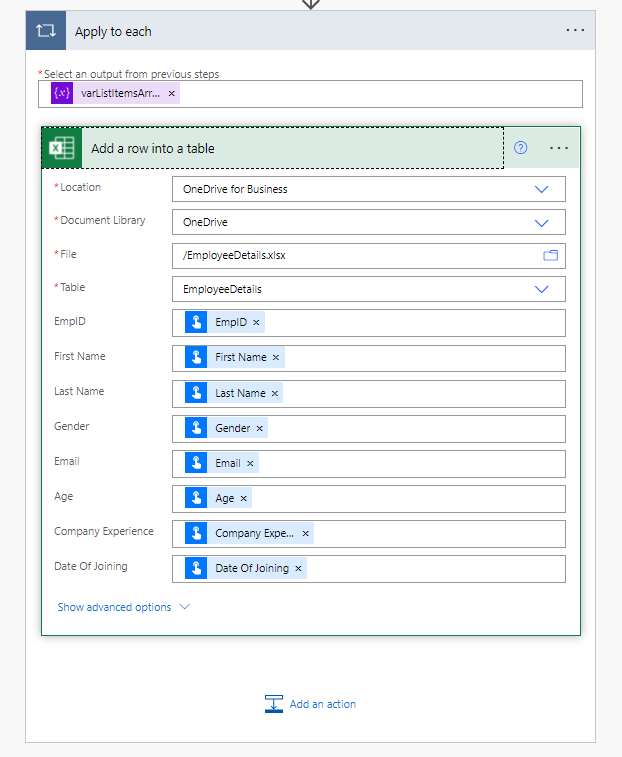
It takes almost a second to write one row into excel and if we have 1000+ records to be written in a single shot, chances are that it takes more than 10 minutes to complete the operation which will eventually result in a time out and flow failure:
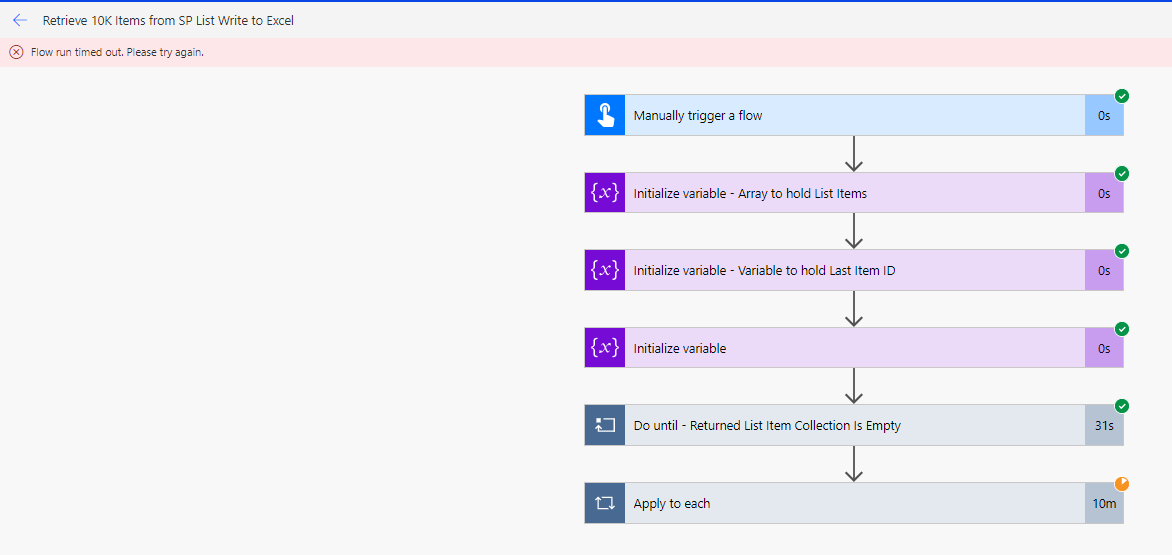
As we can see above, we tried to write 10K Items and it timed out after 10 minutes.
Workaround
So lets try to use a workaround where we will use Microsoft Graph API to write the records in one single shot by appending the records as JSON payload in the body of the REST call. We will take this in 3 steps :
- Configure Microsoft Graph Application for Authentication
- Format the JSON Payload for the Graph API Call
- Call the Graph API
Configure Graph Application in Azure
As the first step, lets configure the application registration in azure by specifying a name for the application and click on Register.

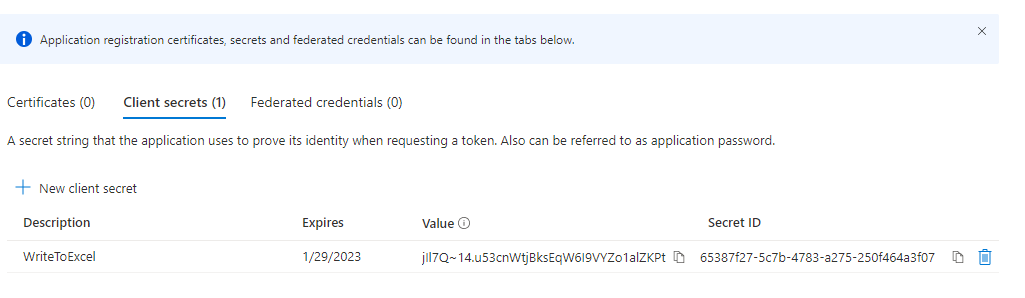
Next step is to generate a Client Secret for which we will head over to the left pane and click on Certificates and secrets. Specify a description and a secret expiry , click on Add.

This will generate the client secret, ensure that you store it somewhere safely as it will be hashed if you try to view it once you navigate away from the window.
Now that we have the secret created, lets add the API permission that has to made available for this application. Click on API permissions -> Add Permission -> Microsoft Graph

It will give us the option to select either delegated or Application permission. As we would be using it unattended with the power automate without a logged In user context, lets go select application permissions

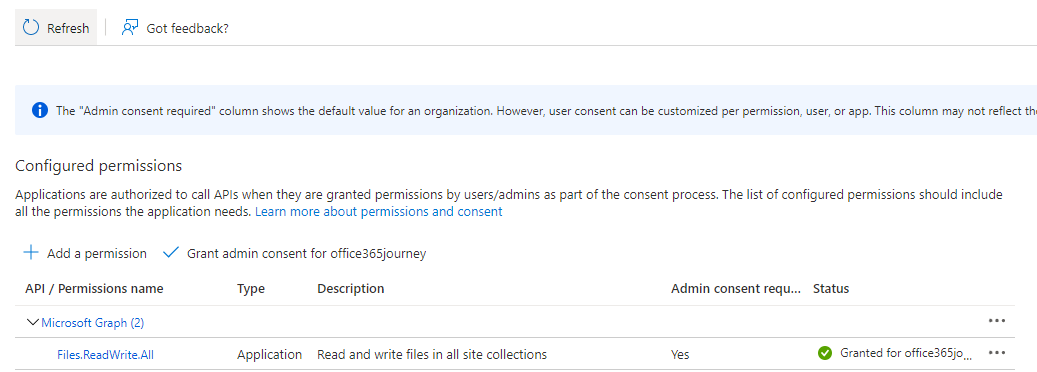
Since we are going to write to an excel file in One Drive, we will be granting the file read and write permission to the application.

Since we have selected application permission, the admin will have to consent the permission which can be done by clicking on ‘Grant admin consent for <tenant> ‘ option and we can see a green tick against the permission which indicates a successful permission assignment. Lets head over to the overview section and copy the client id and tenant in addition to the client secret as we will be using these 3 values for authenticating the Graph API call.
Format JSON Payload
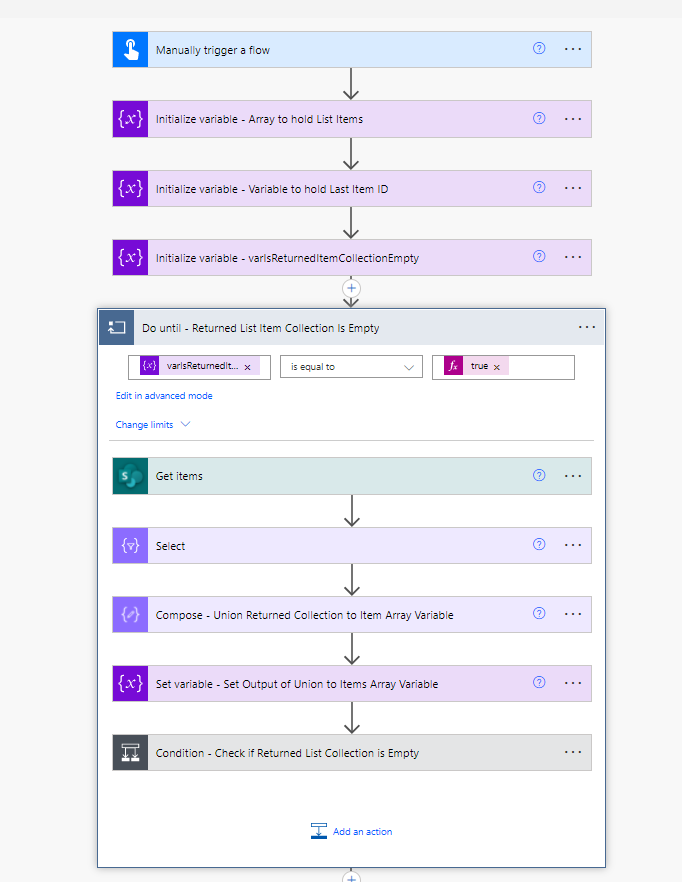
The detailed implementation of getting 10K items is described below. At a very high level, it uses the Do While loop to get 5K items in each iteration and appends it to an array which will act as the master data collection.
The final array that hold 10K items will have the data in the format :

We cannot use this directly as JSON payload for the Graph API that we are going to call. As per the official documentation for the Graph API for writing to excel, the JSON body has to be in the below format
{
"index": 1,
"values": [
["123", "AdamSmith"],
[“789”,”JohnDoe”]
]
}
The value of the first index parameter specifies the relative position of the row that you're adding to the zero-indexed array of rows. Rows below the inserted row will be shifted downwards. The value of the second values parameter is a two-dimensional string array that contains the unformatted values of each row that you want to add
So as to convert the Array body to the desired JSON format, we will use the selection action to map the field values as below :

Here we take the array as the input and map the fields so as to get a 2D array output as needed for the Graph API payload. The Fields added use the expression as below :
ID |
item()?['ID'] |
First Name |
item()?['First Name'] |
Last Name |
item()?['Last Name'] |
Gender |
item()?['Gender'] |
item()?['Email'] |
|
Age |
item()?['Age'] |
Company Experience |
item()?['Company Experience'] |
This will generate the Selection action output in the below format :

Setting up the excel in the destination
Before we can move into the Graph API call section, lets create an excel table with the required headers and create a Table inside it as we will need to use this table name within the Graph API
We have created and named the table ‘EmployeeDetails’ and saved it in OneDrive.
Call the Graph API
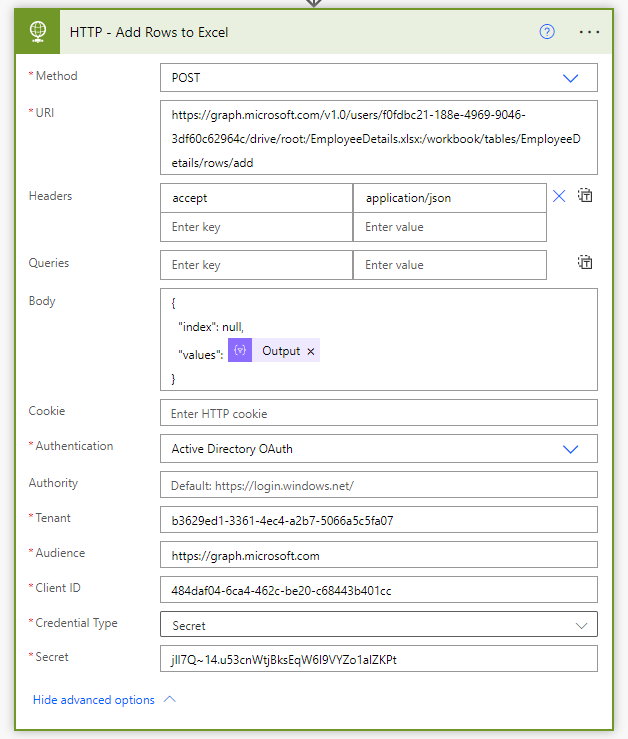
The final step is to call the Graph API that writes to the excel file by adding a row for each of the JSON item. We will be issuing a POST call to the below API and will be mentioning the Client ID, Client Secret and Tenant ID which we had saves from the Azure App registration in the initial step.
the format of the API is as below :
In the Body, we will specify the payload as below which indicates that the collection of JSON items will start getting created from the end of the current table.
{
"index": null,
"values": @{body('Select_-_Format_JSON')
}
So the overall flow looks like below :

Test the flow
Now lets test the flow by manually triggering it. It will fetch the 10K items from the SharePoint list and combine it into a single array which will be converted into the required JSON format which will act as the payload for the Graph API Call. We have received a 201 status code which indicates success. As you can see that it took just 4 Seconds to populate the entire 10K records which is a huge performance improvement.

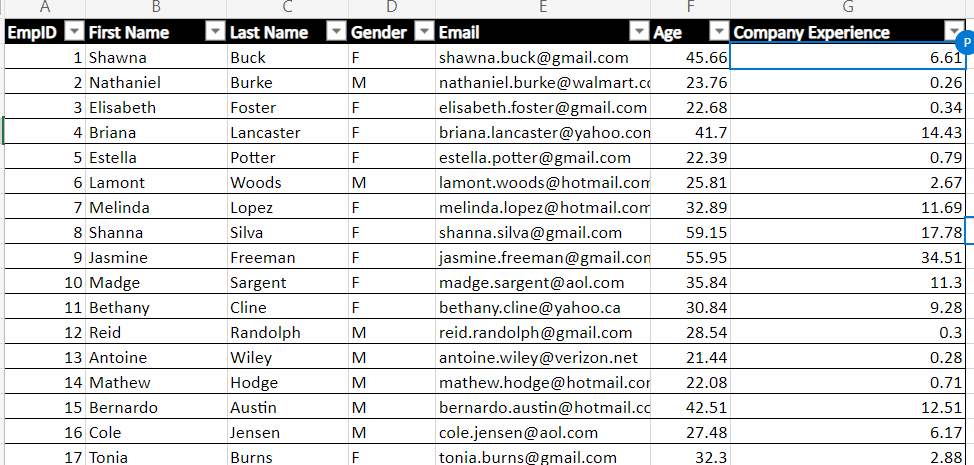
We can also see that the excel has been populated with the records :
Summary
Thus we saw how to populate excel in a single call with 10K records fetched from SharePoint using Graph API in just 4 seconds.