Azure Virtual Desktop: Imaging Process
This Article demonstrates and explains the process and steps on how to Publish a(n) (new) Imagine to a Desktop Pool in Azure Virtual Desktop (AVD)!
1. Create Master Image VM
Create a VM which will function as the Master-Image.
Special hint: In the public Microsoft Gallery there are several Multi-User OS Versions inkl. M365 Apps, especially for Windows 10 / Windows 11 (Multi-User Version also includes FSLogix)!
2. Customizing Image
Once the VM has been provisioned you can connect to it and install further software and required configurations.
! Don´t join the VM to the domain, keep this untouched !
! Do not perform sysprep up to now !
3. Create a first Snapshot
After you have a first initial version of the image to go live with you can now continue with creating a snapshot.
This Snapshot will be your first basepoint.
You can take a snapshot as described in the following ways:
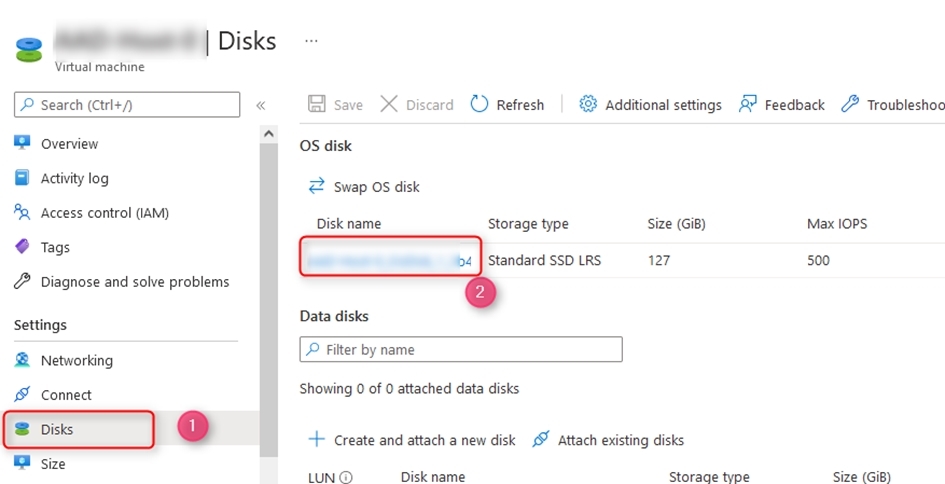
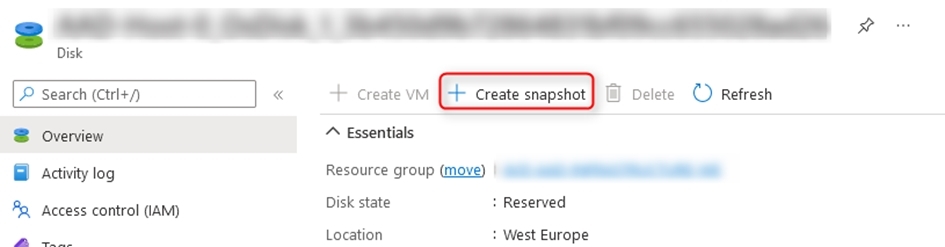
The next step is self-explaining, for the name oft he Snapshot i recommend something meaningful.
It does not matter if you take the snapshot while the machine is running or not.
4. SYSPreparation
Now with a Snapshot you are safe and ready to go for further steps and well-prepared if something would go wrong from now on!
Connect to the VM again and start the sysprep process (C:\Windows\system32\sysprep), e.g. like this
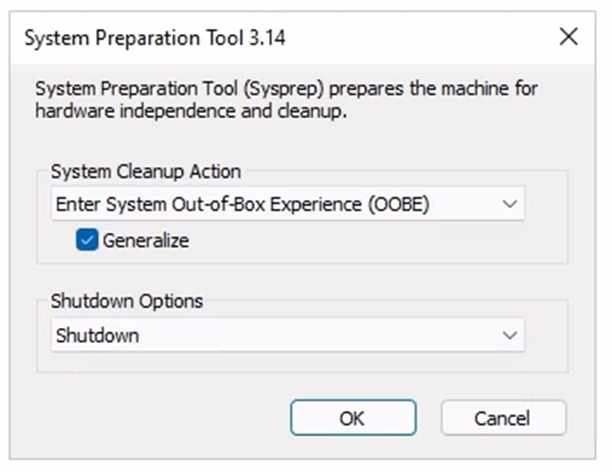
After some time you will be disconnected due to the shutdown process.
Hint: Do not „Stop“ the VM in Azure Portal !!
5. Creating the Image Template
Once you can see the VM in the „Stopped“ Mode in the Azure portal, you can continue by Capturing the VM.

In the next steps you can choose whether to share this image to a Shared Gallery or only as a managed image.
To reduce costs i recommend to enable the feature to delete the VM

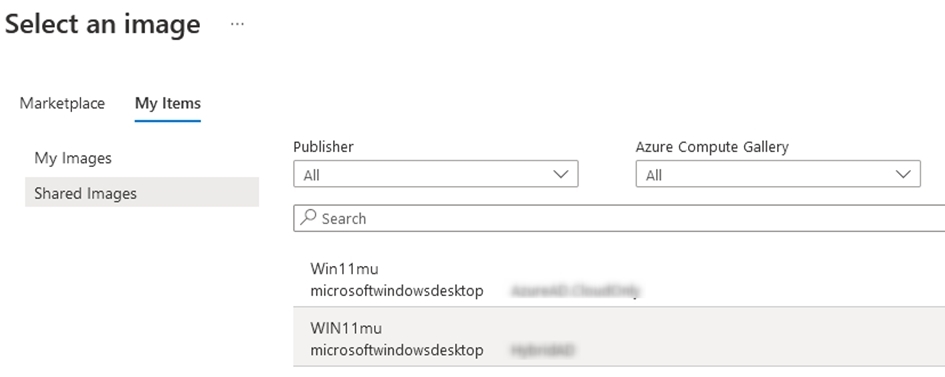
6. Add AVD Session Hosts
Now you can add Session hosts based on this image to your hostpool.
Depending on your decision in the previous step, your image will be displayed in „my images“ or „shared images“-
In my Example i worked with Image Galleries!
7. Next Steps with Updates ?!
You now have learned how to create, publish an image template and add session hosts to a hostpool based on this image template.
If you now want to install updates do some further customizations on the image, you follow the steps from 3) again.
To Start you need to go tot he Base Snapshot you created in Step 3) and create a disk

After that you can create a new Master-VM based on this new created Snapshot-Disk, install your updates and continue with step 3.
Further information can be taken from the following article