Azure Cloud Services for Tello Drones: How to Use Azure Custom Vision Services
Introduction
Tello is a programmable mini drone, which is perfect and popular for beginners. Users can easily control it by programming languages such as Scratch, Python, and Swift. Microsoft Azure provides a variety of cloud computing services including artificial intelligence, machine learning, IoT, storage, security, networking, media, integration and so on. Azure Custom Vision is an image recognition service that lets you build, deploy, and improve your own image identifier models. An image identifier applies labels to images, according to their detected visual characteristics. Unlike the Azure Computer Vision service, Custom Vision allows you to specify your own labels and train custom models to detect them. So, compared with Azure Computer Vision service, it’s more flexible to use.
In this article, we will walk you through the steps required to capture and send image from Tello to Azure Custom Vision with Microsoft Azure Custom Vision Client Library for Python to get the analyses of the image. Additionally, we will mark the identified target with red rectangle and send the marked image to Azure Blob Storage.
Prerequisites
- Tello Drone.
- Azure Storage Blobs client library for Python
- IDE: PyCharm Community
- Azure subscription
Network Access for PC
Since Tello is connected to the PC by Wi-Fi, it is straightforward to know that our PC should equipped with two network interface cards, one is for connecting with Tello, and the other one is for connecting with Internet.

Fig. 1 Network Access
Azure Custom Vision
Azure Custom Vision service uses a machine learning algorithm to analyze images. We shall submit sets of images that have and don't have the visual characteristics you're looking for. Then label the images with own custom labels (tags) at the time of submission. The algorithm trains to this data and calculates its own accuracy by testing itself on the same images. Once the model is ready, we can test, retrain, and eventually use it in image recognition app to classify images or detect objects. Custom Vision Service can be divided into two features. Image classification applies one or more labels to an entire image. Object detection is similar, but it returns the coordinates in the image where the applied label(s) can be found. We can use Custom Vision through a client library SDK, REST API, or through the Custom Vision web portal.
In this project, we will create an Azure Custom Vision project to detect the specific kind of bird we want to identify. Then, we will transmit the image that captured by the Tello to the deployed model to find the object in the image and show the results.
Create Necessary Services on Azure
In this project, we will use Azure Custom Vision and Azure Storage services. The “Create an Azure Storage Account” section in this wiki article “Azure Cloud Services for Tello Drones: How to Send Images to Azure Blob Storage” will guide you to create Azure Storage service. For Azure Custom Vision, this project “Bird Detector Based on Microsoft Azure and Raspberry Pi” is a good start. The Custom Vision service used in this wiki article takes advantage of the model established above. You will need the key and endpoint from the resource you create to connect your application to the Computer Vision service. The free pricing tier (F0) is enough for you to try the service.
Install Python Packages
In this project, we will install “djitellopy”, “azure-storage-blob”, “Pygame”, “PIL” and “azure-cognitiveservices-vision-customvision” packages to accelerate the development. Please refer to the “Install Python Azure IoT SDK and Tello Python SDK” section of the article “Azure Cloud Services for Tello Drones: How to send telemetry to Azure IoTHub” to complete this step.
Create and Debug Python Code on Your PC
Copy and paste the following code to your PyCharm project.
from djitellopy import tello
import KeyPressModule as kp
import time
import cv2
from PIL import Image
from PIL import ImageDraw
from azure.storage.blob import ContentSettings, BlobClient
from azure.cognitiveservices.vision.customvision.prediction import  CustomVisionPredictionClient
from msrest.authentication import ApiKeyCredentials

kp.init()
me =  tello.Tello()
me.connect()
print(me.get_battery())
me.streamon()

global img
# connection string for Azure Blob storage
conn_str =  "your connection string"
container_name =  "raspberrypic"
blob_name =  "capture"
# custom vision api
credentials =  ApiKeyCredentials(in_headers={"Prediction-key": "your key"})
predictor =  CustomVisionPredictionClient("your endpoint", credentials)
projectID =  "your project ID"
publish_iteration_name="your iteration name"


def getKeyboardInput():
    lr, fb, ud, yv =  0, 0, 0, 0
    speed =  50

    if kp.getKey("LEFT"):
        lr =  -speed
    elif kp.getKey("RIGHT"):
        lr =  speed

    if kp.getKey("UP"):
        fb =  speed
    elif kp.getKey("DOWN"):
        fb =  -speed

    if kp.getKey("w"):
        ud =  speed
    elif kp.getKey("s"):
        ud =  -speed

    if kp.getKey("a"):
        yv =  speed
    elif kp.getKey("d"):
        yv =  -speed

    if kp.getKey("q"): me.land()
    if kp.getKey("e"): me.takeoff()

    if kp.getKey("z"):
        global img
        cv2.imwrite(f'Resources/Images/capture.jpg', img)
        time.sleep(0.1)
        target =  0
        # open and detect the captured image
        with open(f'Resources/Images/capture.jpg', mode="rb") as captured_image:
            results =  predictor.detect_image(projectID, publish_iteration_name, captured_image)
        # Display the results.
        for prediction in results.predictions:
            if prediction.probability > 0.6:
                target =  1
                print("\t" +  prediction.tag_name + ": {0:.2f}%".format(prediction.probability *  100))
                bbox =  prediction.bounding_box
                im =  Image.open(f'Resources/Images/capture.jpg')
                draw =  ImageDraw.Draw(im)
                draw.rectangle([int(bbox.left *  1280), int(bbox.top * 720), int((bbox.left +  bbox.width) *  1280),
                                int((bbox.top +  bbox.height) *  720)], outline='red', width=5)
                im.save(f'Resources/Images/results.jpg')
        if target == 1:
            img =  cv2.imread(f'Resources/Images/results.jpg', cv2.IMREAD_COLOR)
            cv2.imshow("results", img)
            cv2.waitKey(1000)
            cv2.destroyWindow("results")
        else:
            img =  cv2.imread(f'Resources/Images/capture.jpg', cv2.IMREAD_COLOR)
            cv2.imshow("capture", img)
            cv2.waitKey(1000)
            cv2.destroyWindow("capture")
        # upload the image to Azure Blob Storage, Overwrite if it already exists!
        blob =  BlobClient.from_connection_string(conn_str, container_name, blob_name)
        image_content_setting =  ContentSettings(content_type='image/jpeg')
        with open(f'Resources/Images/capture.jpg', "rb") as data:
            try:
                blob.upload_blob(data, overwrite=True, content_settings=image_content_setting)
                print("Blob storage uploading completed")
            except ValueError:
                print("Blob storage uploading error")
    return [lr, fb, ud, yv]


def main():
    print("Tello Image Custom Vision Demo")
    while True:
        vals =  getKeyboardInput()
        me.send_rc_control(vals[0], vals[1], vals[2], vals[3])
        global img
        img =  me.get_frame_read().frame
        img =  cv2.resize(img, (1280, 720))
        cv2.putText(img, str(me.get_current_state()), (10, 60), cv2.FONT_HERSHEY_PLAIN, 0.9, (255, 0, 255), 1)
        cv2.imshow("image", img)
        cv2.waitKey(50)


if __name__ == "__main__":
    main()
As we did in this serial’s articles, we define a function getKeyboardInput to receive the keyboard input of the user, which return the control parameters to the loop in main function. It is quite the same as we designed in this article “Azure Cloud Services for Tello Drones: How to Control Tello by Azure C2D Messages”.
To achieve the custom vision service, we first store the image in the folder “Resources/Images/” of the project when we input “z” from keyboard. Then, a Custom Vision Prediction Client is created to send the image to our deployed Azure Custom Vision service model to get the predictions of the image. The results will be displayed on the screen as soon as the application receives the reply.
Please do substitute the connection string and Custom Vision service information with yours that created before. Then, power on the Tello, connect your PC with Tello by Wi-Fi. You will notice that the LED on the Tello will flash quickly with yellow color. Press Run or Debug button to start the process.
After a few seconds, the real time image that streamed from the Tello, as well as the Pygame window will be shown on the screen, as presented in Fig. 2.
Then, we can click the mouse on the Pygame window to focus user input on it. After that, we can use “w, s, a, d, e, q, up arrow, down arrow, left arrow, right arrow” to control the movement of the Tello drone. The device status of the Tello will be written on the top center of the image.
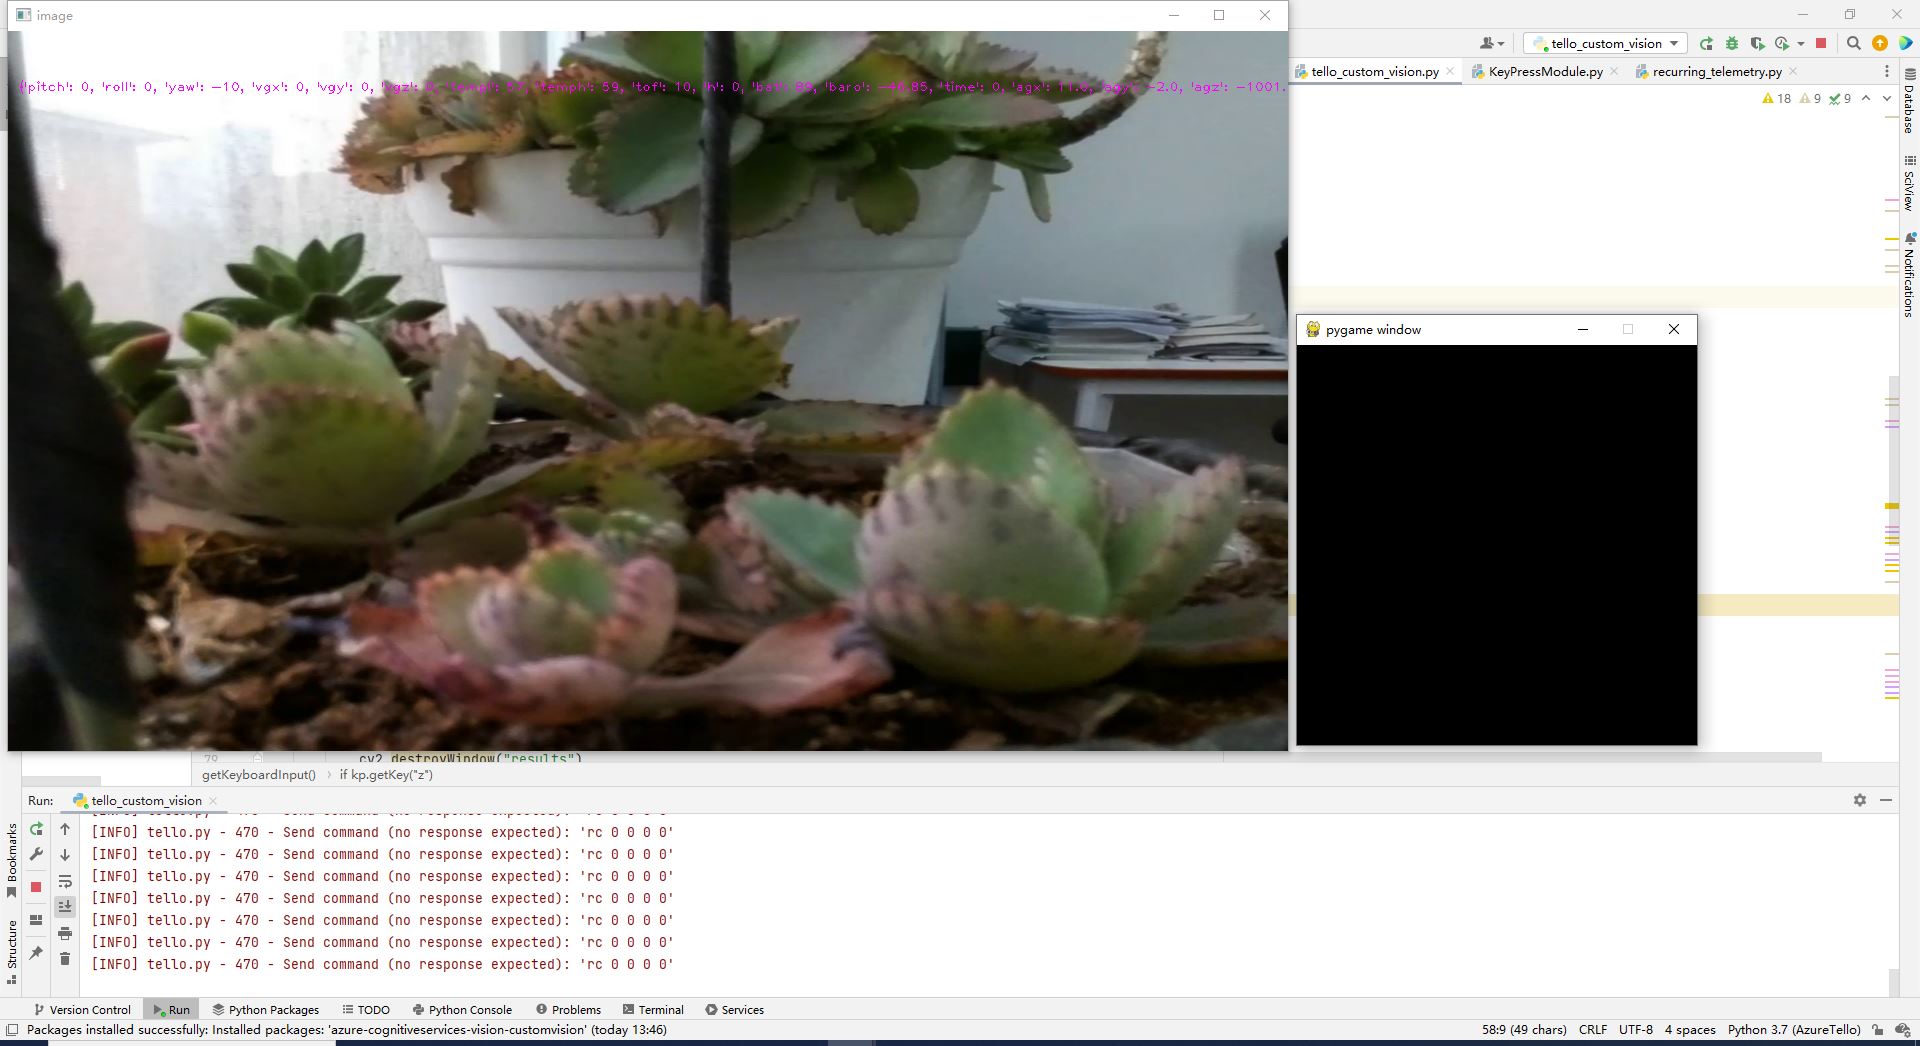
Fig. 2 Real time image and Pygame window
When we click “z” from keyboard, a Custom Vision Prediction Client is created to send the image to the Azure Custom Vision service to get the predicts of the image. In this project, we want to identify doves and crows in the image. So, here we capture the image of the dove on the PC screen. The results will be analyzed to show in the output window in Fig. 3. And the recognized bird will be highlighted with red rectangle in the image, as shown in Fig. 4.

Fig. 3 Custom Vision Results of the captured image from Tello

Fig. 4 The image with Custom Vision Results
If the probability of the prediction is below 0.6, we will not show the object. After that, the image is transmitted to the Azure Blob storage. We can see the log information on the debug window. Also, we can make use of Azure Storage Explorer to check the image.
Summary
In this tutorial, we have presented the steps and Python codes on how to create an Azure Custom Vision Service, send the image streamed from Tello drone to the deployed model to get the prediction, as well as send the result to the Azure Blob Storage.
Resources
- MS Docs for Azure Custom Vision.
- MS Docs for Create a storage account.
- MS Docs for Manage storage account access keys.
See Also
- Azure Cloud Services for Tello Drones: How to send telemetry to Azure IoTHub
- Azure Cloud Services for Tello Drones: How to Control Tello by Azure C2D Messages
- Azure Cloud Services for Tello Drones: How to Config Tello by Azure Direct Methods
- Azure Cloud Services for Tello Drones: How to Send Images to Azure Blob Storage
- Azure Cloud Services for Tello Drones: How to Analyze Images by Azure Computer Vision