Azure Data Studio 명령줄 인터페이스
중요하다
Azure Data Studio는 2026년 2월 28일에사용 중지됩니다. Visual Studio Code를 사용하는 것을 권장합니다. Visual Studio Code로 마이그레이션하는 방법에 대한 자세한 내용은 Azure Data Studio에 무슨 일이 일어나고 있는지 확인하세요.
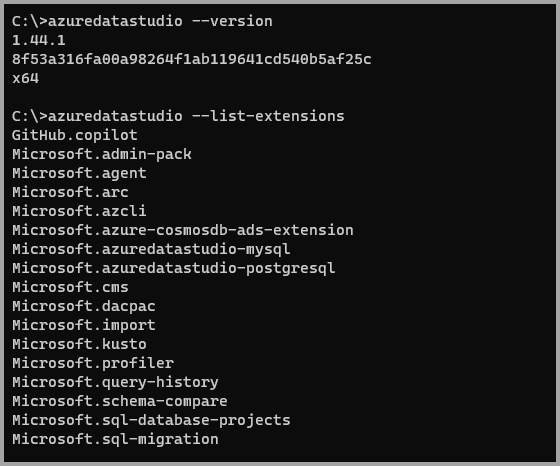
Azure Data Studio에는 애플리케이션을 시작하는 방법을 제어할 수 있는 기본 제공 명령줄 인터페이스가 포함되어 있습니다. 명령줄 옵션(스위치)을 통해 파일을 열고, 확장을 설치하고, 표시 언어를 변경하고, 진단을 출력할 수 있습니다.

Azure Data Studio 내에서 명령줄 도구를 실행하는 방법의 예는 통합 터미널을 참조하세요.
참고 항목
Microsoft Entra ID는 Azure AD(Azure Active Directory)의 새 이름이지만, 기존 환경의 중단을 방지하기 위해 UI 필드, 연결 공급자, 오류 코드 및 cmdlet과 같은 일부 하드 코딩된 요소에는 여전히 Azure AD가 남아 있습니다. 이 문서에서는 두 이름을 혼용할 수 있습니다.
명령줄 도움말
Azure Data Studio 명령줄 인터페이스의 개요를 보려면 Azure Data Studio(> 터미널 보기) 또는 명령 프롬프트 내에서 터미널을 열고 azuredatastudio --help를 입력합니다. 출력에는 잘린 예제와 같이 버전, 사용 예제, 명령줄 옵션 목록이 포함됩니다.
Azure Data Studio 1.48.1

Usage: azuredatastudio.exe [options][paths...]

To read output from another program, append '-' (e.g. 'echo Hello World | azuredatastudio.exe -')

Options

  <vscode options>

  -h --help                                  Print usage.
  --aad                                      Use Azure Active Directory authentication, this option is
                                             deprecated - use 'authenticationType' instead.
  -A --applicationName                       Supports providing applicationName
                                             that will be used for connection profile app name.
  -T --authenticationType                    Provide authentication mode to be
                                             used. Accepted values: AzureMFA, SqlLogin, Integrated, etc.
  -c --command <command-name>                Name of command to run, accepted
                                             values: connect, openConnectionDialog
  -Z --connectionProperties                  Supports providing advanced connection properties that
                                             providers support. Value must be a json object containing
                                             key-value pairs in format: '{"key1":"value1"}'
  -D --database <database>                   Name of database
  -E --integrated                            Use Integrated authentication,
                                             this option is deprecated - use 'authenticationType' instead.
  -P --provider                              Connection provider to use, e.g. MSSQL, PGSQL, etc.
  -S --server <server>                       Name of target server or host name.
  --showDashboard                            Whether or not to show dashboard on connection, false by default.
  -U --user <user-name>                      User name/email address
명령줄에서 시작
명령줄에서 Azure Data Studio를 시작하여 파일, 폴더 또는 프로젝트를 빠르게 열 수 있습니다. 일반적으로 폴더의 컨텍스트 내에서 Azure Data Studio를 엽니다. 열린 터미널 또는 명령 프롬프트에서 프로젝트 폴더로 이동하고 azuredatastudio를 입력합니다.
쿼리 편집기로 시작
Azure Data Studio를 열 때 쿼리 편집기에서 스크립트를 여는 경우가 있습니다. 파일의 경로를 제공하여 기존 스크립트로 Azure Data Studio를 시작할 수 있습니다.
azuredatastudio .\samplescript.sql
URI를 사용하여 시작
URL 형식을 사용하여 브라우저에서 Azure Data Studio를 시작하여 빠르게 연결을 설정하거나 연결 대화 상자를 열고 필요에 따라 쿼리 편집기에서 스크립트를 열 수 있습니다. URI를 사용하여 시작하는 데 지원되는 형식은 다음과 같습니다.
azuredatastudio://{command}?{option1}={value1}&{option2}={value2}...
지원되는 명령
명령줄에서 Azure Data Studio를 시작할 때 지원되는 명령은 다음과 같습니다.
-
connect: 제공된 옵션을 사용하여 대상 서버에 연결 -
openConnectionDialog: 제공된 옵션을 사용하여 연결 대화 상자 열기
지원되는 옵션
다음 옵션은 URL에서 제공될 수 있습니다.
| 옵션 | 설명 |
|---|---|
provider |
MSSQL, PGSQL 등과 같이 사용할 연결 공급자입니다. |
server |
대상 서버 이름 또는 호스트 이름입니다. |
database |
데이터베이스의 이름입니다. |
user |
사용자의 이름입니다. |
authenticationType |
사용할 인증 모드, 허용되는 값: AzureMFA, SqlLogin, Integrated, 등입니다. |
applicationName |
연결 프로필에 사용되는 애플리케이션 이름을 제공합니다. |
connectionProperties |
공급자가 지원하는 고급 연결 속성입니다. 값은 형식 {"key1":"value1"}의 키-값 쌍을 포함하는 json 개체여야 합니다. |
예제
명령 프롬프트: 통합 인증
azuredatastudio --server localhost --authenticationType Integrated
"서버 인증서 신뢰" 경고가 표시될 수 있습니다.
참고 항목
Virtual Machine에서 온-프레미스 SQL Server 또는 SQL Server에 연결하는 사용자의 경우 암호화된 연결을 지원하도록 데이터베이스 엔진을 구성해야 합니다. 자세한 지침은 연결 암호화에 대한 SQL Server 데이터베이스 엔진 구성을 참조하세요.
명령 프롬프트: 저장된 스크립트를 사용하여 Azure Data Studio 시작
azuredatastudio --server localhost --provider mssql --user sa .\samplescript.sql
브라우저
azuredatastudio://connect?server=*****&user=*****&authenticationType=*****&connectionProperties={"key1":"value1"}