자습서: Node.js 및 Express 웹앱에서 사용자 로그인 및 Microsoft Graph용 토큰 획득
이 자습서에서는 사용자를 로그인하고 Microsoft Graph를 호출하기 위한 액세스 토큰을 획득하는 웹앱을 빌드합니다. 빌드한 웹앱은 Node용 MSAL(Microsoft 인증 라이브러리)을 사용합니다.
다음을 수행하려면 이 자습서의 단계를 따릅니다.
- Azure Portal에 애플리케이션 등록
- Express 웹앱 프로젝트 만들기
- 인증 라이브러리 패키지 설치
- 앱 등록 세부 정보 추가
- 사용자 로그인 코드 추가
- 앱 테스트
자세한 내용은 MSAL 노드를 사용하여 Microsoft Graph와 같은 보호된 리소스에 대한 액세스 토큰에 로그인, 로그아웃 및 획득하는 방법을 보여 주는 샘플 코드를 참조하세요.
필수 조건
- Node.JS
- Visual Studio Code 또는 다른 코드 편집기
응용 프로그램 등록
먼저 Microsoft ID 플랫폼에 애플리케이션 등록의 단계를 완료하여 앱을 등록합니다.
앱 등록 시 다음 설정을 사용합니다.
- 이름:
ExpressWebApp(권장) - 지원되는 계정 유형: 이 조직 디렉터리의 계정만
- 플랫폼 유형: 웹
- 리디렉션 URI:
http://localhost:3000/auth/redirect - 클라이언트 암호:
*********(이 값은 한 번만 표시되므로 이후 단계에서 사용할 수 있게 기록해 두세요.)
프로젝트 만들기
Express 애플리케이션 생성기 도구를 사용하여 애플리케이션 기본 구조를 만듭니다.
- 먼저 express-generator 패키지를 설치합니다.
npm install -g express-generator
- 그런 다음, 다음과 같이 애플리케이션 구조를 만듭니다.
    express --view=hbs /ExpressWebApp && cd /ExpressWebApp
    npm install
이제 간단한 Express 웹앱이 생겼습니다. 프로젝트의 파일 및 폴더 구조는 다음 폴더 구조와 유사합니다.
ExpressWebApp/
├── bin/
|    └── wwww
├── public/
|    ├── images/
|    ├── javascript/
|    └── stylesheets/
|        └── style.css
├── routes/
|    ├── index.js
|    └── users.js
├── views/
|    ├── error.hbs
|    ├── index.hbs
|    └── layout.hbs
├── app.js
└── package.json
인증 라이브러리 설치
터미널에서 프로젝트 디렉터리의 루트를 찾고 npm을 통해 MSAL 노드 패키지를 설치합니다.
npm install --save @azure/msal-node
다른 종속성 설치
이 자습서의 웹앱 샘플은 세션 관리를 위한 express-session 패키지, 개발 중 환경 매개 변수 읽기를 위한 dotenv 패키지, Microsoft Graph API에 대한 네트워크 호출을 위한 axios를 사용합니다. 이러한 패키지를 npm을 통해 설치합니다.
npm install --save express-session dotenv axios
앱 등록 세부 정보 추가
- 프로젝트 폴더의 루트에 .env.dev 파일을 만듭니다. 다음 코드를 추가합니다.
CLOUD_INSTANCE="Enter_the_Cloud_Instance_Id_Here" # cloud instance string should end with a trailing slash
TENANT_ID="Enter_the_Tenant_Info_Here"
CLIENT_ID="Enter_the_Application_Id_Here"
CLIENT_SECRET="Enter_the_Client_Secret_Here"

REDIRECT_URI="http://localhost:3000/auth/redirect"
POST_LOGOUT_REDIRECT_URI="http://localhost:3000"

GRAPH_API_ENDPOINT="Enter_the_Graph_Endpoint_Here" # graph api endpoint string should end with a trailing slash

EXPRESS_SESSION_SECRET="Enter_the_Express_Session_Secret_Here"
Azure 앱 등록 포털에서 얻은 값으로 이러한 세부 정보를 입력합니다.
Enter_the_Cloud_Instance_Id_Here: 애플리케이션이 등록된 Azure 클라우드 인스턴스입니다.- 기본(또는 전역) Azure 클라우드의 경우
https://login.microsoftonline.com/을 입력합니다(후행 슬래시 포함). - 국가별 클라우드(예: 중국)의 경우 국가별 클라우드에서 적절한 값을 찾을 수 있습니다.
- 기본(또는 전역) Azure 클라우드의 경우
Enter_the_Tenant_Info_here는 다음 매개 변수 중 하나여야 합니다.- 애플리케이션에서 이 조직 디렉터리의 계정을 지원하는 경우 이 값을 테넌트 ID 또는 테넌트 이름으로 바꿉니다. 예:
contoso.microsoft.com. - 애플리케이션에서 모든 조직 디렉터리의 계정을 지원하는 경우 이 값을
organizations로 바꾸세요. - 애플리케이션에서 모든 조직 디렉터리의 계정 및 개인 Microsoft 계정을 지원하는 경우 이 값을
common으로 바꿉니다. - 개인 Microsoft 계정만 지원하도록 제한하려면 이 값을
consumers로 바꿉니다.
- 애플리케이션에서 이 조직 디렉터리의 계정을 지원하는 경우 이 값을 테넌트 ID 또는 테넌트 이름으로 바꿉니다. 예:
Enter_the_Application_Id_Here: 등록한 애플리케이션의 애플리케이션(클라이언트) ID입니다.Enter_the_Client_secret: 이 값을 이전에 만든 클라이언트 암호로 바꿉니다. 새 키를 생성하려면 Azure Portal의 앱 등록 설정에서 인증서 및 비밀을 사용합니다.
Warning
소스 코드의 일반 텍스트 비밀은 보안 위험을 가중시킵니다. 이 문서에서는 간단한 설명을 위해 일반 텍스트 클라이언트 암호를 사용합니다. 기밀 클라이언트 애플리케이션(특히 프로덕션 환경에 배포하려는 앱)에는 클라이언트 암호 대신 인증서 자격 증명을 사용합니다.
Enter_the_Graph_Endpoint_Here: 앱에서 호출할 Microsoft Graph API 클라우드 인스턴스. 기본(글로벌) Microsoft Graph API 서비스의 경우https://graph.microsoft.com/(후행 슬래시 포함)을 입력합니다.Enter_the_Express_Session_Secret_HereExpress 세션 쿠키에 서명하는 데 사용되는 비밀. 이 문자열을 바꿀 임의의 문자 문자열(예: 클라이언트 암호)을 선택합니다.
- 다음으로, 이러한 매개변수를 읽을 수 있도록 프로젝트 루트에 authConfig.js라는 파일을 만듭니다. 만들어지면 거기에 다음 코드를 추가합니다.
/*
 * Copyright (c) Microsoft Corporation. All rights reserved.
 * Licensed under the MIT License.
 */

require('dotenv').config({ path: '.env.dev' });

/**
 * Configuration object to be passed to MSAL instance on creation.
 * For a full list of MSAL Node configuration parameters, visit:
 * https://github.com/AzureAD/microsoft-authentication-library-for-js/blob/dev/lib/msal-node/docs/configuration.md
 */
const msalConfig = {
    auth: {
        clientId: process.env.CLIENT_ID, // 'Application (client) ID' of app registration in Azure portal - this value is a GUID
        authority: process.env.CLOUD_INSTANCE + process.env.TENANT_ID, // Full directory URL, in the form of https://login.microsoftonline.com/<tenant>
        clientSecret: process.env.CLIENT_SECRET // Client secret generated from the app registration in Azure portal
    },
    system: {
        loggerOptions: {
            loggerCallback(loglevel, message, containsPii) {
                console.log(message);
            },
            piiLoggingEnabled: false,
            logLevel: 3,
        }
    }
}

const REDIRECT_URI = process.env.REDIRECT_URI;
const POST_LOGOUT_REDIRECT_URI = process.env.POST_LOGOUT_REDIRECT_URI;
const GRAPH_ME_ENDPOINT = process.env.GRAPH_API_ENDPOINT + "v1.0/me";

module.exports = {
    msalConfig,
    REDIRECT_URI,
    POST_LOGOUT_REDIRECT_URI,
    GRAPH_ME_ENDPOINT
};
사용자 로그인 및 토큰 획득을 위한 코드 추가
- auth라는 새 폴더를 만들고 그 아래에 AuthProvider.js이라는 새 파일을 추가합니다. 여기에는 MSAL 노드를 사용하여 필요한 인증 논리를 캡슐화하는 AuthProvider 클래스가 포함됩니다. 거기에 다음 코드를 추가합니다.
const msal = require('@azure/msal-node');
const axios = require('axios');

const { msalConfig } = require('../authConfig');

class AuthProvider {
    msalConfig;
    cryptoProvider;

    constructor(msalConfig) {
        this.msalConfig = msalConfig
        this.cryptoProvider = new msal.CryptoProvider();
    };

    login(options = {}) {
        return async (req, res, next) => {

            /**
             * MSAL Node library allows you to pass your custom state as state parameter in the Request object.
             * The state parameter can also be used to encode information of the app's state before redirect.
             * You can pass the user's state in the app, such as the page or view they were on, as input to this parameter.
             */
            const state = this.cryptoProvider.base64Encode(
                JSON.stringify({
                    successRedirect: options.successRedirect || '/',
                })
            );

            const authCodeUrlRequestParams = {
                state: state,

                /**
                 * By default, MSAL Node will add OIDC scopes to the auth code url request. For more information, visit:
                 * https://docs.microsoft.com/azure/active-directory/develop/v2-permissions-and-consent#openid-connect-scopes
                 */
                scopes: options.scopes || [],
                redirectUri: options.redirectUri,
            };

            const authCodeRequestParams = {
                state: state,

                /**
                 * By default, MSAL Node will add OIDC scopes to the auth code request. For more information, visit:
                 * https://docs.microsoft.com/azure/active-directory/develop/v2-permissions-and-consent#openid-connect-scopes
                 */
                scopes: options.scopes || [],
                redirectUri: options.redirectUri,
            };

            /**
             * If the current msal configuration does not have cloudDiscoveryMetadata or authorityMetadata, we will
             * make a request to the relevant endpoints to retrieve the metadata. This allows MSAL to avoid making
             * metadata discovery calls, thereby improving performance of token acquisition process. For more, see:
             * https://github.com/AzureAD/microsoft-authentication-library-for-js/blob/dev/lib/msal-node/docs/performance.md
             */
            if (!this.msalConfig.auth.cloudDiscoveryMetadata || !this.msalConfig.auth.authorityMetadata) {

                const [cloudDiscoveryMetadata, authorityMetadata] = await Promise.all([
                    this.getCloudDiscoveryMetadata(this.msalConfig.auth.authority),
                    this.getAuthorityMetadata(this.msalConfig.auth.authority)
                ]);

                this.msalConfig.auth.cloudDiscoveryMetadata = JSON.stringify(cloudDiscoveryMetadata);
                this.msalConfig.auth.authorityMetadata = JSON.stringify(authorityMetadata);
            }

            const msalInstance = this.getMsalInstance(this.msalConfig);

            // trigger the first leg of auth code flow
            return this.redirectToAuthCodeUrl(
                authCodeUrlRequestParams,
                authCodeRequestParams,
                msalInstance
            )(req, res, next);
        };
    }

    acquireToken(options = {}) {
        return async (req, res, next) => {
            try {
                const msalInstance = this.getMsalInstance(this.msalConfig);

                /**
                 * If a token cache exists in the session, deserialize it and set it as the
                 * cache for the new MSAL CCA instance. For more, see:
                 * https://github.com/AzureAD/microsoft-authentication-library-for-js/blob/dev/lib/msal-node/docs/caching.md
                 */
                if (req.session.tokenCache) {
                    msalInstance.getTokenCache().deserialize(req.session.tokenCache);
                }

                const tokenResponse = await msalInstance.acquireTokenSilent({
                    account: req.session.account,
                    scopes: options.scopes || [],
                });

                /**
                 * On successful token acquisition, write the updated token
                 * cache back to the session. For more, see:
                 * https://github.com/AzureAD/microsoft-authentication-library-for-js/blob/dev/lib/msal-node/docs/caching.md
                 */
                req.session.tokenCache = msalInstance.getTokenCache().serialize();
                req.session.accessToken = tokenResponse.accessToken;
                req.session.idToken = tokenResponse.idToken;
                req.session.account = tokenResponse.account;

                res.redirect(options.successRedirect);
            } catch (error) {
                if (error instanceof msal.InteractionRequiredAuthError) {
                    return this.login({
                        scopes: options.scopes || [],
                        redirectUri: options.redirectUri,
                        successRedirect: options.successRedirect || '/',
                    })(req, res, next);
                }

                next(error);
            }
        };
    }

    handleRedirect(options = {}) {
        return async (req, res, next) => {
            if (!req.body || !req.body.state) {
                return next(new Error('Error: response not found'));
            }

            const authCodeRequest = {
                ...req.session.authCodeRequest,
                code: req.body.code,
                codeVerifier: req.session.pkceCodes.verifier,
            };

            try {
                const msalInstance = this.getMsalInstance(this.msalConfig);

                if (req.session.tokenCache) {
                    msalInstance.getTokenCache().deserialize(req.session.tokenCache);
                }

                const tokenResponse = await msalInstance.acquireTokenByCode(authCodeRequest, req.body);

                req.session.tokenCache = msalInstance.getTokenCache().serialize();
                req.session.idToken = tokenResponse.idToken;
                req.session.account = tokenResponse.account;
                req.session.isAuthenticated = true;

                const state = JSON.parse(this.cryptoProvider.base64Decode(req.body.state));
                res.redirect(state.successRedirect);
            } catch (error) {
                next(error);
            }
        }
    }

    logout(options = {}) {
        return (req, res, next) => {

            /**
             * Construct a logout URI and redirect the user to end the
             * session with Azure AD. For more information, visit:
             * https://docs.microsoft.com/azure/active-directory/develop/v2-protocols-oidc#send-a-sign-out-request
             */
            let logoutUri = `${this.msalConfig.auth.authority}/oauth2/v2.0/`;

            if (options.postLogoutRedirectUri) {
                logoutUri += `logout?post_logout_redirect_uri=${options.postLogoutRedirectUri}`;
            }

            req.session.destroy(() => {
                res.redirect(logoutUri);
            });
        }
    }

    /**
     * Instantiates a new MSAL ConfidentialClientApplication object
     * @param msalConfig: MSAL Node Configuration object
     * @returns
     */
    getMsalInstance(msalConfig) {
        return new msal.ConfidentialClientApplication(msalConfig);
    }


    /**
     * Prepares the auth code request parameters and initiates the first leg of auth code flow
     * @param req: Express request object
     * @param res: Express response object
     * @param next: Express next function
     * @param authCodeUrlRequestParams: parameters for requesting an auth code url
     * @param authCodeRequestParams: parameters for requesting tokens using auth code
     */
    redirectToAuthCodeUrl(authCodeUrlRequestParams, authCodeRequestParams, msalInstance) {
        return async (req, res, next) => {
            // Generate PKCE Codes before starting the authorization flow
            const { verifier, challenge } = await this.cryptoProvider.generatePkceCodes();

            // Set generated PKCE codes and method as session vars
            req.session.pkceCodes = {
                challengeMethod: 'S256',
                verifier: verifier,
                challenge: challenge,
            };

            /**
             * By manipulating the request objects below before each request, we can obtain
             * auth artifacts with desired claims. For more information, visit:
             * https://azuread.github.io/microsoft-authentication-library-for-js/ref/modules/_azure_msal_node.html#authorizationurlrequest
             * https://azuread.github.io/microsoft-authentication-library-for-js/ref/modules/_azure_msal_node.html#authorizationcoderequest
             **/
            req.session.authCodeUrlRequest = {
                ...authCodeUrlRequestParams,
                responseMode: msal.ResponseMode.FORM_POST, // recommended for confidential clients
                codeChallenge: req.session.pkceCodes.challenge,
                codeChallengeMethod: req.session.pkceCodes.challengeMethod,
            };

            req.session.authCodeRequest = {
                ...authCodeRequestParams,
                code: '',
            };

            try {
                const authCodeUrlResponse = await msalInstance.getAuthCodeUrl(req.session.authCodeUrlRequest);
                res.redirect(authCodeUrlResponse);
            } catch (error) {
                next(error);
            }
        };
    }

    /**
     * Retrieves cloud discovery metadata from the /discovery/instance endpoint
     * @returns
     */
    async getCloudDiscoveryMetadata(authority) {
        const endpoint = 'https://login.microsoftonline.com/common/discovery/instance';

        try {
            const response = await axios.get(endpoint, {
                params: {
                    'api-version': '1.1',
                    'authorization_endpoint': `${authority}/oauth2/v2.0/authorize`
                }
            });

            return await response.data;
        } catch (error) {
            throw error;
        }
    }

    /**
     * Retrieves oidc metadata from the openid endpoint
     * @returns
     */
    async getAuthorityMetadata(authority) {
        const endpoint = `${authority}/v2.0/.well-known/openid-configuration`;

        try {
            const response = await axios.get(endpoint);
            return await response.data;
        } catch (error) {
            console.log(error);
        }
    }
}

const authProvider = new AuthProvider(msalConfig);

module.exports = authProvider;
- 그다음 라우터 폴더 아래에 auth.js라는 새 파일을 만들고 여기에 다음 코드를 추가합니다.
/*
 * Copyright (c) Microsoft Corporation. All rights reserved.
 * Licensed under the MIT License.
 */

var express = require('express');

const authProvider = require('../auth/AuthProvider');
const { REDIRECT_URI, POST_LOGOUT_REDIRECT_URI } = require('../authConfig');

const router = express.Router();

router.get('/signin', authProvider.login({
    scopes: [],
    redirectUri: REDIRECT_URI,
    successRedirect: '/'
}));

router.get('/acquireToken', authProvider.acquireToken({
    scopes: ['User.Read'],
    redirectUri: REDIRECT_URI,
    successRedirect: '/users/profile'
}));

router.post('/redirect', authProvider.handleRedirect());

router.get('/signout', authProvider.logout({
    postLogoutRedirectUri: POST_LOGOUT_REDIRECT_URI
}));

module.exports = router;
- 기존 코드를 다음 코드 조각으로 바꿔서 index.js 경로를 업데이트합니다.
/*
 * Copyright (c) Microsoft Corporation. All rights reserved.
 * Licensed under the MIT License.
 */

var express = require('express');
var router = express.Router();

router.get('/', function (req, res, next) {
    res.render('index', {
        title: 'MSAL Node & Express Web App',
        isAuthenticated: req.session.isAuthenticated,
        username: req.session.account?.username,
    });
});

module.exports = router;
- 마지막으로 기존 코드를 다음 코드 조각으로 바꿔서 users.js 경로를 업데이트합니다.
/*
 * Copyright (c) Microsoft Corporation. All rights reserved.
 * Licensed under the MIT License.
 */

var express = require('express');
var router = express.Router();

var fetch = require('../fetch');

var { GRAPH_ME_ENDPOINT } = require('../authConfig');

// custom middleware to check auth state
function isAuthenticated(req, res, next) {
    if (!req.session.isAuthenticated) {
        return res.redirect('/auth/signin'); // redirect to sign-in route
    }

    next();
};

router.get('/id',
    isAuthenticated, // check if user is authenticated
    async function (req, res, next) {
        res.render('id', { idTokenClaims: req.session.account.idTokenClaims });
    }
);

router.get('/profile',
    isAuthenticated, // check if user is authenticated
    async function (req, res, next) {
        try {
            const graphResponse = await fetch(GRAPH_ME_ENDPOINT, req.session.accessToken);
            res.render('profile', { profile: graphResponse });
        } catch (error) {
            next(error);
        }
    }
);

module.exports = router;
Microsoft Graph API를 호출하기 위한 코드 추가
프로젝트 루트에 fetch.js라는 파일을 만들고 다음 코드를 추가합니다.
/*
 * Copyright (c) Microsoft Corporation. All rights reserved.
 * Licensed under the MIT License.
 */

var axios = require('axios');

/**
 * Attaches a given access token to a MS Graph API call
 * @param endpoint: REST API endpoint to call
 * @param accessToken: raw access token string
 */
async function fetch(endpoint, accessToken) {
    const options = {
        headers: {
            Authorization: `Bearer ${accessToken}`
        }
    };

    console.log(`request made to ${endpoint} at: ` + new Date().toString());

    try {
        const response = await axios.get(endpoint, options);
        return await response.data;
    } catch (error) {
        throw new Error(error);
    }
}

module.exports = fetch;
데이터 표시를 위한 보기 추가
- 보기 폴더에서 기존 코드를 다음으로 바꿔서 index.hbs 파일을 업데이트합니다.
<h1>{{title}}</h1>
{{#if isAuthenticated }}
<p>Hi {{username}}!</p>
<a href="/users/id">View ID token claims</a>
<br>
<a href="/auth/acquireToken">Acquire a token to call the Microsoft Graph API</a>
<br>
<a href="/auth/signout">Sign out</a>
{{else}}
<p>Welcome to {{title}}</p>
<a href="/auth/signin">Sign in</a>
{{/if}}
- 동일한 폴더에 사용자의 ID 토큰 내용을 표시하기 위해 id.hbs라는 다른 파일을 만듭니다.
<h1>Azure AD</h1>
<h3>ID Token</h3>
<table>
    <tbody>
        {{#each idTokenClaims}}
        <tr>
            <td>{{@key}}</td>
            <td>{{this}}</td>
        </tr>
        {{/each}}
    </tbody>
</table>
<br>
<a href="https://aka.ms/id-tokens" target="_blank">Learn about claims in this ID token</a>
<br>
<a href="/">Go back</a>
- 마지막으로 Microsoft Graph에 대한 호출 결과를 표시하기 위해 profile.hbs라는 다른 파일을 만듭니다.
<h1>Microsoft Graph API</h1>
<h3>/me endpoint response</h3>
<table>
    <tbody>
        {{#each profile}}
        <tr>
            <td>{{@key}}</td>
            <td>{{this}}</td>
        </tr>
        {{/each}}
    </tbody>
</table>
<br>
<a href="/">Go back</a>
라우터 등록 및 상태 관리 추가
프로젝트 폴더의 루트에 있는 app.js 파일에서 이전에 만든 경로를 등록하고 express-session 패키지를 사용하여 인증 상태를 추적하기 위한 세션 지원을 추가합니다. 거기에 있는 기존 코드를 다음 코드 조각으로 바꿉니다.
/*
 * Copyright (c) Microsoft Corporation. All rights reserved.
 * Licensed under the MIT License.
 */

require('dotenv').config();

var path = require('path');
var express = require('express');
var session = require('express-session');
var createError = require('http-errors');
var cookieParser = require('cookie-parser');
var logger = require('morgan');

var indexRouter = require('./routes/index');
var usersRouter = require('./routes/users');
var authRouter = require('./routes/auth');

// initialize express
var app = express();

/**
 * Using express-session middleware for persistent user session. Be sure to
 * familiarize yourself with available options. Visit: https://www.npmjs.com/package/express-session
 */
 app.use(session({
    secret: process.env.EXPRESS_SESSION_SECRET,
    resave: false,
    saveUninitialized: false,
    cookie: {
        httpOnly: true,
        secure: false, // set this to true on production
    }
}));

// view engine setup
app.set('views', path.join(__dirname, 'views'));
app.set('view engine', 'hbs');

app.use(logger('dev'));
app.use(express.json());
app.use(cookieParser());
app.use(express.urlencoded({ extended: false }));
app.use(express.static(path.join(__dirname, 'public')));

app.use('/', indexRouter);
app.use('/users', usersRouter);
app.use('/auth', authRouter);

// catch 404 and forward to error handler
app.use(function (req, res, next) {
    next(createError(404));
});

// error handler
app.use(function (err, req, res, next) {
    // set locals, only providing error in development
    res.locals.message = err.message;
    res.locals.error = req.app.get('env') === 'development' ? err : {};

    // render the error page
    res.status(err.status || 500);
    res.render('error');
});

module.exports = app;
로그인 및 Microsoft Graph 호출 테스트
애플리케이션 만들기가 완료되었으며 이제 앱의 기능을 테스트할 준비가 되었습니다.
- 프로젝트 폴더의 루트 내에서 다음 명령을 실행하여 Node.js 콘솔 앱을 시작합니다.
npm start
- 브라우저 창을 열고
http://localhost:3000으로 이동합니다. 시작 페이지가 표시되어야 합니다.
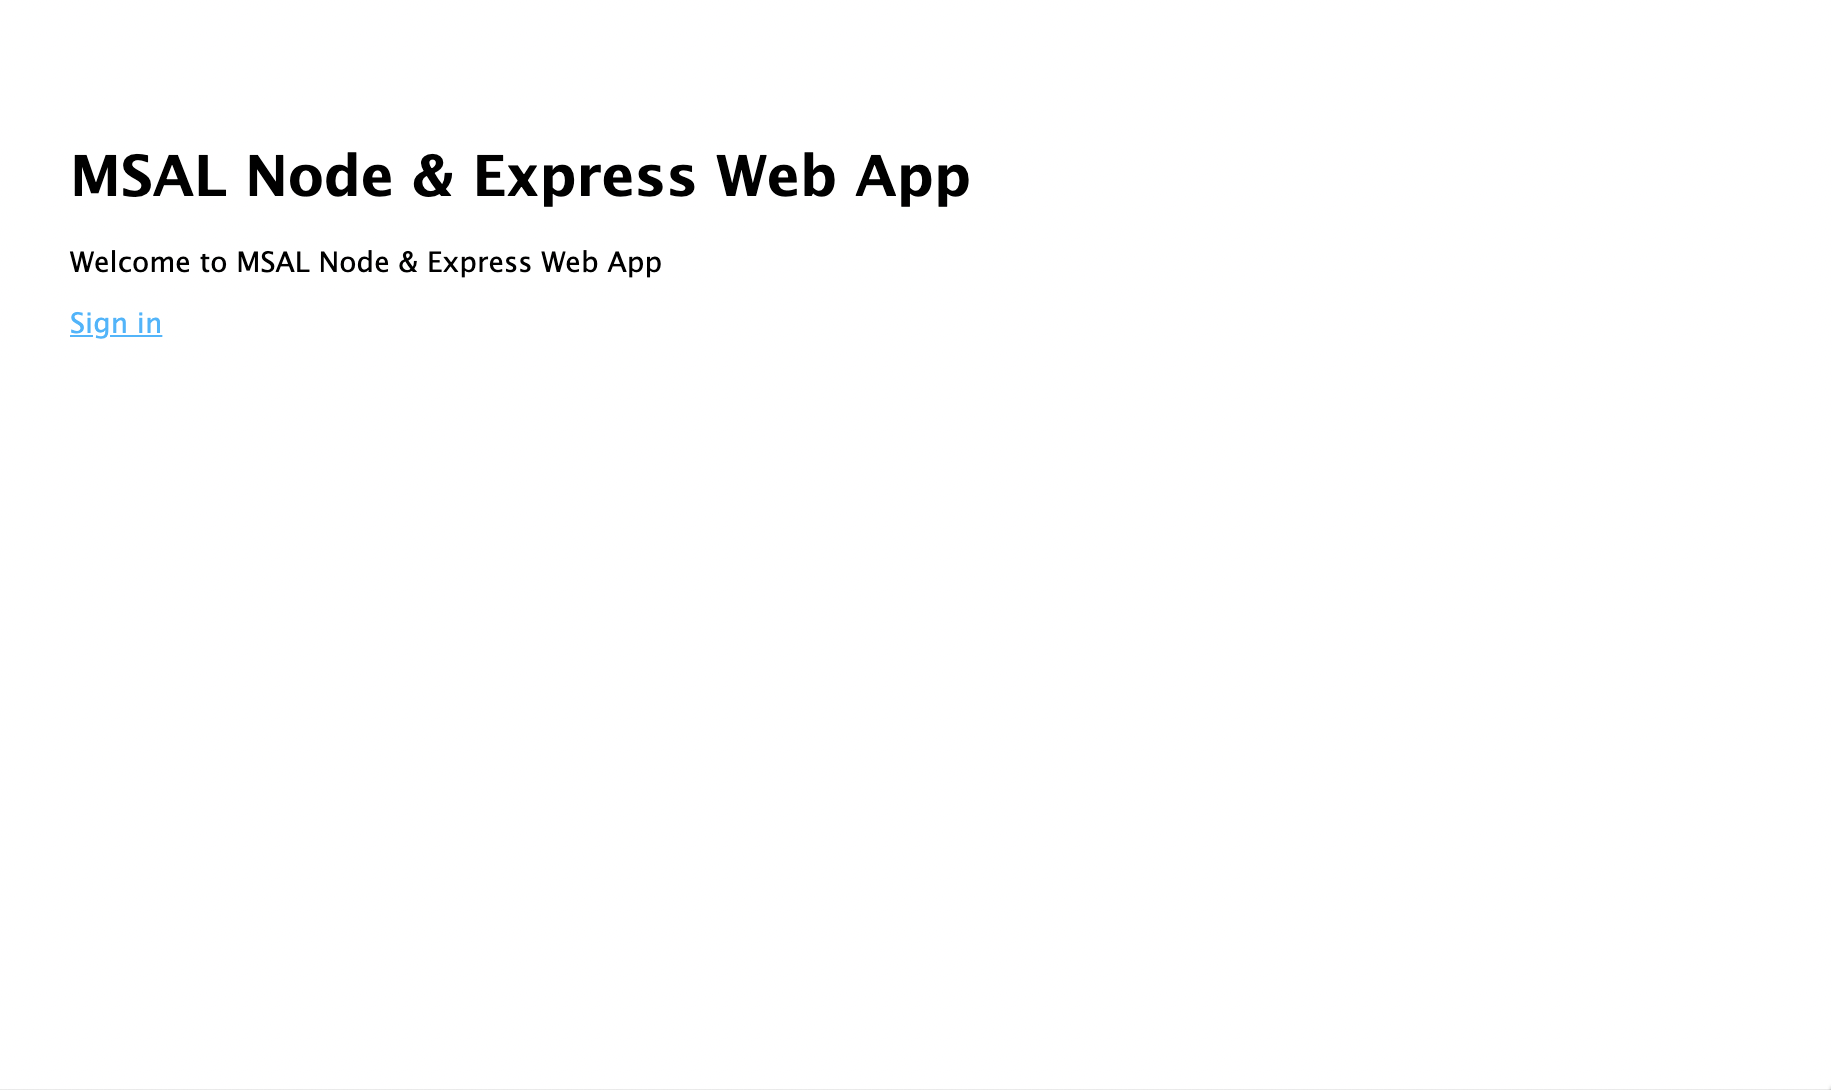
- 로그인 링크를 선택합니다. Microsoft Entra 로그인 화면이 표시됩니다.

- 자격 증명을 입력하면 앱 사용 권한을 승인하라는 동의 화면이 표시됩니다.
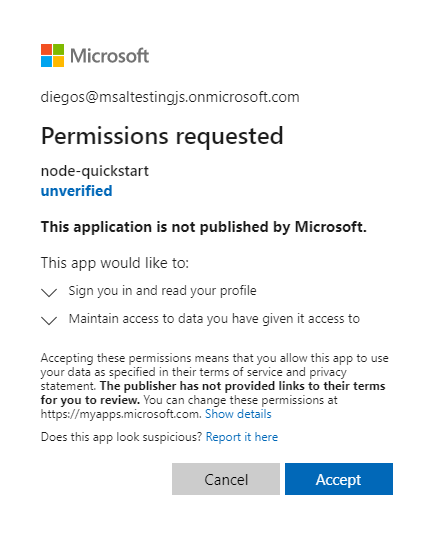
- 동의하면 애플리케이션 홈페이지로 다시 리디렉션되어야 합니다.

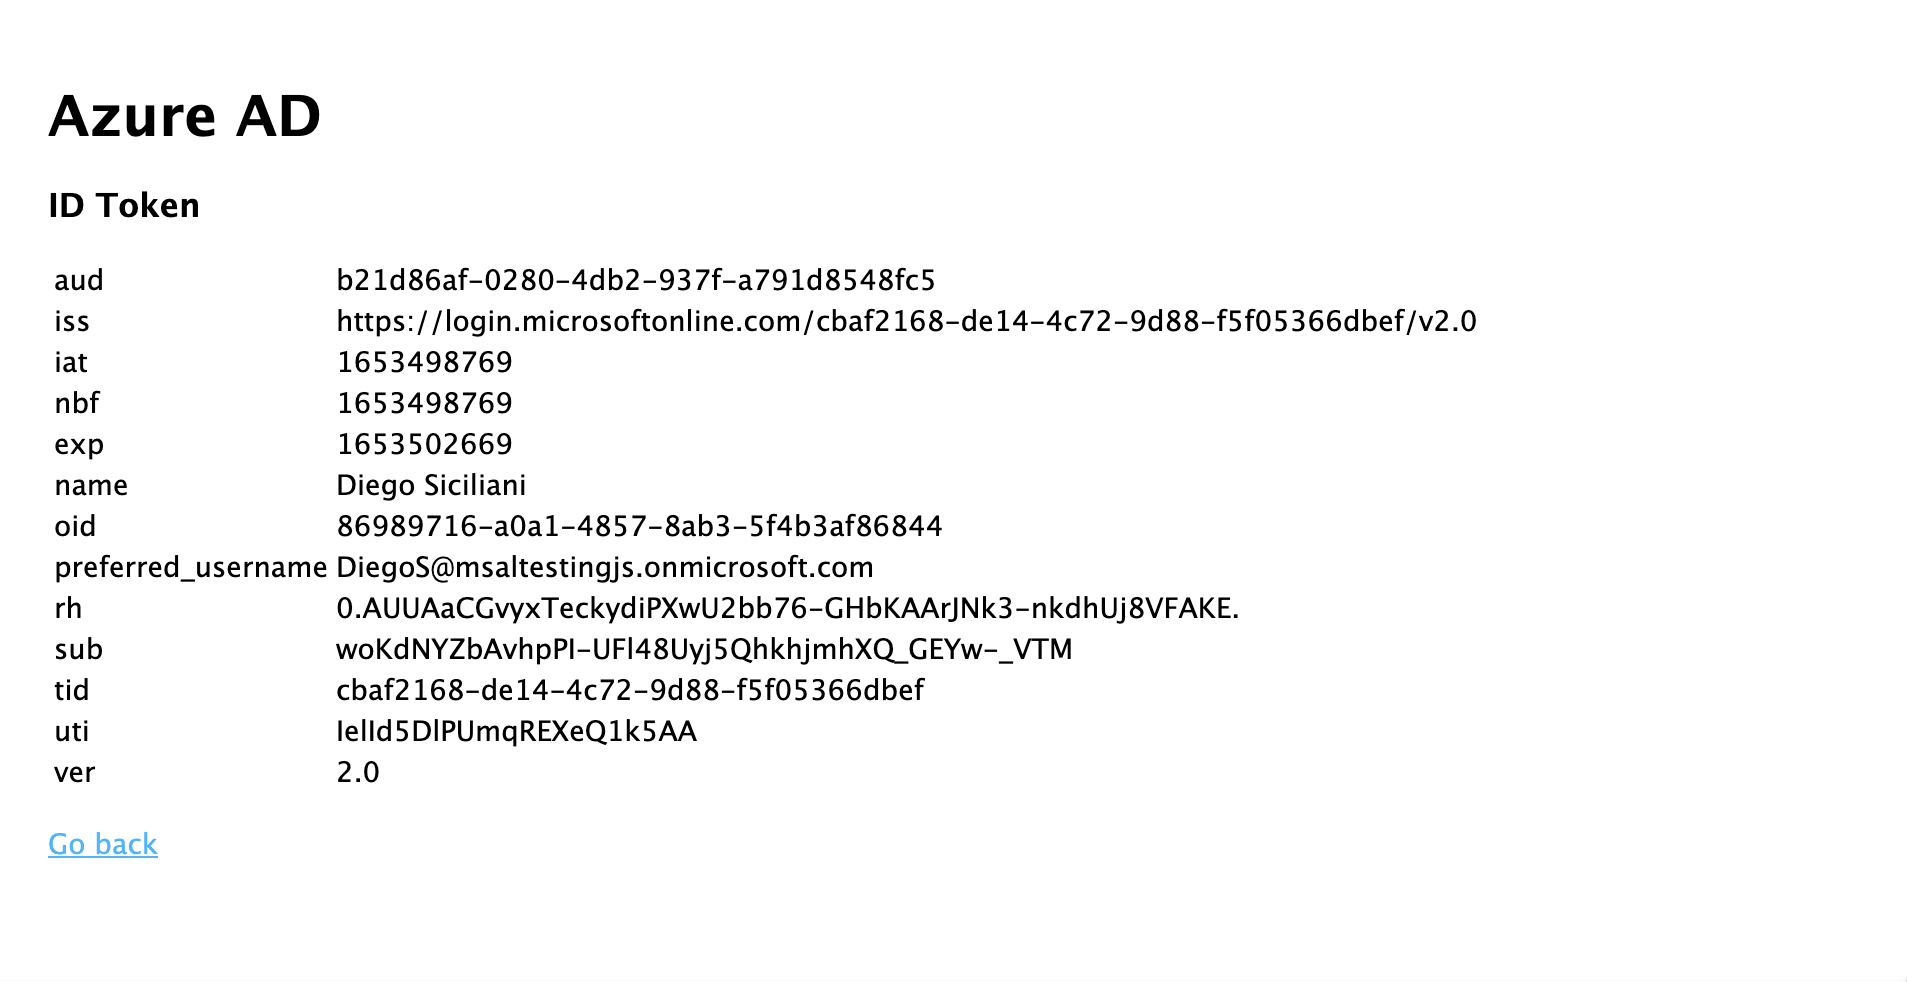
- 로그인한 사용자의 ID 토큰 내용을 표시하려면 ID 토큰 보기 링크를 선택합니다.
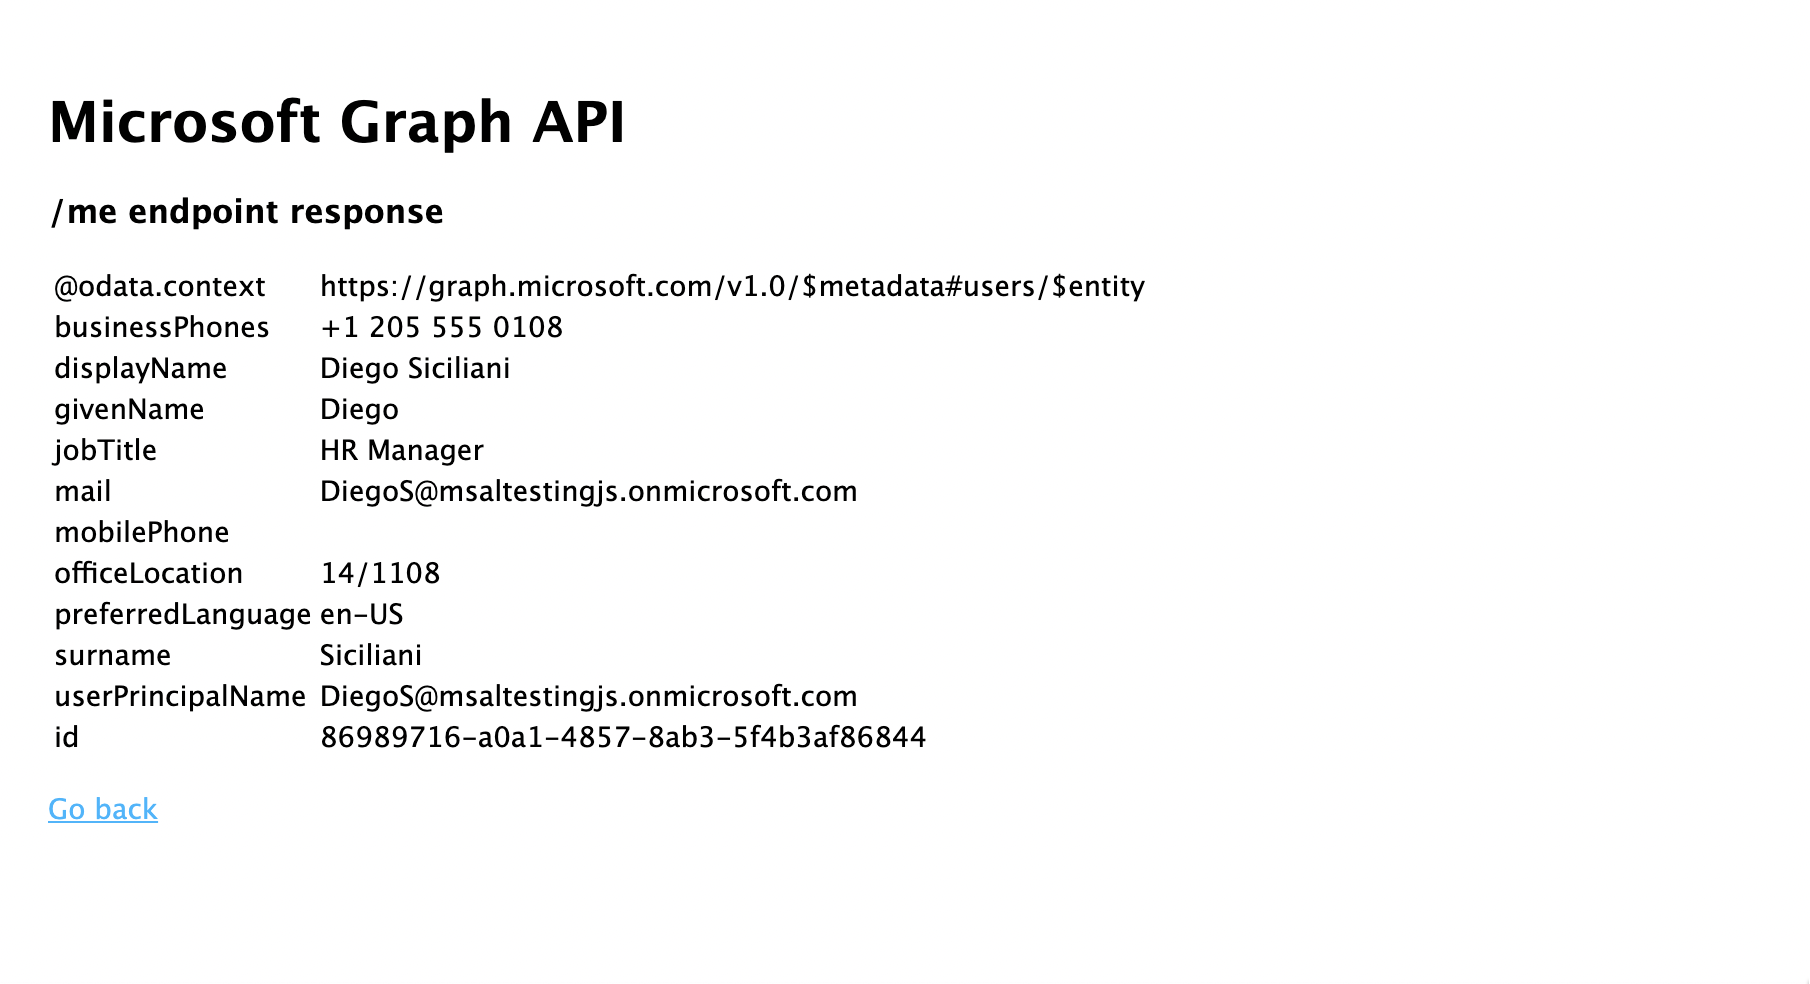
- 홈페이지로 돌아가서 액세스 토큰 획득 및 Microsoft Graph API 호출 링크를 선택합니다. 이렇게 하면 로그인한 사용자에 대한 Microsoft Graph /me 엔드포인트의 응답이 표시됩니다.
- 홈페이지로 돌아가서 로그아웃 링크를 선택합니다. Microsoft Entra 로그아웃 화면이 표시됩니다.
애플리케이션 작동 방식
이 자습서에서는 Azure Portal의 Microsoft Entra 앱 등록에서 가져온 매개 변수를 포함하는 구성 개체(msalConfig)를 전달하여 MSAL Node ConfidentialClientApplication 개체를 인스턴스화했습니다. 생성한 웹앱은 OpenID Connect 프로토콜을 사용하여 사용자를 로그인시키고 OAuth 2.0 인증 코드 흐름을 사용하여 액세스 토큰을 얻습니다.
다음 단계
Microsoft ID 플랫폼 Node.js 및 Express 웹 애플리케이션 개발에 대해 자세히 알아보려면 다중 파트 시나리오 시리즈를 참조하세요.