Azure AI 에이전트는 에이전트가 안전한 샌드박스 실행 환경 내에서 코드를 작성하고 실행할 수 있도록 하는 코드 인터프리터 도구 사용을 지원합니다. 이렇게 하면 에이전트가 사용자 요청에 따라 데이터 분석, 수학 계산 또는 파일 조작과 같은 작업을 수행할 수 있습니다. 이 문서에서는 Azure AI 에이전트에서 코드 인터프리터 도구를 사용하도록 설정하고 활용하기 위한 단계별 지침 및 코드 샘플을 제공합니다.
에이전트와 함께 코드 인터프리터 도구 사용
이 문서의 맨 위에 나열된 코드 예제 또는 Azure AI Foundry 포털을 사용하여 프로그래밍 방식으로 에이전트에 코드 인터프리터 도구를 추가할 수 있습니다. 포털을 사용하려는 경우:
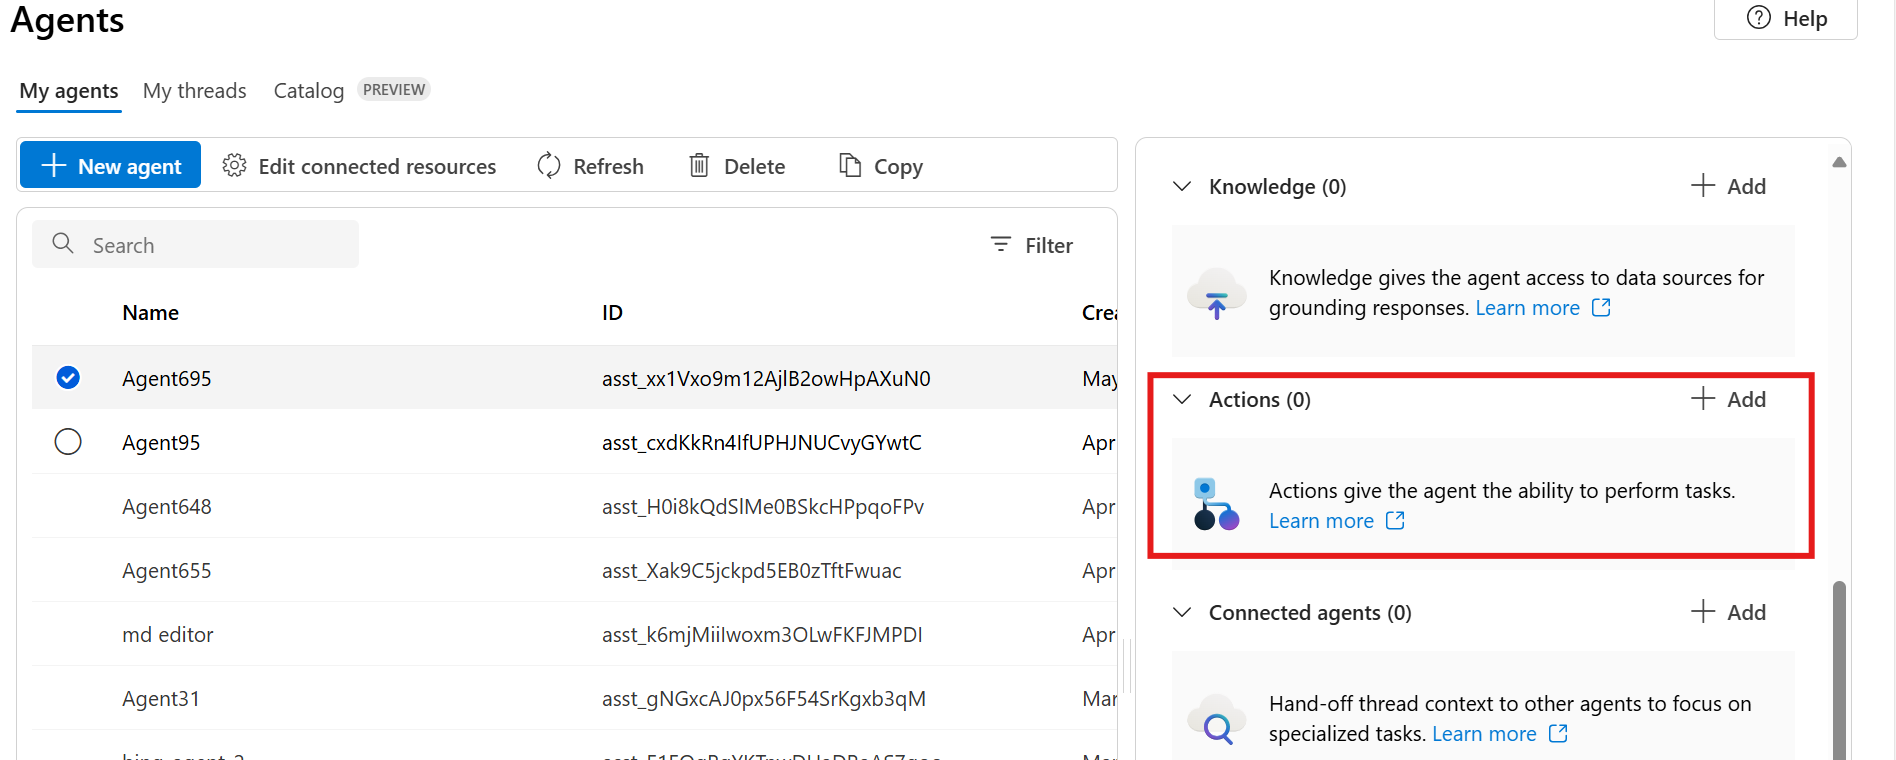
에이전트 화면에서 오른쪽의 설정 창 아래로 스크롤하여 작업으로 이동합니다. 그런 다음, 추가를 선택합니다.
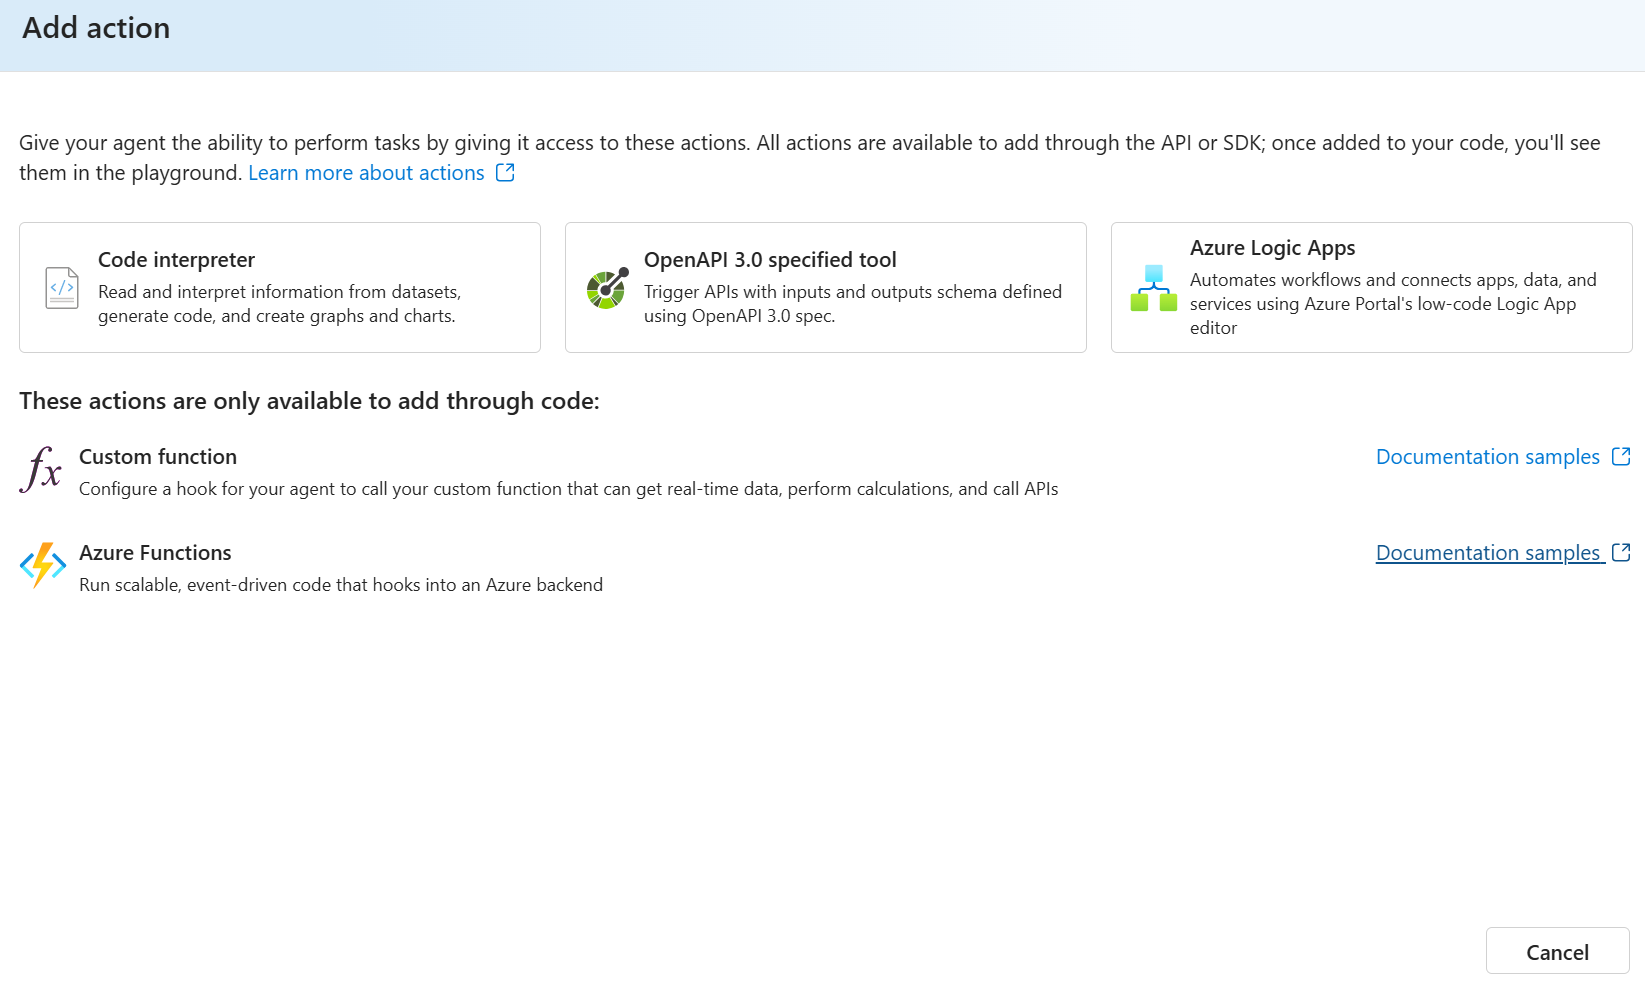
코드 인터프리터를 선택하고 프롬프트에 따라 도구를 추가합니다.
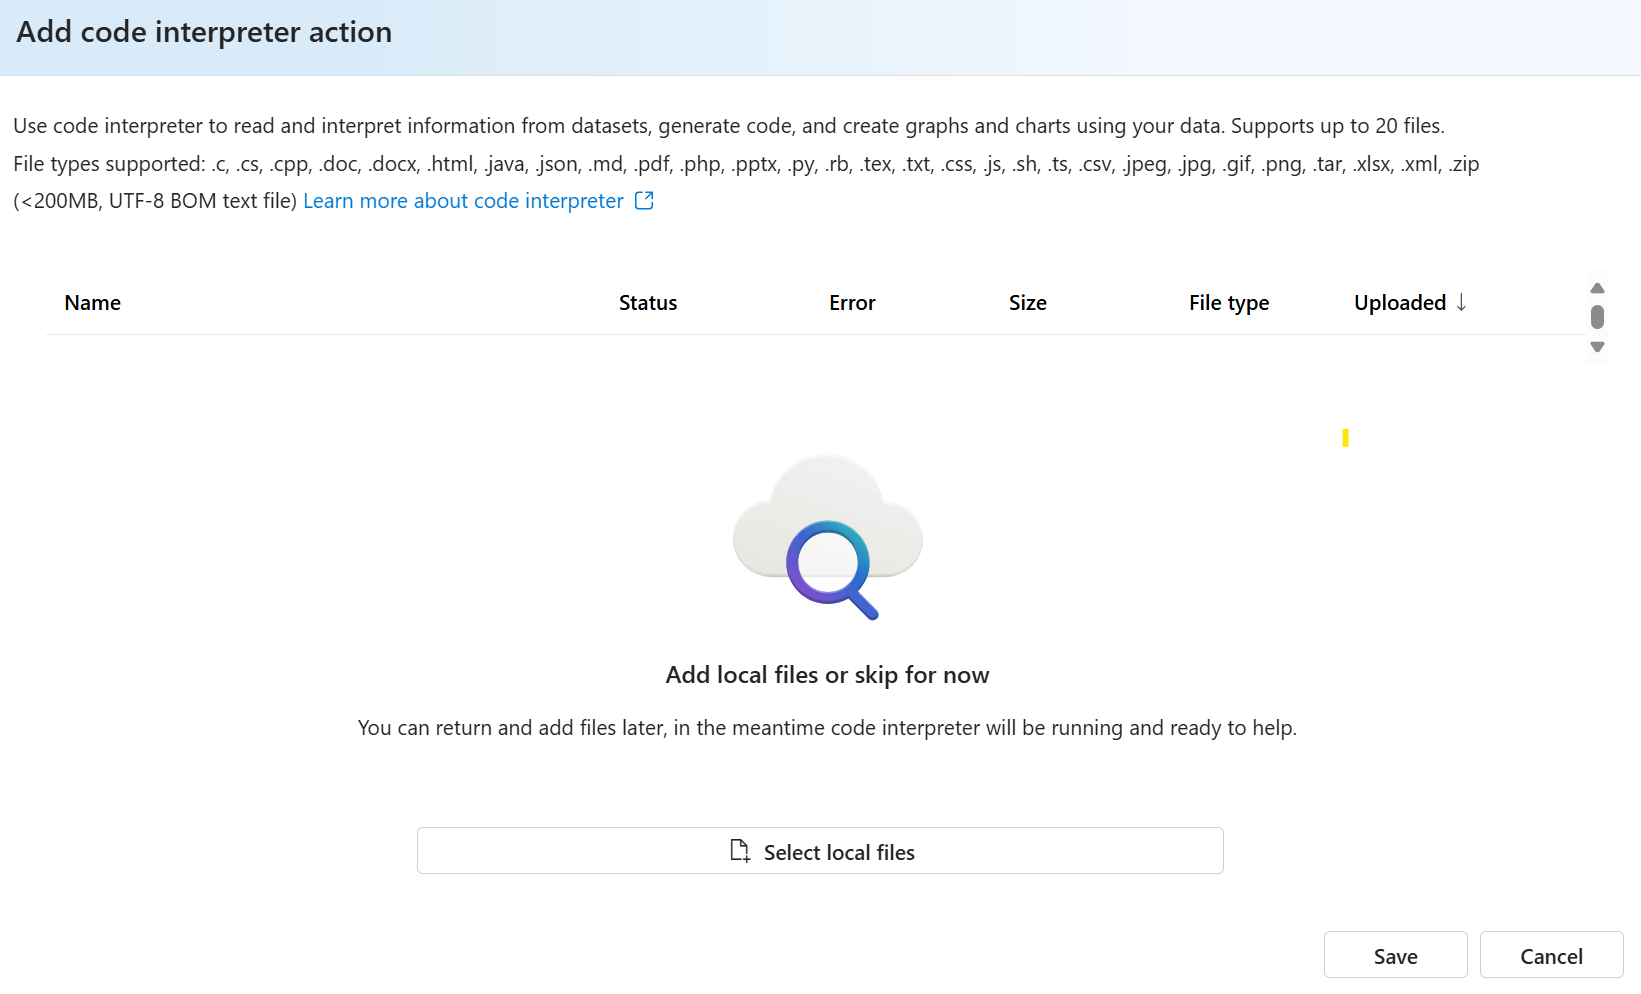
필요에 따라 에이전트에 대한 파일을 업로드하여 데이터 세트의 정보를 읽고 해석하고, 코드를 생성하고, 데이터를 사용하여 그래프와 차트를 만들 수 있습니다.


초기화
코드는 필요한 가져오기를 설정하고 AI Project 클라이언트를 초기화하는 것으로 시작합니다.
import os
from azure.ai.projects import AIProjectClient
from azure.identity import DefaultAzureCredential
from azure.ai.agents.models import CodeInterpreterTool


# Create an Azure AI Client from an endpoint, copied from your Azure AI Foundry project.
# You need to login to Azure subscription via Azure CLI and set the environment variables
project_endpoint = os.environ["PROJECT_ENDPOINT"]  # Ensure the PROJECT_ENDPOINT environment variable is set

# Create an AIProjectClient instance
project_client = AIProjectClient(
    endpoint=project_endpoint,
    credential=DefaultAzureCredential(),  # Use Azure Default Credential for authentication
)
파일 업로드
샘플은 분석을 위해 데이터 파일을 업로드합니다.
file = project_client.agents.upload_file_and_poll(
    file_path="nifty_500_quarterly_results.csv",
    purpose=FilePurpose.AGENTS
)
코드 인터프리터 설정
코드 인터프리터 도구는 업로드된 파일로 초기화됩니다.
code_interpreter = CodeInterpreterTool(file_ids=[file.id])
에이전트 만들기
코드 인터프리터 기능을 사용하여 에이전트를 만듭니다.
agent = project_client.agents.create_agent(
    model=os.environ["MODEL_DEPLOYMENT_NAME"],
    name="my-agent",
    instructions="You are helpful agent",
    tools=code_interpreter.definitions,
    tool_resources=code_interpreter.resources,
)
스레드 관리
코드는 대화 스레드 및 초기 메시지를 만듭니다.
thread = project_client.agents.threads.create()
message = project_client.agents.messages.create(
    thread_id=thread.id,
    role=MessageRole.USER,
    content="Could you please create bar chart in TRANSPORTATION sector for the operating profit from the uploaded csv file and provide file to me?",
)
메시지 처리
메시지를 처리하고 코드를 실행하기 위한 실행이 만들어집니다.
run = project_client.agents.runs.create_and_process(thread_id=thread.id, agent_id=agent.id)
파일 처리
코드는 출력 파일 및 주석을 처리합니다.
messages = project_client.agents.messages.list(thread_id=thread.id)

# Save generated image files
for image_content in messages.image_contents:
    file_id = image_content.image_file.file_id
    file_name = f"{file_id}_image_file.png"
    project_client.agents.save_file(file_id=file_id, file_name=file_name)

# Process file path annotations
for file_path_annotation in messages.file_path_annotations:
    print(f"File Paths:")
    print(f"Type: {file_path_annotation.type}")
    print(f"Text: {file_path_annotation.text}")
    print(f"File ID: {file_path_annotation.file_path.file_id}")
청소
상호 작용을 완료한 후 코드는 리소스를 올바르게 정리합니다.
project_client.agents.delete_file(file.id)
project_client.agents.delete_agent(agent.id)
이렇게 하면 적절한 리소스 관리가 보장되고 불필요한 리소스 사용이 방지됩니다.
클라이언트 및 에이전트 만들기
먼저 appsettings.json를 사용하여 구성을 설정하고, PersistentAgentsClient를 만든 후 코드 인터프리터 도구가 활성화된 상태로 PersistentAgent를 만듭니다.
using Azure;
using Azure.AI.Agents.Persistent;
using Azure.Identity;
using Microsoft.Extensions.Configuration;
using System.Diagnostics;

IConfigurationRoot configuration = new ConfigurationBuilder()
    .SetBasePath(AppContext.BaseDirectory)
    .AddJsonFile("appsettings.json", optional: false, reloadOnChange: true)
    .Build();

var projectEndpoint = configuration["ProjectEndpoint"];
var modelDeploymentName = configuration["ModelDeploymentName"];

PersistentAgentsClient client = new(projectEndpoint, new DefaultAzureCredential());

PersistentAgent agent = client.Administration.CreateAgent(
    model: modelDeploymentName,
    name: "My Friendly Test Agent",
    instructions: "You politely help with math questions. Use the code interpreter tool when asked to visualize numbers.",
    tools: [new CodeInterpreterToolDefinition()]
);
스레드 만들기 및 메시지 추가
다음으로, 대화를 위해 PersistentAgentThread를 생성하고 초기 사용자 메시지를 추가합니다.
PersistentAgentThread thread = client.Threads.CreateThread();

client.Messages.CreateMessage(
    thread.Id,
    MessageRole.User,
    "Hi, Agent! Draw a graph for a line with a slope of 4 and y-intercept of 9.");
실행 설정 및 모니터링
그런 다음 스레드 및 에이전트용을 ThreadRun 만듭니다. 상태가 완료되거나 작업이 필요할 때까지 실행 여부를 확인합니다.
ThreadRun run = client.Runs.CreateRun(
    thread.Id,
    agent.Id,
    additionalInstructions: "Please address the user as Jane Doe. The user has a premium account.");

do
{
    Thread.Sleep(TimeSpan.FromMilliseconds(500));
    run = client.Runs.GetRun(thread.Id, run.Id);
}
while (run.Status == RunStatus.Queued
    || run.Status == RunStatus.InProgress
    || run.Status == RunStatus.RequiresAction);
결과 처리 및 파일 처리
실행이 완료되면 스레드에서 모든 메시지를 검색합니다. 메시지를 반복하여 텍스트 콘텐츠를 표시하고 생성된 이미지 파일을 로컬로 저장하고 열어 처리합니다.
Pageable<PersistentThreadMessage> messages = client.Messages.GetMessages(
    threadId: thread.Id,
    order: ListSortOrder.Ascending);

foreach (PersistentThreadMessage threadMessage in messages)
{
    foreach (MessageContent content in threadMessage.ContentItems)
    {
        switch (content)
        {
            case MessageTextContent textItem:
                Console.WriteLine($"[{threadMessage.Role}]: {textItem.Text}");
                break;
            case MessageImageFileContent imageFileContent:
                Console.WriteLine($"[{threadMessage.Role}]: Image content file ID = {imageFileContent.FileId}");
                BinaryData imageContent = client.Files.GetFileContent(imageFileContent.FileId);
                string tempFilePath = Path.Combine(AppContext.BaseDirectory, $"{Guid.NewGuid()}.png");
                File.WriteAllBytes(tempFilePath, imageContent.ToArray());
                client.Files.DeleteFile(imageFileContent.FileId);

                ProcessStartInfo psi = new()
                {
                    FileName = tempFilePath,
                    UseShellExecute = true
                };
                Process.Start(psi);
                break;
        }
    }
}
자원을 정리하세요
마지막으로 스레드와 에이전트를 삭제하여 이 샘플에서 만든 리소스를 정리합니다.
    client.Threads.DeleteThread(threadId: thread.Id);
    client.Administration.DeleteAgent(agentId: agent.Id);
프로젝트 클라이언트 만들기
코드 인터프리터를 사용하려면 먼저 AI 프로젝트에 대한 엔드포인트를 포함하고 API 호출을 인증하는 데 사용되는 프로젝트 클라이언트를 만들어야 합니다.
const { AgentsClient, isOutputOfType, ToolUtility } = require("@azure/ai-agents");
const { delay } = require("@azure/core-util");
const { DefaultAzureCredential } = require("@azure/identity");
const fs = require("fs");
const path = require("node:path");
require("dotenv/config");

const projectEndpoint = process.env["PROJECT_ENDPOINT"];

// Create an Azure AI Client
const client = new AgentsClient(projectEndpoint, new DefaultAzureCredential());
파일 업로드
파일을 업로드한 다음 에이전트 또는 메시지에서 참조할 수 있습니다. 업로드되면 참조를 위해 도구 유틸리티에 추가할 수 있습니다.
// Upload file and wait for it to be processed
const filePath = "./data/nifty500QuarterlyResults.csv";
const localFileStream = fs.createReadStream(filePath);
const localFile = await client.files.upload(localFileStream, "assistants", {
  fileName: "localFile",
});

console.log(`Uploaded local file, file ID : ${localFile.id}`);
코드 인터프리터 도구를 사용하여 에이전트 만들기
// Create code interpreter tool
const codeInterpreterTool = ToolUtility.createCodeInterpreterTool([localFile.id]);

// Notice that CodeInterpreter must be enabled in the agent creation, otherwise the agent will not be able to see the file attachment
const agent = await client.createAgent("gpt-4o", {
  name: "my-agent",
  instructions: "You are a helpful agent",
  tools: [codeInterpreterTool.definition],
  toolResources: codeInterpreterTool.resources,
});
console.log(`Created agent, agent ID: ${agent.id}`);
스레드, 메시지 만들기 및 에이전트 응답 가져오기
// Create a thread
const thread = await client.threads.create();
console.log(`Created thread, thread ID: ${thread.id}`);

// Create a message
const message = await client.messages.create(
  thread.id,
  "user",
  "Could you please create a bar chart in the TRANSPORTATION sector for the operating profit from the uploaded CSV file and provide the file to me?",
  {
    attachments: [
      {
        fileId: localFile.id,
        tools: [codeInterpreterTool.definition],
      },
    ],
  },
);

console.log(`Created message, message ID: ${message.id}`);

// Create and execute a run
let run = await client.runs.create(thread.id, agent.id);
while (run.status === "queued" || run.status === "in_progress") {
  await delay(1000);
  run = await client.runs.get(thread.id, run.id);
}
if (run.status === "failed") {
  // Check if you got "Rate limit is exceeded.", then you want to get more quota
  console.log(`Run failed: ${run.lastError}`);
}
console.log(`Run finished with status: ${run.status}`);

// Delete the original file from the agent to free up space (note: this does not delete your version of the file)
await client.files.delete(localFile.id);
console.log(`Deleted file, file ID: ${localFile.id}`);

// Print the messages from the agent
const messagesIterator = client.messages.list(thread.id);
const allMessages = [];
for await (const m of messagesIterator) {
  allMessages.push(m);
}
console.log("Messages:", allMessages);

// Get most recent message from the assistant
const assistantMessage = allMessages.find((msg) => msg.role === "assistant");
if (assistantMessage) {
  const textContent = assistantMessage.content.find((content) => isOutputOfType(content, "text"));
  if (textContent) {
    console.log(`Last message: ${textContent.text.value}`);
  }
}

// Save the newly created file
console.log(`Saving new files...`);
const imageFile = allMessages[0].content[0].imageFile;
console.log(`Image file ID : ${imageFile.fileId}`);
const imageFileName = path.resolve(
  "./data/" + (await client.files.get(imageFile.fileId)).filename + "ImageFile.png",
);

const fileContent = await (await client.files.getContent(imageFile.fileId).asNodeStream()).body;
if (fileContent) {
  const chunks = [];
  for await (const chunk of fileContent) {
    chunks.push(Buffer.isBuffer(chunk) ? chunk : Buffer.from(chunk));
  }
  const buffer = Buffer.concat(chunks);
  fs.writeFileSync(imageFileName, buffer);
} else {
  console.error("Failed to retrieve file content: fileContent is undefined");
}
console.log(`Saved image file to: ${imageFileName}`);

// Iterate through messages and print details for each annotation
console.log(`Message Details:`);
allMessages.forEach((m) => {
  console.log(`File Paths:`);
  console.log(`Type: ${m.content[0].type}`);
  if (isOutputOfType(m.content[0], "text")) {
    const textContent = m.content[0];
    console.log(`Text: ${textContent.text.value}`);
  }
  console.log(`File ID: ${m.id}`);
});

// Delete the agent once done
await client.deleteAgent(agent.id);
console.log(`Deleted agent, agent ID: ${agent.id}`);
REST API 빠른 시작을 따라 환경 변수 AGENT_TOKEN, AZURE_AI_FOUNDRY_PROJECT_ENDPOINT, API_VERSION에 올바른 값을 설정하십시오.
파일 업로드
curl --request POST \
  --url $AZURE_AI_FOUNDRY_PROJECT_ENDPOINT/files?api-version=$API_VERSION \
  -H "Authorization: Bearer $AGENT_TOKEN" \
  -F purpose="assistants" \
  -F file="@c:\\path_to_file\\file.csv"
코드 인터프리터 도구를 사용하여 에이전트 만들기
curl --request POST \
  --url $AZURE_AI_FOUNDRY_PROJECT_ENDPOINT/assistants?api-version=$API_VERSION \
  -H "Authorization: Bearer $AGENT_TOKEN" \
  -H "Content-Type: application/json" \
  -d '{
    "instructions": "You are an AI assistant that can write code to help answer math questions.",
    "tools": [
      { "type": "code_interpreter" }
    ],
    "model": "gpt-4o-mini",
    "tool_resources"{
      "code interpreter": {
          "file_ids": ["assistant-1234"]
      }
    }
  }'
스레드 만들기
curl --request POST \
  --url $AZURE_AI_FOUNDRY_PROJECT_ENDPOINT/threads?api-version=$API_VERSION \
  -H "Authorization: Bearer $AGENT_TOKEN" \
  -H "Content-Type: application/json" \
  -d ''
스레드에 사용자 질문 추가
curl --request POST \
  --url $AZURE_AI_FOUNDRY_PROJECT_ENDPOINT/threads/thread_abc123/messages?api-version=$API_VERSION \
  -H "Authorization: Bearer $AGENT_TOKEN" \
  -H "Content-Type: application/json" \
  -d '{
      "role": "user",
      "content": "I need to solve the equation `3x + 11 = 14`. Can you help me?"
    }'
스레드 실행
curl --request POST \
  --url $AZURE_AI_FOUNDRY_PROJECT_ENDPOINT/threads/thread_abc123/runs?api-version=$API_VERSION \
  -H "Authorization: Bearer $AGENT_TOKEN" \
  -H "Content-Type: application/json" \
  -d '{
    "assistant_id": "asst_abc123",
  }'
실행 상태 검색
curl --request GET \
  --url $AZURE_AI_FOUNDRY_PROJECT_ENDPOINT/threads/thread_abc123/runs/run_abc123?api-version=$API_VERSION \
  -H "Authorization: Bearer $AGENT_TOKEN"
에이전트 응답 검색
curl --request GET \
  --url $AZURE_AI_FOUNDRY_PROJECT_ENDPOINT/threads/thread_abc123/messages?api-version=$API_VERSION \
  -H "Authorization: Bearer $AGENT_TOKEN"