최신 버전의 Azure AI Translator를 사용해 보세요. 이 빠른 시작에서는 번역기 서비스를 사용하여 선택한 프로그래밍 언어 또는 REST API로 텍스트를 번역하기 시작합니다. 이 프로젝트의 경우 기술을 학습하는 동안 F0(무료 가격 책정 계층)을 사용하고 나중에 프로덕션용 유료 계층으로 업그레이드하는 것이 좋습니다.
Translator 서비스의 핵심 작업은 텍스트를 번역하는 것입니다. 이 빠른 시작에서는 원하는 프로그래밍 언어를 사용하여 단일 원본(from)을 사용하고 두 개의 출력(to)을 제공하는 요청을 작성합니다. 그런 다음, 요청과 응답을 모두 조정하는 데 사용할 수 있는 몇 가지 매개 변수를 검토합니다.
Visual Studio 프로젝트 설정
현재 버전의 Visual Studio IDE가 있는지 확인합니다.
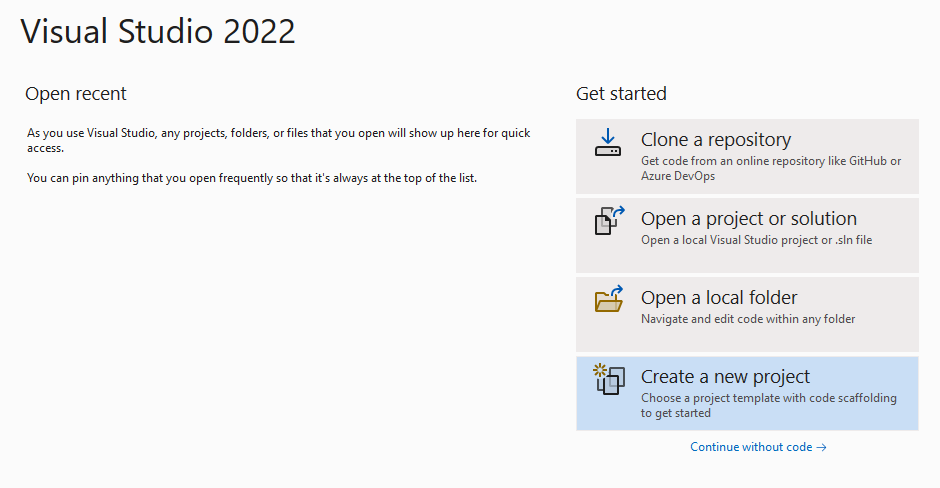
Visual Studio를 엽니다.
시작 페이지에서 새 프로젝트 만들기를 선택합니다.
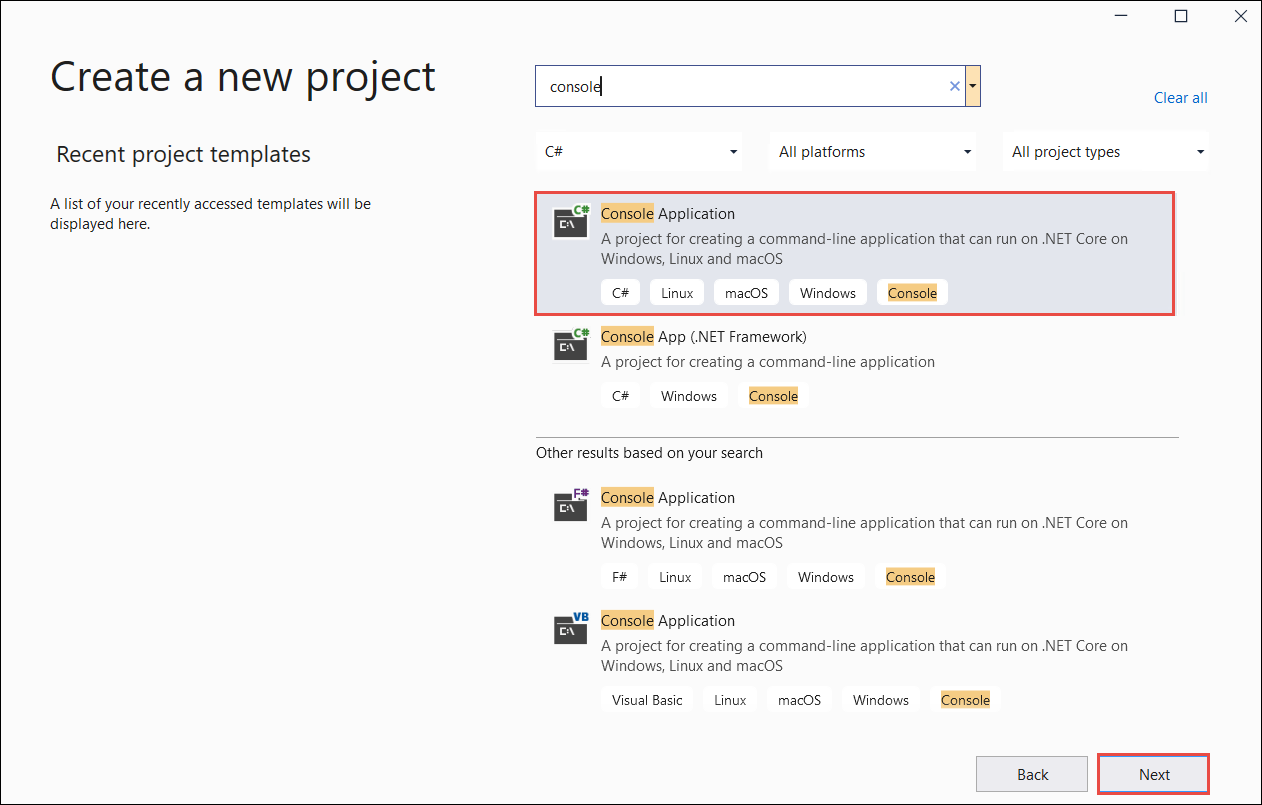
새 프로젝트 만들기 페이지의 검색 상자에서 콘솔을 입력합니다. 콘솔 애플리케이션 템플릿을 선택하고, 다음을 선택합니다.
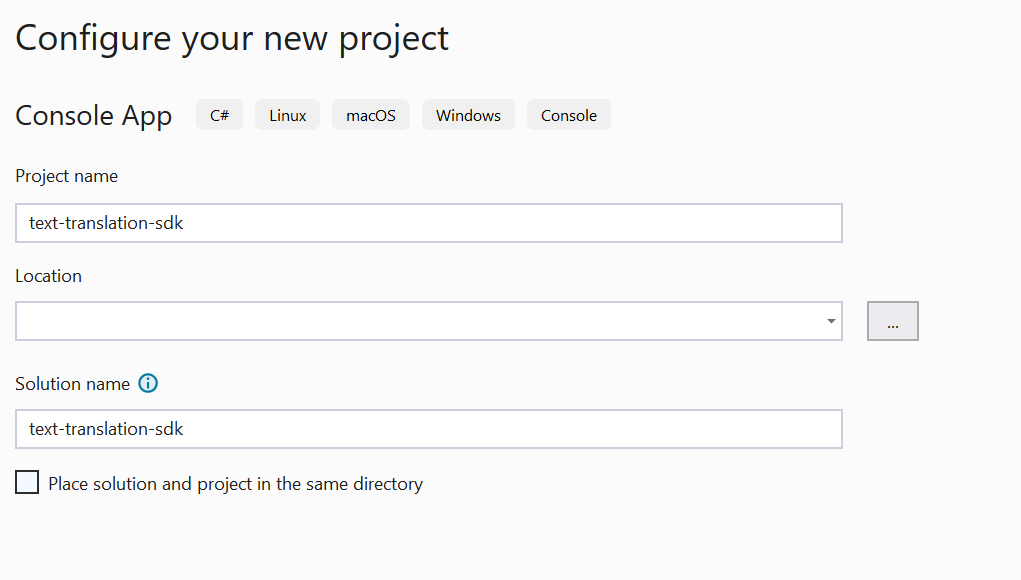
새 프로젝트 구성 대화 상자 창의 [프로젝트 이름] 상자에서 translator_quickstart를 입력합니다. "동일한 디렉터리에 솔루션 및 프로젝트 배치" 확인란을 선택 취소한 상태로 두고 다음을 선택합니다.
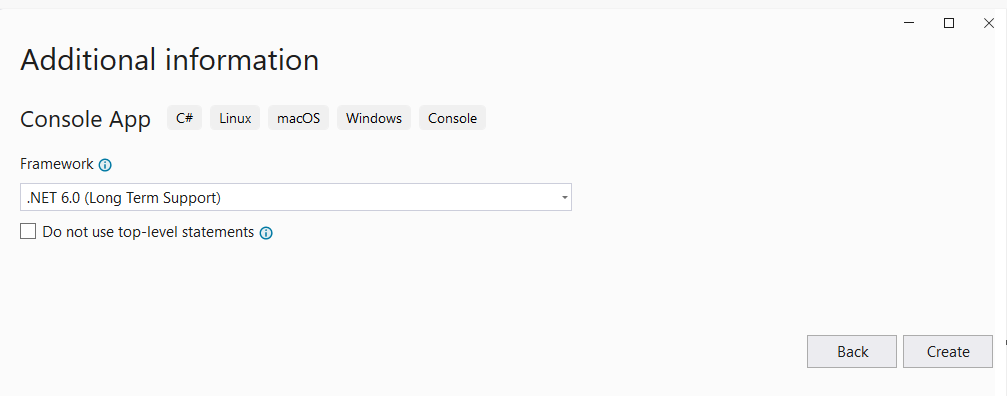
추가 정보 대화 상자 창에서 .NET 6.0(장기 지원)이 선택되어 있는지 확인합니다. "최상위 문 사용 안 함" 확인란을 선택 취소하고 만들기를 선택합니다.
NuGet을 사용하여 Newtonsoft.json 패키지 설치
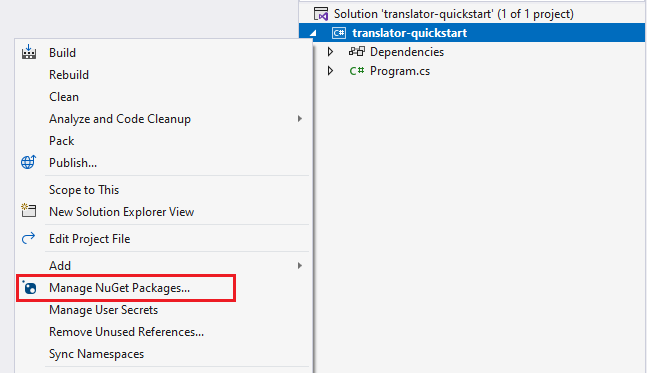
translator_quickstart 프로젝트를 마우스 오른쪽 단추로 클릭하고 NuGet 패키지 관리...를 선택합니다.
찾아보기 탭을 선택하고 Newtonsoft.json을 입력합니다.
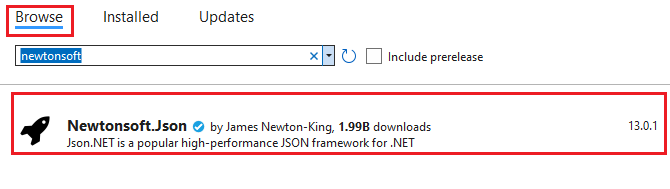
오른쪽 패키지 관리자 창에서 설치를 선택하여 프로젝트에 패키지를 추가합니다.

C# 애플리케이션 빌드
참고 항목
- .NET 6부터
console 템플릿을 사용하는 새 프로젝트는 이전 버전과 다른 새 프로그램 스타일을 생성합니다.
- 새 출력에서는 작성해야 하는 코드를 간소화하는 최신 C# 기능을 사용합니다.
- 최신 버전을 사용하는 경우
Main 메서드 본문을 작성하기만 하면 됩니다. 최상위 문, 전역 using 지시문 또는 암시적 using 지시문을 포함할 필요가 없습니다.
- 자세한 내용은 최상위 문을 생성하는 새 C# 템플릿을 참조하세요.
Program.cs 파일을 엽니다.
Console.WriteLine("Hello World!") 줄을 포함하여 기존 코드를 삭제합니다. 코드 샘플을 복사하여 애플리케이션의 Program.cs 파일에 붙여넣습니다. 키 변수를 Azure Portal Translator 인스턴스의 값으로 업데이트해야 합니다.
using System.Text;
using Newtonsoft.Json;
class Program
{
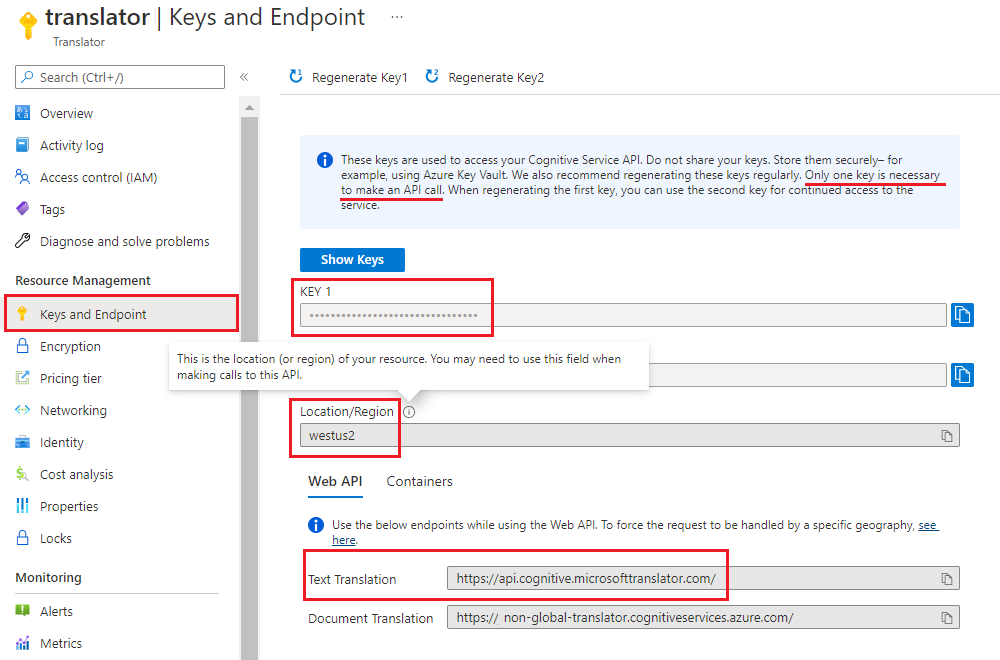
private static readonly string key = "<your-translator-key>";
private static readonly string endpoint = "https://api.cognitive.microsofttranslator.com";
// location, also known as region.
// required if you're using a multi-service or regional (not global) resource. It can be found in the Azure portal on the Keys and Endpoint page.
private static readonly string location = "<YOUR-RESOURCE-LOCATION>";
static async Task Main(string[] args)
{
// Input and output languages are defined as parameters.
string route = "/translate?api-version=3.0&from=en&to=fr&to=zu";
string textToTranslate = "I would really like to drive your car around the block a few times!";
object[] body = new object[] { new { Text = textToTranslate } };
var requestBody = JsonConvert.SerializeObject(body);
using (var client = new HttpClient())
using (var request = new HttpRequestMessage())
{
// Build the request.
request.Method = HttpMethod.Post;
request.RequestUri = new Uri(endpoint + route);
request.Content = new StringContent(requestBody, Encoding.UTF8, "application/json");
request.Headers.Add("Ocp-Apim-Subscription-Key", key);
// location required if you're using a multi-service or regional (not global) resource.
request.Headers.Add("Ocp-Apim-Subscription-Region", location);
// Send the request and get response.
HttpResponseMessage response = await client.SendAsync(request).ConfigureAwait(false);
// Read response as a string.
string result = await response.Content.ReadAsStringAsync();
Console.WriteLine(result);
}
}
}
C# 애플리케이션 실행
애플리케이션에 코드 샘플을 추가한 후 formRecognizer_quickstart 옆에 있는 녹색 시작 단추를 선택하여 프로그램을 빌드하고 실행하거나 F5를 누릅니다.

번역 출력:
성공적으로 호출되면 다음과 같은 응답이 표시됩니다.
[
    {
        "detectedLanguage": {
            "language": "en",
            "score": 1.0
        },
        "translations": [
            {
                "text": "J'aimerais vraiment conduire votre voiture autour du pâté de maisons plusieurs fois!",
                "to": "fr"
            },
            {
                "text": "Ngingathanda ngempela ukushayela imoto yakho endaweni evimbelayo izikhathi ezimbalwa!",
                "to": "zu"
            }
        ]
    }
]
Go 환경 설정
텍스트 편집기를 사용하여 Go 애플리케이션을 작성할 수 있습니다. 최신 버전의 Visual Studio Code 및 Go 확장을 사용하는 것이 좋습니다.
팁
Go를 처음 사용하는 경우 Go 시작하기 Learn 모듈을 사용해 보세요.
최신 버전의 Go가 설치되어 있는지 확인합니다.
운영 체제용 Go 프로그래밍 언어 버전을 다운로드합니다.
다운로드가 완료되면 설치 관리자를 실행합니다.
명령 프롬프트를 열고 다음을 입력하여 Go가 설치되었는지 확인합니다.
go version
Go 애플리케이션 빌드
콘솔 창(예: cmd, PowerShell 또는 Bash)에서 translator-app이라는 앱에 대한 새 디렉터리를 만들고 해당 디렉터리로 이동합니다.
translator-app 디렉터리에서 translation.go라는 새 GO 파일을 만듭니다.
제공된 코드 샘플을 복사하여 translation.go 파일에 붙여넣습니다. 키 변수를 Azure Portal Translator 인스턴스의 값으로 업데이트해야 합니다.
package main

import (
    "bytes"
    "encoding/json"
    "fmt"
    "log"
    "net/http"
    "net/url"
)

func main() {
    key := "<YOUR-TRANSLATOR-KEY>"
    endpoint := "https://api.cognitive.microsofttranslator.com/"
    uri := endpoint + "/translate?api-version=3.0"

    // location, also known as region.
    // required if you're using a multi-service or regional (not global) resource. It can be found in the Azure portal on the Keys and Endpoint page.
    location := "<YOUR-RESOURCE-LOCATION>"

    // Build the request URL. See: https://go.dev/pkg/net/url/#example_URL_Parse
    u, _ := url.Parse(uri)
    q := u.Query()
    q.Add("from", "en")
    q.Add("to", "fr")
    q.Add("to", "zu")
    u.RawQuery = q.Encode()

    // Create an anonymous struct for your request body and encode it to JSON
    body := []struct {
        Text string
    }{
        {Text: "I would really like to drive your car around the block a few times."},
    }
    b, _ := json.Marshal(body)

    // Build the HTTP POST request
    req, err := http.NewRequest("POST", u.String(), bytes.NewBuffer(b))
    if err != nil {
        log.Fatal(err)
    }
    // Add required headers to the request
    req.Header.Add("Ocp-Apim-Subscription-Key", key)
    // location required if you're using a multi-service or regional (not global) resource.
    req.Header.Add("Ocp-Apim-Subscription-Region", location)
    req.Header.Add("Content-Type", "application/json")

    // Call the Translator API
    res, err := http.DefaultClient.Do(req)
    if err != nil {
        log.Fatal(err)
    }

    // Decode the JSON response
    var result interface{}
    if err := json.NewDecoder(res.Body).Decode(&result); err != nil {
        log.Fatal(err)
    }
    // Format and print the response to terminal
    prettyJSON, _ := json.MarshalIndent(result, "", "  ")
    fmt.Printf("%s\n", prettyJSON)
}
Go 애플리케이션 실행
애플리케이션에 코드 샘플을 추가한 후에는 명령 또는 터미널 프롬프트에서 Go 프로그램을 실행할 수 있습니다. 프롬프트의 경로가 translator-app 폴더로 설정되어 있는지 확인하고 다음 명령을 사용합니다.
go run translation.go
번역 출력:
성공적으로 호출되면 다음과 같은 응답이 표시됩니다.
[
    {
        "detectedLanguage": {
            "language": "en",
            "score": 1.0
        },
        "translations": [
            {
                "text": "J'aimerais vraiment conduire votre voiture autour du pâté de maisons plusieurs fois!",
                "to": "fr"
            },
            {
                "text": "Ngingathanda ngempela ukushayela imoto yakho endaweni evimbelayo izikhathi ezimbalwa!",
                "to": "zu"
            }
        ]
    }
]
Java 환경 설정
새 Gradle 프로젝트 만들기
콘솔 창(예: cmd, PowerShell 또는 Bash)에서 translator-text-app이라는 앱에 대한 새 디렉터리를 만들고 해당 디렉터리로 이동합니다.
mkdir translator-text-app && translator-text-app
mkdir translator-text-app; cd translator-text-app
translator-text-app 디렉터리에서 gradle init 명령을 실행합니다. 이 명령은 build.gradle.kts를 포함하여 런타임에 애플리케이션을 만들고 구성하는 데 사용되는 Gradle용 필수 빌드 파일을 만듭니다.
gradle init --type basic
DSL을 선택하라는 메시지가 표시되면 Kotlin을 선택합니다.
Return 또는 Enter를 선택하여 기본 프로젝트 이름(translator-text-app)을 적용합니다.
다음 코드를 사용하여 build.gradle.kts을 업데이트합니다.
plugins {
  java
  application
}
application {
  mainClass.set("TranslatorText")
}
repositories {
  mavenCentral()
}
dependencies {
  implementation("com.squareup.okhttp3:okhttp:4.10.0")
  implementation("com.google.code.gson:gson:2.9.0")
}
Java 애플리케이션 만들기
translator-text-app 디렉터리에서 다음 명령을 실행합니다.
mkdir -p src/main/java
다음 디렉터리 구조를 만듭니다.
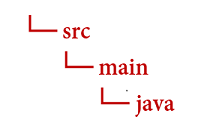
java 디렉터리로 이동하고 TranslatorText.java라는 파일을 만듭니다.
팁
PowerShell을 사용하여 새 파일을 만들 수 있습니다.
Shift 키를 누른 채 폴더를 마우스 오른쪽 단추로 클릭하여 프로젝트 디렉터리에서 PowerShell 창을 엽니다.
New-Item TranslatorText.java 명령을 입력합니다.
IDE에서 TranslatorText.java라는 새 파일을 만들어 java 디렉터리에 저장할 수도 있습니다.
IDE에서 TranslatorText.java 파일을 연 후 다음 코드 샘플을 복사하여 애플리케이션에 붙여넣습니다. Azure portal Translator 인스턴스의 키 값 중 하나로 키를 업데이트해야 합니다.
import java.io.IOException;

import com.google.gson.*;
import okhttp3.MediaType;
import okhttp3.OkHttpClient;
import okhttp3.Request;
import okhttp3.RequestBody;
import okhttp3.Response;

public class TranslatorText {
    private static String key = "<your-translator-key";

    // location, also known as region.
   // required if you're using a multi-service or regional (not global) resource. It can be found in the Azure portal on the Keys and Endpoint page.
    private static String location = "<YOUR-RESOURCE-LOCATION>";


    // Instantiates the OkHttpClient.
    OkHttpClient client = new OkHttpClient();

    // This function performs a POST request.
    public String Post() throws IOException {
        MediaType mediaType = MediaType.parse("application/json");
        RequestBody body = RequestBody.create(mediaType,
                "[{\"Text\": \"I would really like to drive your car around the block a few times!\"}]");
        Request request = new Request.Builder()
                .url("https://api.cognitive.microsofttranslator.com/translate?api-version=3.0&from=en&to=fr&to=zu")
                .post(body)
                .addHeader("Ocp-Apim-Subscription-Key", key)
                // location required if you're using a multi-service or regional (not global) resource.
                .addHeader("Ocp-Apim-Subscription-Region", location)
                .addHeader("Content-type", "application/json")
                .build();
        Response response = client.newCall(request).execute();
        return response.body().string();
    }

    // This function prettifies the json response.
    public static String prettify(String json_text) {
        JsonParser parser = new JsonParser();
        JsonElement json = parser.parse(json_text);
        Gson gson = new GsonBuilder().setPrettyPrinting().create();
        return gson.toJson(json);
    }

    public static void main(String[] args) {
        try {
            TranslatorText translateRequest = new TranslatorText();
            String response = translateRequest.Post();
            System.out.println(prettify(response));
        } catch (Exception e) {
            System.out.println(e);
        }
    }
}
Java 애플리케이션 빌드 및 실행
애플리케이션에 코드 샘플을 추가한 후 기본 프로젝트 디렉터리인 translator-text-app으로 돌아가서 콘솔 창을 열고 다음 명령을 입력합니다.
build 명령을 사용하여 애플리케이션을 빌드합니다.
gradle build
run 명령을 사용하여 애플리케이션을 실행합니다.
gradle run
번역 출력:
성공적으로 호출되면 다음과 같은 응답이 표시됩니다.
[
  {
    "translations": [
      {
        "text": "J'aimerais vraiment conduire votre voiture autour du pâté de maisons plusieurs fois!",
        "to": "fr"
      },
      {
        "text": "Ngingathanda ngempela ukushayela imoto yakho endaweni evimbelayo izikhathi ezimbalwa!",
        "to": "zu"
      }
    ]
  }
]
Node.js Express 프로젝트 설정
최신 버전의 Node.js가 설치되어 있는지 확인합니다. npm(노드 패키지 관리자)은 모든 Node.js 설치에 포함되어 있습니다.
팁
Node.js를 처음 사용하는 경우 Node.js 소개 Learn 모듈을 사용해 보세요.
콘솔 창(예: cmd, PowerShell 또는 Bash)에서 translator-app이라는 앱에 대한 새 디렉터리를 만들고 탐색합니다.
mkdir translator-app && cd translator-app
mkdir translator-app; cd translator-app
npm init 명령을 실행하여 애플리케이션을 초기화하고 프로젝트를 스캐폴드합니다.
npm init
터미널에 표시되는 프롬프트를 사용하여 프로젝트 특성을 지정합니다.
- 가장 중요한 특성은 이름, 버전 번호, 진입점입니다.
- 진입점 이름을
index.js로 유지하는 것이 좋습니다. 설명, 테스트 명령, GitHub 리포지토리, 키워드, 작성자, 라이선스 정보는 선택적 특성이며 이 프로젝트에서 건너뛸 수 있습니다.
- Return 또는 Enter 키를 선택하여 괄호 안의 제안을 수락합니다.
- 프롬프트를 완료하면 translator-app 디렉터리에
package.json 파일이 생성됩니다.
콘솔 창을 열고 npm을 사용하여 axios HTTP 라이브러리 및 uuid 패키지를 설치합니다.
npm install axios uuid
애플리케이션 디렉터리에 index.js 파일을 만듭니다.
팁
PowerShell을 사용하여 새 파일을 만들 수 있습니다.
Shift 키를 누른 채 폴더를 마우스 오른쪽 단추로 클릭하여 프로젝트 디렉터리에서 PowerShell 창을 엽니다.
New-Item index.js 명령을 입력합니다.
IDE에서 index.js라는 새 파일을 만들어 translator-app 디렉터리에 저장할 수도 있습니다.
JavaScript 애플리케이션 빌드
index.js 파일에 다음 코드 샘플을 추가합니다. 키 변수를 Azure Portal Translator 인스턴스의 값으로 업데이트해야 합니다.
    const axios = require('axios').default;
    const { v4: uuidv4 } = require('uuid');

    let key = "<your-translator-key>";
    let endpoint = "https://api.cognitive.microsofttranslator.com";

    // location, also known as region.
    // required if you're using a multi-service or regional (not global) resource. It can be found in the Azure portal on the Keys and Endpoint page.
    let location = "<YOUR-RESOURCE-LOCATION>";

    axios({
        baseURL: endpoint,
        url: '/translate',
        method: 'post',
        headers: {
            'Ocp-Apim-Subscription-Key': key,
             // location required if you're using a multi-service or regional (not global) resource.
            'Ocp-Apim-Subscription-Region': location,
            'Content-type': 'application/json',
            'X-ClientTraceId': uuidv4().toString()
        },
        params: {
            'api-version': '3.0',
            'from': 'en',
            'to': 'fr,zu'
        },
        data: [{
            'text': 'I would really like to drive your car around the block a few times!'
        }],
        responseType: 'json'
    }).then(function(response){
        console.log(JSON.stringify(response.data, null, 4));
    })
JavaScript 애플리케이션 실행
애플리케이션에 코드 샘플을 추가한 후 프로그램을 실행합니다.
애플리케이션 디렉터리(translator-app)로 이동합니다.
터미널에 다음 명령을 입력합니다.
node index.js
번역 출력:
성공적으로 호출되면 다음과 같은 응답이 표시됩니다.
[
    {
        "translations": [
            {
                "text": "J'aimerais vraiment conduire votre voiture autour du pâté de maisons plusieurs fois!",
                "to": "fr"
            },
            {
                "text": "Ngingathanda ngempela ukushayela imoto yakho endaweni evimbelayo izikhathi ezimbalwa!",
                "to": "zu"
            }
        ]
    }
]
Python 프로젝트 설정
최신 버전의 Python 3.x가 설치되어 있는지 확인합니다. Python 설치 관리자 패키지(pip)는 Python 설치에 포함됩니다.
팁
Python을 처음 사용하는 경우 Python 소개 Learn 모듈을 사용해 보세요.
터미널 창을 열고 pip를 사용하여 요청 라이브러리 및 uuid0 패키지를 설치합니다.
pip install requests uuid
참고 항목
또한 json이라는 Python 기본 제공 패키지를 사용합니다. JSON 데이터로 작업하는 데 사용됩니다.
Python 애플리케이션 빌드
기본 설정 편집기 또는 IDE에서 translator-app.py라는 새 Python 파일을 만듭니다.
translator-app.py 파일에 다음 코드 샘플을 추가합니다. Azure portal Translator 인스턴스의 값 중 하나로 키를 업데이트해야 합니다.
import requests, uuid, json

# Add your key and endpoint
key = "<your-translator-key>"
endpoint = "https://api.cognitive.microsofttranslator.com"

# location, also known as region.
# required if you're using a multi-service or regional (not global) resource. It can be found in the Azure portal on the Keys and Endpoint page.
location = "<YOUR-RESOURCE-LOCATION>"

path = '/translate'
constructed_url = endpoint + path

params = {
    'api-version': '3.0',
    'from': 'en',
    'to': ['fr', 'zu']
}

headers = {
    'Ocp-Apim-Subscription-Key': key,
    # location required if you're using a multi-service or regional (not global) resource.
    'Ocp-Apim-Subscription-Region': location,
    'Content-type': 'application/json',
    'X-ClientTraceId': str(uuid.uuid4())
}

# You can pass more than one object in body.
body = [{
    'text': 'I would really like to drive your car around the block a few times!'
}]

request = requests.post(constructed_url, params=params, headers=headers, json=body)
response = request.json()

print(json.dumps(response, sort_keys=True, ensure_ascii=False, indent=4, separators=(',', ': ')))
Python 애플리케이션 실행
애플리케이션에 코드 샘플을 추가한 후 프로그램을 빌드하고 실행합니다.
translator-app.py 파일로 이동합니다.
콘솔에 다음 명령을 입력합니다.
python translator-app.py
번역 출력:
성공적으로 호출되면 다음과 같은 응답이 표시됩니다.
[
  {
    "translations": [
      {
        "text": "J'aimerais vraiment conduire votre voiture autour du pâté de maisons plusieurs fois!",
        "to": "fr"
      },
      {
        "text": "Ngingathanda ngempela ukushayela imoto yakho endaweni evimbelayo izikhathi ezimbalwa!",
        "to": "zu"
      }
    ]
  }
]
완료되었습니다. 축하합니다! Translator 서비스를 사용하여 텍스트를 번역하는 방법을 알아보았습니다.
방법 설명서를 살펴보고 Translation 서비스 기능에 대해 자세히 알아봅니다.