Batch 문서 번역 클라이언트 라이브러리
문서 번역은 지원되는 언어 및 다양한 파일 형식으로 전체 문서를 비동기식으로 번역하는 Azure AI 번역기 서비스의 클라우드 기반 기능입니다. 이 빠른 시작에서는 구조 및 텍스트 서식을 유지하면서 원본 문서를 대상 언어로 번역하기 위해 선택한 프로그래밍 언어로 문서 번역을 사용하는 방법을 알아봅니다.
Important
문서 번역은 현재 번역기(단일 서비스) 리소스에서만 지원되며, Azure AI 서비스(다중 서비스) 리소스에는 포함되지 않습니다.
문서 번역은 유료 계층에서 지원됩니다. Language Studio는 S1 또는 D3 인스턴스 계층만 지원합니다. 문서 번역을 시도하려면 표준 S1을 선택하는 것이 좋습니다. Azure AI 서비스 가격 책정 - 번역기를 참조하세요.
필수 조건
시작하려면 다음이 필요합니다.
단일 서비스 번역기 리소스(다중 서비스 Azure AI 서비스 리소스가 아님): 관리 ID 인증으로 문서 번역 기능을 사용하려면 미국 동부와 같은 지리적 지역을 선택합니다. 표준 S1 또는 D3 또는 가격 책정 계층을 선택합니다.
Azure Blob Storage 계정 원본 및 대상 파일에 대한 Azure Blob Storage 계정에서 컨테이너를 만듭니다.
- 원본 컨테이너. 이 컨테이너는 번역을 위해 파일을 업로드하는 위치입니다(필수).
- 대상 컨테이너. 이 컨테이너는 번역된 파일이 저장되는 곳입니다(필수).
저장 컨테이너 권한 부여
다음 옵션 중 하나를 선택하여 번역기 리소스에 대한 액세스 권한을 부여할 수 있습니다.
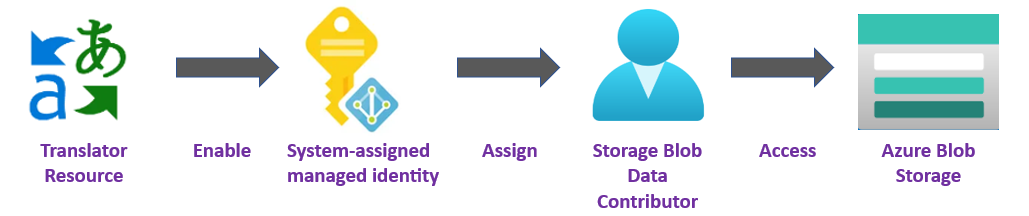
✔️ 관리 ID. 관리 ID는 Azure 관리되는 리소스에 대한 Microsoft Entra ID 및 특정 권한을 만드는 서비스 주체입니다. 관리 ID를 사용하면 코드에 자격 증명을 포함하지 않고도 번역기 애플리케이션을 실행할 수 있습니다. 관리 ID는 스토리지 데이터에 대한 액세스 권한을 부여하고 SAS(공유 액세스 서명 토큰)를 원본 및 대상 URL에 포함해야 하는 요구 사항을 바꾸는 더 안전한 방법입니다.
자세한 내용은 문서 번역용 관리 ID를 참조하세요.
✔️ SAS(공유 액세스 서명). 공유 액세스 서명은 번역기 서비스에 대해 지정된 기간 동안 제한된 액세스 권한을 부여하는 URL입니다. 이 방법을 사용하려면 원본 및 대상 컨테이너에 대한 SAS(공유 액세스 서명) 토큰을 만들어야 합니다. sourceUrl 및 targetUrl에는 쿼리 문자열로 추가된 SAS(공유 액세스 서명) 토큰이 포함되어야 합니다. 토큰은 컨테이너 또는 특정 Blob에 할당할 수 있습니다.
- 원본 컨테이너 또는 Blob은 읽기 및 목록 액세스를 지정해야 합니다.
- 대상 컨테이너 또는 Blob은 쓰기 및 목록 액세스를 지정해야 합니다.
자세한 내용은 SAS 토큰 만들기를 참조하세요.

애플리케이션 빌드
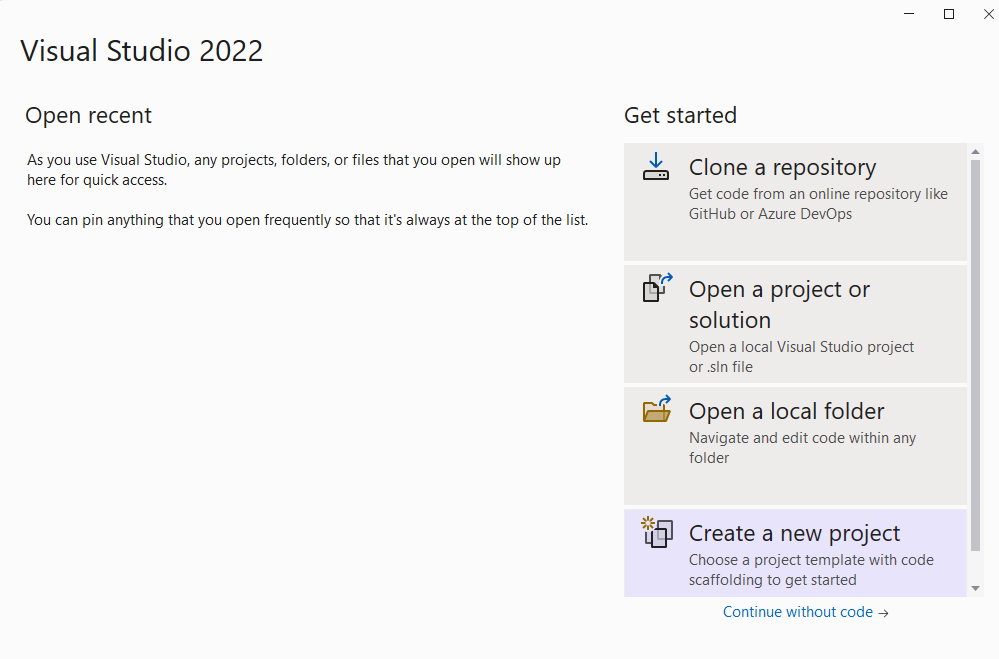
번역기 C#/.NET 애플리케이션을 만들기, 빌드 및 실행하는 데 사용할 수 있는 여러 도구가 있습니다. 여기에서는 CLI(명령줄 인터페이스) 또는 Visual Studio를 사용하는 방법을 안내합니다. 시작하려면 다음 탭 중 하나를 선택합니다.
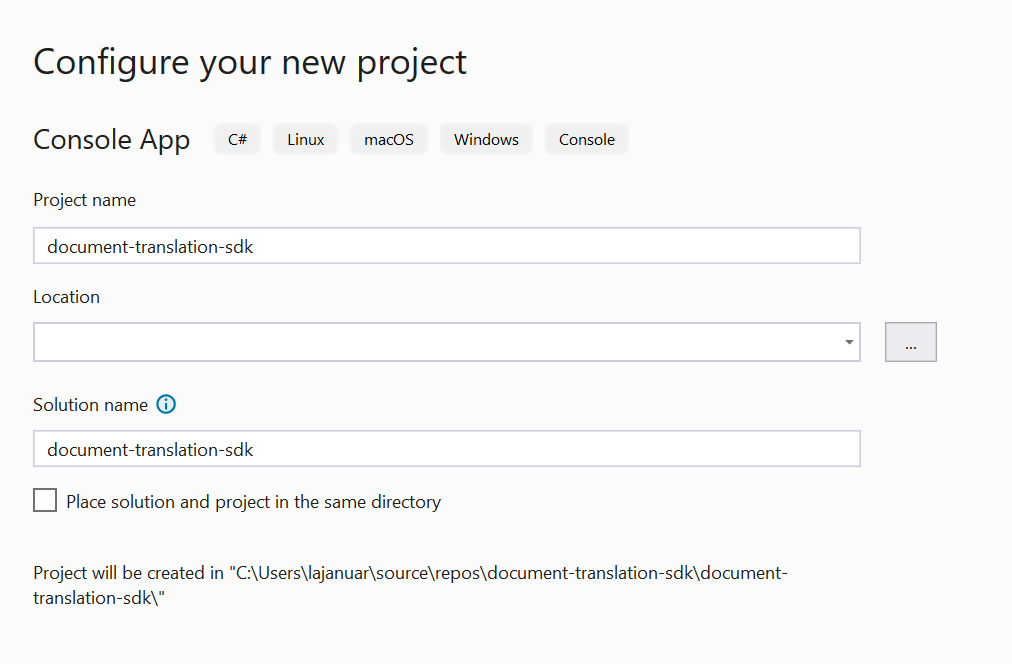
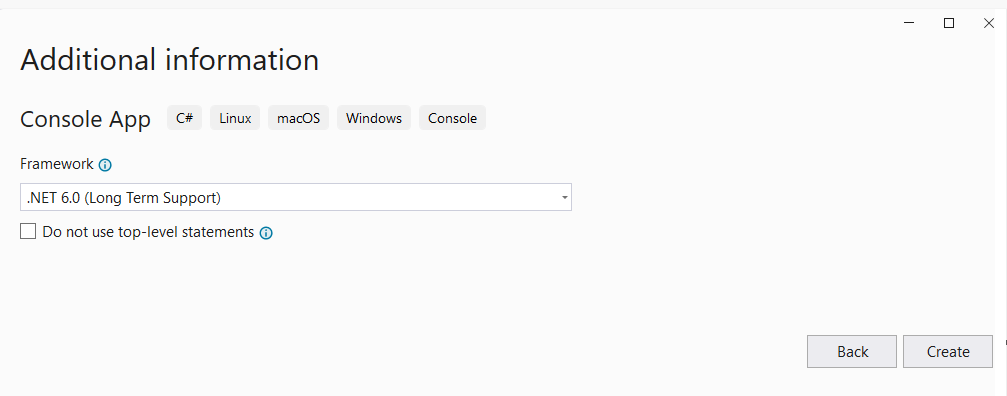
프로젝트 설정
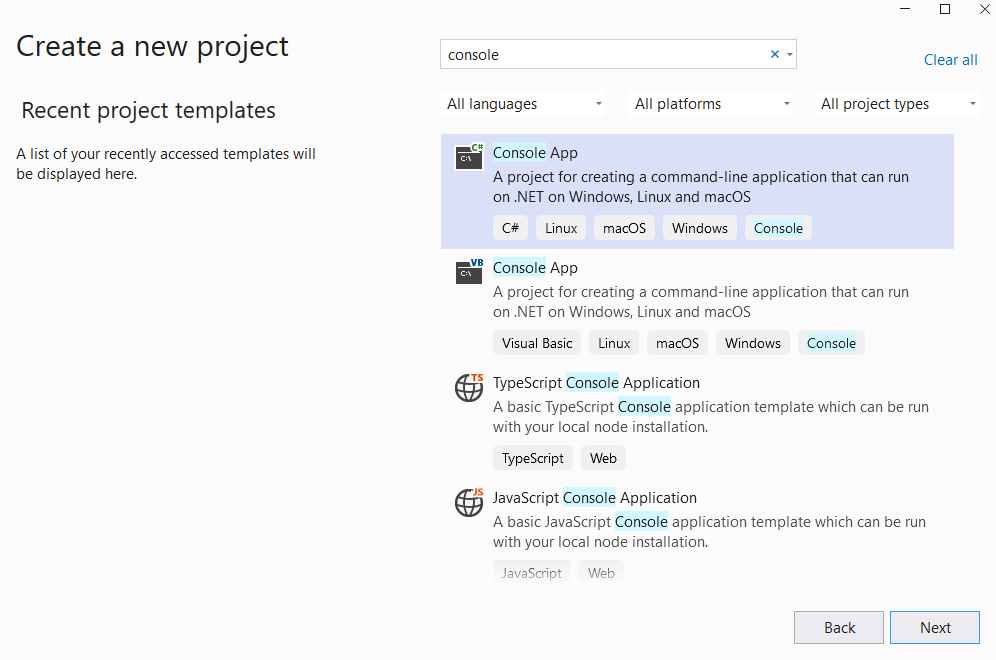
콘솔 창(예: cmd, PowerShell 또는 Bash)에서 dotnet new 명령을 사용하여 batch-document-translation라는 새 콘솔 앱을 만듭니다. 이 명령은 Program.cs라는 원본 파일 하나만 들어 있는 간단한 "Hello World" C# 프로젝트를 만듭니다.
dotnet new console -n batch-document-translation
새로 만든 앱 폴더로 디렉터리를 변경합니다. 다음 명령을 사용하여 애플리케이션을 빌드합니다.
dotnet build
빌드 출력에 경고나 오류가 포함되지 않아야 합니다.
...
Build succeeded.
 0 Warning(s)
 0 Error(s)
...
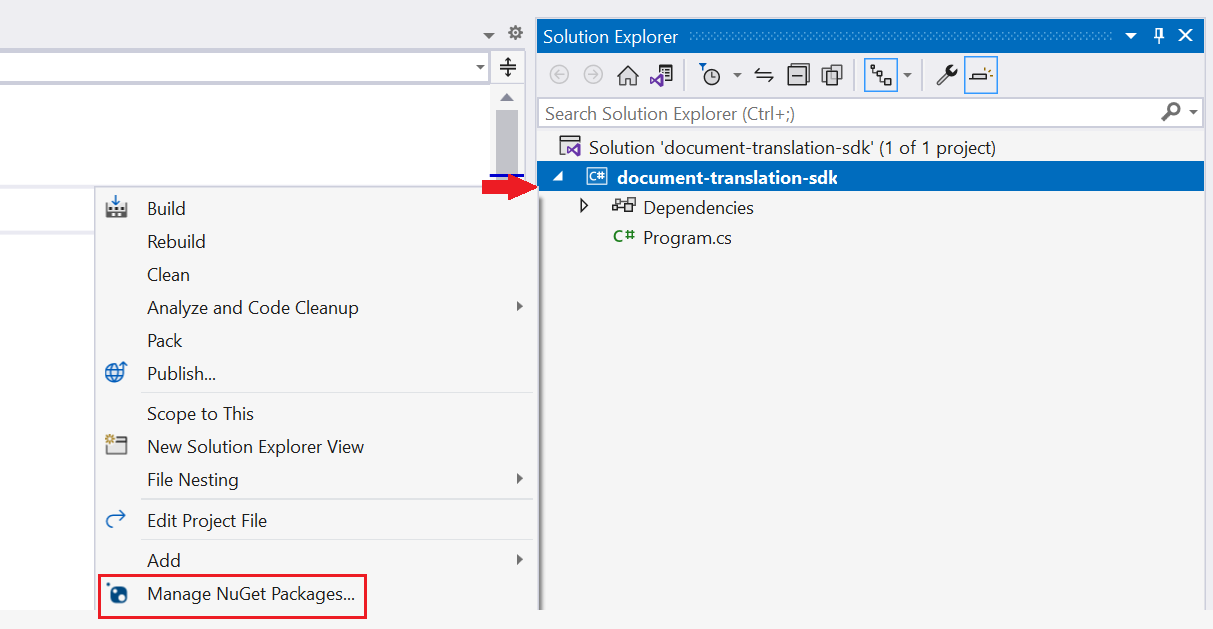
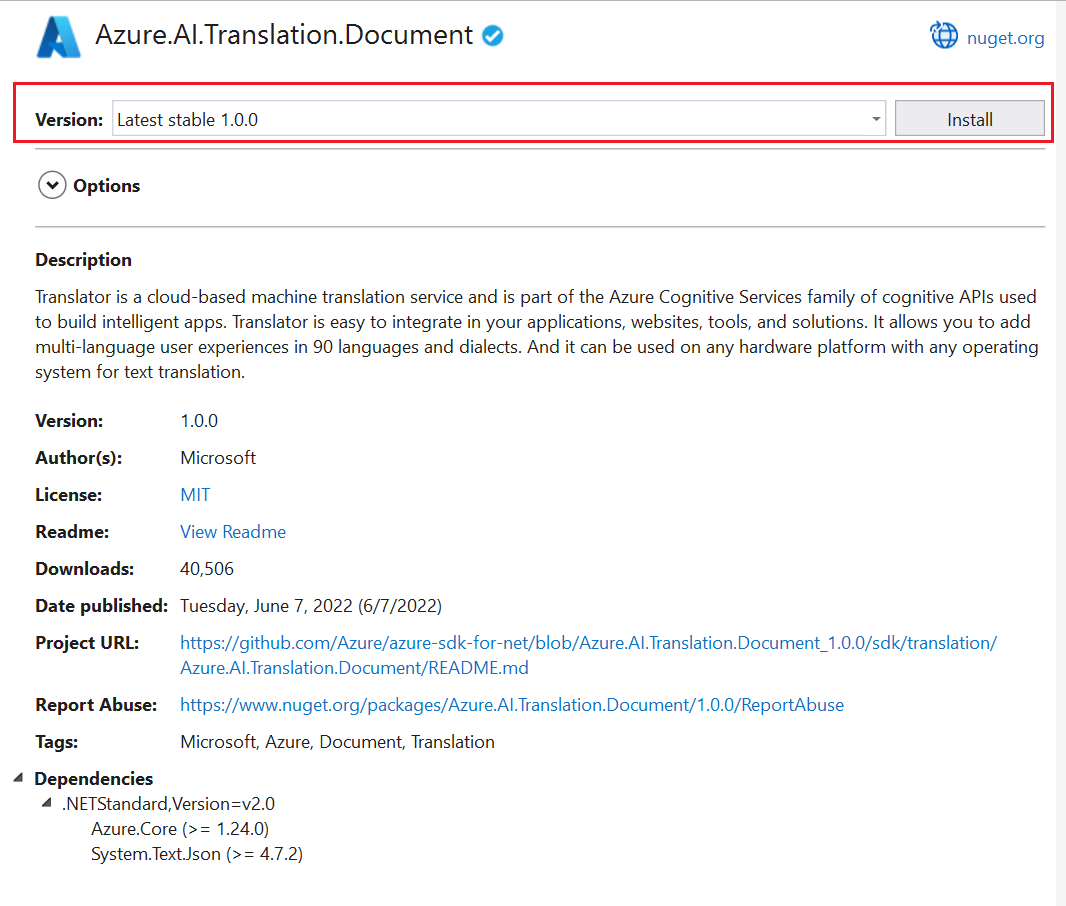
클라이언트 라이브러리 설치
애플리케이션 디렉터리 내에 .NET용 문서 번역 클라이언트 라이브러리를 설치합니다.
dotnet add package Azure.AI.Translation.Document --version 1.0.0
문서 또는 배치 파일 번역
이 프로젝트의 경우 원본 컨테이너에 업로드된 원본 문서가 필요합니다. 이 빠른 시작에서는 문서 번역 샘플 문서를 다운로드할 수 있습니다. 소스 언어는 영어입니다.
프로젝트 디렉터리에서 기본 설정 편집기 또는 IDE에서 Program.cs 파일을 엽니다.
Console.WriteLine("Hello World!")줄을 포함하여 기존 코드를 삭제합니다.애플리케이션의 Program.cs에서 키와 사용자 지정 엔드포인트에 대한 변수를 만듭니다. 자세한 내용은 키 검색 및 사용자 지정 do기본 엔드포인트를 참조하세요.
private static readonly string endpoint = "<your-document-translation-endpoint>";
private static readonly string key = "<your-key>";
단일 Blob 컨테이너에 있는 하나 이상의 문서에 대한 번역 작업을 시작하려면
StartTranslationAsync메서드를 호출합니다.StartTranslationAsync를 호출하려면sourceUri,targetUri및targetLanguageCode매개 변수가 포함된DocumentTranslationInput개체를 초기화해야 합니다.관리 ID 권한 부여의 경우 다음 변수를 만듭니다.
sourceUri. 번역할 문서가 포함된 원본 컨테이너의 URL입니다.
targetUri 번역된 문서가 기록되는 대상 컨테이너의 URL입니다.
targetLanguageCode. 번역된 문서의 언어 코드입니다. 언어 지원 페이지에서 언어 코드를 찾을 수 있습니다.
원본 및 대상 URL을 찾으려면 Azure Portal에서 스토리지 계정으로 이동합니다. 왼쪽 사이드바의 데이터 스토리지에서 컨테이너를 선택하고 다음 단계에 따라 원본 문서 및 대상 컨테이너
URLS를 검색합니다.원본 대상 1. 원본 컨테이너 옆의 확인란을 선택합니다. 1. 대상 컨테이너 옆의 확인란을 선택합니다. 2. 기본 창 영역에서 번역할 파일 또는 문서를 선택합니다. 2. 오른쪽에 있는 타원을 선택한 다음 속성을 선택합니다. 3. 원본 URL은 속성 목록 상단에 있습니다. 3. 대상 URL은 속성 목록 상단에 있습니다.
SAS(공유 액세스 서명) 권한 부여를 위해 다음 변수를 만듭니다.
- sourceUri. 번역할 문서가 포함된 원본 컨테이너에 대한 SAS 토큰이 쿼리 문자열로 추가된 SAS URI입니다.
- targetUri 번역된 문서가 기록되는 대상 컨테이너에 대한 SAS 토큰이 쿼리 문자열로 추가된 SAS URI입니다.
- targetLanguageCode. 번역된 문서의 언어 코드입니다. 언어 지원 페이지에서 언어 코드를 찾을 수 있습니다.
코드 샘플
Important
완료되면 코드에서 키를 제거하고 공개적으로 게시하지 마세요. 프로덕션의 경우 Azure Key Vault와 같은 자격 증명을 안전하게 저장하고 액세스하는 방법을 사용합니다. 자세한 내용은 Azure AI 서비스 보안을 참조하세요.
애플리케이션의 Program.cs 파일에 다음 코드 샘플을 입력합니다.
using Azure;
using Azure.AI.Translation.Document;
using System;
using System.Threading;
using System.Text;

class Program {

  // create variables for your custom endpoint and resource key
  private static readonly string endpoint = "<your-document-translation-endpoint>";
  private static readonly string key = "<your-key>";

  static async Task Main(string[] args) {

    // create variables for your sourceUrl, targetUrl, and targetLanguageCode
    Uri sourceUri = new Uri("<sourceUrl>");
    Uri targetUri = new Uri("<targetUrl>");
    string targetLanguage = "<targetLanguageCode>"

    // initialize a new instance  of the DocumentTranslationClient object to interact with the Document Translation feature
    DocumentTranslationClient client = new DocumentTranslationClient(new Uri(endpoint), new AzureKeyCredential(key));

    // initialize a new instance of the `DocumentTranslationInput` object to provide the location of input for the translation operation
    DocumentTranslationInput input = new DocumentTranslationInput(sourceUri, targetUri, targetLanguage);

    // initialize a new instance of the DocumentTranslationOperation class to track the status of the translation operation
    DocumentTranslationOperation operation = await client.StartTranslationAsync(input);

    await operation.WaitForCompletionAsync();

    Console.WriteLine($"  Status: {operation.Status}");
    Console.WriteLine($"  Created on: {operation.CreatedOn}");
    Console.WriteLine($"  Last modified: {operation.LastModified}");
    Console.WriteLine($"  Total documents: {operation.DocumentsTotal}");
    Console.WriteLine($"    Succeeded: {operation.DocumentsSucceeded}");
    Console.WriteLine($"    Failed: {operation.DocumentsFailed}");
    Console.WriteLine($"    In Progress: {operation.DocumentsInProgress}");
    Console.WriteLine($"    Not started: {operation.DocumentsNotStarted}");

    await foreach(DocumentStatusResult document in operation.Value) {
      Console.WriteLine($"Document with Id: {document.Id}");
      Console.WriteLine($"  Status:{document.Status}");
      if (document.Status == DocumentTranslationStatus.Succeeded) {
        Console.WriteLine($"  Translated Document Uri: {document.TranslatedDocumentUri}");
        Console.WriteLine($"  Translated to language: {document.TranslatedToLanguageCode}.");
        Console.WriteLine($"  Document source Uri: {document.SourceDocumentUri}");
      } else {
        Console.WriteLine($"  Error Code: {document.Error.Code}");
        Console.WriteLine($"  Message: {document.Error.Message}");
      }
    }
  }
}
애플리케이션 실행
애플리케이션에 코드 샘플을 추가한 후 터미널에 다음 명령을 입력하여 프로젝트 디렉터리에서 애플리케이션을 실행합니다.
dotnet run
다음은 예상 출력의 코드 조각입니다.
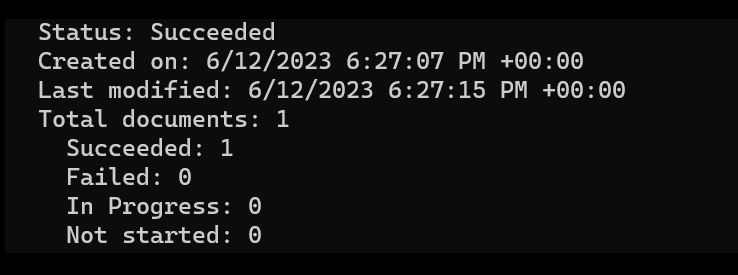


정말 간단하죠. 방금 .NET 클라이언트 라이브러리를 사용하여 스토리지 컨테이너에서 문서를 번역하는 프로그램을 만들었습니다.
프로젝트 설정
최신 버전의 Python 이 설치되어 있는지 확인합니다.
클라이언트 라이브러리 설치
최신 버전의 문서 번역 클라이언트 라이브러리를 설치합니다.
pip install azure-ai-translation-document==1.0.0
문서 또는 배치 파일 번역
이 프로젝트의 경우 원본 컨테이너에 업로드된 원본 문서가 필요합니다. 이 빠른 시작에서는 문서 번역 샘플 문서를 다운로드할 수 있습니다. 소스 언어는 영어입니다.
Python 애플리케이션 파일에서 리소스 키와 사용자 지정 엔드포인트에 대한 변수를 만듭니다. 자세한 내용은 키 검색 및 사용자 지정 do기본 엔드포인트를 참조하세요.
key = "<your-key>"
endpoint = "<your-custom-endpoint>"
endpoint및key매개 변수가 포함된DocumentTranslationClient개체를 초기화합니다.begin_translation메서드를 호출하고sourceUri,targetUri및targetLanguageCode매개 변수를 전달합니다.관리 ID 권한 부여의 경우 다음 변수를 만듭니다.
sourceUri. 번역할 문서가 포함된 원본 컨테이너의 URL입니다.
targetUri 번역된 문서가 기록되는 대상 컨테이너의 URL입니다.
targetLanguageCode. 번역된 문서의 언어 코드입니다. 언어 지원 페이지에서 언어 코드를 찾을 수 있습니다.
원본 및 대상 URL을 찾으려면 Azure Portal에서 스토리지 계정으로 이동합니다. 왼쪽 사이드바의 데이터 스토리지에서 컨테이너를 선택하고 다음 단계에 따라 원본 문서 및 대상 컨테이너
URLS를 검색합니다.원본 대상 1. 원본 컨테이너 옆의 확인란을 선택합니다. 1. 대상 컨테이너 옆의 확인란을 선택합니다. 2. 기본 창 영역에서 번역할 파일 또는 문서를 선택합니다. 2. 오른쪽에 있는 타원을 선택한 다음 속성을 선택합니다. 3. 원본 URL은 속성 목록 상단에 있습니다. 3. 대상 URL은 속성 목록 상단에 있습니다.
SAS(공유 액세스 서명) 권한 부여를 위해 다음 변수를 만듭니다.
- sourceUri. 번역할 문서가 포함된 원본 컨테이너에 대한 SAS 토큰이 쿼리 문자열로 추가된 SAS URI입니다.
- targetUri 번역된 문서가 기록되는 대상 컨테이너에 대한 SAS 토큰이 쿼리 문자열로 추가된 SAS URI입니다.
- targetLanguageCode. 번역된 문서의 언어 코드입니다. 언어 지원 페이지에서 언어 코드를 찾을 수 있습니다.
코드 예제
Important
완료되면 코드에서 키를 제거하고 공개적으로 게시하지 마세요. 프로덕션의 경우 Azure Key Vault와 같은 자격 증명을 안전하게 저장하고 액세스하는 방법을 사용합니다. 자세한 내용은 Azure AI 서비스 보안을 참조하세요.
Python 애플리케이션에 다음 코드 샘플을 입력합니다.
#  import libraries
from azure.core.credentials import AzureKeyCredential
from azure.ai.translation.document import DocumentTranslationClient

# create variables for your resource key, custom endpoint, sourceUrl, targetUrl, and targetLanguage
key = "<your-key>"
endpoint = "<your-custom-endpoint>"
sourceUri = "<your-container-sourceUrl>"
targetUri = "<your-container-targetUrl>"
targetLanguage = "<target-language-code>"


# initialize a new instance of the DocumentTranslationClient object to interact with the Document Translation feature
client = DocumentTranslationClient(endpoint, AzureKeyCredential(key))

# include source and target locations and target language code for the begin translation operation
poller = client.begin_translation(sourceUri, targetUri, targetLanguage)
result = poller.result()

print("Status: {}".format(poller.status()))
print("Created on: {}".format(poller.details.created_on))
print("Last updated on: {}".format(poller.details.last_updated_on))
print(
    "Total number of translations on documents: {}".format(
        poller.details.documents_total_count
    )
)

print("\nOf total documents...")
print("{} failed".format(poller.details.documents_failed_count))
print("{} succeeded".format(poller.details.documents_succeeded_count))

for document in result:
    print("Document ID: {}".format(document.id))
    print("Document status: {}".format(document.status))
    if document.status == "Succeeded":
        print("Source document location: {}".format(document.source_document_url))
        print(
            "Translated document location: {}".format(document.translated_document_url)
        )
        print("Translated to language: {}\n".format(document.translated_to))
    else:
        print(
            "Error Code: {}, Message: {}\n".format(
                document.error.code, document.error.message
            )
        )
애플리케이션 실행
애플리케이션에 코드 샘플을 추가하면 터미널에서 다음 명령을 입력합니다.
python asynchronous-sdk.py
다음은 예상 출력의 코드 조각입니다.
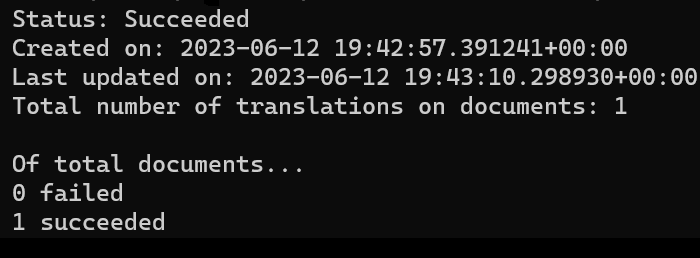
정말 간단하죠. Python 클라이언트 라이브러리를 사용하여 스토리지 컨테이너에서 문서를 번역하는 프로그램을 만들었습니다.