이 자습서에서는 변형 기능 플래그를 사용하여 예 애플리케이션인 Quote of the Day에서 다양한 사용자 세그먼트의 환경을 관리합니다. 변형 기능 플래그 사용에서 만들어진 변형 기능 플래그를 활용합니다. 계속 진행하기 전에 App Configuration 저장소에 Greeting이라는 이름의 변형 기능 플래그를 만들었는지 확인합니다.
필수 조건
- Node.js의 LTS 버전.
- 변형 기능 플래그 사용 자습서에 따라 Greeting이라는 이름의 변형 기능 플래그를 만듭니다.
Node.js 애플리케이션 만들기
quote-of-the-day라는 폴더를 만들고 프로젝트를 초기화합니다.mkdir quote-of-the-day cd quote-of-the-day npm init -y다음 패키지를 설치합니다.
npm install @azure/app-configuration-provider
npm install @microsoft/feature-management
npm install express
server.js 새 파일을 만들고 다음 코드를 추가합니다.
const express = require("express");
const server = express();

const appConfigEndpoint = process.env.AZURE_APPCONFIG_ENDPOINT;
const { DefaultAzureCredential } = require("@azure/identity");
const { load } = require("@azure/app-configuration-provider");
const { FeatureManager, ConfigurationMapFeatureFlagProvider } = require("@microsoft/feature-management");

let appConfig;
let featureManager;

async function initializeConfig() {
    appConfig = await load(appConfigEndpoint, new DefaultAzureCredential(), {
        featureFlagOptions: {
            enabled: true,
            refresh: {
                enabled: true
            }
        }
    });

    featureManager = new FeatureManager(
        new ConfigurationMapFeatureFlagProvider(appConfig));
}

function startServer() {
    // Use a middleware to refresh the configuration before each request
    server.use((req, res, next) => {
        appConfig.refresh();
        next();
    });
    server.use(express.json());
    // Serve static index.html from the current folder
    server.use(express.static("."));

    // This API returns the different greeting messages based on the segment the user belongs to.
    // It evaluates a variant feature flag based on user context. The greeting message is retrieved from the variant configuration.
    server.get("/api/getGreetingMessage", async (req, res) => {
        const { userId, groups } = req.query;
        const variant = await featureManager.getVariant("Greeting", { userId: userId, groups: groups ? groups.split(",") : [] });
        res.status(200).send({ message: variant?.configuration });
    });

    server.post("/api/like", (req, res) => {
        const { UserId } = req.body;
        if (UserId === undefined) {
            return res.status(400).send({ error: "UserId is required" });
        }
        // Here you would typically emit a 'like' event to compare variants.
        res.status(200).send();
    });

    const port = "8080";
    server.listen(port, () => {
        console.log(`Server is running at http://localhost:${port}`);
    });
}

// Initialize the configuration and start the server
initializeConfig()
    .then(() => {
        startServer();
    })
    .catch((error) => {
        console.error("Failed to load configuration:", error);
        process.exit(1);
    });
index.html 새 파일을 만들고 다음 코드를 추가합니다.
<!DOCTYPE html>
<html lang="en">
<head>
<meta charset="UTF-8">
<title>Quote of the Day</title>
<style>
    .heart-button {
    background-color: transparent;
    border: none;
    cursor: pointer;
    font-size: 24px;
    }

    .heart-button:hover {
    background-color: #F0F0F0;
    }
</style>
</head>
<body>
<div style="display: flex; flex-direction: column; min-height: 100vh; background-color: #f4f4f4;">
    <header style="background-color: white; border-bottom: 1px solid #eaeaea; display: flex; justify-content: space-between; align-items: center; font-family: 'Arial', sans-serif; font-size: 16px;">
    <div style="font-size: 1.25em; color: black;">QuoteOfTheDay</div>
    </header>

    <main style="display: flex; justify-content: center; align-items: center; flex-grow: 1;">
    <div style="background-color: white; padding: 30px; border-radius: 8px; box-shadow: 0 2px 10px rgba(0, 0, 0, 0.1); max-width: 700px; position: relative; text-align: left;">
        <div id="quote-content">
        <h2 id="greeting">Quote of the Day</h2>
        <blockquote style="font-size: 2em; font-style: italic; color: #4EC2F7; margin: 0 0 20px 0; line-height: 1.4;">
            <p>"You cannot change what you are, only what you do."</p>
            <footer style="font-size: 0.55em; color: black; font-family: 'Arial', sans-serif; font-style: normal; font-weight: bold;">— Philip Pullman</footer>
        </blockquote>
        <div style="position: absolute; top: 10px; right: 10px; display: flex;">
            <button class="heart-button" id="like-button">
            <span id="heart-icon" style="color: #ccc">♥</span>
            </button>
        </div>
        </div>
        <div id="loading" style="display: none;">
        <p>Loading</p>
        </div>
    </div>
    </main>
</div>

<script>
    // extract URL parameters to simulate user login
    document.addEventListener('DOMContentLoaded', function() {
    const urlParams = new URLSearchParams(window.location.search);
    const currentUser = urlParams.get('userId') || '';
    let liked = false;

    const greetingElement = document.getElementById('greeting');
    const heartIcon = document.getElementById('heart-icon');
    const likeButton = document.getElementById('like-button');
    const quoteContent = document.getElementById('quote-content');
    const loadingElement = document.getElementById('loading');

    async function init() {
        quoteContent.style.display = 'none';
        loadingElement.style.display = 'block';

        const response = await fetch(`/api/getGreetingMessage?userId=${currentUser}`, {
        method: "GET"
        });
        const result = await response.json();
        greetingElement.textContent = result.message || "";
        quoteContent.style.display = 'block';
        loadingElement.style.display = 'none';
    }

    likeButton.addEventListener('click', async function() {
        if (!liked) {
        const response = await fetch("/api/like", {
            method: "POST",
            headers: { "Content-Type": "application/json" },
            body: JSON.stringify({ UserId: currentUser }),
        });
        }
        liked = !liked;
        heartIcon.style.color = liked ? 'red' : '#ccc';
    });

    init();
    });
</script>
</body>
</html>
간단히 하기 위해, 이 예제에서는 URL 쿼리 매개 변수(예:
userId)에서?userId=UserA을(를) 추출하여 다른 사용자 ID를 시뮬레이션합니다.
애플리케이션 실행
AZURE_APPCONFIG_ENDPOINT 환경 변수를 Azure Portal의 저장소 개요 아래에 있는 App Configuration 저장소의 엔드포인트로 설정합니다.
Windows 명령 프롬프트를 사용하는 경우 다음 명령을 실행하고, 명령 프롬프트를 다시 시작하여 변경 내용을 적용합니다.
setx AZURE_APPCONFIG_ENDPOINT "<endpoint-of-your-app-configuration-store>"PowerShell을 사용하는 경우 다음 명령을 실행합니다.
$Env:AZURE_APPCONFIG_ENDPOINT = "<endpoint-of-your-app-configuration-store>"macOS 또는 Linux를 사용하는 경우 다음 명령을 실행합니다.
export AZURE_APPCONFIG_ENDPOINT='<endpoint-of-your-app-configuration-store>'애플리케이션을 실행합니다.
node server.js브라우저를 열고
localhost:8080로 이동합니다. 인사말 메시지가 없는 앱의 기본 보기가 표시됩니다.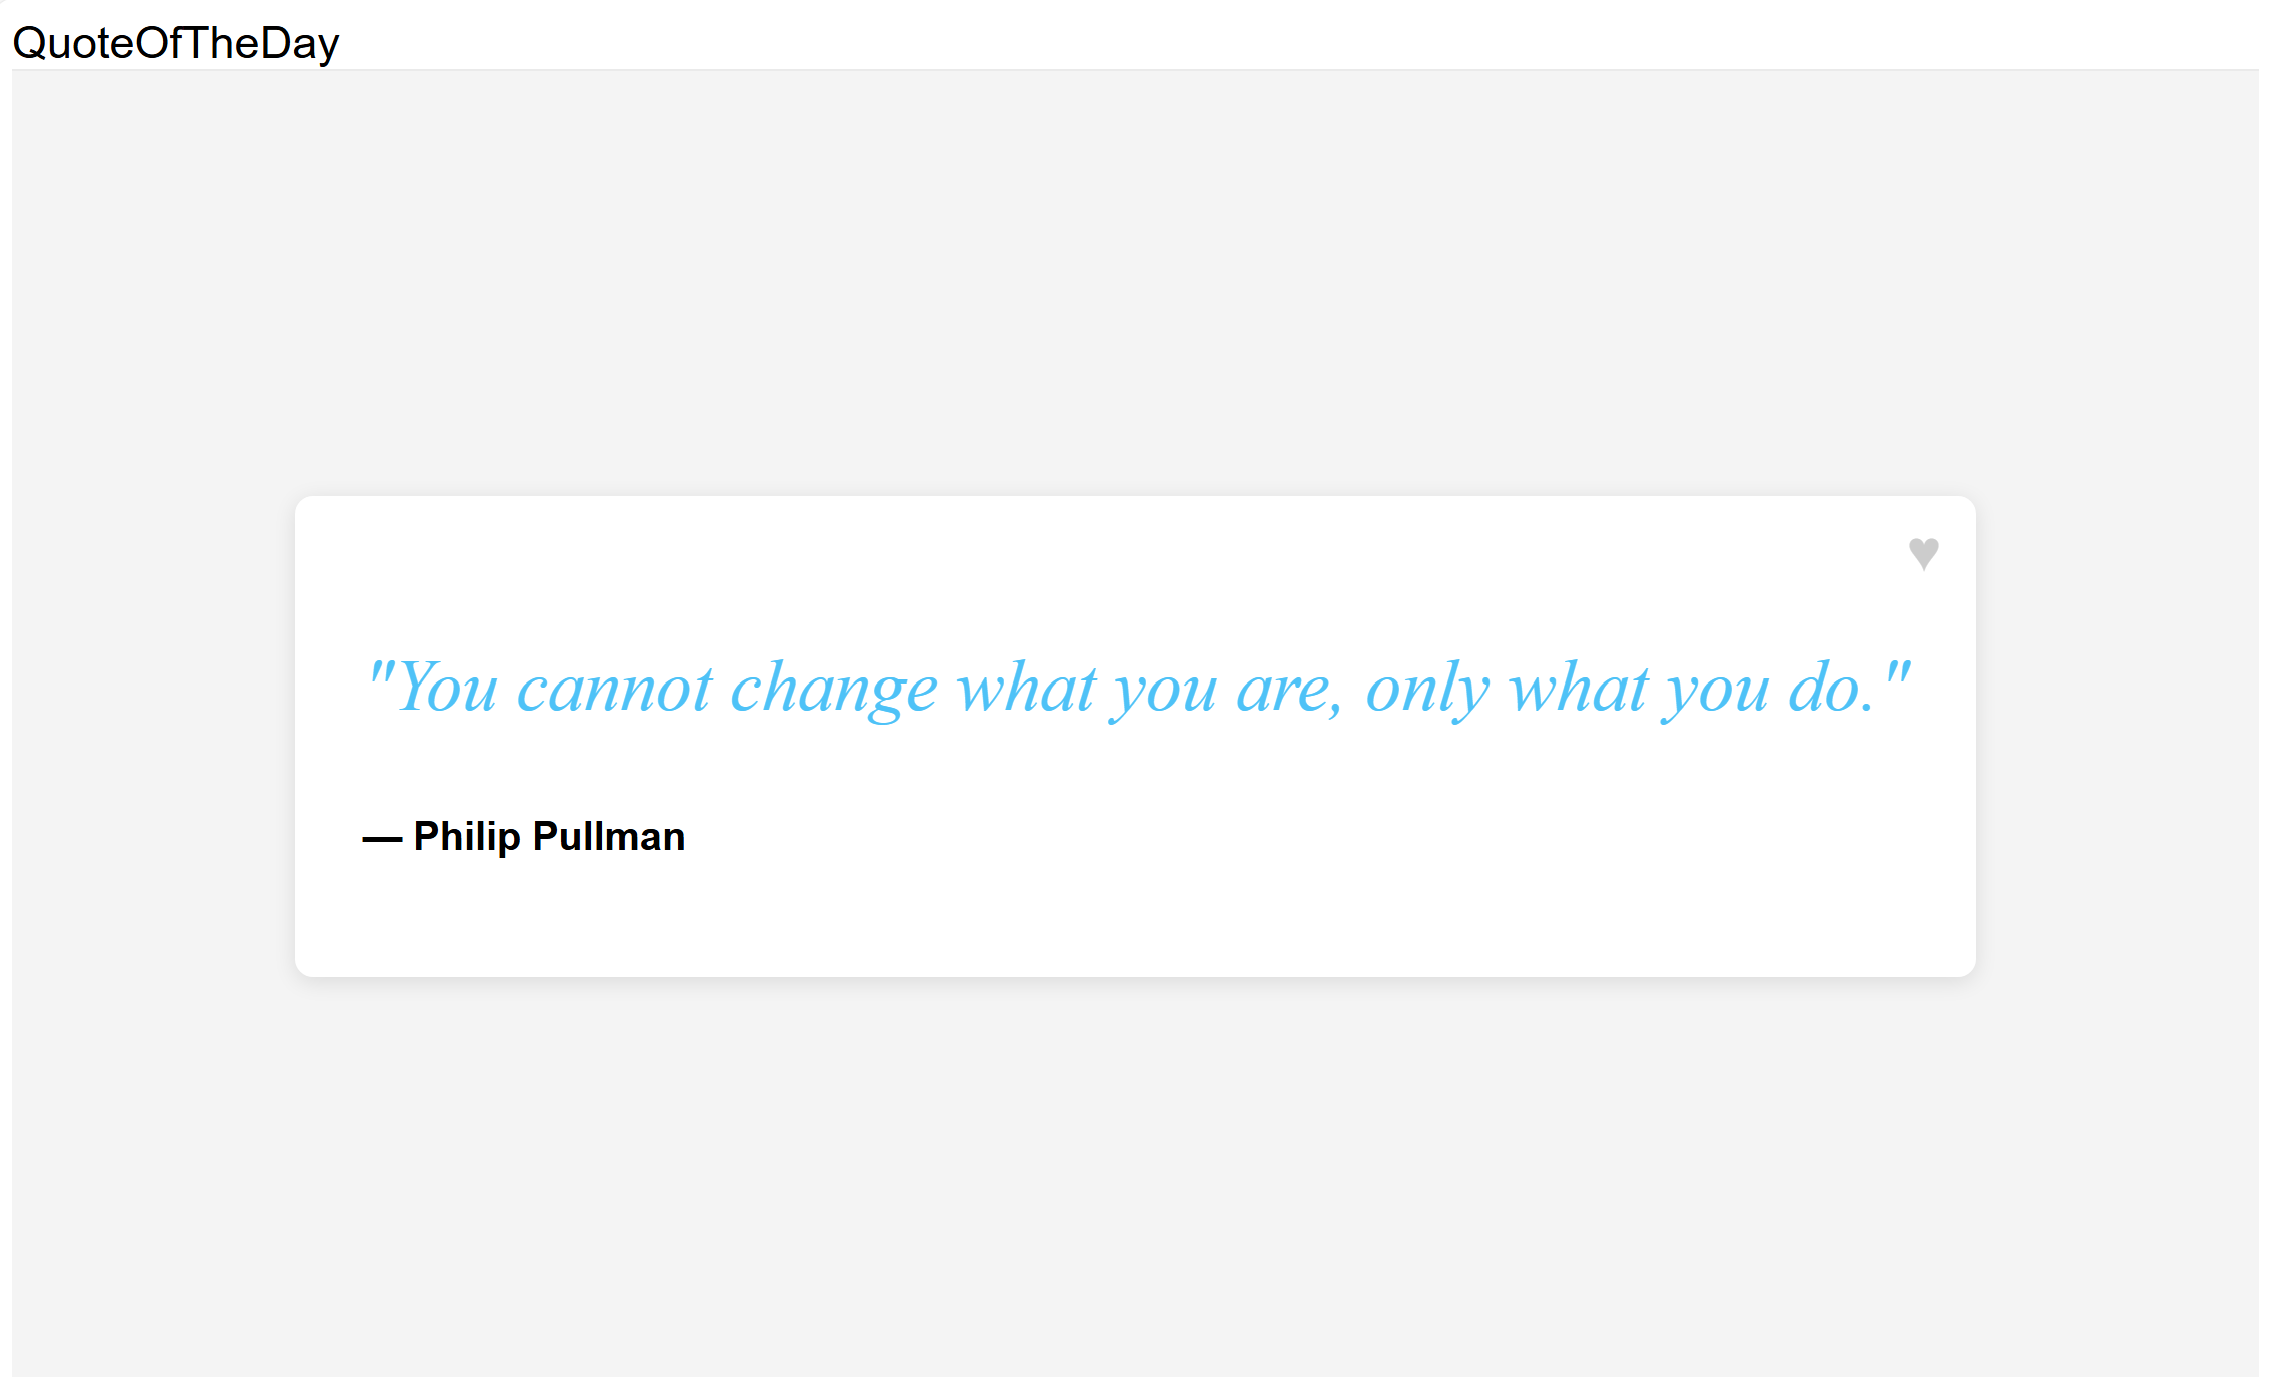
URL에서 쿼리 매개 변수를 사용하여
userId사용자 ID를 지정할 수 있습니다. 방문localhost:8080/?userId=UserA하면 긴 인사말 메시지가 표시됩니다.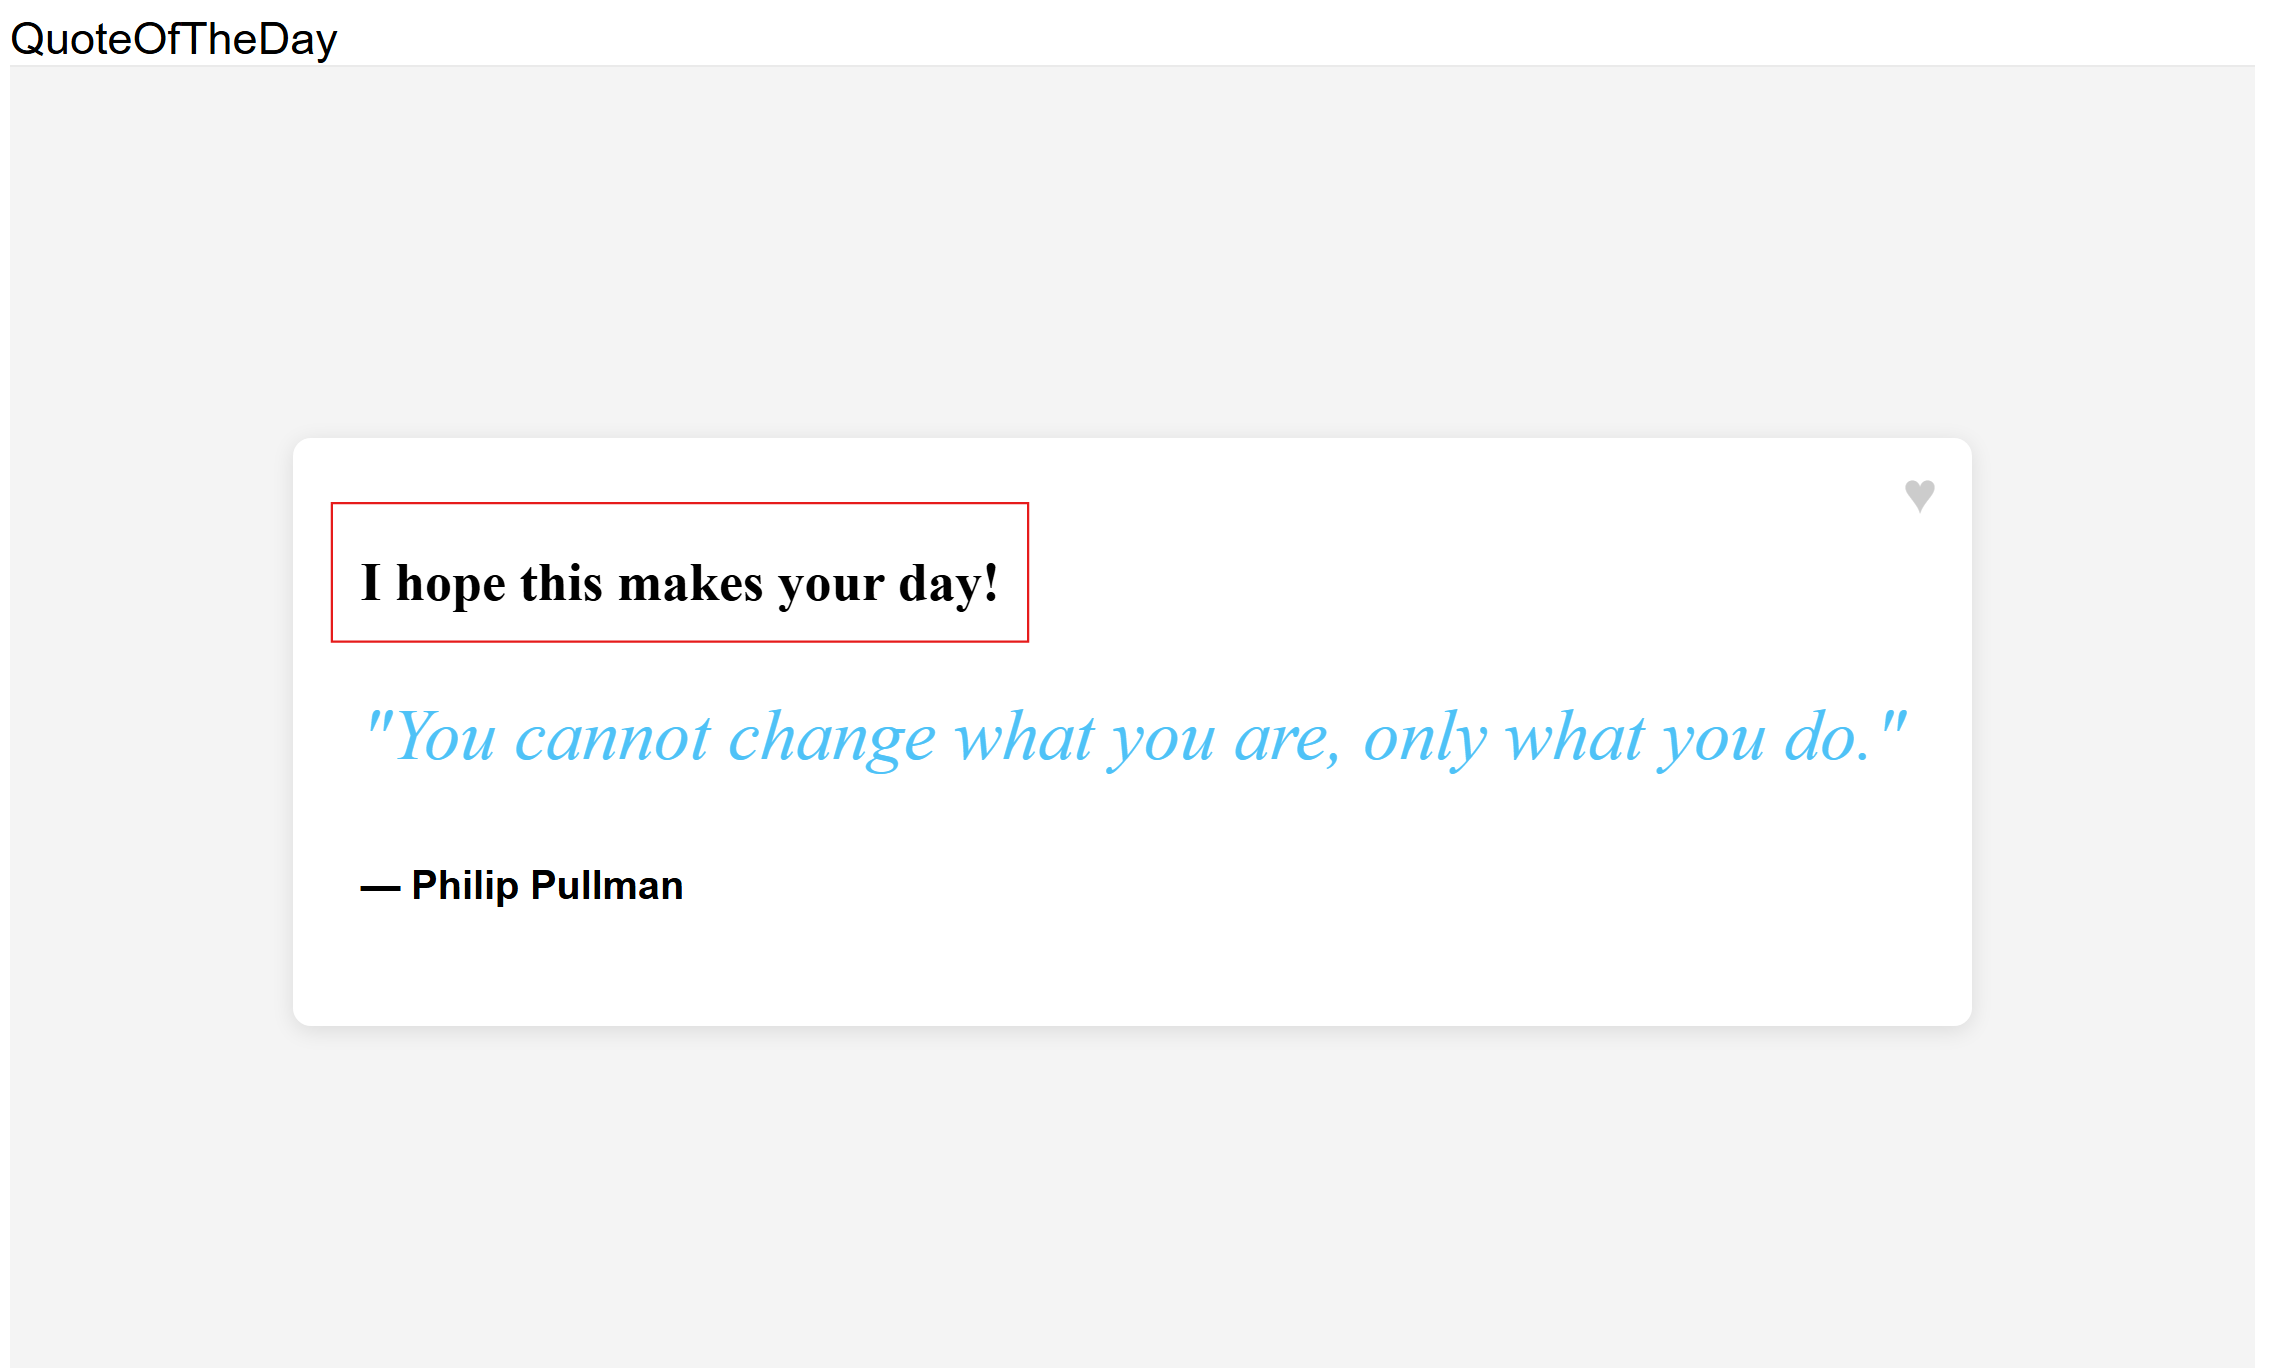
다른 사용자 ID를 시도하여 변형 기능 플래그가 사용자의 여러 세그먼트에 대한 인사말 메시지를 변경하는 방법을 확인합니다. 방문
localhost:8080/?userId=UserB하면 짧은 인사말 메시지가 표시됩니다.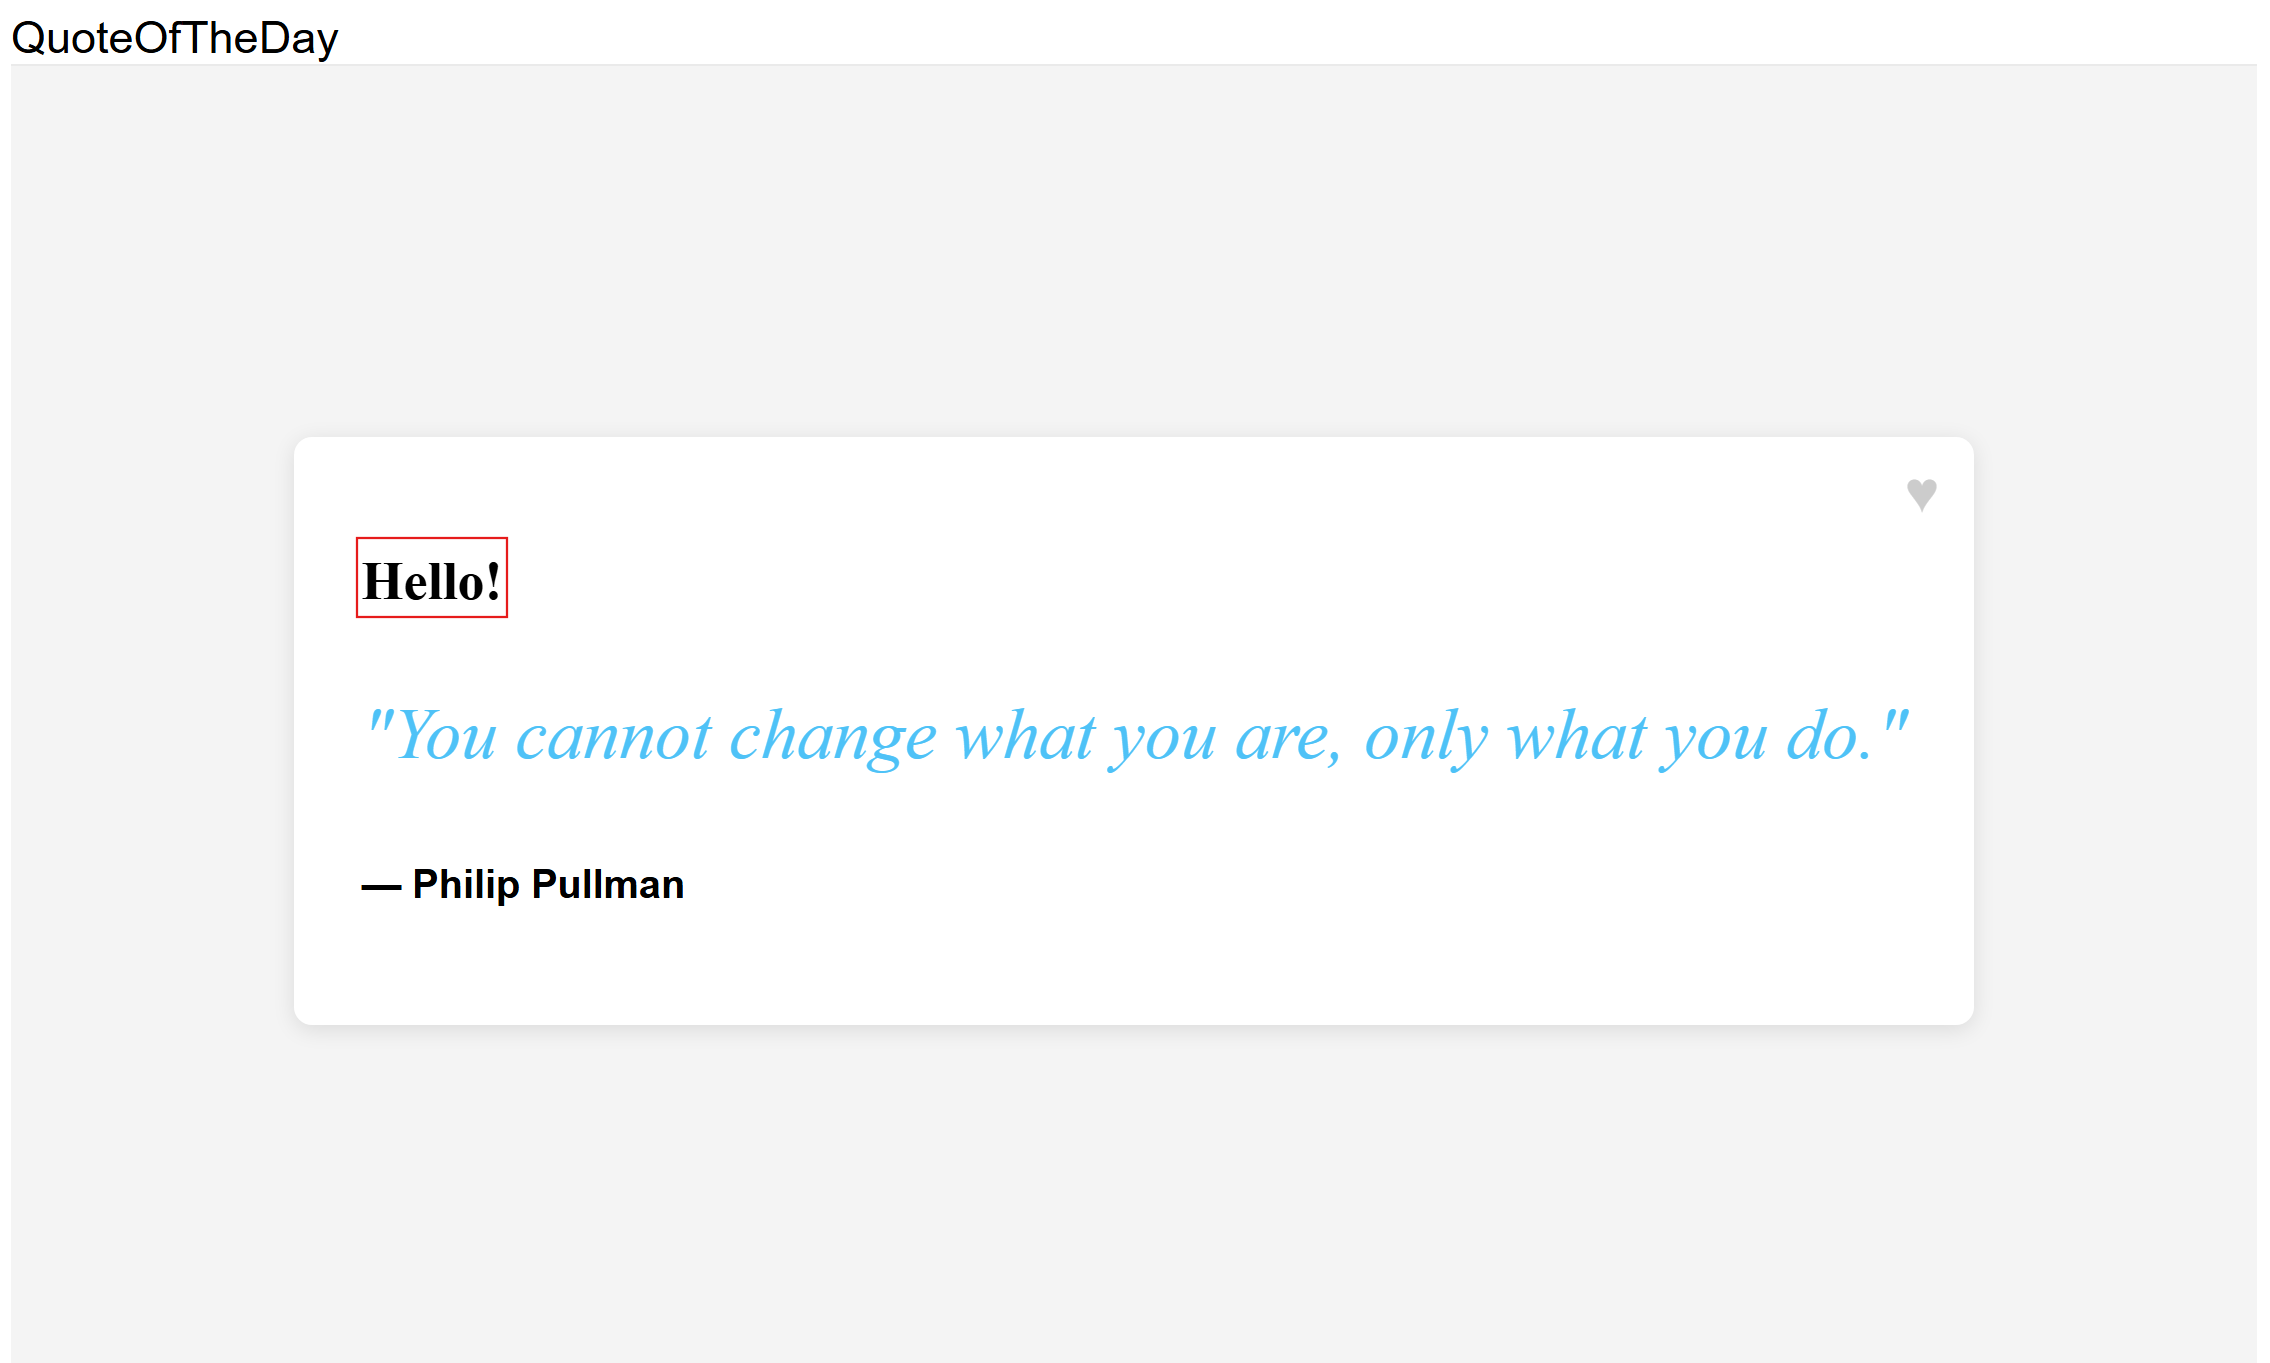
다음 단계
JavaScript 기능 관리 라이브러리의 전체 기능 개요는 다음 문서를 참조하세요.