Azure Government에서 Storage API를 사용하여 개발
Azure Government는 상업용 Azure와 동일한 기본 기술을 사용하므로 이미 익숙한 개발 도구를 사용할 수 있습니다. Azure Government 구독이 없는 경우, 시작하기 전에 체험 계정을 만듭니다.
필수 조건
- 개발자를 위한 지침을 검토합니다. 이 문서에서는 환경을 관리하기 위한 Azure Government의 고유한 URL과 엔드포인트를 설명합니다. Azure Government에 연결하려면 이러한 엔드포인트에 대해 알고 있어야 합니다.
- Azure Government와 글로벌 Azure 비교를 검토하고 관심 있는 서비스를 클릭하여 Azure Government와 글로벌 Azure 간의 차이점을 확인합니다.
- Azure Storage Explorer의 최신 버전을 다운로드하여 설치합니다.
Storage Explorer를 Azure Government에 연결
Microsoft Azure Storage Explorer는 Azure Storage 작업을 위한 플랫폼 간 도구입니다. 이제 정부 고객은 Blob, 큐, 테이블 및 파일 공유 만들기 및 관리와 같은 Azure Storage Explorer의 모든 최신 기능을 활용할 수 있습니다.
Storage Explorer 시작
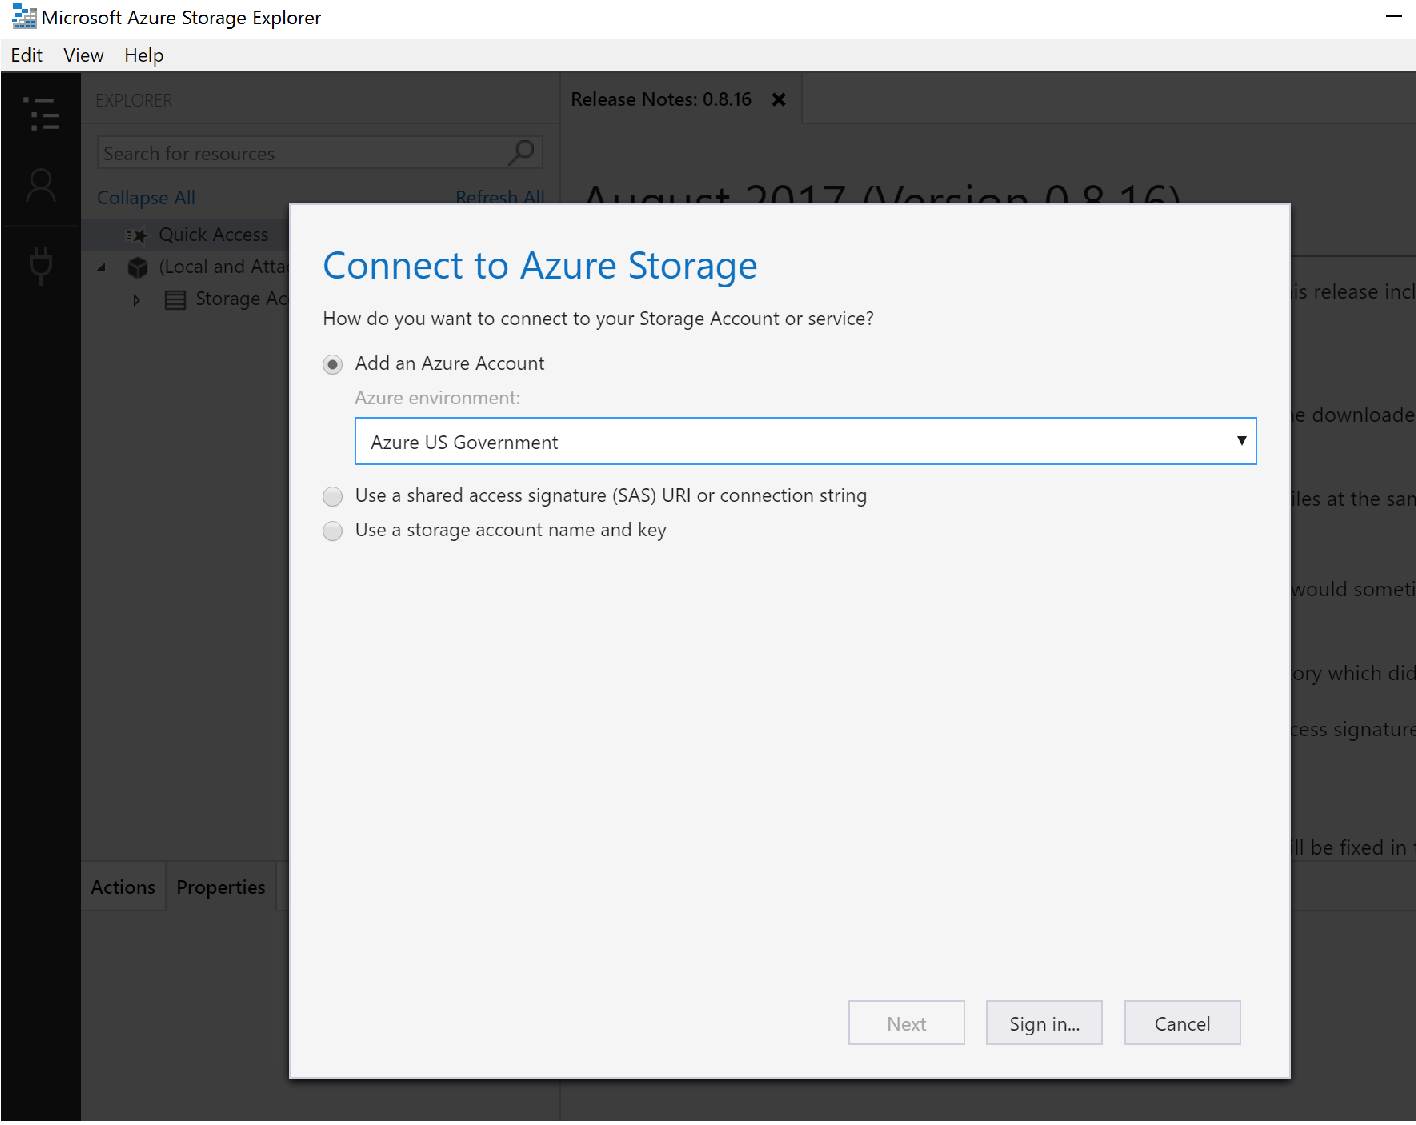
Azure Storage Explorer 데스크톱 애플리케이션을 엽니다.
Azure 계정을 추가하라는 메시지가 표시됩니다. 드롭다운에서 "Azure US Government" 옵션을 선택합니다.
Azure Government 계정에 로그인하면 모든 리소스를 볼 수 있습니다. Storage Explorer는 아래 스크린샷과 유사하게 표시됩니다. 스토리지 계정을 클릭하여 Blob 컨테이너, 파일 공유, 큐 및 테이블을 확인합니다.
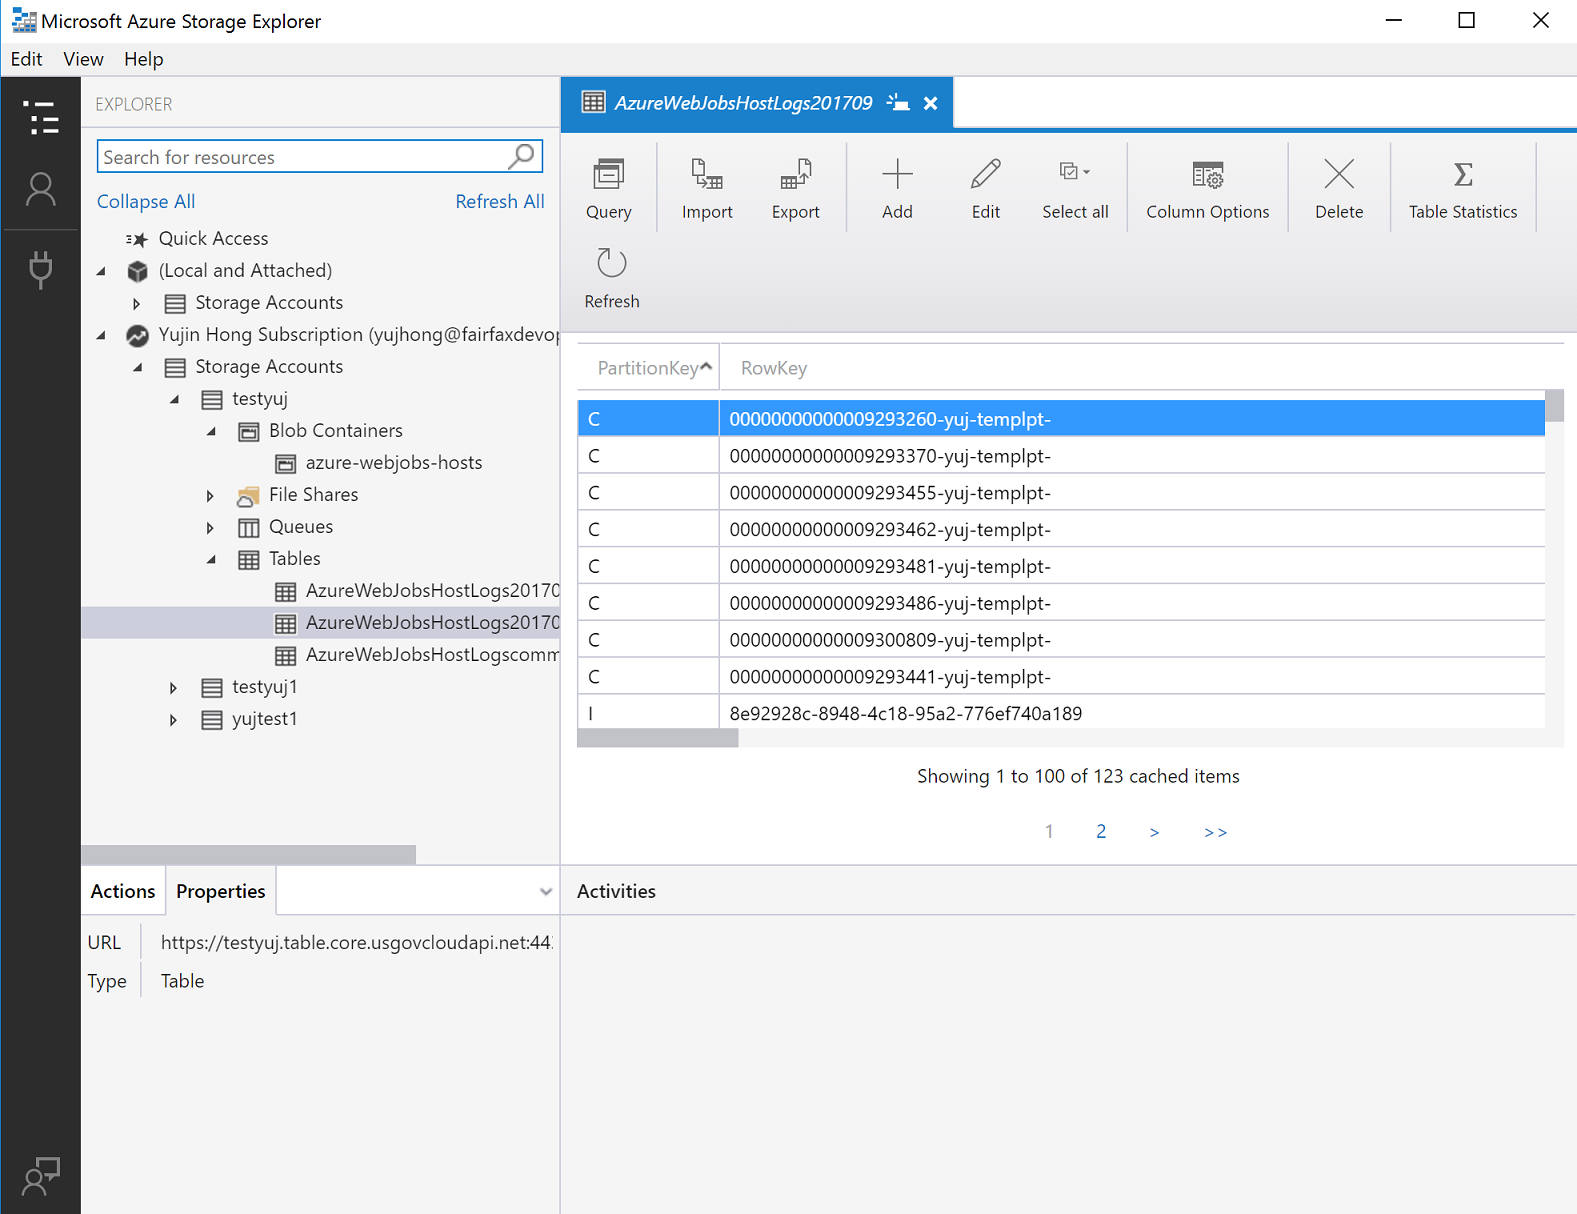
Azure Storage Explorer에 대한 자세한 내용은 Storage Explorer 시작을 참조하세요.
Storage API에 연결
필수 조건
- 활성 Azure Government 구독이 있습니다. Azure Government 구독이 없는 경우, 시작하기 전에 체험 계정을 만듭니다.
- Visual Studio 2019를 다운로드합니다.
Storage API 시작
Storage API와 연결할 때 기억해야 할 중요한 차이점 중 하나는 Azure Government의 스토리지 URL이 상업용 Azure의 스토리지 URL과 다르다는 것입니다. 특히 도메인은 "core.windows.net"이 아니라 "core.usgovcloudapi.net"으로 끝납니다.
C#을 사용하여 Azure Government의 스토리지에 연결할 때 이러한 엔드포인트 차이점을 고려해야 합니다.
Azure Government 포털로 이동하여 스토리지 계정을 선택한 다음, "액세스 키" 탭을 클릭합니다.
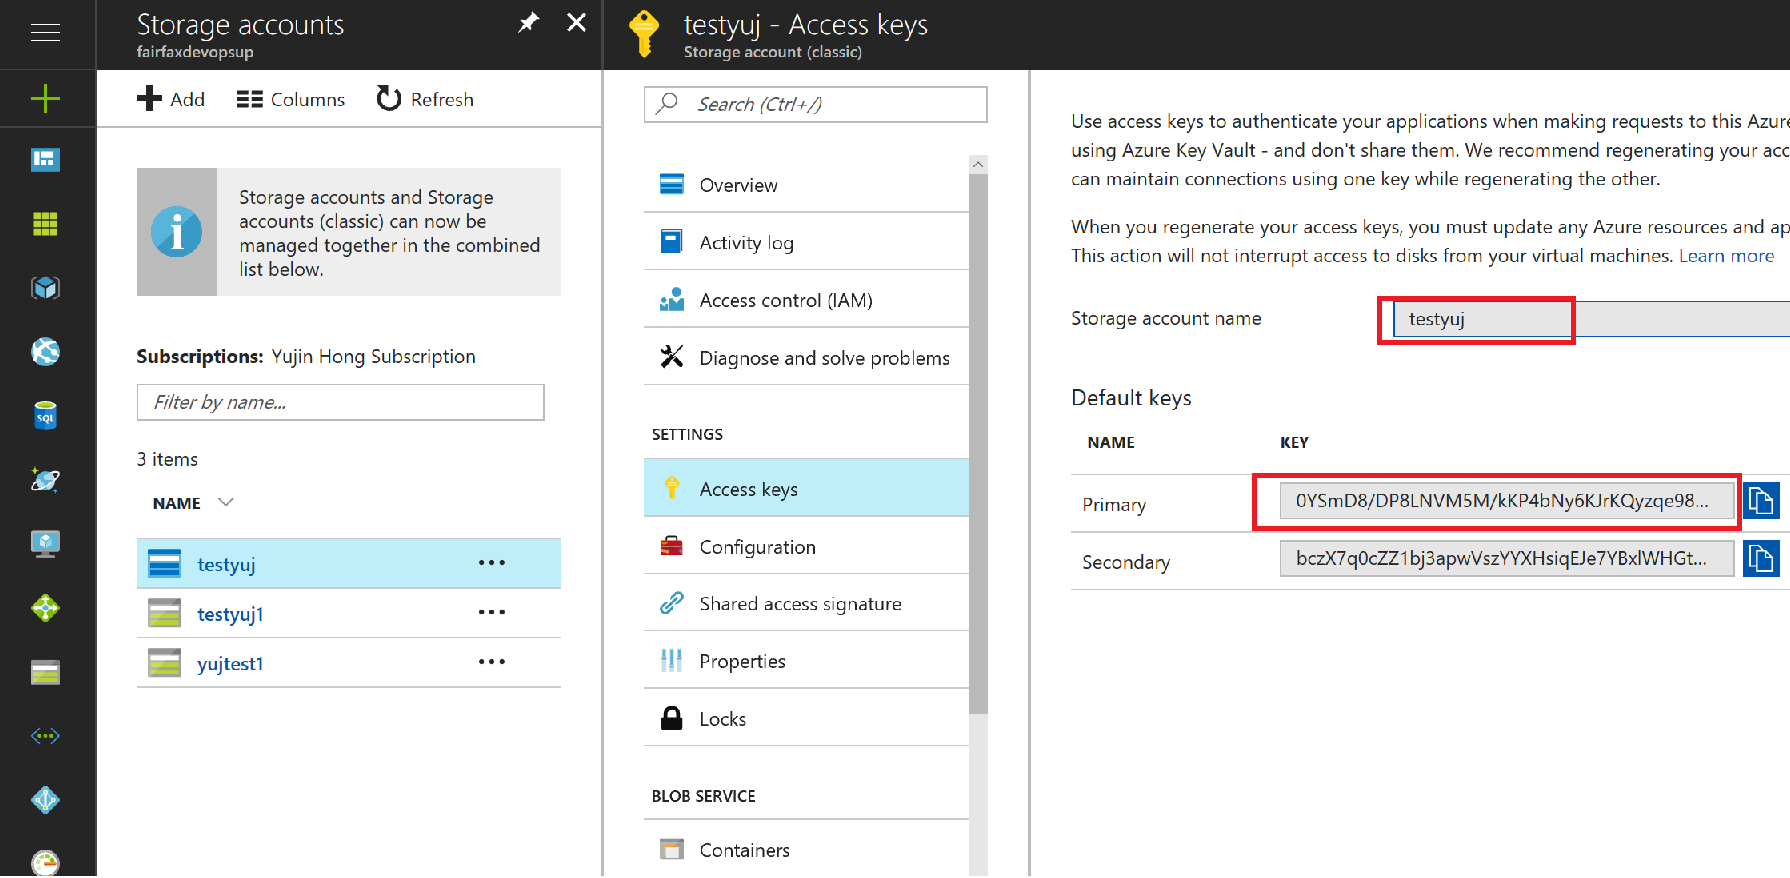
스토리지 계정 연결 문자열을 복사/붙여넣습니다.
C#
Visual Studio를 연 다음 새 프로젝트를 만듭니다. .NET용 Azure Tables 클라이언트 라이브러리에 참조를 추가합니다. 이 패키지에는 Storage Table 계정에 연결하기 위한 클래스가 포함되어 있습니다.
다음 두 줄의 C# 코드를 추가하여 연결합니다.
var credentials = new TableSharedKeyCredential(storageAccountName, Environment.GetEnvironmentVariable("STORAGE_ACCOUNT_KEY"));
var storageTableUri = Environment.GetEnvironmentVariable("STORAGE_TABLE_URI");
var tableServiceClient = new TableServiceClient(new Uri(storageTableUri), credentials);
이제 정상적으로 스토리지와 상호 작용할 수 있습니다. 예를 들어 Table Storage에서 특정 엔터티를 검색하려는 경우 다음과 같이 수행할 수 있습니다.
 var tableClient = tableServiceClient.GetTableClient("Contacts");
 ContactEntity contact = tableClient.GetEntity<ContactEntity>("gov-partition1", "0fb52a6c-3784-4dc5-aa6d-ecda4426dbda");
 Console.WriteLine($"Contact: {contact.FirstName} {contact.LastName}");
Java
- Java용 Azure Tables 클라이언트 라이브러리를 다운로드하고 프로젝트를 올바르게 구성합니다.
- Azure Tables 클라이언트 라이브러리를 사용하여 Azure Table Storage에 액세스할 "test" 클래스를 만듭니다.
아래 코드를 복사하여 붙여넣고 스토리지 계정 연결 문자열을AZURE_STORAGE_CONNECTION_STRING환경 변수에 붙여넣습니다.import com.azure.data.tables.implementation.ModelHelper; import com.azure.data.tables.models.*; import java.util.HashMap; public class test { public static final String storageConnectionString = System.getEnv("AZURE_STORAGE_CONNECTION_STRING"); public static void main(String[] args) { try { // Create the table service client. TableServiceClient tableServiceClient = new TableServiceClientBuilder() .connectionString(storageConnectionString) .buildClient(); // Create the table if it doesn't exist. String tableName = "Contacts"; TableClient tableClient = tableServiceClient.createTableIfNotExists(tableName); // Create a new customer entity. TableEntity customer1 = ModelHelper.createEntity(new HashMap<String, Object>() {{ put("PartitionKey", "Brown"); put("RowKey", "Walter"); put("Email", "Walter@contoso.com"); }}); // Insert table entry into table tableClient.createEntity(customer1); } catch (Exception e) { // Output the stack trace. e.printStackTrace(); } } }
Node.js
Node.js용 Azure Storage Blob 클라이언트 라이브러리를 다운로드하고 애플리케이션을 올바르게 구성합니다.
아래의 다음 코드는 Azure Blob Storage에 연결하고 Azure Storage API를 사용하여 컨테이너를 만듭니다. Azure Storage 계정 연결 문자열을
AZURE_STORAGE_CONNECTION_STRING환경 변수에 붙여넣습니다.var { BlobServiceClient } = require("@azure/storage-blob"); var storageConnectionString = process.env["AZURE_STORAGE_CONNECTION_STRING"]; var blobServiceClient = BlobServiceClient.fromConnectionString(storageConnectionString); var containerClient = blobServiceClient.getContainerClient('testing'); containerClient.createIfNotExists();
Python
Python용 Azure Storage Blob 클라이언트 라이브러리를 다운로드합니다.
Python용 Storage 라이브러리를 사용하여 Azure Government에 연결하는 경우 Azure Storage 연결 문자열을
AZURE_STORAGE_CONNECTION_STRING환경 변수에 붙여넣습니다.# Create the BlobServiceClient that is used to call the Blob service for the storage account connection_string = os.getenv("AZURE_STORAGE_CONNECTION_STRING") blob_service_client = BlobServiceClient.from_connection_string(conn_str=connection_string) container_name ='ml-gov-demo' container = blob_service_client.get_container_client(container=container_name) generator = container.list_blobs() for blob in generator: print("\t Blob name: " + blob.name)
PHP
PHP용 Azure Storage SDK를 다운로드합니다.
아래 코드는 Azure Storage API를 사용하여 Azure Table Storage에 액세스합니다.
connectionString변수에TableEndpoint매개 변수가 있음을 알 수 있습니다. 사용 중인 서비스에 따라 매개 변수를 정의하고 해당 서비스의 엔드포인트로 설정해야 합니다.BlobEndpoint= //ends with 'blob.core.usgovcloudapi.net'
QueueEndpoint= //ends with 'queue.core.usgovcloudapi.net'
TableEndpoint= //ends with 'table.core.usgovcloudapi.net'
참고 항목
포털에서 스토리지 계정으로 이동하여 이러한 엔드포인트를 찾을 수 있습니다.
connectionString변수의 스토리지 계정 이름, 키 및 서비스 엔드포인트에 붙여넣습니다.<?php require_once "vendor/autoload.php"; use WindowsAzure\Common\ServicesBuilder; use MicrosoftAzure\Storage\Common\ServiceException; $connectionString = 'DefaultEndpointsProtocol=http;AccountName=<accountname>;AccountKey=<accountkey>;TableEndpoint=http://<storageaccountname>.table.core.usgovcloudapi.net/'; $tableRestProxy = ServicesBuilder::getInstance()->createTableService($connectionString); try { // Create table. $tableRestProxy->createTable("test"); } catch(ServiceException $e){ $code = $e->getCode(); $error_message = $e->getMessage(); } ?>
다음 단계
- Azure Storage에 대해 자세히 읽어봅니다.
- Azure Government 블로그 구독
- azure-gov 태그를 사용하여 Stack Overflow에 대한 도움말 보기