빠른 시작: 감정 분석 및 오피니언 마이닝
참조 설명서 | 추가 샘플 | 패키지(NuGet) | 라이브러리 소스 코드
이 빠른 시작을 사용하여 .NET용 클라이언트 라이브러리를 통해 감정 분석 애플리케이션을 만듭니다. 다음 예제에서는 텍스트 샘플에 표현된 감정을 식별하고 측면 기반 감정 분석을 수행할 수 있는 C# 애플리케이션을 만듭니다.
필수 조건
- Azure 구독 - 체험 구독 만들기
- Visual Studio IDE
설정
Azure 리소스 만들기
아래 코드 샘플을 사용하려면 Azure 리소스를 배포해야 합니다. 이 리소스에는 Language 서비스에 보내는 API 호출을 인증하는 데 사용할 키와 엔드포인트가 포함됩니다.
다음 링크를 사용하여 Azure Portal에서 Language 리소스를 만듭니다. Azure 구독을 사용하여 로그인해야 합니다.
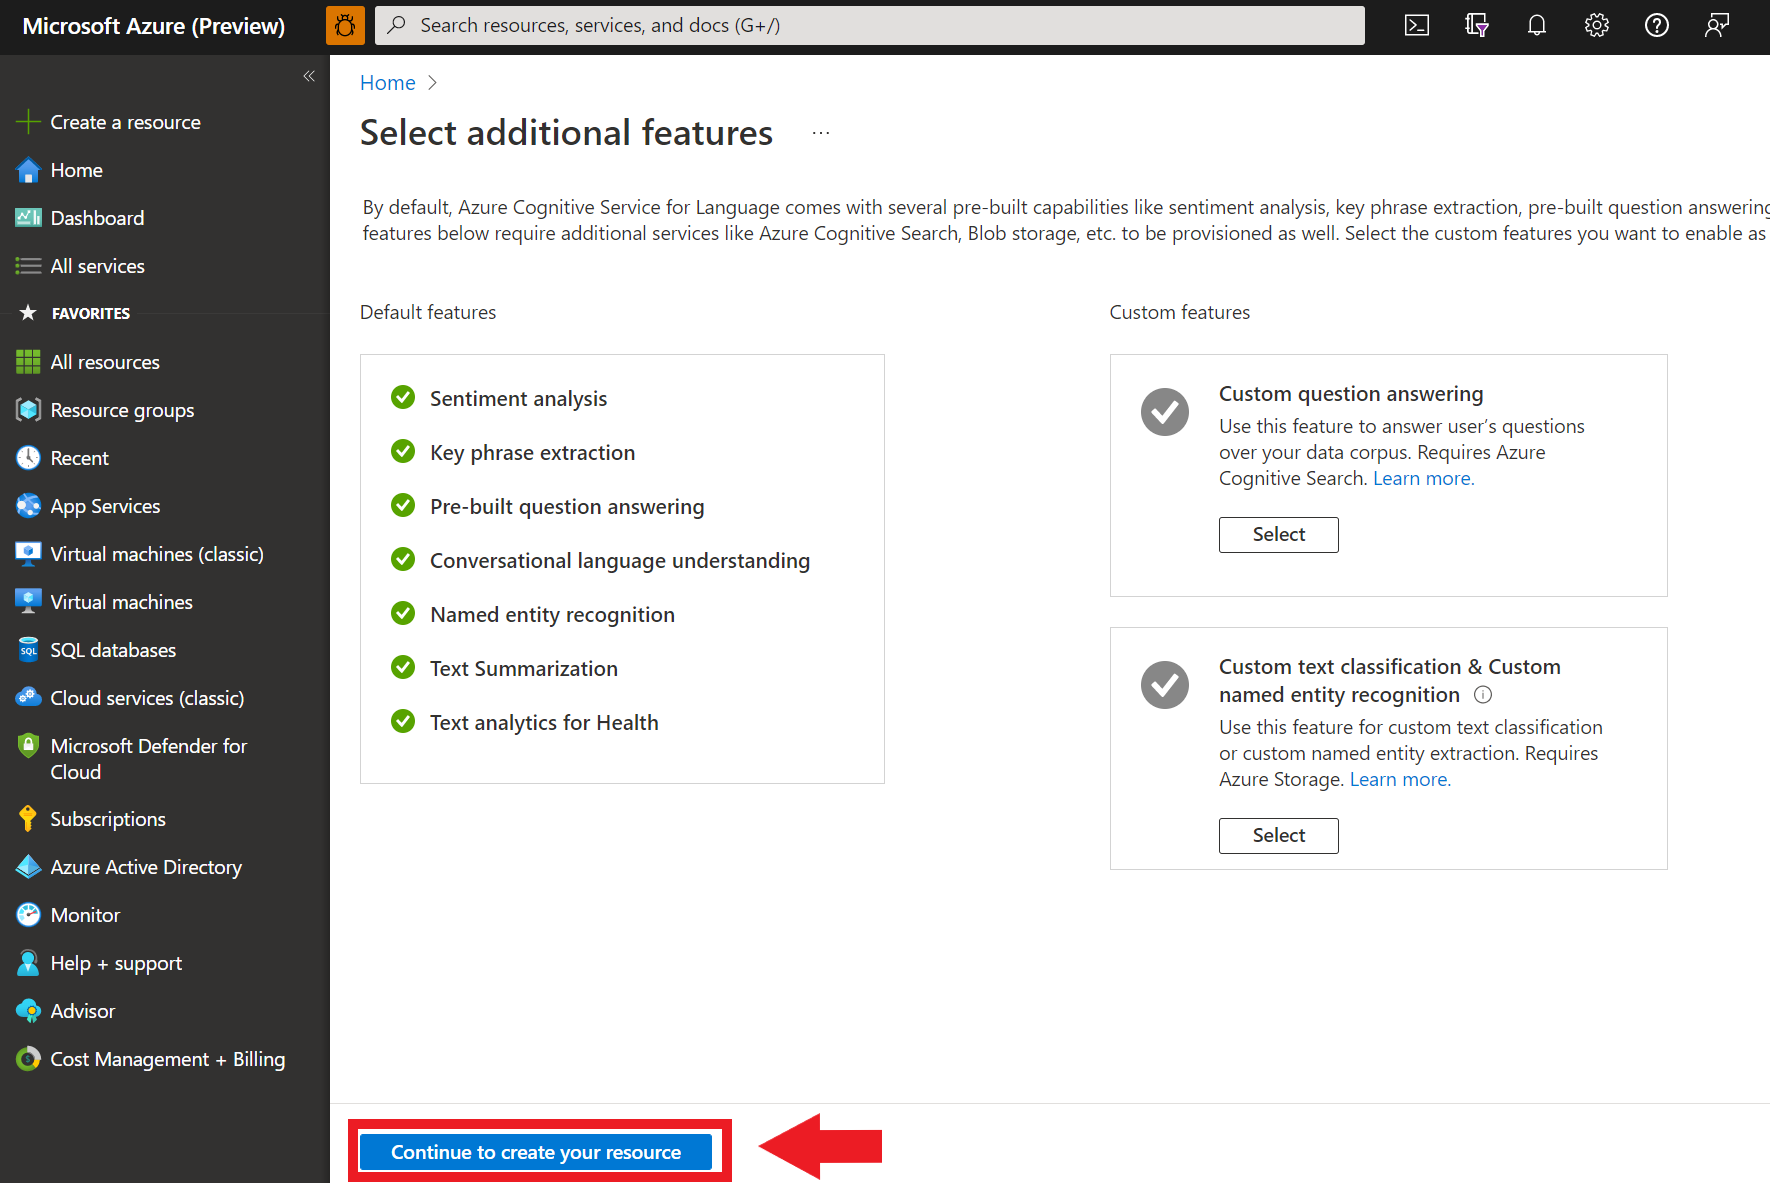
표시되는 추가 기능 선택 화면에서 계속해서 리소스 만들기를 선택합니다.
언어 만들기 화면에서 다음 정보를 제공합니다.
세부 정보 설명 Subscription 리소스가 연결되는 구독 계정입니다. 드롭다운 메뉴에서 Azure 구독을 선택합니다. Resource group 리소스 그룹은 사용자가 만든 리소스를 저장하는 컨테이너입니다. 새로 만들기를 선택하여 새 리소스 그룹을 만듭니다. 지역 언어 리소스의 위치입니다. 지역마다 실제 위치에 따라 대기 시간이 발생할 수 있지만 리소스의 런타임 가용성에는 영향을 주지 않습니다. 이 빠른 시작에서는 사용 가능한 가까운 지역을 선택하거나 미국 동부를 선택합니다. 이름 Language 리소스의 이름입니다. 이 이름은 애플리케이션에서 API 요청을 보내는 데 사용할 엔드포인트 URL을 만드는 데도 사용됩니다. 가격 책정 계층 언어 리소스에 대한 가격 책정 계층입니다. 무료 F0 계층을 사용하여 서비스를 사용해 보고, 나중에 프로덕션에 대한 유료 계층으로 업그레이드할 수 있습니다. 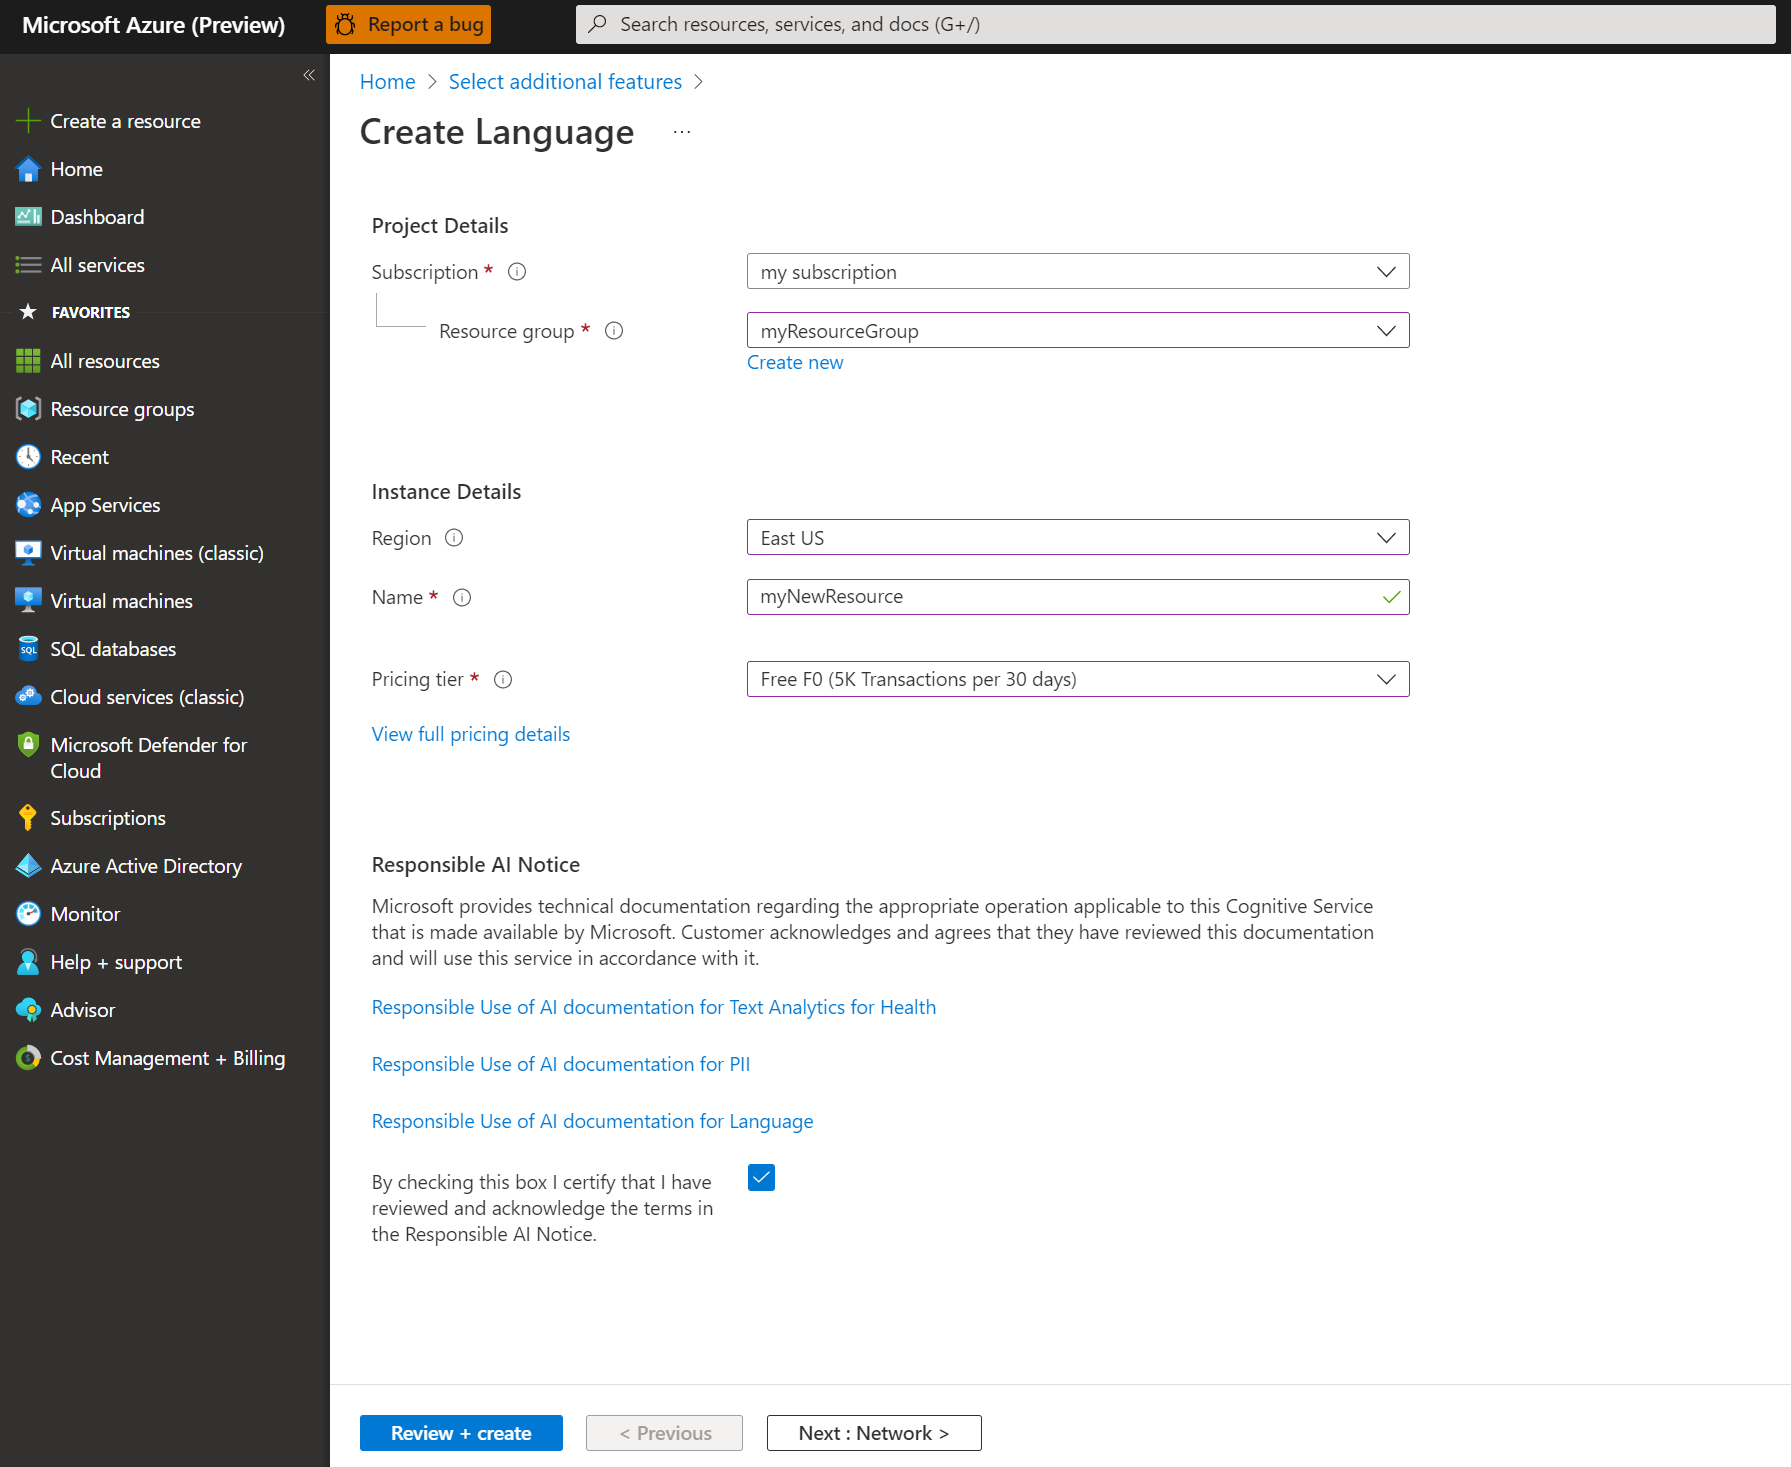
책임 있는 AI 알림 확인란이 선택되어 있는지 확인합니다.
페이지 아래쪽에서 검토 + 만들기를 선택합니다.
표시되는 화면에서 유효성 검사가 통과되었고 정보를 올바르게 입력했는지 확인합니다. 다음으로 만들기를 선택합니다.


키 및 엔드포인트 가져오기
다음으로 애플리케이션을 API에 연결하기 위해 리소스의 키와 엔드포인트가 필요합니다. 키와 엔드포인트는 이 빠른 시작의 뒷부분에서 코드에 붙여넣습니다.
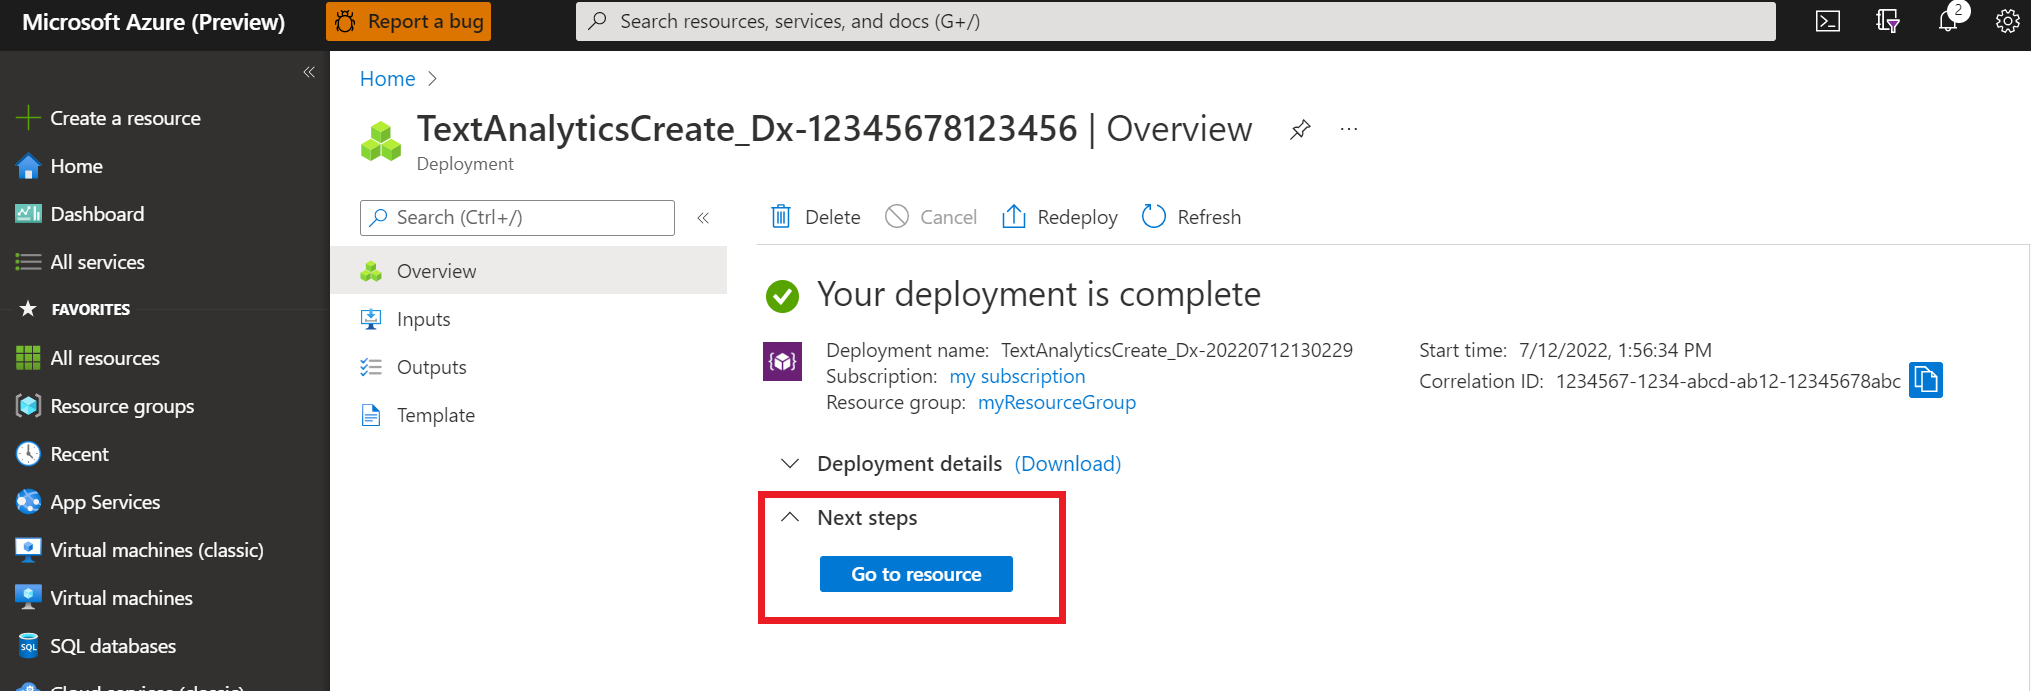
Language 리소스가 성공적으로 배포되면 다음 단계 아래에 있는 리소스로 이동 단추를 클릭합니다.
리소스에 대한 화면의 왼쪽 탐색 영역 메뉴에서 키 및 엔드포인트를 선택합니다. 아래 단계에서 키와 엔드포인트 중 하나를 사용합니다.


환경 변수 만들기
API 요청을 보내려면 애플리케이션을 인증해야 합니다. 프로덕션의 경우 자격 증명을 안전하게 저장하고 액세스하는 방법을 사용합니다. 이 예제에서는 애플리케이션을 실행하는 로컬 컴퓨터의 환경 변수에 자격 증명을 작성합니다.
팁
코드에 키를 직접 포함하지 말고 공개적으로 게시하지 마세요. Azure Key Vault와 같은 추가 인증 옵션은 Azure AI 서비스 보안 문서를 참조하세요.
Language 리소스 키에 대한 환경 변수를 설정하려면 콘솔 창을 열고 운영 체제 및 개발 환경에 대한 지침을 따릅니다.
LANGUAGE_KEY환경 변수를 설정하려면your-key를 리소스에 대한 키 중 하나로 바꿉니다.LANGUAGE_ENDPOINT환경 변수를 설정하려면your-endpoint를 리소스에 대한 엔드포인트로 바꿉니다.
setx LANGUAGE_KEY your-key
setx LANGUAGE_ENDPOINT your-endpoint
참고 항목
현재 실행 중인 콘솔에서만 환경 변수에 액세스해야 하는 경우 환경 변수를 setx 대신 set으로 설정할 수 있습니다.
환경 변수가 추가되면 콘솔 창을 포함하여 환경 변수를 읽어야 하는 실행 중인 프로그램을 다시 시작해야 할 수 있습니다. 예를 들어 편집기로 Visual Studio를 사용하는 경우 Visual Studio를 다시 시작한 후 예제를 실행합니다.
새 .NET Core 애플리케이션 만들기
Visual Studio IDE를 사용하여 새 .NET Core 콘솔 앱을 만듭니다. 이렇게 하면 program.cs라는 단일 C# 원본 파일이 포함된 "Hello World" 프로젝트가 생성됩니다.
솔루션 탐색기에서 솔루션을 마우스 오른쪽 단추로 클릭하고 NuGet 패키지 관리를 선택하여 클라이언트 라이브러리를 설치합니다. 열리는 패키지 관리자에서 찾아보기를 선택하고 Azure.AI.TextAnalytics를 검색합니다. 5.2.0 버전, 설치를 차례로 선택합니다. 패키지 관리자 콘솔을 사용할 수도 있습니다.
코드 예
program.cs 파일에 다음 코드를 복사하고 코드를 실행합니다.
using Azure;
using System;
using Azure.AI.TextAnalytics;
using System.Collections.Generic;

namespace Example
{
    class Program
    {
        // This example requires environment variables named "LANGUAGE_KEY" and "LANGUAGE_ENDPOINT"
        static string languageKey = Environment.GetEnvironmentVariable("LANGUAGE_KEY");
        static string languageEndpoint = Environment.GetEnvironmentVariable("LANGUAGE_ENDPOINT");

        private static readonly AzureKeyCredential credentials = new AzureKeyCredential(languageKey);
        private static readonly Uri endpoint = new Uri(languageEndpoint);

        // Example method for detecting opinions text.
        static void SentimentAnalysisWithOpinionMiningExample(TextAnalyticsClient client)
        {
            var documents = new List<string>
            {
                "The food and service were unacceptable. The concierge was nice, however."
            };

            AnalyzeSentimentResultCollection reviews = client.AnalyzeSentimentBatch(documents, options: new AnalyzeSentimentOptions()
            {
                IncludeOpinionMining = true
            });

            foreach (AnalyzeSentimentResult review in reviews)
            {
                Console.WriteLine($"Document sentiment: {review.DocumentSentiment.Sentiment}\n");
                Console.WriteLine($"\tPositive score: {review.DocumentSentiment.ConfidenceScores.Positive:0.00}");
                Console.WriteLine($"\tNegative score: {review.DocumentSentiment.ConfidenceScores.Negative:0.00}");
                Console.WriteLine($"\tNeutral score: {review.DocumentSentiment.ConfidenceScores.Neutral:0.00}\n");
                foreach (SentenceSentiment sentence in review.DocumentSentiment.Sentences)
                {
                    Console.WriteLine($"\tText: \"{sentence.Text}\"");
                    Console.WriteLine($"\tSentence sentiment: {sentence.Sentiment}");
                    Console.WriteLine($"\tSentence positive score: {sentence.ConfidenceScores.Positive:0.00}");
                    Console.WriteLine($"\tSentence negative score: {sentence.ConfidenceScores.Negative:0.00}");
                    Console.WriteLine($"\tSentence neutral score: {sentence.ConfidenceScores.Neutral:0.00}\n");

                    foreach (SentenceOpinion sentenceOpinion in sentence.Opinions)
                    {
                        Console.WriteLine($"\tTarget: {sentenceOpinion.Target.Text}, Value: {sentenceOpinion.Target.Sentiment}");
                        Console.WriteLine($"\tTarget positive score: {sentenceOpinion.Target.ConfidenceScores.Positive:0.00}");
                        Console.WriteLine($"\tTarget negative score: {sentenceOpinion.Target.ConfidenceScores.Negative:0.00}");
                        foreach (AssessmentSentiment assessment in sentenceOpinion.Assessments)
                        {
                            Console.WriteLine($"\t\tRelated Assessment: {assessment.Text}, Value: {assessment.Sentiment}");
                            Console.WriteLine($"\t\tRelated Assessment positive score: {assessment.ConfidenceScores.Positive:0.00}");
                            Console.WriteLine($"\t\tRelated Assessment negative score: {assessment.ConfidenceScores.Negative:0.00}");
                        }
                    }
                }
                Console.WriteLine($"\n");
            }
        }

        static void Main(string[] args)
        {
            var client = new TextAnalyticsClient(endpoint, credentials);
            SentimentAnalysisWithOpinionMiningExample(client);

            Console.Write("Press any key to exit.");
            Console.ReadKey();
        }

    }
}
출력
Document sentiment: Mixed

    Positive score: 0.47
    Negative score: 0.52
    Neutral score: 0.00

    Text: "The food and service were unacceptable. "
    Sentence sentiment: Negative
    Sentence positive score: 0.00
    Sentence negative score: 0.99
    Sentence neutral score: 0.00

    Target: food, Value: Negative
    Target positive score: 0.00
    Target negative score: 1.00
            Related Assessment: unacceptable, Value: Negative
            Related Assessment positive score: 0.00
            Related Assessment negative score: 1.00
    Target: service, Value: Negative
    Target positive score: 0.00
    Target negative score: 1.00
            Related Assessment: unacceptable, Value: Negative
            Related Assessment positive score: 0.00
            Related Assessment negative score: 1.00
    Text: "The concierge was nice, however."
    Sentence sentiment: Positive
    Sentence positive score: 0.94
    Sentence negative score: 0.05
    Sentence neutral score: 0.01

    Target: concierge, Value: Positive
    Target positive score: 1.00
    Target negative score: 0.00
            Related Assessment: nice, Value: Positive
            Related Assessment positive score: 1.00
            Related Assessment negative score: 0.00
리소스 정리
Azure AI 서비스 구독을 정리하고 제거하려면 리소스 또는 리소스 그룹을 삭제할 수 있습니다. 리소스 그룹을 삭제하면 해당 리소스 그룹에 연결된 다른 모든 리소스가 함께 삭제됩니다.
다음 명령을 사용하여 이 빠른 시작에서 만든 환경 변수를 삭제합니다.
reg delete "HKCU\Environment" /v LANGUAGE_KEY /f
reg delete "HKCU\Environment" /v LANGUAGE_ENDPOINT /f
다음 단계
참조 설명서 | 추가 샘플 | 패키지(Maven) | 라이브러리 소스 코드
이 빠른 시작을 사용하여 Java용 클라이언트 라이브러리를 통해 감정 분석 애플리케이션을 만듭니다. 다음 예제에서는 텍스트 샘플에 표현된 감정을 식별하고 측면 기반 감정 분석을 수행할 수 있는 Java 애플리케이션을 만듭니다.
필수 조건
- Azure 구독 - 체험 구독 만들기
- JDK(Java Development Kit) 버전 8 이상
설정
Azure 리소스 만들기
아래 코드 샘플을 사용하려면 Azure 리소스를 배포해야 합니다. 이 리소스에는 Language 서비스에 보내는 API 호출을 인증하는 데 사용할 키와 엔드포인트가 포함됩니다.
다음 링크를 사용하여 Azure Portal에서 Language 리소스를 만듭니다. Azure 구독을 사용하여 로그인해야 합니다.
표시되는 추가 기능 선택 화면에서 계속해서 리소스 만들기를 선택합니다.
언어 만들기 화면에서 다음 정보를 제공합니다.
세부 정보 설명 Subscription 리소스가 연결되는 구독 계정입니다. 드롭다운 메뉴에서 Azure 구독을 선택합니다. Resource group 리소스 그룹은 사용자가 만든 리소스를 저장하는 컨테이너입니다. 새로 만들기를 선택하여 새 리소스 그룹을 만듭니다. 지역 언어 리소스의 위치입니다. 지역마다 실제 위치에 따라 대기 시간이 발생할 수 있지만 리소스의 런타임 가용성에는 영향을 주지 않습니다. 이 빠른 시작에서는 사용 가능한 가까운 지역을 선택하거나 미국 동부를 선택합니다. 이름 Language 리소스의 이름입니다. 이 이름은 애플리케이션에서 API 요청을 보내는 데 사용할 엔드포인트 URL을 만드는 데도 사용됩니다. 가격 책정 계층 언어 리소스에 대한 가격 책정 계층입니다. 무료 F0 계층을 사용하여 서비스를 사용해 보고, 나중에 프로덕션에 대한 유료 계층으로 업그레이드할 수 있습니다.
책임 있는 AI 알림 확인란이 선택되어 있는지 확인합니다.
페이지 아래쪽에서 검토 + 만들기를 선택합니다.
표시되는 화면에서 유효성 검사가 통과되었고 정보를 올바르게 입력했는지 확인합니다. 다음으로 만들기를 선택합니다.
키 및 엔드포인트 가져오기
다음으로 애플리케이션을 API에 연결하기 위해 리소스의 키와 엔드포인트가 필요합니다. 키와 엔드포인트는 이 빠른 시작의 뒷부분에서 코드에 붙여넣습니다.
Language 리소스가 성공적으로 배포되면 다음 단계 아래에 있는 리소스로 이동 단추를 클릭합니다.
리소스에 대한 화면의 왼쪽 탐색 영역 메뉴에서 키 및 엔드포인트를 선택합니다. 아래 단계에서 키와 엔드포인트 중 하나를 사용합니다.
환경 변수 만들기
API 요청을 보내려면 애플리케이션을 인증해야 합니다. 프로덕션의 경우 자격 증명을 안전하게 저장하고 액세스하는 방법을 사용합니다. 이 예제에서는 애플리케이션을 실행하는 로컬 컴퓨터의 환경 변수에 자격 증명을 작성합니다.
팁
코드에 키를 직접 포함하지 말고 공개적으로 게시하지 마세요. Azure Key Vault와 같은 추가 인증 옵션은 Azure AI 서비스 보안 문서를 참조하세요.
Language 리소스 키에 대한 환경 변수를 설정하려면 콘솔 창을 열고 운영 체제 및 개발 환경에 대한 지침을 따릅니다.
LANGUAGE_KEY환경 변수를 설정하려면your-key를 리소스에 대한 키 중 하나로 바꿉니다.LANGUAGE_ENDPOINT환경 변수를 설정하려면your-endpoint를 리소스에 대한 엔드포인트로 바꿉니다.
setx LANGUAGE_KEY your-key
setx LANGUAGE_ENDPOINT your-endpoint
참고 항목
현재 실행 중인 콘솔에서만 환경 변수에 액세스해야 하는 경우 환경 변수를 setx 대신 set으로 설정할 수 있습니다.
환경 변수가 추가되면 콘솔 창을 포함하여 환경 변수를 읽어야 하는 실행 중인 프로그램을 다시 시작해야 할 수 있습니다. 예를 들어 편집기로 Visual Studio를 사용하는 경우 Visual Studio를 다시 시작한 후 예제를 실행합니다.
클라이언트 라이브러리 추가
선호하는 IDE 또는 개발 환경에서 Maven 프로젝트를 만듭니다. 그런 다음, 프로젝트의 pom.xml 파일에 다음 종속성을 추가합니다. 온라인에서 다른 빌드 도구용 구현 구문을 찾을 수 있습니다.
<dependencies>
     <dependency>
        <groupId>com.azure</groupId>
        <artifactId>azure-ai-textanalytics</artifactId>
        <version>5.2.0</version>
    </dependency>
</dependencies>
코드 예
Example.java라는 Java 파일을 만듭니다. 파일을 열고 아래 코드를 복사합니다. 그런 다음 코드를 실행합니다.
import com.azure.core.credential.AzureKeyCredential;
import com.azure.ai.textanalytics.models.*;
import com.azure.ai.textanalytics.TextAnalyticsClientBuilder;
import com.azure.ai.textanalytics.TextAnalyticsClient;

public class Example {

    // This example requires environment variables named "LANGUAGE_KEY" and "LANGUAGE_ENDPOINT"
    private static String languageKey = System.getenv("LANGUAGE_KEY");
    private static String languageEndpoint = System.getenv("LANGUAGE_ENDPOINT");

    public static void main(String[] args) {
        TextAnalyticsClient client = authenticateClient(languageKey, languageEndpoint);
        sentimentAnalysisWithOpinionMiningExample(client);
    }
    // Method to authenticate the client object with your key and endpoint.
    static TextAnalyticsClient authenticateClient(String key, String endpoint) {
        return new TextAnalyticsClientBuilder()
                .credential(new AzureKeyCredential(key))
                .endpoint(endpoint)
                .buildClient();
    }
    // Example method for detecting sentiment and opinions in text.
    static void sentimentAnalysisWithOpinionMiningExample(TextAnalyticsClient client)
    {
        // The document that needs be analyzed.
        String document = "The food and service were unacceptable. The concierge was nice, however.";

        System.out.printf("Document = %s%n", document);

        AnalyzeSentimentOptions options = new AnalyzeSentimentOptions().setIncludeOpinionMining(true);
        final DocumentSentiment documentSentiment = client.analyzeSentiment(document, "en", options);
        SentimentConfidenceScores scores = documentSentiment.getConfidenceScores();
        System.out.printf(
                "Recognized document sentiment: %s, positive score: %f, neutral score: %f, negative score: %f.%n",
                documentSentiment.getSentiment(), scores.getPositive(), scores.getNeutral(), scores.getNegative());


        documentSentiment.getSentences().forEach(sentenceSentiment -> {
            SentimentConfidenceScores sentenceScores = sentenceSentiment.getConfidenceScores();
            System.out.printf("\tSentence sentiment: %s, positive score: %f, neutral score: %f, negative score: %f.%n",
                    sentenceSentiment.getSentiment(), sentenceScores.getPositive(), sentenceScores.getNeutral(), sentenceScores.getNegative());
            sentenceSentiment.getOpinions().forEach(opinion -> {
                TargetSentiment targetSentiment = opinion.getTarget();
                System.out.printf("\t\tTarget sentiment: %s, target text: %s%n", targetSentiment.getSentiment(),
                        targetSentiment.getText());
                for (AssessmentSentiment assessmentSentiment : opinion.getAssessments()) {
                    System.out.printf("\t\t\t'%s' assessment sentiment because of \"%s\". Is the assessment negated: %s.%n",
                            assessmentSentiment.getSentiment(), assessmentSentiment.getText(), assessmentSentiment.isNegated());
                }
            });
        });
    }
}
출력
Document = The food and service were unacceptable. The concierge was nice, however.
Recognized document sentiment: mixed, positive score: 0.470000, neutral score: 0.000000, negative score: 0.520000.
	Sentence sentiment: negative, positive score: 0.000000, neutral score: 0.000000, negative score: 0.990000.
		Target sentiment: negative, target text: food
			'negative' assessment sentiment because of "unacceptable". Is the assessment negated: false.
		Target sentiment: negative, target text: service
			'negative' assessment sentiment because of "unacceptable". Is the assessment negated: false.
	Sentence sentiment: positive, positive score: 0.940000, neutral score: 0.010000, negative score: 0.050000.
		Target sentiment: positive, target text: concierge
			'positive' assessment sentiment because of "nice". Is the assessment negated: false.
리소스 정리
Azure AI 서비스 구독을 정리하고 제거하려면 리소스 또는 리소스 그룹을 삭제할 수 있습니다. 리소스 그룹을 삭제하면 해당 리소스 그룹에 연결된 다른 모든 리소스가 함께 삭제됩니다.
다음 명령을 사용하여 이 빠른 시작에서 만든 환경 변수를 삭제합니다.
reg delete "HKCU\Environment" /v LANGUAGE_KEY /f
reg delete "HKCU\Environment" /v LANGUAGE_ENDPOINT /f
다음 단계
참조 설명서 | 추가 샘플 | 패키지(npm) | 라이브러리 소스 코드
이 빠른 시작을 사용하여 Node.js용 클라이언트 라이브러리를 통해 감정 분석 애플리케이션을 만듭니다. 다음 예제에서는 텍스트 샘플에 표현된 감정을 식별하고 측면 기반 감정 분석을 수행할 수 있는 JavaScript 애플리케이션을 만듭니다.
필수 조건
설정
Azure 리소스 만들기
아래 코드 샘플을 사용하려면 Azure 리소스를 배포해야 합니다. 이 리소스에는 Language 서비스에 보내는 API 호출을 인증하는 데 사용할 키와 엔드포인트가 포함됩니다.
다음 링크를 사용하여 Azure Portal에서 Language 리소스를 만듭니다. Azure 구독을 사용하여 로그인해야 합니다.
표시되는 추가 기능 선택 화면에서 계속해서 리소스 만들기를 선택합니다.
언어 만들기 화면에서 다음 정보를 제공합니다.
세부 정보 설명 Subscription 리소스가 연결되는 구독 계정입니다. 드롭다운 메뉴에서 Azure 구독을 선택합니다. Resource group 리소스 그룹은 사용자가 만든 리소스를 저장하는 컨테이너입니다. 새로 만들기를 선택하여 새 리소스 그룹을 만듭니다. 지역 언어 리소스의 위치입니다. 지역마다 실제 위치에 따라 대기 시간이 발생할 수 있지만 리소스의 런타임 가용성에는 영향을 주지 않습니다. 이 빠른 시작에서는 사용 가능한 가까운 지역을 선택하거나 미국 동부를 선택합니다. 이름 Language 리소스의 이름입니다. 이 이름은 애플리케이션에서 API 요청을 보내는 데 사용할 엔드포인트 URL을 만드는 데도 사용됩니다. 가격 책정 계층 언어 리소스에 대한 가격 책정 계층입니다. 무료 F0 계층을 사용하여 서비스를 사용해 보고, 나중에 프로덕션에 대한 유료 계층으로 업그레이드할 수 있습니다.
책임 있는 AI 알림 확인란이 선택되어 있는지 확인합니다.
페이지 아래쪽에서 검토 + 만들기를 선택합니다.
표시되는 화면에서 유효성 검사가 통과되었고 정보를 올바르게 입력했는지 확인합니다. 다음으로 만들기를 선택합니다.
키 및 엔드포인트 가져오기
다음으로 애플리케이션을 API에 연결하기 위해 리소스의 키와 엔드포인트가 필요합니다. 키와 엔드포인트는 이 빠른 시작의 뒷부분에서 코드에 붙여넣습니다.
Language 리소스가 성공적으로 배포되면 다음 단계 아래에 있는 리소스로 이동 단추를 클릭합니다.
리소스에 대한 화면의 왼쪽 탐색 영역 메뉴에서 키 및 엔드포인트를 선택합니다. 아래 단계에서 키와 엔드포인트 중 하나를 사용합니다.
환경 변수 만들기
API 요청을 보내려면 애플리케이션을 인증해야 합니다. 프로덕션의 경우 자격 증명을 안전하게 저장하고 액세스하는 방법을 사용합니다. 이 예제에서는 애플리케이션을 실행하는 로컬 컴퓨터의 환경 변수에 자격 증명을 작성합니다.
팁
코드에 키를 직접 포함하지 말고 공개적으로 게시하지 마세요. Azure Key Vault와 같은 추가 인증 옵션은 Azure AI 서비스 보안 문서를 참조하세요.
Language 리소스 키에 대한 환경 변수를 설정하려면 콘솔 창을 열고 운영 체제 및 개발 환경에 대한 지침을 따릅니다.
LANGUAGE_KEY환경 변수를 설정하려면your-key를 리소스에 대한 키 중 하나로 바꿉니다.LANGUAGE_ENDPOINT환경 변수를 설정하려면your-endpoint를 리소스에 대한 엔드포인트로 바꿉니다.
setx LANGUAGE_KEY your-key
setx LANGUAGE_ENDPOINT your-endpoint
참고 항목
현재 실행 중인 콘솔에서만 환경 변수에 액세스해야 하는 경우 환경 변수를 setx 대신 set으로 설정할 수 있습니다.
환경 변수가 추가되면 콘솔 창을 포함하여 환경 변수를 읽어야 하는 실행 중인 프로그램을 다시 시작해야 할 수 있습니다. 예를 들어 편집기로 Visual Studio를 사용하는 경우 Visual Studio를 다시 시작한 후 예제를 실행합니다.
새 Node.js 애플리케이션 만들기
콘솔 창(예: cmd, PowerShell 또는 Bash)에서 앱에 대한 새 디렉터리를 만들고 이 디렉터리로 이동합니다.
mkdir myapp

cd myapp
package.json 파일을 사용하여 노드 애플리케이션을 만들려면 npm init 명령을 실행합니다.
npm init
클라이언트 라이브러리 설치
npm 패키지를 설치합니다.
npm install @azure/ai-language-text
코드 예
파일을 열고 아래 코드를 복사합니다. 그런 다음 코드를 실행합니다.
"use strict";

const { TextAnalyticsClient, AzureKeyCredential } = require("@azure/ai-text-analytics");

// This example requires environment variables named "LANGUAGE_KEY" and "LANGUAGE_ENDPOINT"
const key = process.env.LANGUAGE_KEY;
const endpoint = process.env.LANGUAGE_ENDPOINT;


//an example document for sentiment analysis and opinion mining
const documents = [{
    text: "The food and service were unacceptable. The concierge was nice, however.",
    id: "0",
    language: "en"
  }];

async function main() {
  console.log("=== Sentiment analysis and opinion mining sample ===");

  const client = new TextAnalysisClient(endpoint, new AzureKeyCredential(key));

  const results = await client.analyze("SentimentAnalysis", documents, {
    includeOpinionMining: true,
  });

  for (let i = 0; i < results.length; i++) {
    const result = results[i];
    console.log(`- Document ${result.id}`);
    if (!result.error) {
      console.log(`\tDocument text: ${documents[i].text}`);
      console.log(`\tOverall Sentiment: ${result.sentiment}`);
      console.log("\tSentiment confidence scores:", result.confidenceScores);
      console.log("\tSentences");
      for (const { sentiment, confidenceScores, opinions } of result.sentences) {
        console.log(`\t- Sentence sentiment: ${sentiment}`);
        console.log("\t  Confidence scores:", confidenceScores);
        console.log("\t  Mined opinions");
        for (const { target, assessments } of opinions) {
          console.log(`\t\t- Target text: ${target.text}`);
          console.log(`\t\t  Target sentiment: ${target.sentiment}`);
          console.log("\t\t  Target confidence scores:", target.confidenceScores);
          console.log("\t\t  Target assessments");
          for (const { text, sentiment } of assessments) {
            console.log(`\t\t\t- Text: ${text}`);
            console.log(`\t\t\t  Sentiment: ${sentiment}`);
          }
        }
      }
    } else {
      console.error(`\tError: ${result.error}`);
    }
  }
}

main().catch((err) => {
  console.error("The sample encountered an error:", err);
});
출력
=== Sentiment analysis and opinion mining sample ===
- Document 0
    Document text: The food and service were unacceptable. The concierge was nice, however.
    Overall Sentiment: mixed
    Sentiment confidence scores: { positive: 0.49, neutral: 0, negative: 0.5 }
    Sentences
    - Sentence sentiment: negative
      Confidence scores: { positive: 0, neutral: 0, negative: 1 }
      Mined opinions
            - Target text: food
              Target sentiment: negative
              Target confidence scores: { positive: 0.01, negative: 0.99 }
              Target assessments
                    - Text: unacceptable
                      Sentiment: negative
            - Target text: service
              Target sentiment: negative
              Target confidence scores: { positive: 0.01, negative: 0.99 }
              Target assessments
                    - Text: unacceptable
                      Sentiment: negative
    - Sentence sentiment: positive
      Confidence scores: { positive: 0.98, neutral: 0.01, negative: 0.01 }
      Mined opinions
            - Target text: concierge
              Target sentiment: positive
              Target confidence scores: { positive: 1, negative: 0 }
              Target assessments
                    - Text: nice
                      Sentiment: positive
리소스 정리
Azure AI 서비스 구독을 정리하고 제거하려면 리소스 또는 리소스 그룹을 삭제할 수 있습니다. 리소스 그룹을 삭제하면 해당 리소스 그룹에 연결된 다른 모든 리소스가 함께 삭제됩니다.
다음 명령을 사용하여 이 빠른 시작에서 만든 환경 변수를 삭제합니다.
reg delete "HKCU\Environment" /v LANGUAGE_KEY /f
reg delete "HKCU\Environment" /v LANGUAGE_ENDPOINT /f
다음 단계
참조 설명서 | 추가 샘플 | 패키지(PyPi) | 라이브러리 소스 코드
이 빠른 시작을 사용하여 Python용 클라이언트 라이브러리를 통해 감정 분석 애플리케이션을 만듭니다. 다음 예제에서는 텍스트 샘플에 표현된 감정을 식별하고 측면 기반 감정 분석을 수행할 수 있는 Python 애플리케이션을 만듭니다.
필수 조건
- Azure 구독 - 체험 구독 만들기
- Python 3.7 이상
설정
Azure 리소스 만들기
아래 코드 샘플을 사용하려면 Azure 리소스를 배포해야 합니다. 이 리소스에는 Language 서비스에 보내는 API 호출을 인증하는 데 사용할 키와 엔드포인트가 포함됩니다.
다음 링크를 사용하여 Azure Portal에서 Language 리소스를 만듭니다. Azure 구독을 사용하여 로그인해야 합니다.
표시되는 추가 기능 선택 화면에서 계속해서 리소스 만들기를 선택합니다.
언어 만들기 화면에서 다음 정보를 제공합니다.
세부 정보 설명 Subscription 리소스가 연결되는 구독 계정입니다. 드롭다운 메뉴에서 Azure 구독을 선택합니다. Resource group 리소스 그룹은 사용자가 만든 리소스를 저장하는 컨테이너입니다. 새로 만들기를 선택하여 새 리소스 그룹을 만듭니다. 지역 언어 리소스의 위치입니다. 지역마다 실제 위치에 따라 대기 시간이 발생할 수 있지만 리소스의 런타임 가용성에는 영향을 주지 않습니다. 이 빠른 시작에서는 사용 가능한 가까운 지역을 선택하거나 미국 동부를 선택합니다. 이름 Language 리소스의 이름입니다. 이 이름은 애플리케이션에서 API 요청을 보내는 데 사용할 엔드포인트 URL을 만드는 데도 사용됩니다. 가격 책정 계층 언어 리소스에 대한 가격 책정 계층입니다. 무료 F0 계층을 사용하여 서비스를 사용해 보고, 나중에 프로덕션에 대한 유료 계층으로 업그레이드할 수 있습니다.
책임 있는 AI 알림 확인란이 선택되어 있는지 확인합니다.
페이지 아래쪽에서 검토 + 만들기를 선택합니다.
표시되는 화면에서 유효성 검사가 통과되었고 정보를 올바르게 입력했는지 확인합니다. 다음으로 만들기를 선택합니다.
키 및 엔드포인트 가져오기
다음으로 애플리케이션을 API에 연결하기 위해 리소스의 키와 엔드포인트가 필요합니다. 키와 엔드포인트는 이 빠른 시작의 뒷부분에서 코드에 붙여넣습니다.
Language 리소스가 성공적으로 배포되면 다음 단계 아래에 있는 리소스로 이동 단추를 클릭합니다.
리소스에 대한 화면의 왼쪽 탐색 영역 메뉴에서 키 및 엔드포인트를 선택합니다. 아래 단계에서 키와 엔드포인트 중 하나를 사용합니다.
환경 변수 만들기
API 요청을 보내려면 애플리케이션을 인증해야 합니다. 프로덕션의 경우 자격 증명을 안전하게 저장하고 액세스하는 방법을 사용합니다. 이 예제에서는 애플리케이션을 실행하는 로컬 컴퓨터의 환경 변수에 자격 증명을 작성합니다.
팁
코드에 키를 직접 포함하지 말고 공개적으로 게시하지 마세요. Azure Key Vault와 같은 추가 인증 옵션은 Azure AI 서비스 보안 문서를 참조하세요.
Language 리소스 키에 대한 환경 변수를 설정하려면 콘솔 창을 열고 운영 체제 및 개발 환경에 대한 지침을 따릅니다.
LANGUAGE_KEY환경 변수를 설정하려면your-key를 리소스에 대한 키 중 하나로 바꿉니다.LANGUAGE_ENDPOINT환경 변수를 설정하려면your-endpoint를 리소스에 대한 엔드포인트로 바꿉니다.
setx LANGUAGE_KEY your-key
setx LANGUAGE_ENDPOINT your-endpoint
참고 항목
현재 실행 중인 콘솔에서만 환경 변수에 액세스해야 하는 경우 환경 변수를 setx 대신 set으로 설정할 수 있습니다.
환경 변수가 추가되면 콘솔 창을 포함하여 환경 변수를 읽어야 하는 실행 중인 프로그램을 다시 시작해야 할 수 있습니다. 예를 들어 편집기로 Visual Studio를 사용하는 경우 Visual Studio를 다시 시작한 후 예제를 실행합니다.
클라이언트 라이브러리 설치
Python을 설치한 후, 다음을 사용하여 클라이언트 라이브러리를 설치할 수 있습니다.
pip install azure-ai-textanalytics==5.2.0
코드 예
새 Python 파일을 만들고 아래 코드를 복사합니다. 그런 다음, 코드를 실행합니다.
# This example requires environment variables named "LANGUAGE_KEY" and "LANGUAGE_ENDPOINT"
language_key = os.environ.get('LANGUAGE_KEY')
language_endpoint = os.environ.get('LANGUAGE_ENDPOINT')

from azure.ai.textanalytics import TextAnalyticsClient
from azure.core.credentials import AzureKeyCredential

# Authenticate the client using your key and endpoint
def authenticate_client():
    ta_credential = AzureKeyCredential(language_key)
    text_analytics_client = TextAnalyticsClient(
            endpoint=language_endpoint,
            credential=ta_credential)
    return text_analytics_client

client = authenticate_client()

# Example method for detecting sentiment and opinions in text
def sentiment_analysis_with_opinion_mining_example(client):

    documents = [
        "The food and service were unacceptable. The concierge was nice, however."
    ]

    result = client.analyze_sentiment(documents, show_opinion_mining=True)
    doc_result = [doc for doc in result if not doc.is_error]

    positive_reviews = [doc for doc in doc_result if doc.sentiment == "positive"]
    negative_reviews = [doc for doc in doc_result if doc.sentiment == "negative"]

    positive_mined_opinions = []
    mixed_mined_opinions = []
    negative_mined_opinions = []

    for document in doc_result:
        print("Document Sentiment: {}".format(document.sentiment))
        print("Overall scores: positive={0:.2f}; neutral={1:.2f}; negative={2:.2f} \n".format(
            document.confidence_scores.positive,
            document.confidence_scores.neutral,
            document.confidence_scores.negative,
        ))
        for sentence in document.sentences:
            print("Sentence: {}".format(sentence.text))
            print("Sentence sentiment: {}".format(sentence.sentiment))
            print("Sentence score:\nPositive={0:.2f}\nNeutral={1:.2f}\nNegative={2:.2f}\n".format(
                sentence.confidence_scores.positive,
                sentence.confidence_scores.neutral,
                sentence.confidence_scores.negative,
            ))
            for mined_opinion in sentence.mined_opinions:
                target = mined_opinion.target
                print("......'{}' target '{}'".format(target.sentiment, target.text))
                print("......Target score:\n......Positive={0:.2f}\n......Negative={1:.2f}\n".format(
                    target.confidence_scores.positive,
                    target.confidence_scores.negative,
                ))
                for assessment in mined_opinion.assessments:
                    print("......'{}' assessment '{}'".format(assessment.sentiment, assessment.text))
                    print("......Assessment score:\n......Positive={0:.2f}\n......Negative={1:.2f}\n".format(
                        assessment.confidence_scores.positive,
                        assessment.confidence_scores.negative,
                    ))
            print("\n")
        print("\n")

sentiment_analysis_with_opinion_mining_example(client)
출력
Document Sentiment: mixed
Overall scores: positive=0.47; neutral=0.00; negative=0.52

Sentence: The food and service were unacceptable.
Sentence sentiment: negative
Sentence score:
Positive=0.00
Neutral=0.00
Negative=0.99

......'negative' target 'food'
......Target score:
......Positive=0.00
......Negative=1.00

......'negative' assessment 'unacceptable'
......Assessment score:
......Positive=0.00
......Negative=1.00

......'negative' target 'service'
......Target score:
......Positive=0.00
......Negative=1.00

......'negative' assessment 'unacceptable'
......Assessment score:
......Positive=0.00
......Negative=1.00


Sentence: The concierge was nice, however.
Sentence sentiment: positive
Sentence score:
Positive=0.94
Neutral=0.01
Negative=0.05

......'positive' target 'concierge'
......Target score:
......Positive=1.00
......Negative=0.00

......'positive' assessment 'nice'
......Assessment score:
......Positive=1.00
......Negative=0.00
리소스 정리
Azure AI 서비스 구독을 정리하고 제거하려면 리소스 또는 리소스 그룹을 삭제할 수 있습니다. 리소스 그룹을 삭제하면 해당 리소스 그룹에 연결된 다른 모든 리소스가 함께 삭제됩니다.
다음 명령을 사용하여 이 빠른 시작에서 만든 환경 변수를 삭제합니다.
reg delete "HKCU\Environment" /v LANGUAGE_KEY /f
reg delete "HKCU\Environment" /v LANGUAGE_ENDPOINT /f
다음 단계
이 빠른 시작을 통해 REST API를 사용하여 감정 분석 요청을 보냅니다. 다음 예제에서는 cURL을 사용하여 텍스트 샘플에 표현된 감정을 식별하고 양상 기반 감정 분석을 수행합니다.
필수 조건
- Azure 구독 - 체험 구독 만들기
설정
Azure 리소스 만들기
아래 코드 샘플을 사용하려면 Azure 리소스를 배포해야 합니다. 이 리소스에는 Language 서비스에 보내는 API 호출을 인증하는 데 사용할 키와 엔드포인트가 포함됩니다.
다음 링크를 사용하여 Azure Portal에서 Language 리소스를 만듭니다. Azure 구독을 사용하여 로그인해야 합니다.
표시되는 추가 기능 선택 화면에서 계속해서 리소스 만들기를 선택합니다.
언어 만들기 화면에서 다음 정보를 제공합니다.
세부 정보 설명 Subscription 리소스가 연결되는 구독 계정입니다. 드롭다운 메뉴에서 Azure 구독을 선택합니다. Resource group 리소스 그룹은 사용자가 만든 리소스를 저장하는 컨테이너입니다. 새로 만들기를 선택하여 새 리소스 그룹을 만듭니다. 지역 언어 리소스의 위치입니다. 지역마다 실제 위치에 따라 대기 시간이 발생할 수 있지만 리소스의 런타임 가용성에는 영향을 주지 않습니다. 이 빠른 시작에서는 사용 가능한 가까운 지역을 선택하거나 미국 동부를 선택합니다. 이름 Language 리소스의 이름입니다. 이 이름은 애플리케이션에서 API 요청을 보내는 데 사용할 엔드포인트 URL을 만드는 데도 사용됩니다. 가격 책정 계층 언어 리소스에 대한 가격 책정 계층입니다. 무료 F0 계층을 사용하여 서비스를 사용해 보고, 나중에 프로덕션에 대한 유료 계층으로 업그레이드할 수 있습니다.
책임 있는 AI 알림 확인란이 선택되어 있는지 확인합니다.
페이지 아래쪽에서 검토 + 만들기를 선택합니다.
표시되는 화면에서 유효성 검사가 통과되었고 정보를 올바르게 입력했는지 확인합니다. 다음으로 만들기를 선택합니다.
키 및 엔드포인트 가져오기
다음으로 애플리케이션을 API에 연결하기 위해 리소스의 키와 엔드포인트가 필요합니다. 키와 엔드포인트는 이 빠른 시작의 뒷부분에서 코드에 붙여넣습니다.
Language 리소스가 성공적으로 배포되면 다음 단계 아래에 있는 리소스로 이동 단추를 클릭합니다.
리소스에 대한 화면의 왼쪽 탐색 영역 메뉴에서 키 및 엔드포인트를 선택합니다. 아래 단계에서 키와 엔드포인트 중 하나를 사용합니다.
환경 변수 만들기
API 요청을 보내려면 애플리케이션을 인증해야 합니다. 프로덕션의 경우 자격 증명을 안전하게 저장하고 액세스하는 방법을 사용합니다. 이 예제에서는 애플리케이션을 실행하는 로컬 컴퓨터의 환경 변수에 자격 증명을 작성합니다.
팁
코드에 키를 직접 포함하지 말고 공개적으로 게시하지 마세요. Azure Key Vault와 같은 추가 인증 옵션은 Azure AI 서비스 보안 문서를 참조하세요.
Language 리소스 키에 대한 환경 변수를 설정하려면 콘솔 창을 열고 운영 체제 및 개발 환경에 대한 지침을 따릅니다.
LANGUAGE_KEY환경 변수를 설정하려면your-key를 리소스에 대한 키 중 하나로 바꿉니다.LANGUAGE_ENDPOINT환경 변수를 설정하려면your-endpoint를 리소스에 대한 엔드포인트로 바꿉니다.
setx LANGUAGE_KEY your-key
setx LANGUAGE_ENDPOINT your-endpoint
참고 항목
현재 실행 중인 콘솔에서만 환경 변수에 액세스해야 하는 경우 환경 변수를 setx 대신 set으로 설정할 수 있습니다.
환경 변수가 추가되면 콘솔 창을 포함하여 환경 변수를 읽어야 하는 실행 중인 프로그램을 다시 시작해야 할 수 있습니다. 예를 들어 편집기로 Visual Studio를 사용하는 경우 Visual Studio를 다시 시작한 후 예제를 실행합니다.
예제 요청 본문을 사용하여 JSON 파일 만들기
코드 편집기에서 test_sentiment_payload.json이라는 새 파일을 만들고 다음 JSON 예제를 복사합니다. 이 예제 요청은 다음 단계에서 API로 보냅니다.
{
	"kind": "SentimentAnalysis",
	"parameters": {
		"modelVersion": "latest",
		"opinionMining": "True"
	},
	"analysisInput":{
		"documents":[
			{
				"id":"1",
				"language":"en",
				"text": "The food and service were unacceptable. The concierge was nice, however."
			}
		]
	}
}
test_sentiment_payload.json을 컴퓨터의 어딘가에 저장합니다. 예를 들어 데스크톱입니다.
감정 분석 및 오피니언 마이닝 API 요청 보내기
참고 항목
아래 예제에는 텍스트의 대상(명사)과 관련된 평가(형용사)에 대한 세분화된 정보를 제공하는 감정 분석의 오피니언 마이닝 기능에 대한 요청이 포함됩니다.
다음 명령을 사용하여 사용하고 있는 프로그램을 사용하여 API 요청을 보냅니다. 명령을 터미널에 복사하고 실행합니다.
| parameter | 설명 |
|---|---|
-X POST <endpoint> |
API에 액세스하기 위한 엔드포인트를 지정합니다. |
-H Content-Type: application/json |
JSON 데이터를 보내기 위한 콘텐츠 형식. |
-H "Ocp-Apim-Subscription-Key:<key> |
API에 액세스하기 위한 키를 지정합니다. |
-d <documents> |
보내려는 문서가 포함되는 JSON 파일입니다. |
C:\Users\<myaccount>\Desktop\test_sentiment_payload.json을 이전 단계에서 만든 예제 JSON 요청 파일의 위치로 바꿉니다.
명령 프롬프트
curl -X POST "%LANGUAGE_ENDPOINT%/language/:analyze-text?api-version=2023-04-15-preview" ^
-H "Content-Type: application/json" ^
-H "Ocp-Apim-Subscription-Key: %LANGUAGE_KEY%" ^
-d "@C:\Users\<myaccount>\Desktop\test_sentiment_payload.json"
PowerShell
curl.exe -X POST $env:LANGUAGE_ENDPOINT/language/:analyze-text?api-version=2023-04-15-preview `
-H "Content-Type: application/json" `
-H "Ocp-Apim-Subscription-Key: $env:LANGUAGE_KEY" `
-d "@C:\Users\<myaccount>\Desktop\test_sentiment_payload.json"
JSON 응답
{
	"kind": "SentimentAnalysisResults",
	"results": {
		"documents": [{
			"id": "1",
			"sentiment": "mixed",
			"confidenceScores": {
				"positive": 0.47,
				"neutral": 0.0,
				"negative": 0.52
			},
			"sentences": [{
				"sentiment": "negative",
				"confidenceScores": {
					"positive": 0.0,
					"neutral": 0.0,
					"negative": 0.99
				},
				"offset": 0,
				"length": 40,
				"text": "The food and service were unacceptable. ",
				"targets": [{
					"sentiment": "negative",
					"confidenceScores": {
						"positive": 0.0,
						"negative": 1.0
					},
					"offset": 4,
					"length": 4,
					"text": "food",
					"relations": [{
						"relationType": "assessment",
						"ref": "#/documents/0/sentences/0/assessments/0"
					}]
				}, {
					"sentiment": "negative",
					"confidenceScores": {
						"positive": 0.0,
						"negative": 1.0
					},
					"offset": 13,
					"length": 7,
					"text": "service",
					"relations": [{
						"relationType": "assessment",
						"ref": "#/documents/0/sentences/0/assessments/0"
					}]
				}],
				"assessments": [{
					"sentiment": "negative",
					"confidenceScores": {
						"positive": 0.0,
						"negative": 1.0
					},
					"offset": 26,
					"length": 12,
					"text": "unacceptable",
					"isNegated": false
				}]
			}, {
				"sentiment": "positive",
				"confidenceScores": {
					"positive": 0.94,
					"neutral": 0.01,
					"negative": 0.05
				},
				"offset": 40,
				"length": 32,
				"text": "The concierge was nice, however.",
				"targets": [{
					"sentiment": "positive",
					"confidenceScores": {
						"positive": 1.0,
						"negative": 0.0
					},
					"offset": 44,
					"length": 9,
					"text": "concierge",
					"relations": [{
						"relationType": "assessment",
						"ref": "#/documents/0/sentences/1/assessments/0"
					}]
				}],
				"assessments": [{
					"sentiment": "positive",
					"confidenceScores": {
						"positive": 1.0,
						"negative": 0.0
					},
					"offset": 58,
					"length": 4,
					"text": "nice",
					"isNegated": false
				}]
			}],
			"warnings": []
		}],
		"errors": [],
		"modelVersion": "2022-06-01"
	}
}
리소스 정리
Azure AI 서비스 구독을 정리하고 제거하려면 리소스 또는 리소스 그룹을 삭제할 수 있습니다. 리소스 그룹을 삭제하면 해당 리소스 그룹에 연결된 다른 모든 리소스가 함께 삭제됩니다.
다음 명령을 사용하여 이 빠른 시작에서 만든 환경 변수를 삭제합니다.
reg delete "HKCU\Environment" /v LANGUAGE_KEY /f
reg delete "HKCU\Environment" /v LANGUAGE_ENDPOINT /f