REST API를 사용하여 LUIS 모델을 업데이트하는 방법
Important
LUIS는 2025년 10월 1일에 사용 중지되며 2023년 4월 1일부터 새 LUIS 리소스를 만들 수 없습니다. 지속적인 제품 지원 및 다국어 기능을 활용하려면 LUIS 애플리케이션을 대화 언어 이해로 마이그레이션하는 것이 좋습니다.
이 문서에서는 Pizza 앱에 예제 발언을 추가하여 앱을 학습시킵니다. 예제 발언은 의도에 매핑된 대화형 사용자 텍스트입니다. 의도에 대한 예제 발언을 제공하여, 사용자가 제공한 텍스트의 종류가 어떤 의도에 속하는지 LUIS에 알려줍니다.
필수 조건
예제 발언 JSON 파일
예제 발화는 특정 형식을 따릅니다.
text 필드에는 예시 발언 텍스트가 포함됩니다. intentName 필드는 LUIS 앱의 기존 의도 이름과 일치해야 합니다. entityLabels 필드는 필수입니다. 엔터티에 레이블을 지정하지 않으려면 빈 배열을 제공하세요.
entityLabels 배열이 비어 있지 않으면 startCharIndex 및 endCharIndex에서 entityName 필드에 언급된 엔터티를 표시해야 합니다. 인덱스는 0부터 시작합니다. 텍스트의 공간에서 레이블을 시작하거나 종료하는 경우 발화를 추가하기 위한 API 호출이 실패합니다.
[
  {
    "text": "order a pizza",
    "intentName": "ModifyOrder",
    "entityLabels": [
      {
        "entityName": "Order",
        "startCharIndex": 6,
        "endCharIndex": 12
      }
    ]
  },
  {
    "text": "order a large pepperoni pizza",
    "intentName": "ModifyOrder",
    "entityLabels": [
      {
        "entityName": "Order",
        "startCharIndex": 6,
        "endCharIndex": 28
      },
      {
        "entityName": "FullPizzaWithModifiers",
        "startCharIndex": 6,
        "endCharIndex": 28
      },
      {
        "entityName": "PizzaType",
        "startCharIndex": 14,
        "endCharIndex": 28
      },
      {
        "entityName": "Size",
        "startCharIndex": 8,
        "endCharIndex": 12
      }
    ]
  },
  {
    "text": "I want two large pepperoni pizzas on thin crust",
    "intentName": "ModifyOrder",
    "entityLabels": [
      {
        "entityName": "Order",
        "startCharIndex": 7,
        "endCharIndex": 46
      },
      {
        "entityName": "FullPizzaWithModifiers",
        "startCharIndex": 7,
        "endCharIndex": 46
      },
      {
        "entityName": "PizzaType",
        "startCharIndex": 17,
        "endCharIndex": 32
      },
      {
        "entityName": "Size",
        "startCharIndex": 11,
        "endCharIndex": 15
      },
      {
        "entityName": "Quantity",
        "startCharIndex": 7,
        "endCharIndex": 9
      },
      {
        "entityName": "Crust",
        "startCharIndex": 37,
        "endCharIndex": 46
      }
    ]
  }
]
Pizza 앱 만들기
Pizza 앱 만들기
- pizza-app-for-luis-v6.json을 선택하여
pizza-app-for-luis.json파일에 대한 GitHub 페이지를 엽니다. - Raw 단추를 마우스 오른쪽 단추로 클릭하거나 길게 누르고 다른 이름으로 링크 저장을 선택하여
pizza-app-for-luis.json을 컴퓨터에 저장합니다. - LUIS 포털에 로그인합니다.
- 내 앱을 선택합니다.
- 내 앱 페이지에서 + 대화용 새 앱을 선택합니다.
- JSON으로 가져오기를 선택합니다.
- 새 앱 가져오기 대화 상자에서 파일 선택 단추를 선택합니다.
- 다운로드한
pizza-app-for-luis.json파일을 선택한 다음, 열기를 선택합니다. - 새 앱 가져오기 대화 상자의 이름 필드에 Pizza 앱의 이름을 입력한 다음, 완료 단추를 선택합니다.
앱을 가져옵니다.
효과적인 LUIS 앱을 만드는 방법 대화 상자가 표시되면 대화 상자를 닫습니다.
Pizza 앱 학습 및 게시
의도 페이지가 Pizza 앱의 의도 목록과 함께 표시되어야 합니다.
LUIS 웹 사이트의 오른쪽 위에서 학습 단추를 선택합니다.

학습 단추가 사용하지 않도록 설정되어 있으면 학습이 완료된 것입니다.
챗봇 또는 다른 클라이언트 애플리케이션에서 LUIS 예측을 받으려면 앱을 예측 엔드포인트에 게시해야 합니다.
오른쪽 위 탐색에서 게시를 선택합니다.

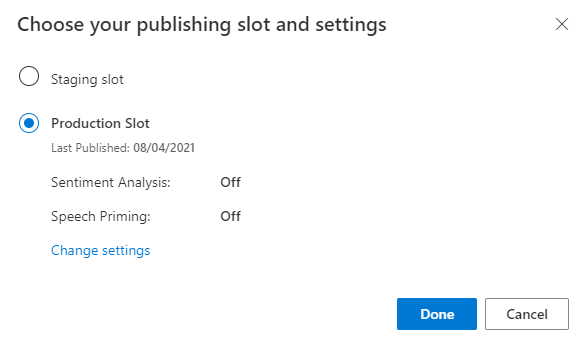
프로덕션 슬롯을 선택한 다음, 완료를 선택합니다.
알림에서 엔드포인트 URL에 액세스를 선택하여 Azure 리소스 페이지로 이동합니다. 앱과 연결된 예측 리소스가 있는 경우에만 URL을 볼 수 있습니다. 관리를 클릭하여 Azure 리소스 페이지를 찾을 수도 있습니다.

Pizza 앱에 제작 리소스 추가
- 관리를 선택합니다.
- Azure 리소스를 선택합니다.
- 제작 리소스를 선택합니다.
- 제작 리소스 변경을 선택합니다.
제작 리소스가 있는 경우 제작 리소스의 테넌트 이름, 구독 이름 및 LUIS 리소스 이름을 입력합니다.
제작 리소스가 없는 경우
- 새 리소스 만들기를 선택합니다.
- 테넌트 이름, 리소스 이름, 구독 이름 및 Azure 리소스 그룹 이름을 입력합니다.
이제 Pizza 앱을 사용할 준비가 되었습니다.
피자 앱에 대한 액세스 값 기록
새 Pizza 앱을 사용하려면 Pizza 앱의 앱 ID, 제작 키 및 제작 엔드포인트가 필요합니다. 예측을 가져오려면 별도의 예측 엔드포인트와 예측 키가 필요합니다.
이러한 값을 찾으려면 다음을 수행합니다.
- 의도 페이지에서 관리를 선택합니다.
- 애플리케이션 설정 페이지에서 앱 ID를 기록합니다.
- Azure 리소스를 선택합니다.
- 제작 리소스를 선택합니다.
- 작성 리소스 및 예측 리소스 탭에서 기본 키를 기록합니다. 이 값은 제작 키입니다.
- 엔드포인트 URL을 기록합니다. 이 값은 제작 엔드포인트입니다.
프로그래밍 방식으로 모델 변경
csharp-model-with-rest의 프로젝트 및 폴더 이름을 사용하여 C# 언어를 대상으로 하는 새 콘솔 애플리케이션을 만듭니다.dotnet new console -lang C# -n csharp-model-with-rest생성한
csharp-model-with-rest디렉터리로 변경하고 다음 명령을 사용하여 필요한 종속성을 설치합니다.cd csharp-model-with-rest dotnet add package System.Net.Http dotnet add package JsonFormatterPlusProgram.cs를 다음 코드로 덮어씁니다.
// // This quickstart shows how to add utterances to a LUIS model using the REST APIs. // using System; using System.IO; using System.Net.Http; using System.Text; using System.Threading.Tasks; using System.Collections.Generic; using System.Linq; // 3rd party NuGet packages using JsonFormatterPlus; namespace AddUtterances { class Program { ////////// // Values to modify. // YOUR-APP-ID: The App ID GUID found on the www.luis.ai Application Settings page. static string appID = "PASTE_YOUR_LUIS_APP_ID_HERE"; // YOUR-AUTHORING-KEY: Your LUIS authoring key, 32 character value. static string authoringKey = "PASTE_YOUR_LUIS_AUTHORING_SUBSCRIPTION_KEY_HERE"; // YOUR-AUTHORING-ENDPOINT: Replace this endpoint with your authoring key endpoint. // For example, "https://your-resource-name.cognitiveservices.azure.com/" static string authoringEndpoint = "PASTE_YOUR_LUIS_AUTHORING_ENDPOINT_HERE"; // NOTE: Replace this your version number. static string appVersion = "0.1"; ////////// static string host = String.Format("{0}luis/authoring/v3.0-preview/apps/{1}/versions/{2}/", authoringEndpoint, appID, appVersion); // GET request with authentication async static Task<HttpResponseMessage> SendGet(string uri) { using (var client = new HttpClient()) using (var request = new HttpRequestMessage()) { request.Method = HttpMethod.Get; request.RequestUri = new Uri(uri); request.Headers.Add("Ocp-Apim-Subscription-Key", authoringKey); return await client.SendAsync(request); } } // POST request with authentication async static Task<HttpResponseMessage> SendPost(string uri, string requestBody) { using (var client = new HttpClient()) using (var request = new HttpRequestMessage()) { request.Method = HttpMethod.Post; request.RequestUri = new Uri(uri); if (!String.IsNullOrEmpty(requestBody)) { request.Content = new StringContent(requestBody, Encoding.UTF8, "text/json"); } request.Headers.Add("Ocp-Apim-Subscription-Key", authoringKey); return await client.SendAsync(request); } } // Add utterances as string with POST request async static Task AddUtterances(string utterances) { string uri = host + "examples"; var response = await SendPost(uri, utterances); var result = await response.Content.ReadAsStringAsync(); Console.WriteLine("Added utterances."); Console.WriteLine(JsonFormatter.Format(result)); } // Train app after adding utterances async static Task Train() { string uri = host + "train"; var response = await SendPost(uri, null); var result = await response.Content.ReadAsStringAsync(); Console.WriteLine("Sent training request."); Console.WriteLine(JsonFormatter.Format(result)); } // Check status of training async static Task Status() { var response = await SendGet(host + "train"); var result = await response.Content.ReadAsStringAsync(); Console.WriteLine("Requested training status."); Console.WriteLine(JsonFormatter.Format(result)); } // Add utterances, train, check status static void Main(string[] args) { string utterances = @" [ { 'text': 'order a pizza', 'intentName': 'ModifyOrder', 'entityLabels': [ { 'entityName': 'Order', 'startCharIndex': 6, 'endCharIndex': 12 } ] }, { 'text': 'order a large pepperoni pizza', 'intentName': 'ModifyOrder', 'entityLabels': [ { 'entityName': 'Order', 'startCharIndex': 6, 'endCharIndex': 28 }, { 'entityName': 'FullPizzaWithModifiers', 'startCharIndex': 6, 'endCharIndex': 28 }, { 'entityName': 'PizzaType', 'startCharIndex': 14, 'endCharIndex': 28 }, { 'entityName': 'Size', 'startCharIndex': 8, 'endCharIndex': 12 } ] }, { 'text': 'I want two large pepperoni pizzas on thin crust', 'intentName': 'ModifyOrder', 'entityLabels': [ { 'entityName': 'Order', 'startCharIndex': 7, 'endCharIndex': 46 }, { 'entityName': 'FullPizzaWithModifiers', 'startCharIndex': 7, 'endCharIndex': 46 }, { 'entityName': 'PizzaType', 'startCharIndex': 17, 'endCharIndex': 32 }, { 'entityName': 'Size', 'startCharIndex': 11, 'endCharIndex': 15 }, { 'entityName': 'Quantity', 'startCharIndex': 7, 'endCharIndex': 9 }, { 'entityName': 'Crust', 'startCharIndex': 37, 'endCharIndex': 46 } ] } ] "; AddUtterances(utterances).Wait(); Train().Wait(); Status().Wait(); } } }YOUR-에서 시작하는 값을 고유한 값으로 바꿉니다.정보 목적 YOUR-APP-IDLUIS 앱 ID입니다. YOUR-AUTHORING-KEY32자 작성 키입니다. YOUR-AUTHORING-ENDPOINT작성 URL 엔드포인트입니다. 예: https://replace-with-your-resource-name.api.cognitive.microsoft.com/. 리소스를 만들 때 리소스 이름을 설정합니다.할당된 키와 리소스는 Azure Resources 페이지의 관리 섹션에 있는 LUIS 포털에 표시됩니다. 앱 ID는 애플리케이션 설정 페이지의 동일한 관리 섹션에서 사용할 수 있습니다.
Important
완료되면 코드에서 키를 제거하고 공개적으로 게시하지 마세요. 프로덕션의 경우 Azure Key Vault와 같은 자격 증명을 안전하게 저장하고 액세스하는 방법을 사용합니다. 자세한 내용은 Azure AI 서비스 보안 문서를 참조하세요.
콘솔 애플리케이션을 빌드합니다.
dotnet build콘솔 애플리케이션을 실행합니다.
dotnet run제작 응답을 검토합니다.
Added utterances.
[
    {
        "value": {
            "ExampleId": 1137150691,
            "UtteranceText": "order a pizza"
        },
        "hasError": false
    },
    {
        "value": {
            "ExampleId": 1137150692,
            "UtteranceText": "order a large pepperoni pizza"
        },
        "hasError": false
    },
    {
        "value": {
            "ExampleId": 1137150693,
            "UtteranceText": "i want two large pepperoni pizzas on thin crust"
        },
        "hasError": false
    }
]
Sent training request.
{
    "statusId": 9,
    "status": "Queued"
}
Requested training status.
[
    {
        "modelId": "edb46abf-0000-41ab-beb2-a41a0fe1630f",
        "details": {
            "statusId": 9,
            "status": "Queued",
            "exampleCount": 0
        }
    },
    {
        "modelId": "a5030be2-616c-4648-bf2f-380fa9417d37",
        "details": {
            "statusId": 9,
            "status": "Queued",
            "exampleCount": 0
        }
    },
    {
        "modelId": "3f2b1f31-a3c3-4fbd-8182-e9d9dbc120b9",
        "details": {
            "statusId": 9,
            "status": "Queued",
            "exampleCount": 0
        }
    },
    {
        "modelId": "e4b6704b-1636-474c-9459-fe9ccbeba51c",
        "details": {
            "statusId": 9,
            "status": "Queued",
            "exampleCount": 0
        }
    },
    {
        "modelId": "031d3777-2a00-4a7a-9323-9a3280a30000",
        "details": {
            "statusId": 9,
            "status": "Queued",
            "exampleCount": 0
        }
    },
    {
        "modelId": "9250e7a1-06eb-4413-9432-ae132ed32583",
        "details": {
            "statusId": 9,
            "status": "Queued",
            "exampleCount": 0
        }
    }
]
리소스 정리
이 빠른 시작을 완료하면 파일 시스템에서 파일을 삭제합니다.
다음 단계
필수 조건
- JDK SE(Java Development Kit, Standard Edition)
- Visual Studio Code 또는 선호하는 IDE
예제 발언 JSON 파일
예제 발화는 특정 형식을 따릅니다.
text 필드에는 예시 발언 텍스트가 포함됩니다. intentName 필드는 LUIS 앱의 기존 의도 이름과 일치해야 합니다. entityLabels 필드는 필수입니다. 엔터티에 레이블을 지정하지 않으려면 빈 배열을 제공하세요.
entityLabels 배열이 비어 있지 않으면 startCharIndex 및 endCharIndex에서 entityName 필드에 언급된 엔터티를 표시해야 합니다. 인덱스는 0부터 시작합니다. 텍스트의 공간에서 레이블을 시작하거나 종료하는 경우 발화를 추가하기 위한 API 호출이 실패합니다.
[
  {
    "text": "order a pizza",
    "intentName": "ModifyOrder",
    "entityLabels": [
      {
        "entityName": "Order",
        "startCharIndex": 6,
        "endCharIndex": 12
      }
    ]
  },
  {
    "text": "order a large pepperoni pizza",
    "intentName": "ModifyOrder",
    "entityLabels": [
      {
        "entityName": "Order",
        "startCharIndex": 6,
        "endCharIndex": 28
      },
      {
        "entityName": "FullPizzaWithModifiers",
        "startCharIndex": 6,
        "endCharIndex": 28
      },
      {
        "entityName": "PizzaType",
        "startCharIndex": 14,
        "endCharIndex": 28
      },
      {
        "entityName": "Size",
        "startCharIndex": 8,
        "endCharIndex": 12
      }
    ]
  },
  {
    "text": "I want two large pepperoni pizzas on thin crust",
    "intentName": "ModifyOrder",
    "entityLabels": [
      {
        "entityName": "Order",
        "startCharIndex": 7,
        "endCharIndex": 46
      },
      {
        "entityName": "FullPizzaWithModifiers",
        "startCharIndex": 7,
        "endCharIndex": 46
      },
      {
        "entityName": "PizzaType",
        "startCharIndex": 17,
        "endCharIndex": 32
      },
      {
        "entityName": "Size",
        "startCharIndex": 11,
        "endCharIndex": 15
      },
      {
        "entityName": "Quantity",
        "startCharIndex": 7,
        "endCharIndex": 9
      },
      {
        "entityName": "Crust",
        "startCharIndex": 37,
        "endCharIndex": 46
      }
    ]
  }
]
프로그래밍 방식으로 모델 변경
java-model-with-rest와 같은 Java 프로젝트를 보관할 새 폴더를 만듭니다.lib라는 하위 디렉터리를 만들고 다음 java 라이브러리에서lib하위 디렉터리로 복사합니다.이름이
Model.java인 새 파일을 만듭니다. 다음 코드를 추가합니다.// // This quickstart shows how to add utterances to a LUIS model using the REST APIs. // import java.io.*; import java.net.URI; import org.apache.http.HttpEntity; import org.apache.http.HttpResponse; import org.apache.http.client.HttpClient; import org.apache.http.client.methods.HttpGet; import org.apache.http.client.methods.HttpPost; import org.apache.http.client.utils.URIBuilder; import org.apache.http.entity.StringEntity; import org.apache.http.impl.client.HttpClients; import org.apache.http.util.EntityUtils; // To compile, execute this command at the console: // Windows: javac -cp ";lib/*" Model.java // macOs: javac -cp ":lib/*" Model.java // Linux: javac -cp ":lib/*" Model.java // To run, execute this command at the console: // Windows: java -cp ";lib/*" Model // macOs: java -cp ":lib/*" Model // Linux: java -cp ":lib/*" Model public class Model { public static void main(String[] args) { try { ////////// // Values to modify. // YOUR-APP-ID: The App ID GUID found on the www.luis.ai Application Settings page. String AppId = "PASTE_YOUR_LUIS_APP_ID_HERE"; // YOUR-AUTHORING-KEY: Your LUIS authoring key, 32 character value. String Key = "PASTE_YOUR_LUIS_AUTHORING_SUBSCRIPTION_KEY_HERE"; // YOUR-AUTHORING-ENDPOINT: Replace this with your authoring key endpoint. // For example, "https://your-resource-name.cognitiveservices.azure.com/" String Endpoint = "PASTE_YOUR_LUIS_AUTHORING_ENDPOINT_HERE"; // NOTE: Replace this your version number. The Pizza app uses a version number of "0.1". String Version = "0.1"; ////////// // The list of utterances to add, in JSON format. String Utterances = "[{'text': 'order a pizza', 'intentName': 'ModifyOrder', 'entityLabels': [{'entityName': 'Order', 'startCharIndex': 6, 'endCharIndex': 12}]}, {'text': 'order a large pepperoni pizza', 'intentName': 'ModifyOrder', 'entityLabels': [{'entityName': 'Order', 'startCharIndex': 6, 'endCharIndex': 28}, {'entityName': 'FullPizzaWithModifiers', 'startCharIndex': 6, 'endCharIndex': 28}, {'entityName': 'PizzaType', 'startCharIndex': 14, 'endCharIndex': 28}, {'entityName': 'Size', 'startCharIndex': 8, 'endCharIndex': 12}]}, {'text': 'I want two large pepperoni pizzas on thin crust', 'intentName': 'ModifyOrder', 'entityLabels': [{'entityName': 'Order', 'startCharIndex': 7, 'endCharIndex': 46}, {'entityName': 'FullPizzaWithModifiers', 'startCharIndex': 7, 'endCharIndex': 46}, {'entityName': 'PizzaType', 'startCharIndex': 17, 'endCharIndex': 32}, {'entityName': 'Size', 'startCharIndex': 11, 'endCharIndex': 15}, {'entityName': 'Quantity', 'startCharIndex': 7, 'endCharIndex': 9}, {'entityName': 'Crust', 'startCharIndex': 37, 'endCharIndex': 46}]}]"; // Create the URLs for uploading example utterances and for training. URIBuilder addUtteranceURL = new URIBuilder(Endpoint + "luis/authoring/v3.0-preview/apps/" + AppId + "/versions/" + Version + "/examples"); URIBuilder trainURL = new URIBuilder(Endpoint + "luis/authoring/v3.0-preview/apps/" + AppId + "/versions/" + Version + "/train"); URI addUtterancesURI = addUtteranceURL.build(); URI trainURI = trainURL.build(); // Add the utterances. // Create the request. HttpClient addUtterancesClient = HttpClients.createDefault(); HttpPost addUtterancesRequest = new HttpPost(addUtterancesURI); // Add the headers. addUtterancesRequest.setHeader("Ocp-Apim-Subscription-Key",Key); addUtterancesRequest.setHeader("Content-type","application/json"); // Add the body. StringEntity stringEntity = new StringEntity(Utterances); addUtterancesRequest.setEntity(stringEntity); // Execute the request and obtain the response. HttpResponse addUtterancesResponse = addUtterancesClient.execute(addUtterancesRequest); HttpEntity addUtterancesEntity = addUtterancesResponse.getEntity(); // Print the response on the console. if (addUtterancesEntity != null) { System.out.println(EntityUtils.toString(addUtterancesEntity)); } // Train the model. // Create the request. HttpClient trainClient = HttpClients.createDefault(); HttpPost trainRequest = new HttpPost(trainURI); // Add the headers. trainRequest.setHeader("Ocp-Apim-Subscription-Key",Key); trainRequest.setHeader("Content-type","application/json"); // Execute the request and obtain the response. HttpResponse trainResponse = trainClient.execute(trainRequest); HttpEntity trainEntity = trainResponse.getEntity(); // Print the response on the console. if (trainEntity != null) { System.out.println(EntityUtils.toString(trainEntity)); } // Get the training status. // Create the request. HttpClient trainStatusClient = HttpClients.createDefault(); HttpGet trainStatusRequest = new HttpGet(trainURI); // Add the headers. trainStatusRequest.setHeader("Ocp-Apim-Subscription-Key",Key); trainStatusRequest.setHeader("Content-type","application/json"); // Execute the request and obtain the response. HttpResponse trainStatusResponse = trainStatusClient.execute(trainStatusRequest); HttpEntity trainStatusEntity = trainStatusResponse.getEntity(); // Print the response on the console. if (trainStatusEntity != null) { System.out.println(EntityUtils.toString(trainStatusEntity)); } } // Display errors if they occur. catch (Exception e) { System.out.println(e.getMessage()); } } }YOUR-에서 시작하는 값을 고유한 값으로 바꿉니다.정보 목적 YOUR-APP-IDLUIS 앱 ID입니다. YOUR-AUTHORING-KEY32자 작성 키입니다. YOUR-AUTHORING-ENDPOINT작성 URL 엔드포인트입니다. 예: https://replace-with-your-resource-name.api.cognitive.microsoft.com/. 리소스를 만들 때 리소스 이름을 설정합니다.할당된 키와 리소스는 Azure Resources 페이지의 관리 섹션에 있는 LUIS 포털에 표시됩니다. 앱 ID는 애플리케이션 설정 페이지의 동일한 관리 섹션에서 사용할 수 있습니다.
Important
완료되면 코드에서 키를 제거하고 공개적으로 게시하지 마세요. 프로덕션의 경우 Azure Key Vault와 같은 자격 증명을 안전하게 저장하고 액세스하는 방법을 사용합니다. 자세한 내용은 Azure AI 서비스 보안 문서를 참조하세요.
Model.java파일을 만든 위치와 동일한 디렉터리에서 명령 프롬프트에 다음 명령을 입력하여 Java 파일을 컴파일합니다.- Windows를 사용하는 경우
javac -cp ";lib/*" Model.java명령을 사용합니다. - macOS 또는 Linux를 사용하는 경우
javac -cp ":lib/*" Model.java명령을 사용합니다.
- Windows를 사용하는 경우
명령 프롬프트에서 다음 텍스트를 입력하여 명령줄에서 Java 애플리케이션을 실행합니다.
- Windows를 사용하는 경우
java -cp ";lib/*" Model명령을 사용합니다. - macOS 또는 Linux를 사용하는 경우
java -cp ":lib/*" Model명령을 사용합니다.
- Windows를 사용하는 경우
제작 응답을 검토합니다.
[{"value":{"ExampleId":1137150691,"UtteranceText":"order a pizza"},"hasError":false},{"value":{"ExampleId":1137150692,"UtteranceText":"order a large pepperoni pizza"},"hasError":false},{"value":{"ExampleId":1137150693,"UtteranceText":"i want two large pepperoni pizzas on thin crust"},"hasError":false}]
{"statusId":9,"status":"Queued"}
[{"modelId":"edb46abf-0000-41ab-beb2-a41a0fe1630f","details":{"statusId":9,"status":"Queued","exampleCount":0}},{"modelId":"a5030be2-616c-4648-bf2f-380fa9417d37","details":{"statusId":9,"status":"Queued","exampleCount":0}},{"modelId":"3f2b1f31-a3c3-4fbd-8182-e9d9dbc120b9","details":{"statusId":9,"status":"Queued","exampleCount":0}},{"modelId":"e4b6704b-1636-474c-9459-fe9ccbeba51c","details":{"statusId":9,"status":"Queued","exampleCount":0}},{"modelId":"031d3777-2a00-4a7a-9323-9a3280a30000","details":{"statusId":9,"status":"Queued","exampleCount":0}},{"modelId":"9250e7a1-06eb-4413-9432-ae132ed32583","details":{"statusId":3,"status":"InProgress","exampleCount":0,"progressSubstatus":"CollectingData"}}]
가독성을 위해 형식이 지정된 출력은 다음과 같습니다.
[
  {
    "value": {
      "ExampleId": 1137150691,
      "UtteranceText": "order a pizza"
    },
    "hasError": false
  },
  {
    "value": {
      "ExampleId": 1137150692,
      "UtteranceText": "order a large pepperoni pizza"
    },
    "hasError": false
  },
  {
    "value": {
      "ExampleId": 1137150693,
      "UtteranceText": "i want two large pepperoni pizzas on thin crust"
    },
    "hasError": false
  }
]
{
  "statusId": 9,
  "status": "Queued"
}
[
  {
    "modelId": "edb46abf-0000-41ab-beb2-a41a0fe1630f",
    "details": {
      "statusId": 9,
      "status": "Queued",
      "exampleCount": 0
    }
  },
  {
    "modelId": "a5030be2-616c-4648-bf2f-380fa9417d37",
    "details": {
      "statusId": 9,
      "status": "Queued",
      "exampleCount": 0
    }
  },
  {
    "modelId": "3f2b1f31-a3c3-4fbd-8182-e9d9dbc120b9",
    "details": {
      "statusId": 9,
      "status": "Queued",
      "exampleCount": 0
    }
  },
  {
    "modelId": "e4b6704b-1636-474c-9459-fe9ccbeba51c",
    "details": {
      "statusId": 9,
      "status": "Queued",
      "exampleCount": 0
    }
  },
  {
    "modelId": "031d3777-2a00-4a7a-9323-9a3280a30000",
    "details": {
      "statusId": 9,
      "status": "Queued",
      "exampleCount": 0
    }
  },
  {
    "modelId": "9250e7a1-06eb-4413-9432-ae132ed32583",
    "details": {
      "statusId": 3,
      "status": "InProgress",
      "exampleCount": 0,
      "progressSubstatus": "CollectingData"
    }
  }
]
리소스 정리
이 빠른 시작을 완료하면 파일 시스템에서 파일을 삭제합니다.
다음 단계
필수 조건
- Go 프로그래밍 언어
- Visual Studio Code
예제 발언 JSON 파일
예제 발화는 특정 형식을 따릅니다.
text 필드에는 예시 발언 텍스트가 포함됩니다. intentName 필드는 LUIS 앱의 기존 의도 이름과 일치해야 합니다. entityLabels 필드는 필수입니다. 엔터티에 레이블을 지정하지 않으려면 빈 배열을 제공하세요.
entityLabels 배열이 비어 있지 않으면 startCharIndex 및 endCharIndex에서 entityName 필드에 언급된 엔터티를 표시해야 합니다. 인덱스는 0부터 시작합니다. 텍스트의 공간에서 레이블을 시작하거나 종료하는 경우 발화를 추가하기 위한 API 호출이 실패합니다.
[
  {
    "text": "order a pizza",
    "intentName": "ModifyOrder",
    "entityLabels": [
      {
        "entityName": "Order",
        "startCharIndex": 6,
        "endCharIndex": 12
      }
    ]
  },
  {
    "text": "order a large pepperoni pizza",
    "intentName": "ModifyOrder",
    "entityLabels": [
      {
        "entityName": "Order",
        "startCharIndex": 6,
        "endCharIndex": 28
      },
      {
        "entityName": "FullPizzaWithModifiers",
        "startCharIndex": 6,
        "endCharIndex": 28
      },
      {
        "entityName": "PizzaType",
        "startCharIndex": 14,
        "endCharIndex": 28
      },
      {
        "entityName": "Size",
        "startCharIndex": 8,
        "endCharIndex": 12
      }
    ]
  },
  {
    "text": "I want two large pepperoni pizzas on thin crust",
    "intentName": "ModifyOrder",
    "entityLabels": [
      {
        "entityName": "Order",
        "startCharIndex": 7,
        "endCharIndex": 46
      },
      {
        "entityName": "FullPizzaWithModifiers",
        "startCharIndex": 7,
        "endCharIndex": 46
      },
      {
        "entityName": "PizzaType",
        "startCharIndex": 17,
        "endCharIndex": 32
      },
      {
        "entityName": "Size",
        "startCharIndex": 11,
        "endCharIndex": 15
      },
      {
        "entityName": "Quantity",
        "startCharIndex": 7,
        "endCharIndex": 9
      },
      {
        "entityName": "Crust",
        "startCharIndex": 37,
        "endCharIndex": 46
      }
    ]
  }
]
Pizza 앱 만들기
Pizza 앱 만들기
- pizza-app-for-luis-v6.json을 선택하여
pizza-app-for-luis.json파일에 대한 GitHub 페이지를 엽니다. - Raw 단추를 마우스 오른쪽 단추로 클릭하거나 길게 누르고 다른 이름으로 링크 저장을 선택하여
pizza-app-for-luis.json을 컴퓨터에 저장합니다. - LUIS 포털에 로그인합니다.
- 내 앱을 선택합니다.
- 내 앱 페이지에서 + 대화용 새 앱을 선택합니다.
- JSON으로 가져오기를 선택합니다.
- 새 앱 가져오기 대화 상자에서 파일 선택 단추를 선택합니다.
- 다운로드한
pizza-app-for-luis.json파일을 선택한 다음, 열기를 선택합니다. - 새 앱 가져오기 대화 상자의 이름 필드에 Pizza 앱의 이름을 입력한 다음, 완료 단추를 선택합니다.
앱을 가져옵니다.
효과적인 LUIS 앱을 만드는 방법 대화 상자가 표시되면 대화 상자를 닫습니다.
Pizza 앱 학습 및 게시
의도 페이지가 Pizza 앱의 의도 목록과 함께 표시되어야 합니다.
LUIS 웹 사이트의 오른쪽 위에서 학습 단추를 선택합니다.
학습 단추가 사용하지 않도록 설정되어 있으면 학습이 완료된 것입니다.
챗봇 또는 다른 클라이언트 애플리케이션에서 LUIS 예측을 받으려면 앱을 예측 엔드포인트에 게시해야 합니다.
오른쪽 위 탐색에서 게시를 선택합니다.
프로덕션 슬롯을 선택한 다음, 완료를 선택합니다.
알림에서 엔드포인트 URL에 액세스를 선택하여 Azure 리소스 페이지로 이동합니다. 앱과 연결된 예측 리소스가 있는 경우에만 URL을 볼 수 있습니다. 관리를 클릭하여 Azure 리소스 페이지를 찾을 수도 있습니다.
Pizza 앱에 제작 리소스 추가
- 관리를 선택합니다.
- Azure 리소스를 선택합니다.
- 제작 리소스를 선택합니다.
- 제작 리소스 변경을 선택합니다.
제작 리소스가 있는 경우 제작 리소스의 테넌트 이름, 구독 이름 및 LUIS 리소스 이름을 입력합니다.
제작 리소스가 없는 경우
- 새 리소스 만들기를 선택합니다.
- 테넌트 이름, 리소스 이름, 구독 이름 및 Azure 리소스 그룹 이름을 입력합니다.
이제 Pizza 앱을 사용할 준비가 되었습니다.
피자 앱에 대한 액세스 값 기록
새 Pizza 앱을 사용하려면 Pizza 앱의 앱 ID, 제작 키 및 제작 엔드포인트가 필요합니다. 예측을 가져오려면 별도의 예측 엔드포인트와 예측 키가 필요합니다.
이러한 값을 찾으려면 다음을 수행합니다.
- 의도 페이지에서 관리를 선택합니다.
- 애플리케이션 설정 페이지에서 앱 ID를 기록합니다.
- Azure 리소스를 선택합니다.
- 제작 리소스를 선택합니다.
- 작성 리소스 및 예측 리소스 탭에서 기본 키를 기록합니다. 이 값은 제작 키입니다.
- 엔드포인트 URL을 기록합니다. 이 값은 제작 엔드포인트입니다.
프로그래밍 방식으로 모델 변경
이름이
predict.go인 새 파일을 만듭니다. 다음 코드를 추가합니다.// // This quickstart shows how to add utterances to a LUIS model using the REST APIs. // // dependencies package main import ( "fmt" "net/http" "io/ioutil" "log" "strings" ) // main function func main() { ////////// // Values to modify. // YOUR-APP-ID: The App ID GUID found on the www.luis.ai Application Settings page. var appID = "PASTE_YOUR_LUIS_APP_ID_HERE" // YOUR-AUTHORING-KEY: Your LUIS authoring key, 32 character value. var authoringKey = "PASTE_YOUR_LUIS_AUTHORING_SUBSCRIPTION_KEY_HERE" // YOUR-AUTHORING-ENDPOINT: Replace this with your authoring key endpoint. // For example, "https://your-resource-name.cognitiveservices.azure.com/" var endpoint = "PASTE_YOUR_LUIS_AUTHORING_ENDPOINT_HERE" // NOTE: Replace this your version number. The Pizza app uses a version number of "0.1". var version = "0.1" ////////// var exampleUtterances = "[{'text': 'order a pizza', 'intentName': 'ModifyOrder', 'entityLabels': [{'entityName': 'Order', 'startCharIndex': 6, 'endCharIndex': 12}]}, {'text': 'order a large pepperoni pizza', 'intentName': 'ModifyOrder', 'entityLabels': [{'entityName': 'Order', 'startCharIndex': 6, 'endCharIndex': 28}, {'entityName': 'FullPizzaWithModifiers', 'startCharIndex': 6, 'endCharIndex': 28}, {'entityName': 'PizzaType', 'startCharIndex': 14, 'endCharIndex': 28}, {'entityName': 'Size', 'startCharIndex': 8, 'endCharIndex': 12}]}, {'text': 'I want two large pepperoni pizzas on thin crust', 'intentName': 'ModifyOrder', 'entityLabels': [{'entityName': 'Order', 'startCharIndex': 7, 'endCharIndex': 46}, {'entityName': 'FullPizzaWithModifiers', 'startCharIndex': 7, 'endCharIndex': 46}, {'entityName': 'PizzaType', 'startCharIndex': 17, 'endCharIndex': 32}, {'entityName': 'Size', 'startCharIndex': 11, 'endCharIndex': 15}, {'entityName': 'Quantity', 'startCharIndex': 7, 'endCharIndex': 9}, {'entityName': 'Crust', 'startCharIndex': 37, 'endCharIndex': 46}]}]" fmt.Println("add example utterances requested") addUtterance(authoringKey, appID, version, exampleUtterances, endpoint) fmt.Println("training selected") requestTraining(authoringKey, appID, version, endpoint) fmt.Println("training status selected") getTrainingStatus(authoringKey, appID, version, endpoint) } // Send the list of utterances to the model. func addUtterance(authoringKey string, appID string, version string, labeledExampleUtterances string, endpoint string){ var authoringUrl = fmt.Sprintf("%sluis/authoring/v3.0-preview/apps/%s/versions/%s/examples", endpoint, appID, version) httpRequest("POST", authoringUrl, authoringKey, labeledExampleUtterances) } // Request training. func requestTraining(authoringKey string, appID string, version string, endpoint string){ trainApp("POST", authoringKey, appID, version, endpoint) } func trainApp(httpVerb string, authoringKey string, appID string, version string, endpoint string){ var authoringUrl = fmt.Sprintf("%sluis/authoring/v3.0-preview/apps/%s/versions/%s/train", endpoint, appID, version) httpRequest(httpVerb,authoringUrl, authoringKey, "") } func getTrainingStatus(authoringKey string, appID string, version string, endpoint string){ trainApp("GET", authoringKey, appID, version, endpoint) } // generic HTTP request // includes setting header with authoring key func httpRequest(httpVerb string, url string, authoringKey string, body string){ client := &http.Client{} request, err := http.NewRequest(httpVerb, url, strings.NewReader(body)) request.Header.Add("Ocp-Apim-Subscription-Key", authoringKey) fmt.Println("body") fmt.Println(body) response, err := client.Do(request) if err != nil { log.Fatal(err) } else { defer response.Body.Close() contents, err := ioutil.ReadAll(response.Body) if err != nil { log.Fatal(err) } fmt.Println(" ", response.StatusCode) fmt.Println(string(contents)) } }YOUR-에서 시작하는 값을 고유한 값으로 바꿉니다.정보 목적 YOUR-APP-IDLUIS 앱 ID입니다. YOUR-AUTHORING-KEY32자 작성 키입니다. YOUR-AUTHORING-ENDPOINT작성 URL 엔드포인트입니다. 예: https://replace-with-your-resource-name.api.cognitive.microsoft.com/. 리소스를 만들 때 리소스 이름을 설정합니다.할당된 키와 리소스는 Azure Resources 페이지의 관리 섹션에 있는 LUIS 포털에 표시됩니다. 앱 ID는 애플리케이션 설정 페이지의 동일한 관리 섹션에서 사용할 수 있습니다.
Important
완료되면 코드에서 키를 제거하고 공개적으로 게시하지 마세요. 프로덕션의 경우 Azure Key Vault와 같은 자격 증명을 안전하게 저장하고 액세스하는 방법을 사용합니다. 자세한 내용은 Azure AI 서비스 보안 문서를 참조하세요.
파일을 만든 위치와 같은 디렉터리에서 명령 프롬프트에 다음 명령을 입력하여 Go 파일을 컴파일합니다.
go build model.go명령 프롬프트에서 다음 텍스트를 입력하여 명령줄에서 Go 애플리케이션을 실행합니다.
go run model.go제작 응답을 검토합니다.
add example utterances requested
body
[{'text': 'order a pizza', 'intentName': 'ModifyOrder', 'entityLabels': [{'entityName': 'Order', 'startCharIndex': 6, 'endCharIndex': 12}]}, {'text': 'order a large pepperoni pizza', 'intentName': 'ModifyOrder', 'entityLabels': [{'entityName': 'Order', 'startCharIndex': 6, 'endCharIndex': 28}, {'entityName': 'FullPizzaWithModifiers', 'startCharIndex': 6, 'endCharIndex': 28}, {'entityName': 'PizzaType', 'startCharIndex': 14, 'endCharIndex': 28}, {'entityName': 'Size', 'startCharIndex': 8, 'endCharIndex': 12}]}, {'text': 'I want two large pepperoni pizzas on thin crust', 'intentName': 'ModifyOrder', 'entityLabels': [{'entityName': 'Order', 'startCharIndex': 7, 'endCharIndex': 46}, {'entityName': 'FullPizzaWithModifiers', 'startCharIndex': 7, 'endCharIndex': 46}, {'entityName': 'PizzaType', 'startCharIndex': 17, 'endCharIndex': 32}, {'entityName': 'Size', 'startCharIndex': 11, 'endCharIndex': 15}, {'entityName': 'Quantity', 'startCharIndex': 7, 'endCharIndex': 9}, {'entityName': 'Crust', 'startCharIndex': 37, 'endCharIndex': 46}]}]
    201
[{"value":{"ExampleId":1137150691,"UtteranceText":"order a pizza"},"hasError":false},{"value":{"ExampleId":1137150692,"UtteranceText":"order a large pepperoni pizza"},"hasError":false},{"value":{"ExampleId":1137150693,"UtteranceText":"i want two large pepperoni pizzas on thin crust"},"hasError":false}]
training selected
body

    202
{"statusId":9,"status":"Queued"}
training status selected
body

    200
[{"modelId":"edb46abf-0000-41ab-beb2-a41a0fe1630f","details":{"statusId":9,"status":"Queued","exampleCount":0}},{"modelId":"a5030be2-616c-4648-bf2f-380fa9417d37","details":{"statusId":9,"status":"Queued","exampleCount":0}},{"modelId":"3f2b1f31-a3c3-4fbd-8182-e9d9dbc120b9","details":{"statusId":9,"status":"Queued","exampleCount":0}},{"modelId":"e4b6704b-1636-474c-9459-fe9ccbeba51c","details":{"statusId":9,"status":"Queued","exampleCount":0}},{"modelId":"031d3777-2a00-4a7a-9323-9a3280a30000","details":{"statusId":9,"status":"Queued","exampleCount":0}},{"modelId":"9250e7a1-06eb-4413-9432-ae132ed32583","details":{"statusId":9,"status":"Queued","exampleCount":0}}]
가독성을 위해 형식이 지정된 출력은 다음과 같습니다.
add example utterances requested
body
[
  {
    'text': 'order a pizza',
    'intentName': 'ModifyOrder',
    'entityLabels': [
      {
        'entityName': 'Order',
        'startCharIndex': 6,
        'endCharIndex': 12
      }
    ]
  },
  {
    'text': 'order a large pepperoni pizza',
    'intentName': 'ModifyOrder',
    'entityLabels': [
      {
        'entityName': 'Order',
        'startCharIndex': 6,
        'endCharIndex': 28
      },
      {
        'entityName': 'FullPizzaWithModifiers',
        'startCharIndex': 6,
        'endCharIndex': 28
      },
      {
        'entityName': 'PizzaType',
        'startCharIndex': 14,
        'endCharIndex': 28
      },
      {
        'entityName': 'Size',
        'startCharIndex': 8,
        'endCharIndex': 12
      }
    ]
  },
  {
    'text': 'I want two large pepperoni pizzas on thin crust',
    'intentName': 'ModifyOrder',
    'entityLabels': [
      {
        'entityName': 'Order',
        'startCharIndex': 7,
        'endCharIndex': 46
      },
      {
        'entityName': 'FullPizzaWithModifiers',
        'startCharIndex': 7,
        'endCharIndex': 46
      },
      {
        'entityName': 'PizzaType',
        'startCharIndex': 17,
        'endCharIndex': 32
      },
      {
        'entityName': 'Size',
        'startCharIndex': 11,
        'endCharIndex': 15
      },
      {
        'entityName': 'Quantity',
        'startCharIndex': 7,
        'endCharIndex': 9
      },
      {
        'entityName': 'Crust',
        'startCharIndex': 37,
        'endCharIndex': 46
      }
    ]
  }
]

    201
[
  {
    "value": {
      "ExampleId": 1137150691,
      "UtteranceText": "order a pizza"
    },
    "hasError": false
  },
  {
    "value": {
      "ExampleId": 1137150692,
      "UtteranceText": "order a large pepperoni pizza"
    },
    "hasError": false
  },
  {
    "value": {
      "ExampleId": 1137150693,
      "UtteranceText": "i want two large pepperoni pizzas on thin crust"
    },
    "hasError": false
  }
]
training selected
body

    202
{
  "statusId": 9,
  "status": "Queued"
}
training status selected
body

    200
[
  {
    "modelId": "edb46abf-0000-41ab-beb2-a41a0fe1630f",
    "details": {
      "statusId": 9,
      "status": "Queued",
      "exampleCount": 0
    }
  },
  {
    "modelId": "a5030be2-616c-4648-bf2f-380fa9417d37",
    "details": {
      "statusId": 9,
      "status": "Queued",
      "exampleCount": 0
    }
  },
  {
    "modelId": "3f2b1f31-a3c3-4fbd-8182-e9d9dbc120b9",
    "details": {
      "statusId": 9,
      "status": "Queued",
      "exampleCount": 0
    }
  },
  {
    "modelId": "e4b6704b-1636-474c-9459-fe9ccbeba51c",
    "details": {
      "statusId": 9,
      "status": "Queued",
      "exampleCount": 0
    }
  },
  {
    "modelId": "031d3777-2a00-4a7a-9323-9a3280a30000",
    "details": {
      "statusId": 9,
      "status": "Queued",
      "exampleCount": 0
    }
  },
  {
    "modelId": "9250e7a1-06eb-4413-9432-ae132ed32583",
    "details": {
      "statusId": 9,
      "status": "Queued",
      "exampleCount": 0
    }
  }
]
리소스 정리
이 빠른 시작을 완료한 후 파일 시스템에서 파일을 삭제합니다.
다음 단계
필수 조건
- Node.js 프로그래밍 언어
- Visual Studio Code
예제 발언 JSON 파일
예제 발화는 특정 형식을 따릅니다.
text 필드에는 예시 발언 텍스트가 포함됩니다. intentName 필드는 LUIS 앱의 기존 의도 이름과 일치해야 합니다. entityLabels 필드는 필수입니다. 엔터티에 레이블을 지정하지 않으려면 빈 배열을 제공하세요.
entityLabels 배열이 비어 있지 않으면 startCharIndex 및 endCharIndex에서 entityName 필드에 언급된 엔터티를 표시해야 합니다. 인덱스는 0부터 시작합니다. 텍스트의 공간에서 레이블을 시작하거나 종료하는 경우 발화를 추가하기 위한 API 호출이 실패합니다.
[
  {
    "text": "order a pizza",
    "intentName": "ModifyOrder",
    "entityLabels": [
      {
        "entityName": "Order",
        "startCharIndex": 6,
        "endCharIndex": 12
      }
    ]
  },
  {
    "text": "order a large pepperoni pizza",
    "intentName": "ModifyOrder",
    "entityLabels": [
      {
        "entityName": "Order",
        "startCharIndex": 6,
        "endCharIndex": 28
      },
      {
        "entityName": "FullPizzaWithModifiers",
        "startCharIndex": 6,
        "endCharIndex": 28
      },
      {
        "entityName": "PizzaType",
        "startCharIndex": 14,
        "endCharIndex": 28
      },
      {
        "entityName": "Size",
        "startCharIndex": 8,
        "endCharIndex": 12
      }
    ]
  },
  {
    "text": "I want two large pepperoni pizzas on thin crust",
    "intentName": "ModifyOrder",
    "entityLabels": [
      {
        "entityName": "Order",
        "startCharIndex": 7,
        "endCharIndex": 46
      },
      {
        "entityName": "FullPizzaWithModifiers",
        "startCharIndex": 7,
        "endCharIndex": 46
      },
      {
        "entityName": "PizzaType",
        "startCharIndex": 17,
        "endCharIndex": 32
      },
      {
        "entityName": "Size",
        "startCharIndex": 11,
        "endCharIndex": 15
      },
      {
        "entityName": "Quantity",
        "startCharIndex": 7,
        "endCharIndex": 9
      },
      {
        "entityName": "Crust",
        "startCharIndex": 37,
        "endCharIndex": 46
      }
    ]
  }
]
Node.js 프로젝트 만들기
node-model-with-rest와 같은 Node.js 프로젝트를 보관할 새 폴더를 만듭니다.새 명령 프롬프트를 열어 만든 폴더로 이동하고 다음 명령을 실행합니다.
npm init각 프롬프트에서 Enter를 눌러 기본 설정을 적용합니다.
다음 명령을 입력하여 요청 약속 모듈을 설치합니다.
npm install --save request
npm install --save request-promise
npm install --save querystring
프로그래밍 방식으로 모델 변경
이름이
model.js인 새 파일을 만듭니다. 다음 코드를 추가합니다.// // This quickstart shows how to add utterances to a LUIS model using the REST APIs. // var request = require('request-promise'); ////////// // Values to modify. // YOUR-APP-ID: The App ID GUID found on the www.luis.ai Application Settings page. const LUIS_appId = "PASTE_YOUR_LUIS_APP_ID_HERE"; // YOUR-AUTHORING-KEY: Your LUIS authoring key, 32 character value. const LUIS_authoringKey = "PASTE_YOUR_LUIS_AUTHORING_SUBSCRIPTION_KEY_HERE"; // YOUR-AUTHORING-ENDPOINT: Replace this with your authoring key endpoint. // For example, "https://your-resource-name.cognitiveservices.azure.com/" const LUIS_endpoint = "PASTE_YOUR_LUIS_AUTHORING_ENDPOINT_HERE"; // NOTE: Replace this your version number. The Pizza app uses a version number of "0.1". const LUIS_versionId = "0.1"; ////////// const addUtterancesURI = `${LUIS_endpoint}luis/authoring/v3.0-preview/apps/${LUIS_appId}/versions/${LUIS_versionId}/examples`; const addTrainURI = `${LUIS_endpoint}luis/authoring/v3.0-preview/apps/${LUIS_appId}/versions/${LUIS_versionId}/train`; const utterances = [ { 'text': 'order a pizza', 'intentName': 'ModifyOrder', 'entityLabels': [ { 'entityName': 'Order', 'startCharIndex': 6, 'endCharIndex': 12 } ] }, { 'text': 'order a large pepperoni pizza', 'intentName': 'ModifyOrder', 'entityLabels': [ { 'entityName': 'Order', 'startCharIndex': 6, 'endCharIndex': 28 }, { 'entityName': 'FullPizzaWithModifiers', 'startCharIndex': 6, 'endCharIndex': 28 }, { 'entityName': 'PizzaType', 'startCharIndex': 14, 'endCharIndex': 28 }, { 'entityName': 'Size', 'startCharIndex': 8, 'endCharIndex': 12 } ] }, { 'text': 'I want two large pepperoni pizzas on thin crust', 'intentName': 'ModifyOrder', 'entityLabels': [ { 'entityName': 'Order', 'startCharIndex': 7, 'endCharIndex': 46 }, { 'entityName': 'FullPizzaWithModifiers', 'startCharIndex': 7, 'endCharIndex': 46 }, { 'entityName': 'PizzaType', 'startCharIndex': 17, 'endCharIndex': 32 }, { 'entityName': 'Size', 'startCharIndex': 11, 'endCharIndex': 15 }, { 'entityName': 'Quantity', 'startCharIndex': 7, 'endCharIndex': 9 }, { 'entityName': 'Crust', 'startCharIndex': 37, 'endCharIndex': 46 } ] } ]; // Main function. const main = async() =>{ await addUtterances(utterances); await train("POST"); await train("GET"); } // Adds the utterances to the model. const addUtterances = async (utterances) => { const options = { uri: addUtterancesURI, method: 'POST', headers: { 'Ocp-Apim-Subscription-Key': LUIS_authoringKey }, json: true, body: utterances }; const response = await request(options) console.log("addUtterance:\n" + JSON.stringify(response, null, 2)); } // With verb === "POST", sends a training request. // With verb === "GET", obtains the training status. const train = async (verb) => { const options = { uri: addTrainURI, method: verb, headers: { 'Ocp-Apim-Subscription-Key': LUIS_authoringKey }, json: true, body: null // The body can be empty for a training request }; const response = await request(options) console.log("train " + verb + ":\n" + JSON.stringify(response, null, 2)); } // MAIN main().then(() => console.log("done")).catch((err)=> console.log(err));YOUR-에서 시작하는 값을 고유한 값으로 바꿉니다.정보 목적 YOUR-APP-IDLUIS 앱 ID입니다. YOUR-AUTHORING-KEY32자 작성 키입니다. YOUR-AUTHORING-ENDPOINT작성 URL 엔드포인트입니다. 예: https://replace-with-your-resource-name.api.cognitive.microsoft.com/. 리소스를 만들 때 리소스 이름을 설정합니다.할당된 키와 리소스는 Azure Resources 페이지의 관리 섹션에 있는 LUIS 포털에 표시됩니다. 앱 ID는 애플리케이션 설정 페이지의 동일한 관리 섹션에서 사용할 수 있습니다.
Important
완료되면 코드에서 키를 제거하고 공개적으로 게시하지 마세요. 프로덕션의 경우 Azure Key Vault와 같은 자격 증명을 안전하게 저장하고 액세스하는 방법을 사용합니다. 자세한 내용은 Azure AI 서비스 보안 문서를 참조하세요.
명령 프롬프트에서 다음 명령을 입력하여 프로젝트를 실행합니다.
node model.js제작 응답을 검토합니다.
addUtterance:
[
  {
    "value": {
      "ExampleId": 1137150691,
      "UtteranceText": "order a pizza"
    },
    "hasError": false
  },
  {
    "value": {
      "ExampleId": 1137150692,
      "UtteranceText": "order a large pepperoni pizza"
    },
    "hasError": false
  },
  {
    "value": {
      "ExampleId": 1137150693,
      "UtteranceText": "i want two large pepperoni pizzas on thin crust"
    },
    "hasError": false
  }
]
train POST:
{
  "statusId": 9,
  "status": "Queued"
}
train GET:
[
  {
    "modelId": "edb46abf-0000-41ab-beb2-a41a0fe1630f",
    "details": {
      "statusId": 9,
      "status": "Queued",
      "exampleCount": 0
    }
  },
  {
    "modelId": "a5030be2-616c-4648-bf2f-380fa9417d37",
    "details": {
      "statusId": 9,
      "status": "Queued",
      "exampleCount": 0
    }
  },
  {
    "modelId": "3f2b1f31-a3c3-4fbd-8182-e9d9dbc120b9",
    "details": {
      "statusId": 9,
      "status": "Queued",
      "exampleCount": 0
    }
  },
  {
    "modelId": "e4b6704b-1636-474c-9459-fe9ccbeba51c",
    "details": {
      "statusId": 9,
      "status": "Queued",
      "exampleCount": 0
    }
  },
  {
    "modelId": "031d3777-2a00-4a7a-9323-9a3280a30000",
    "details": {
      "statusId": 9,
      "status": "Queued",
      "exampleCount": 0
    }
  },
  {
    "modelId": "9250e7a1-06eb-4413-9432-ae132ed32583",
    "details": {
      "statusId": 9,
      "status": "Queued",
      "exampleCount": 0
    }
  }
]
done
리소스 정리
이 빠른 시작을 완료하면 파일 시스템에서 파일을 삭제합니다.
다음 단계
필수 조건
예제 발언 JSON 파일
예제 발화는 특정 형식을 따릅니다.
text 필드에는 예시 발언 텍스트가 포함됩니다. intentName 필드는 LUIS 앱의 기존 의도 이름과 일치해야 합니다. entityLabels 필드는 필수입니다. 엔터티에 레이블을 지정하지 않으려면 빈 배열을 제공하세요.
entityLabels 배열이 비어 있지 않으면 startCharIndex 및 endCharIndex에서 entityName 필드에 언급된 엔터티를 표시해야 합니다. 인덱스는 0부터 시작합니다. 텍스트의 공간에서 레이블을 시작하거나 종료하는 경우 발화를 추가하기 위한 API 호출이 실패합니다.
[
  {
    "text": "order a pizza",
    "intentName": "ModifyOrder",
    "entityLabels": [
      {
        "entityName": "Order",
        "startCharIndex": 6,
        "endCharIndex": 12
      }
    ]
  },
  {
    "text": "order a large pepperoni pizza",
    "intentName": "ModifyOrder",
    "entityLabels": [
      {
        "entityName": "Order",
        "startCharIndex": 6,
        "endCharIndex": 28
      },
      {
        "entityName": "FullPizzaWithModifiers",
        "startCharIndex": 6,
        "endCharIndex": 28
      },
      {
        "entityName": "PizzaType",
        "startCharIndex": 14,
        "endCharIndex": 28
      },
      {
        "entityName": "Size",
        "startCharIndex": 8,
        "endCharIndex": 12
      }
    ]
  },
  {
    "text": "I want two large pepperoni pizzas on thin crust",
    "intentName": "ModifyOrder",
    "entityLabels": [
      {
        "entityName": "Order",
        "startCharIndex": 7,
        "endCharIndex": 46
      },
      {
        "entityName": "FullPizzaWithModifiers",
        "startCharIndex": 7,
        "endCharIndex": 46
      },
      {
        "entityName": "PizzaType",
        "startCharIndex": 17,
        "endCharIndex": 32
      },
      {
        "entityName": "Size",
        "startCharIndex": 11,
        "endCharIndex": 15
      },
      {
        "entityName": "Quantity",
        "startCharIndex": 7,
        "endCharIndex": 9
      },
      {
        "entityName": "Crust",
        "startCharIndex": 37,
        "endCharIndex": 46
      }
    ]
  }
]
Pizza 앱 만들기
Pizza 앱 만들기
- pizza-app-for-luis-v6.json을 선택하여
pizza-app-for-luis.json파일에 대한 GitHub 페이지를 엽니다. - Raw 단추를 마우스 오른쪽 단추로 클릭하거나 길게 누르고 다른 이름으로 링크 저장을 선택하여
pizza-app-for-luis.json을 컴퓨터에 저장합니다. - LUIS 포털에 로그인합니다.
- 내 앱을 선택합니다.
- 내 앱 페이지에서 + 대화용 새 앱을 선택합니다.
- JSON으로 가져오기를 선택합니다.
- 새 앱 가져오기 대화 상자에서 파일 선택 단추를 선택합니다.
- 다운로드한
pizza-app-for-luis.json파일을 선택한 다음, 열기를 선택합니다. - 새 앱 가져오기 대화 상자의 이름 필드에 Pizza 앱의 이름을 입력한 다음, 완료 단추를 선택합니다.
앱을 가져옵니다.
효과적인 LUIS 앱을 만드는 방법 대화 상자가 표시되면 대화 상자를 닫습니다.
Pizza 앱 학습 및 게시
의도 페이지가 Pizza 앱의 의도 목록과 함께 표시되어야 합니다.
LUIS 웹 사이트의 오른쪽 위에서 학습 단추를 선택합니다.
학습 단추가 사용하지 않도록 설정되어 있으면 학습이 완료된 것입니다.
챗봇 또는 다른 클라이언트 애플리케이션에서 LUIS 예측을 받으려면 앱을 예측 엔드포인트에 게시해야 합니다.
오른쪽 위 탐색에서 게시를 선택합니다.
프로덕션 슬롯을 선택한 다음, 완료를 선택합니다.
알림에서 엔드포인트 URL에 액세스를 선택하여 Azure 리소스 페이지로 이동합니다. 앱과 연결된 예측 리소스가 있는 경우에만 URL을 볼 수 있습니다. 관리를 클릭하여 Azure 리소스 페이지를 찾을 수도 있습니다.
Pizza 앱에 제작 리소스 추가
- 관리를 선택합니다.
- Azure 리소스를 선택합니다.
- 제작 리소스를 선택합니다.
- 제작 리소스 변경을 선택합니다.
제작 리소스가 있는 경우 제작 리소스의 테넌트 이름, 구독 이름 및 LUIS 리소스 이름을 입력합니다.
제작 리소스가 없는 경우
- 새 리소스 만들기를 선택합니다.
- 테넌트 이름, 리소스 이름, 구독 이름 및 Azure 리소스 그룹 이름을 입력합니다.
이제 Pizza 앱을 사용할 준비가 되었습니다.
피자 앱에 대한 액세스 값 기록
새 Pizza 앱을 사용하려면 Pizza 앱의 앱 ID, 제작 키 및 제작 엔드포인트가 필요합니다. 예측을 가져오려면 별도의 예측 엔드포인트와 예측 키가 필요합니다.
이러한 값을 찾으려면 다음을 수행합니다.
- 의도 페이지에서 관리를 선택합니다.
- 애플리케이션 설정 페이지에서 앱 ID를 기록합니다.
- Azure 리소스를 선택합니다.
- 제작 리소스를 선택합니다.
- 작성 리소스 및 예측 리소스 탭에서 기본 키를 기록합니다. 이 값은 제작 키입니다.
- 엔드포인트 URL을 기록합니다. 이 값은 제작 엔드포인트입니다.
프로그래밍 방식으로 모델 변경
이름이
model.py인 새 파일을 만듭니다. 다음 코드를 추가합니다.########### Python 3.6 ############# # # This quickstart shows how to add utterances to a LUIS model using the REST APIs. # import requests try: ########## # Values to modify. # YOUR-APP-ID: The App ID GUID found on the www.luis.ai Application Settings page. appId = "PASTE_YOUR_LUIS_APP_ID_HERE" # YOUR-AUTHORING-KEY: Your LUIS authoring key, 32 character value. authoring_key = "PASTE_YOUR_LUIS_AUTHORING_SUBSCRIPTION_KEY_HERE" # YOUR-AUTHORING-ENDPOINT: Replace this with your authoring key endpoint. # For example, "https://your-resource-name.cognitiveservices.azure.com/" authoring_endpoint = "PASTE_YOUR_LUIS_AUTHORING_ENDPOINT_HERE" # The version number of your LUIS app app_version = "0.1" ########## # The headers to use in this REST call. headers = {'Ocp-Apim-Subscription-Key': authoring_key} # The URL parameters to use in this REST call. params ={ #'timezoneOffset': '0', #'verbose': 'true', #'show-all-intents': 'true', #'spellCheck': 'false', #'staging': 'false' } # List of example utterances to send to the LUIS app. data = """[ { 'text': 'order a pizza', 'intentName': 'ModifyOrder', 'entityLabels': [ { 'entityName': 'Order', 'startCharIndex': 6, 'endCharIndex': 12 } ] }, { 'text': 'order a large pepperoni pizza', 'intentName': 'ModifyOrder', 'entityLabels': [ { 'entityName': 'Order', 'startCharIndex': 6, 'endCharIndex': 28 }, { 'entityName': 'FullPizzaWithModifiers', 'startCharIndex': 6, 'endCharIndex': 28 }, { 'entityName': 'PizzaType', 'startCharIndex': 14, 'endCharIndex': 28 }, { 'entityName': 'Size', 'startCharIndex': 8, 'endCharIndex': 12 } ] }, { 'text': 'I want two large pepperoni pizzas on thin crust', 'intentName': 'ModifyOrder', 'entityLabels': [ { 'entityName': 'Order', 'startCharIndex': 7, 'endCharIndex': 46 }, { 'entityName': 'FullPizzaWithModifiers', 'startCharIndex': 7, 'endCharIndex': 46 }, { 'entityName': 'PizzaType', 'startCharIndex': 17, 'endCharIndex': 32 }, { 'entityName': 'Size', 'startCharIndex': 11, 'endCharIndex': 15 }, { 'entityName': 'Quantity', 'startCharIndex': 7, 'endCharIndex': 9 }, { 'entityName': 'Crust', 'startCharIndex': 37, 'endCharIndex': 46 } ] } ] """ # Make the REST call to POST the list of example utterances. response = requests.post(f'{authoring_endpoint}luis/authoring/v3.0-preview/apps/{appId}/versions/{app_version}/examples', headers=headers, params=params, data=data) # Display the results on the console. print('Add the list of utterances:') print(response.json()) # Make the REST call to initiate a training session. response = requests.post(f'{authoring_endpoint}luis/authoring/v3.0-preview/apps/{appId}/versions/{app_version}/train', headers=headers, params=params, data=None) # Display the results on the console. print('Request training:') print(response.json()) # Make the REST call to request the status of training. response = requests.get(f'{authoring_endpoint}luis/authoring/v3.0-preview/apps/{appId}/versions/{app_version}/train', headers=headers, params=params, data=None) # Display the results on the console. print('Request training status:') print(response.json()) except Exception as e: # Display the error string. print(f'{e}')YOUR-에서 시작하는 값을 고유한 값으로 바꿉니다.정보 목적 YOUR-APP-IDLUIS 앱 ID입니다. YOUR-AUTHORING-KEY32자 작성 키입니다. YOUR-AUTHORING-ENDPOINT작성 URL 엔드포인트입니다. 예: https://replace-with-your-resource-name.api.cognitive.microsoft.com/. 리소스를 만들 때 리소스 이름을 설정합니다.할당된 키와 리소스는 Azure Resources 페이지의 관리 섹션에 있는 LUIS 포털에 표시됩니다. 앱 ID는 애플리케이션 설정 페이지의 동일한 관리 섹션에서 사용할 수 있습니다.
Important
완료되면 코드에서 키를 제거하고 공개적으로 게시하지 마세요. 프로덕션의 경우 Azure Key Vault와 같은 자격 증명을 안전하게 저장하고 액세스하는 방법을 사용합니다. 자세한 내용은 Azure AI 서비스 보안 문서를 참조하세요.
파일을 만든 위치와 같은 디렉터리에서 명령 프롬프트에 다음 명령을 입력하여 파일을 실행합니다.
python model.py제작 응답을 검토합니다.
Add the list of utterances:
[{'value': {'ExampleId': 1137150691, 'UtteranceText': 'order a pizza'}, 'hasError': False}, {'value': {'ExampleId': 1137150692, 'UtteranceText': 'order a large pepperoni pizza'}, 'hasError': False}, {'value': {'ExampleId': 1137150693, 'UtteranceText': 'i want two large pepperoni pizzas on thin crust'}, 'hasError': False}]
Request training:
{'statusId': 9, 'status': 'Queued'}
Request training status:
[{'modelId': 'edb46abf-0000-41ab-beb2-a41a0fe1630f', 'details': {'statusId': 3, 'status': 'InProgress', 'exampleCount': 0, 'progressSubstatus': 'CollectingData'}}, {'modelId': 'a5030be2-616c-4648-bf2f-380fa9417d37', 'details': {'statusId': 3, 'status': 'InProgress', 'exampleCount': 0, 'progressSubstatus': 'CollectingData'}}, {'modelId': '3f2b1f31-a3c3-4fbd-8182-e9d9dbc120b9', 'details': {'statusId': 3, 'status': 'InProgress', 'exampleCount': 0, 'progressSubstatus': 'CollectingData'}}, {'modelId': 'e4b6704b-1636-474c-9459-fe9ccbeba51c', 'details': {'statusId': 3, 'status': 'InProgress', 'exampleCount': 0, 'progressSubstatus': 'CollectingData'}}, {'modelId': '031d3777-2a00-4a7a-9323-9a3280a30000', 'details': {'statusId': 3, 'status': 'InProgress', 'exampleCount': 0, 'progressSubstatus': 'CollectingData'}}, {'modelId': '9250e7a1-06eb-4413-9432-ae132ed32583', 'details': {'statusId': 3, 'status': 'InProgress', 'exampleCount': 0, 'progressSubstatus': 'CollectingData'}}]
가독성을 위해 형식이 지정된 출력은 다음과 같습니다.
Add the list of utterances:
[
  {
    'value': {
      'ExampleId': 1137150691,
      'UtteranceText': 'order a pizza'
    },
    'hasError': False
  },
  {
    'value': {
      'ExampleId': 1137150692,
      'UtteranceText': 'order a large pepperoni pizza'
    },
    'hasError': False
  },
  {
    'value': {
      'ExampleId': 1137150693,
      'UtteranceText': 'i want two large pepperoni pizzas on thin crust'
    },
    'hasError': False
  }
]

Request training:
{
  'statusId': 9,
  'status': 'Queued'
}

Request training status:
[
  {
    'modelId': 'edb46abf-0000-41ab-beb2-a41a0fe1630f',
    'details': {
      'statusId': 3,
      'status': 'InProgress',
      'exampleCount': 0,
      'progressSubstatus': 'CollectingData'
    }
  },
  {
    'modelId': 'a5030be2-616c-4648-bf2f-380fa9417d37',
    'details': {
      'statusId': 3,
      'status': 'InProgress',
      'exampleCount': 0,
      'progressSubstatus': 'CollectingData'
    }
  },
  {
    'modelId': '3f2b1f31-a3c3-4fbd-8182-e9d9dbc120b9',
    'details': {
      'statusId': 3,
      'status': 'InProgress',
      'exampleCount': 0,
      'progressSubstatus': 'CollectingData'
    }
  },
  {
    'modelId': 'e4b6704b-1636-474c-9459-fe9ccbeba51c',
    'details': {
      'statusId': 3,
      'status': 'InProgress',
      'exampleCount': 0,
      'progressSubstatus': 'CollectingData'
    }
  },
  {
    'modelId': '031d3777-2a00-4a7a-9323-9a3280a30000',
    'details': {
      'statusId': 3,
      'status': 'InProgress',
      'exampleCount': 0,
      'progressSubstatus': 'CollectingData'
    }
  },
  {
    'modelId': '9250e7a1-06eb-4413-9432-ae132ed32583',
    'details': {
      'statusId': 3,
      'status': 'InProgress',
      'exampleCount': 0,
      'progressSubstatus': 'CollectingData'
    }
  }
]
리소스 정리
이 빠른 시작을 완료한 후 파일 시스템에서 파일을 삭제합니다.