Azure Data Factory 또는 Synapse Analytics 파이프라인에서 Microsoft Teams 채널로 알림 보내기
파이프라인을 실행 중 또는 실행 후에 알림을 보내야 하는 경우가 많습니다. 알림은 사전 경고를 제공하고 문제를 발견하기 위한 사후 모니터링의 필요성을 줄여줍니다. 데이터 팩터리 또는 Synapse 파이프라인이 호출할 수 있는 논리 앱을 사용하여 메일 알림을 보내는 방법에 관해 알아볼 수 있습니다. 또한 많은 기업에서는 협업을 위해 Microsoft Teams를 점점 더 많이 사용하고 있습니다. 이 문서에서는 파이프라인 경고에서 Microsoft Teams로 보내는 알림을 구성하는 방법을 보여 줍니다.
필수 조건
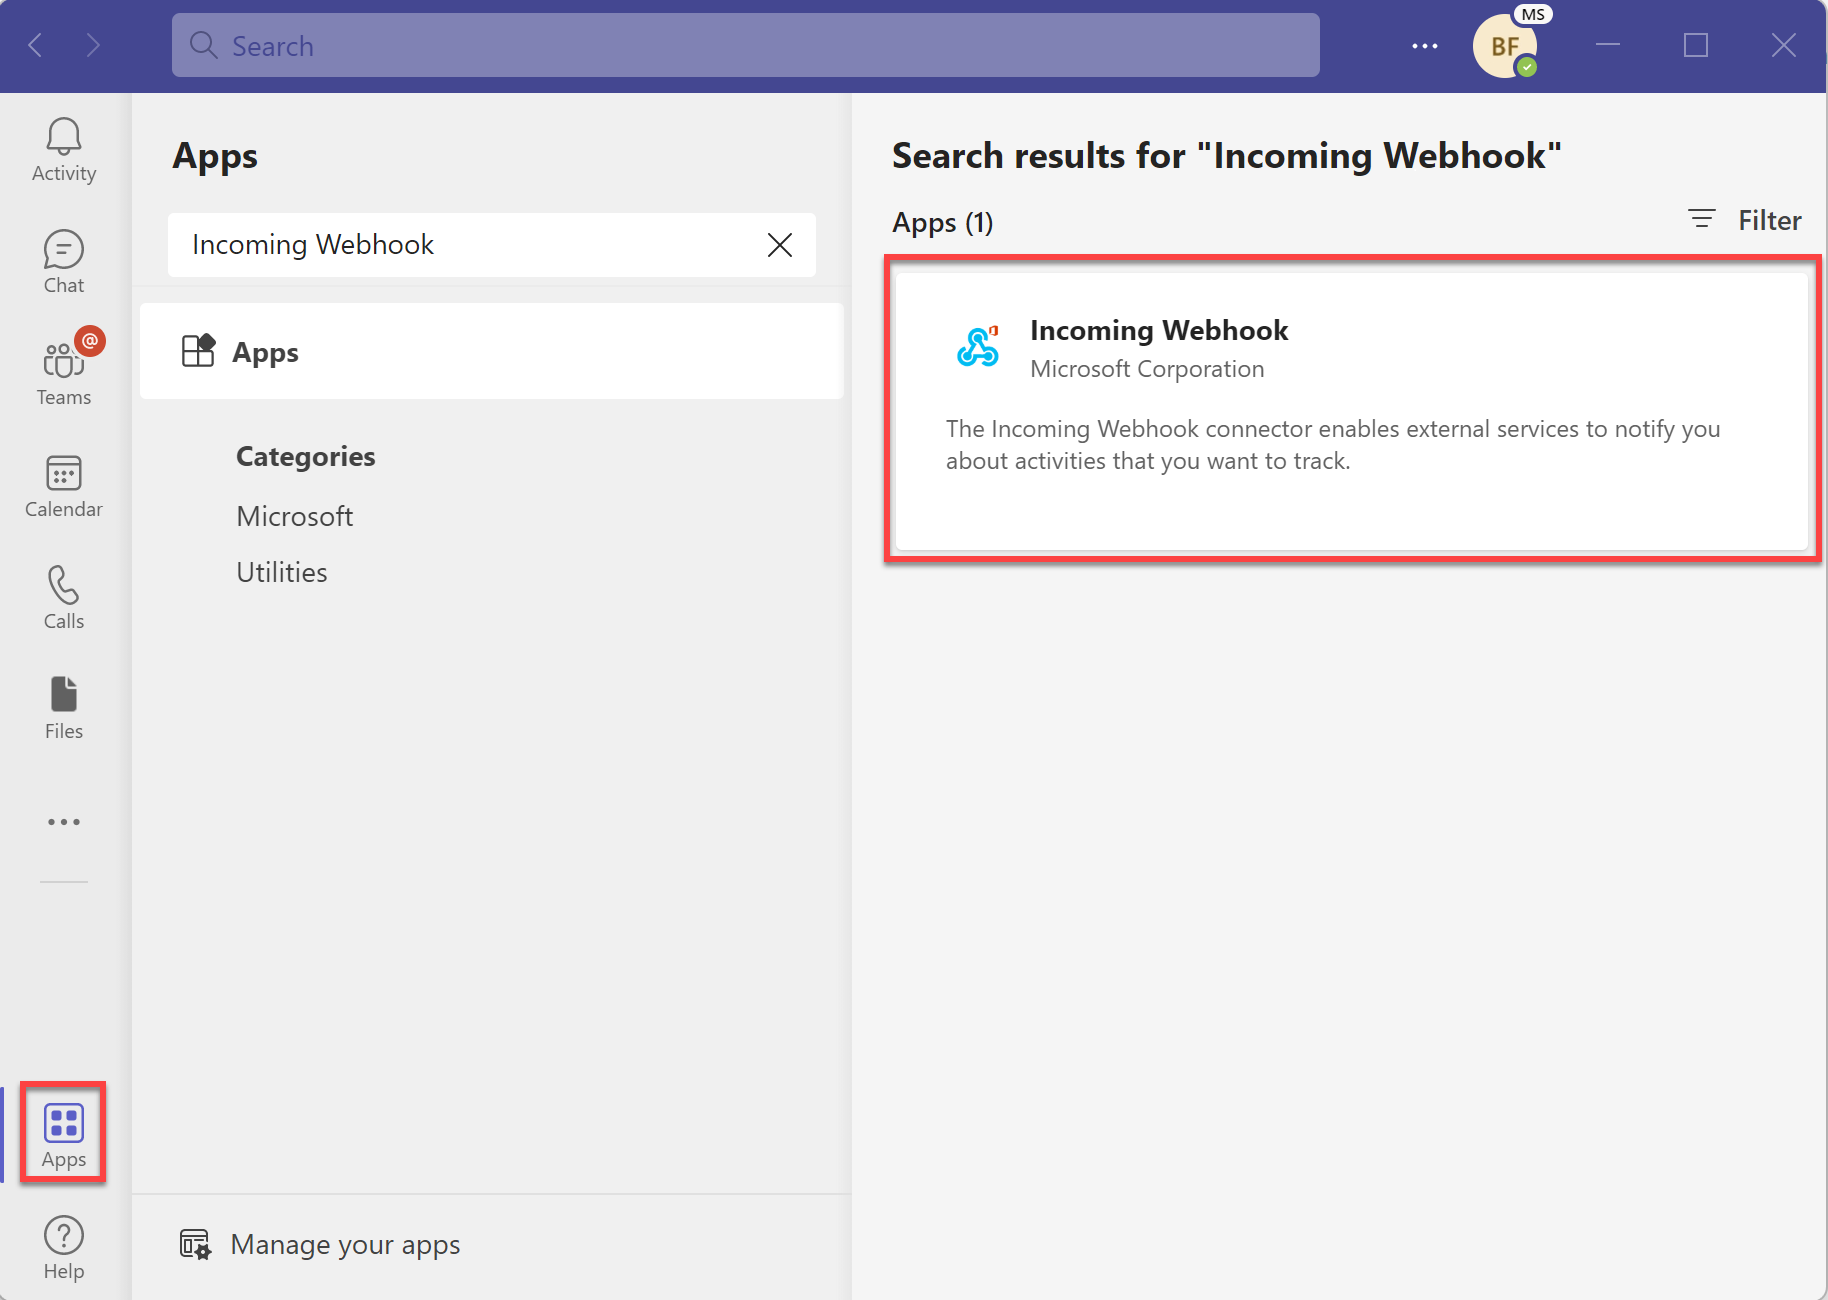
파이프라인에서 Teams로 알림을 보내려면 먼저 Teams 채널에 대한 들어오는 웹후크를 만들어야 합니다. 이를 위해 새 Teams 채널을 만들어야 하는 경우에는 Teams 설명서를 참조하세요.
Microsoft Teams를 열고 {b>앱
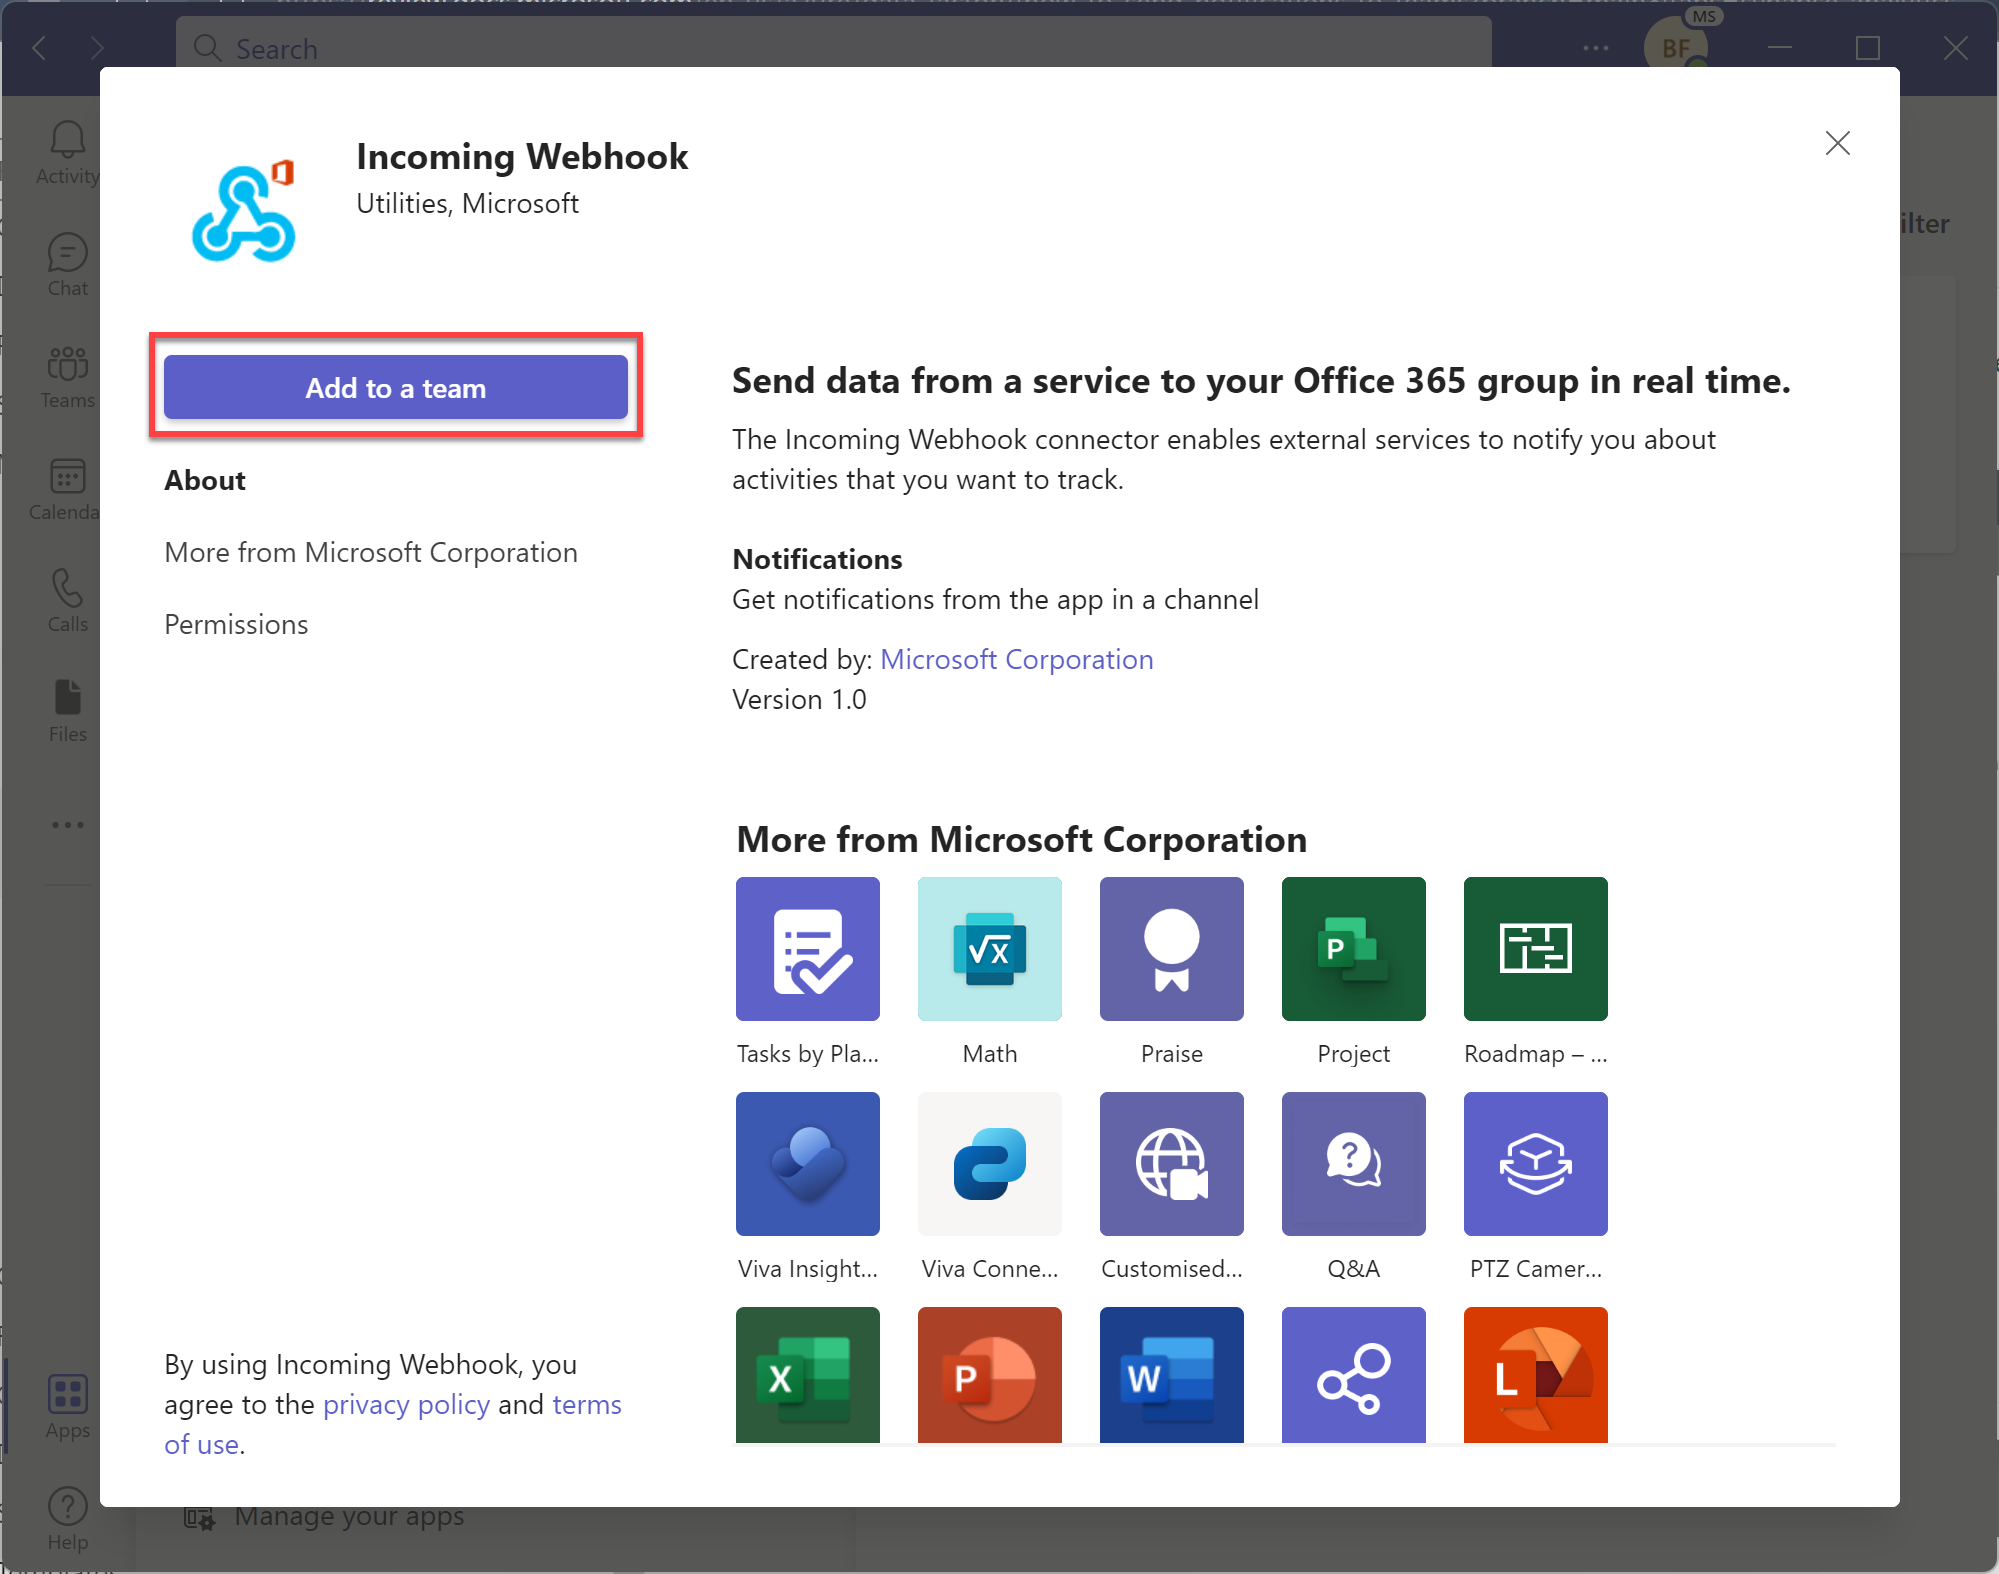
“팀에 추가” 단추를 선택하여 알림을 보낼 팀 또는 팀 채널 이름 사이트에 커넥터를 추가합니다.
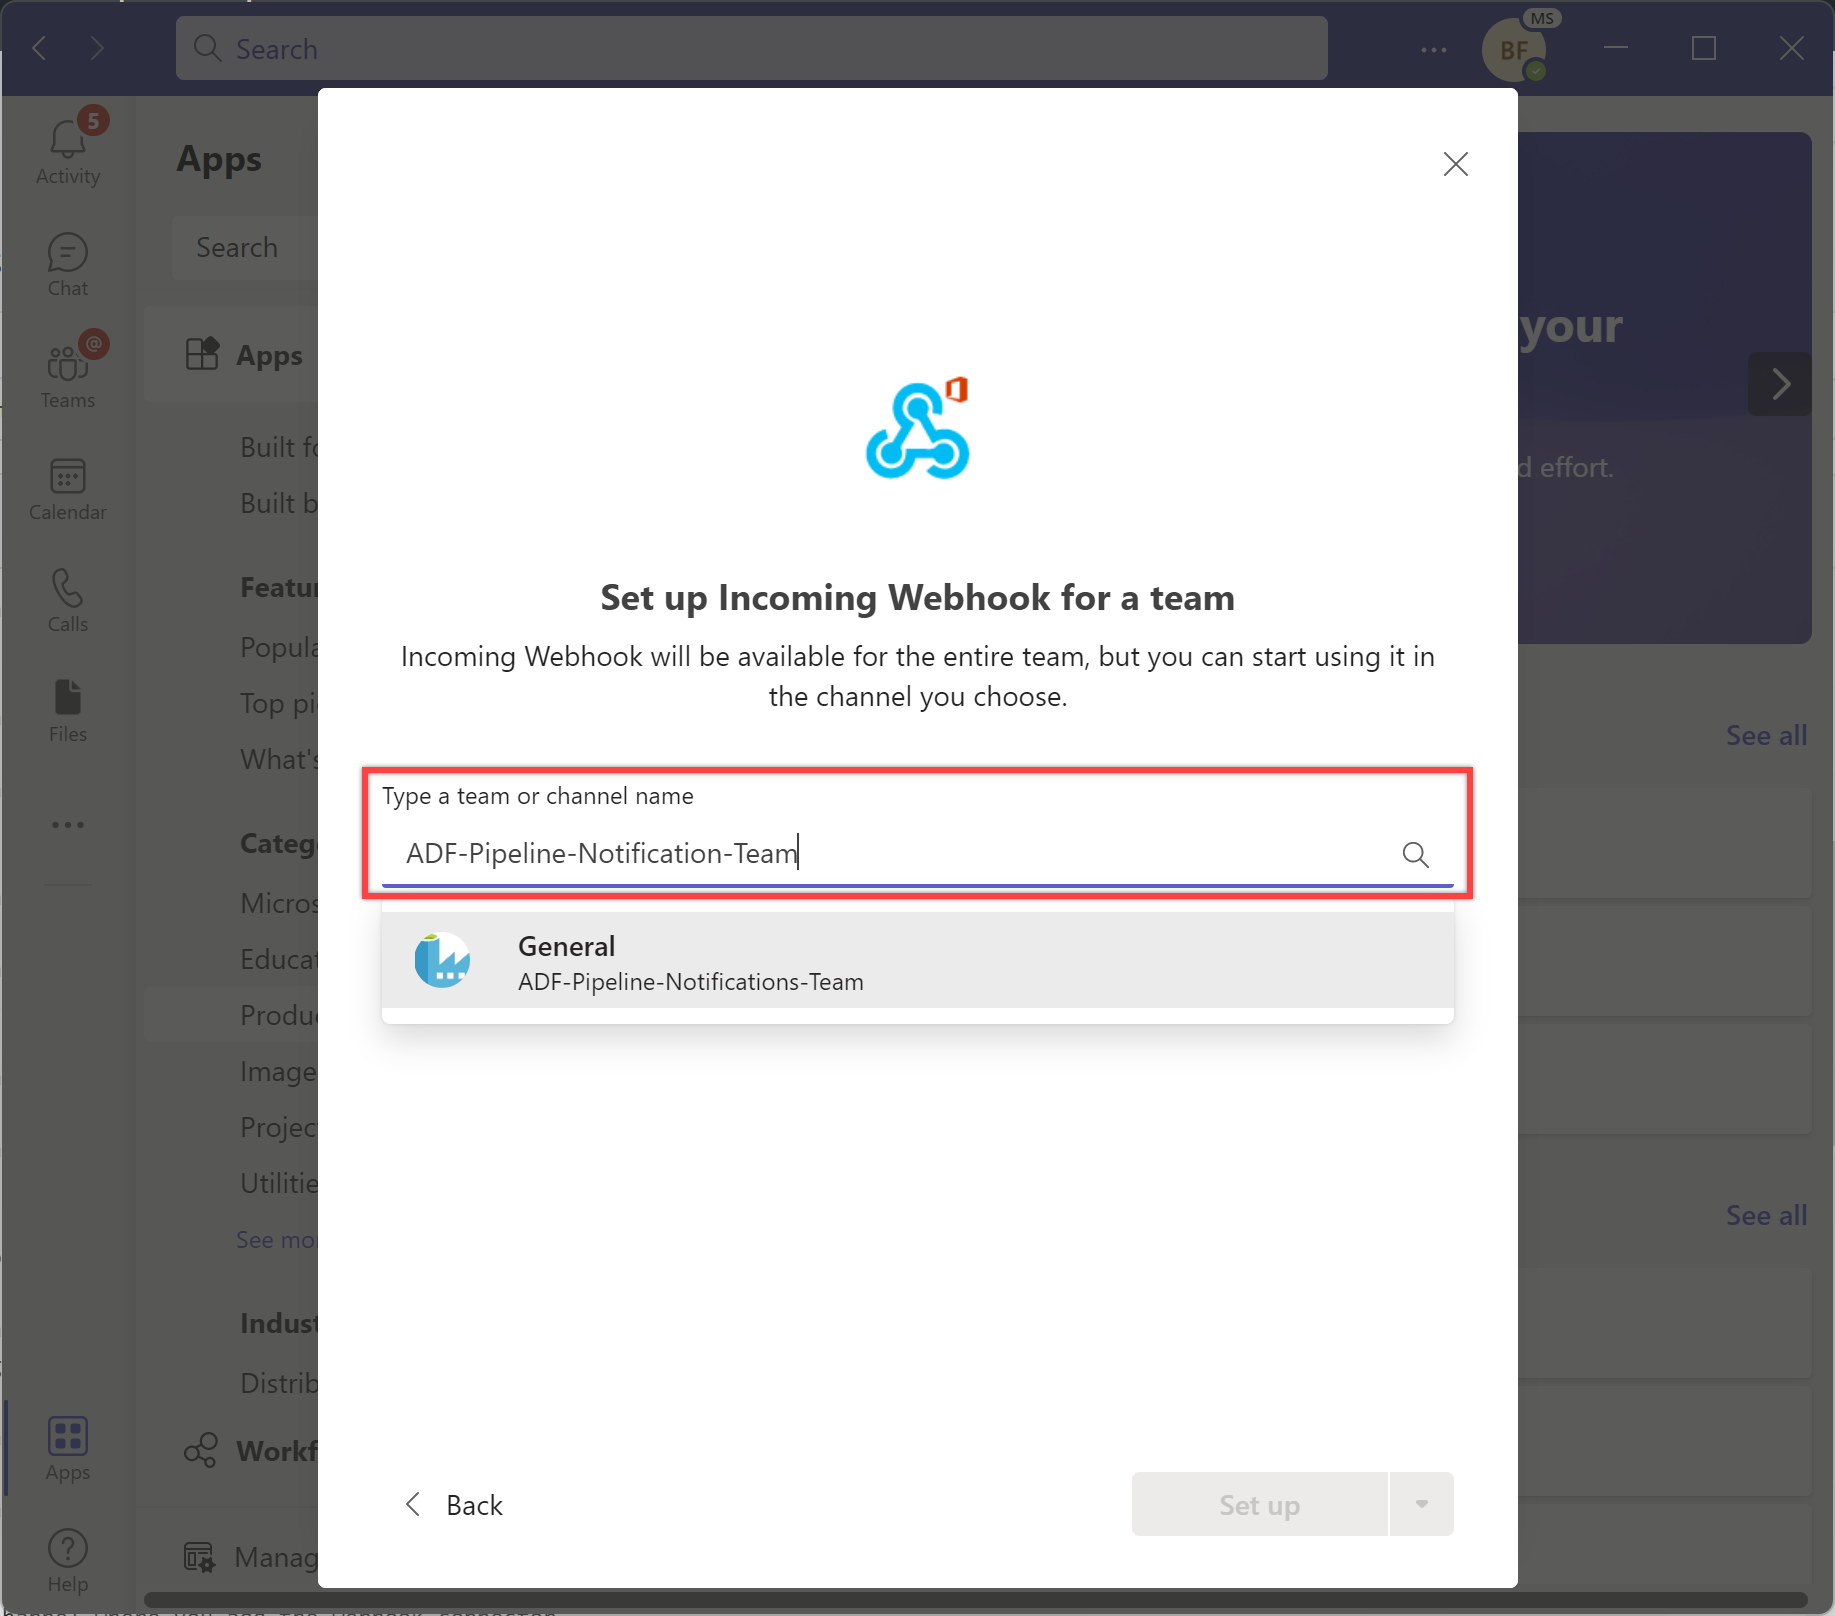
알림을 보낼 팀 또는 팀 채널 이름을 입력하거나 선택합니다.
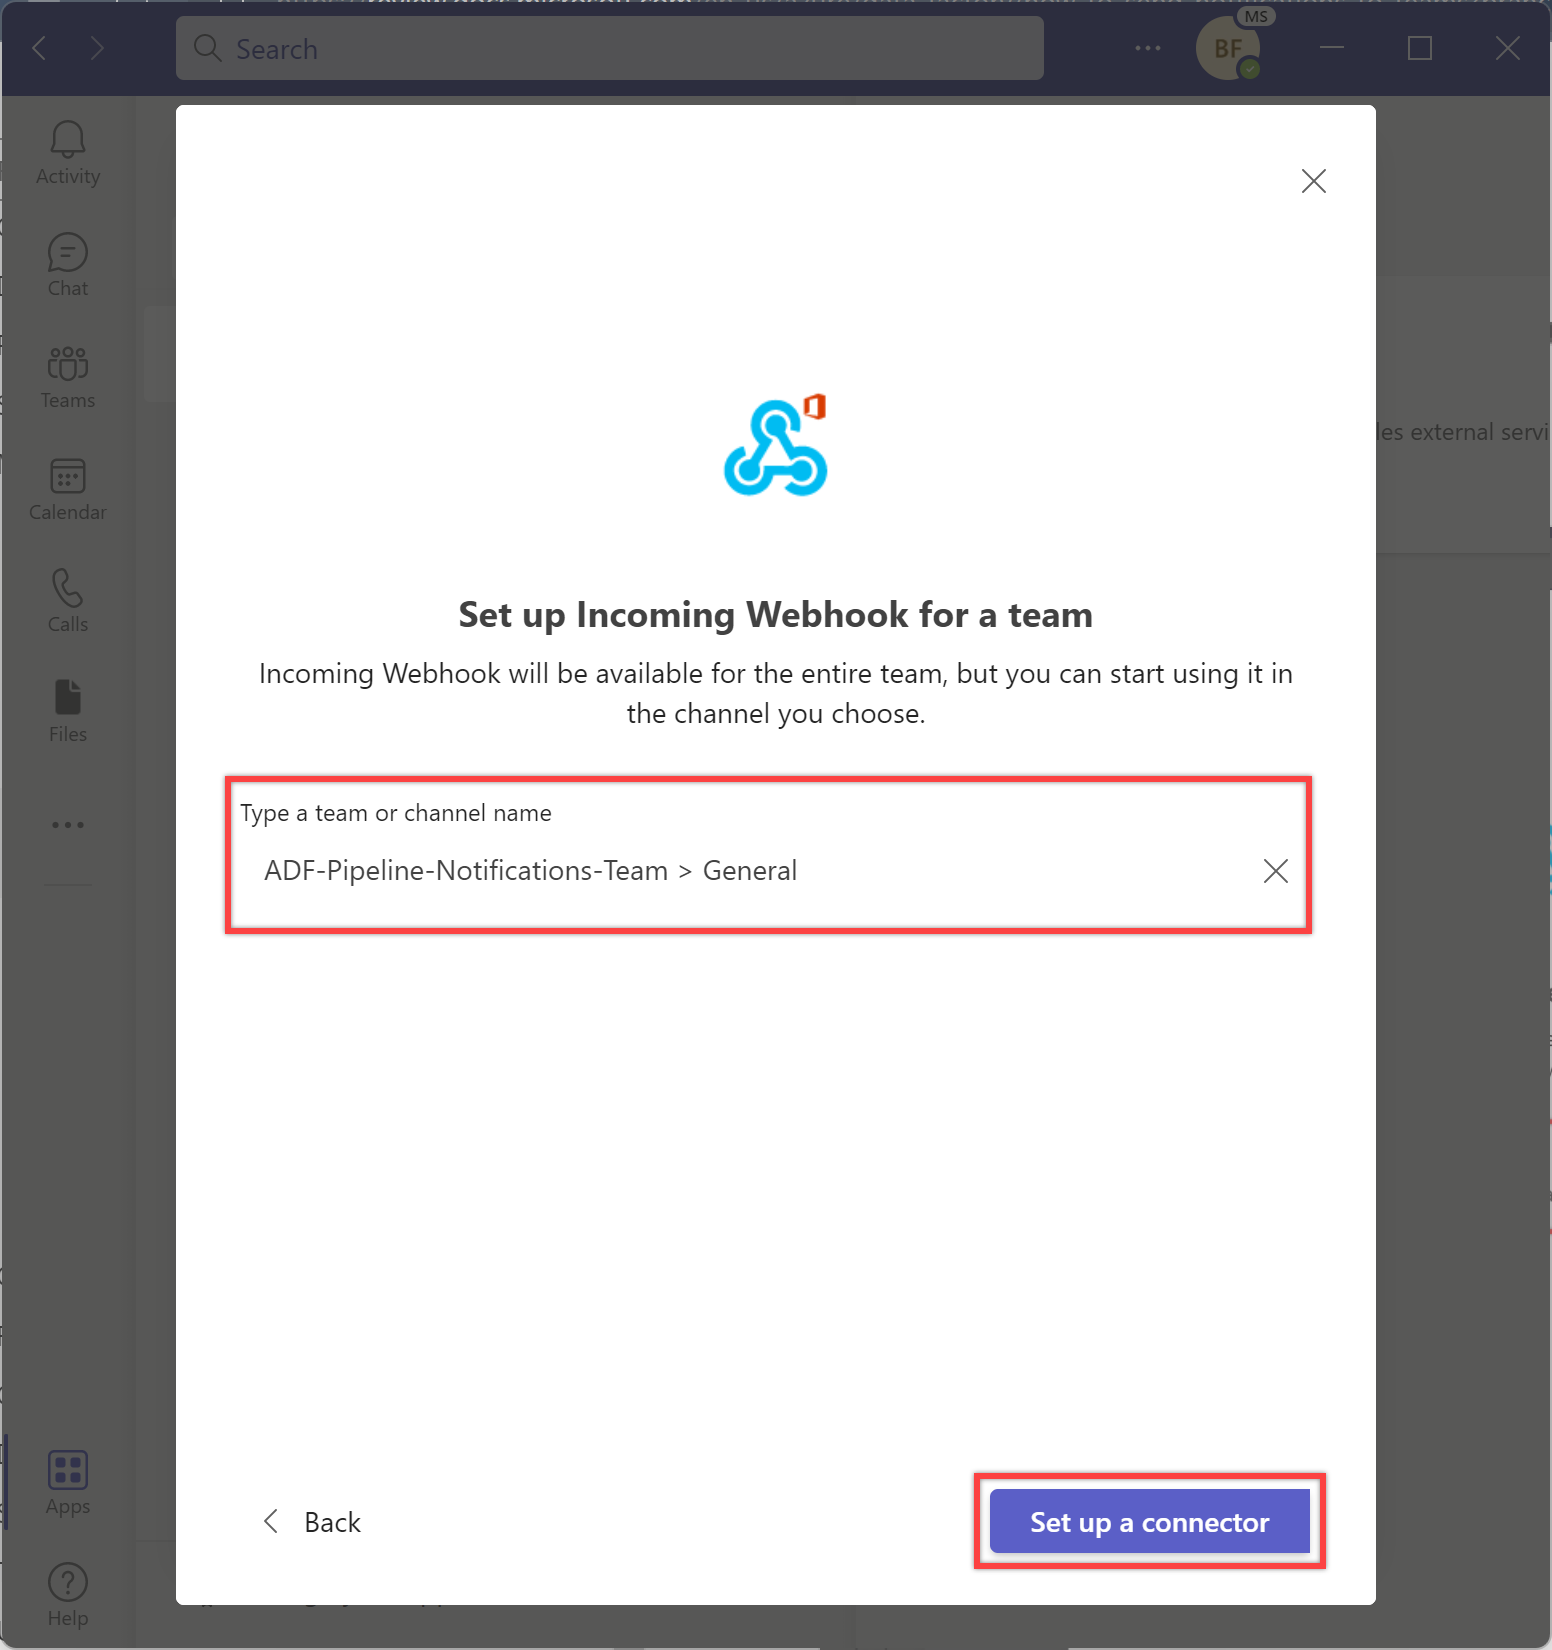
“커넥터 설정” 단추를 선택하여 이전 단계에서 선택한 팀 또는 팀 채널 이름에 대해 들어오는 웹후크를 설정합니다.
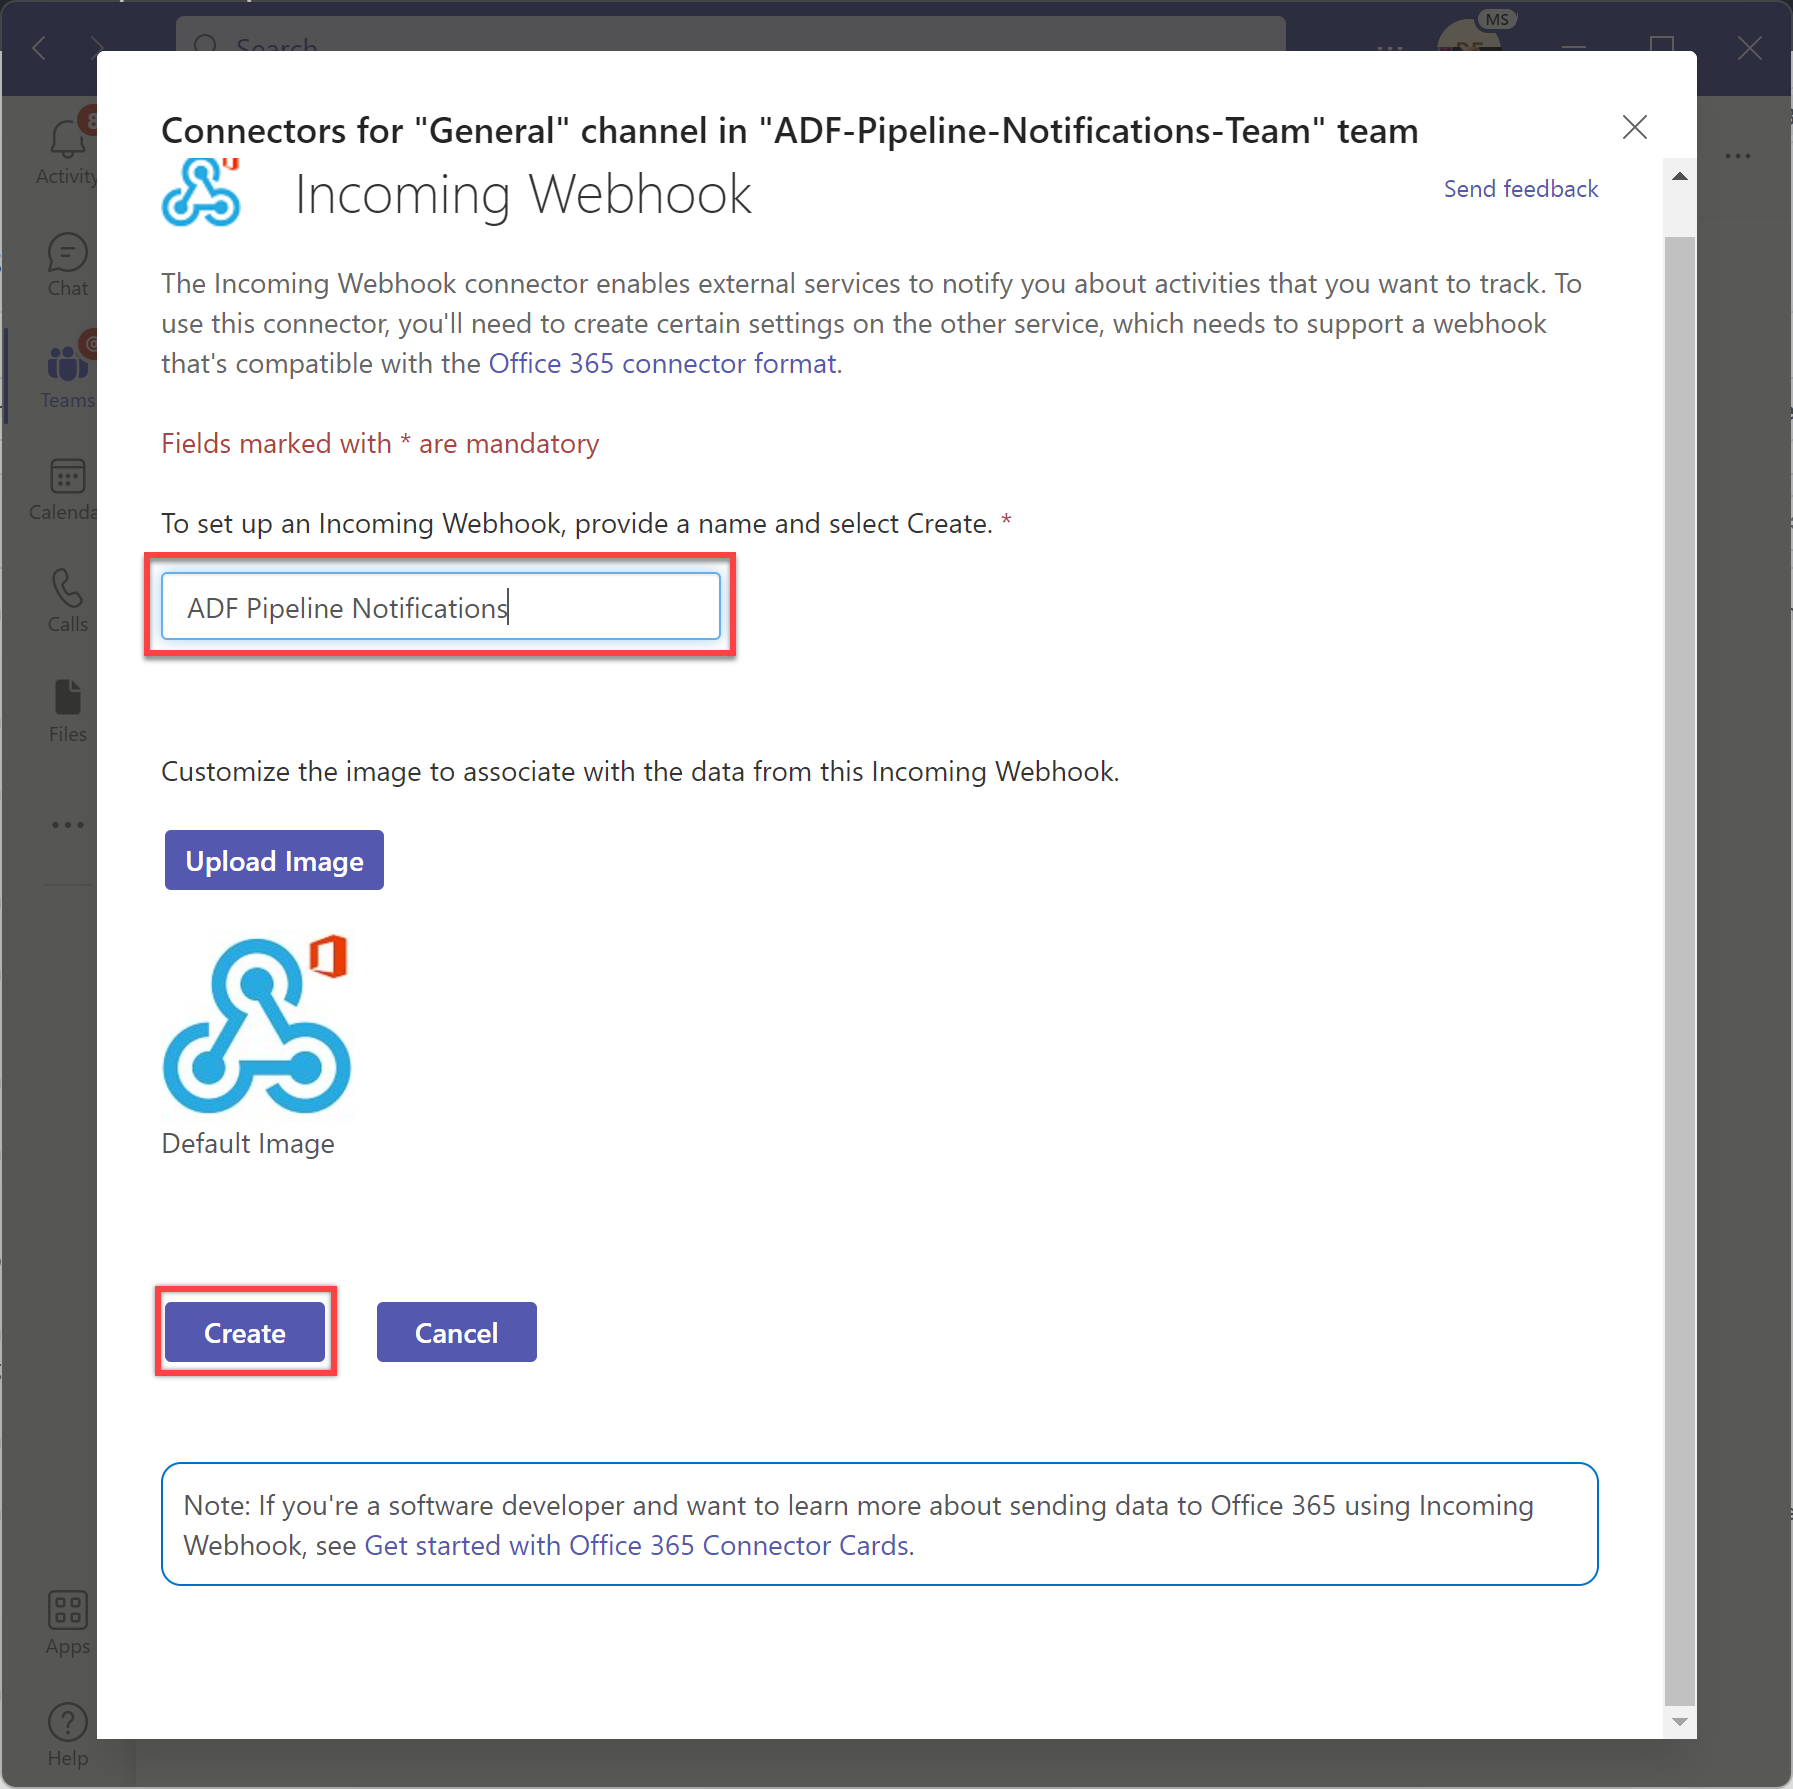
웹후크 이름을 적절하게 지정하고 필요에 따라 메시지를 식별하는 아이콘을 업로드합니다. 그런 다음, “만들기” 단추를 선택하여 들어오는 웹후크를 만듭니다.
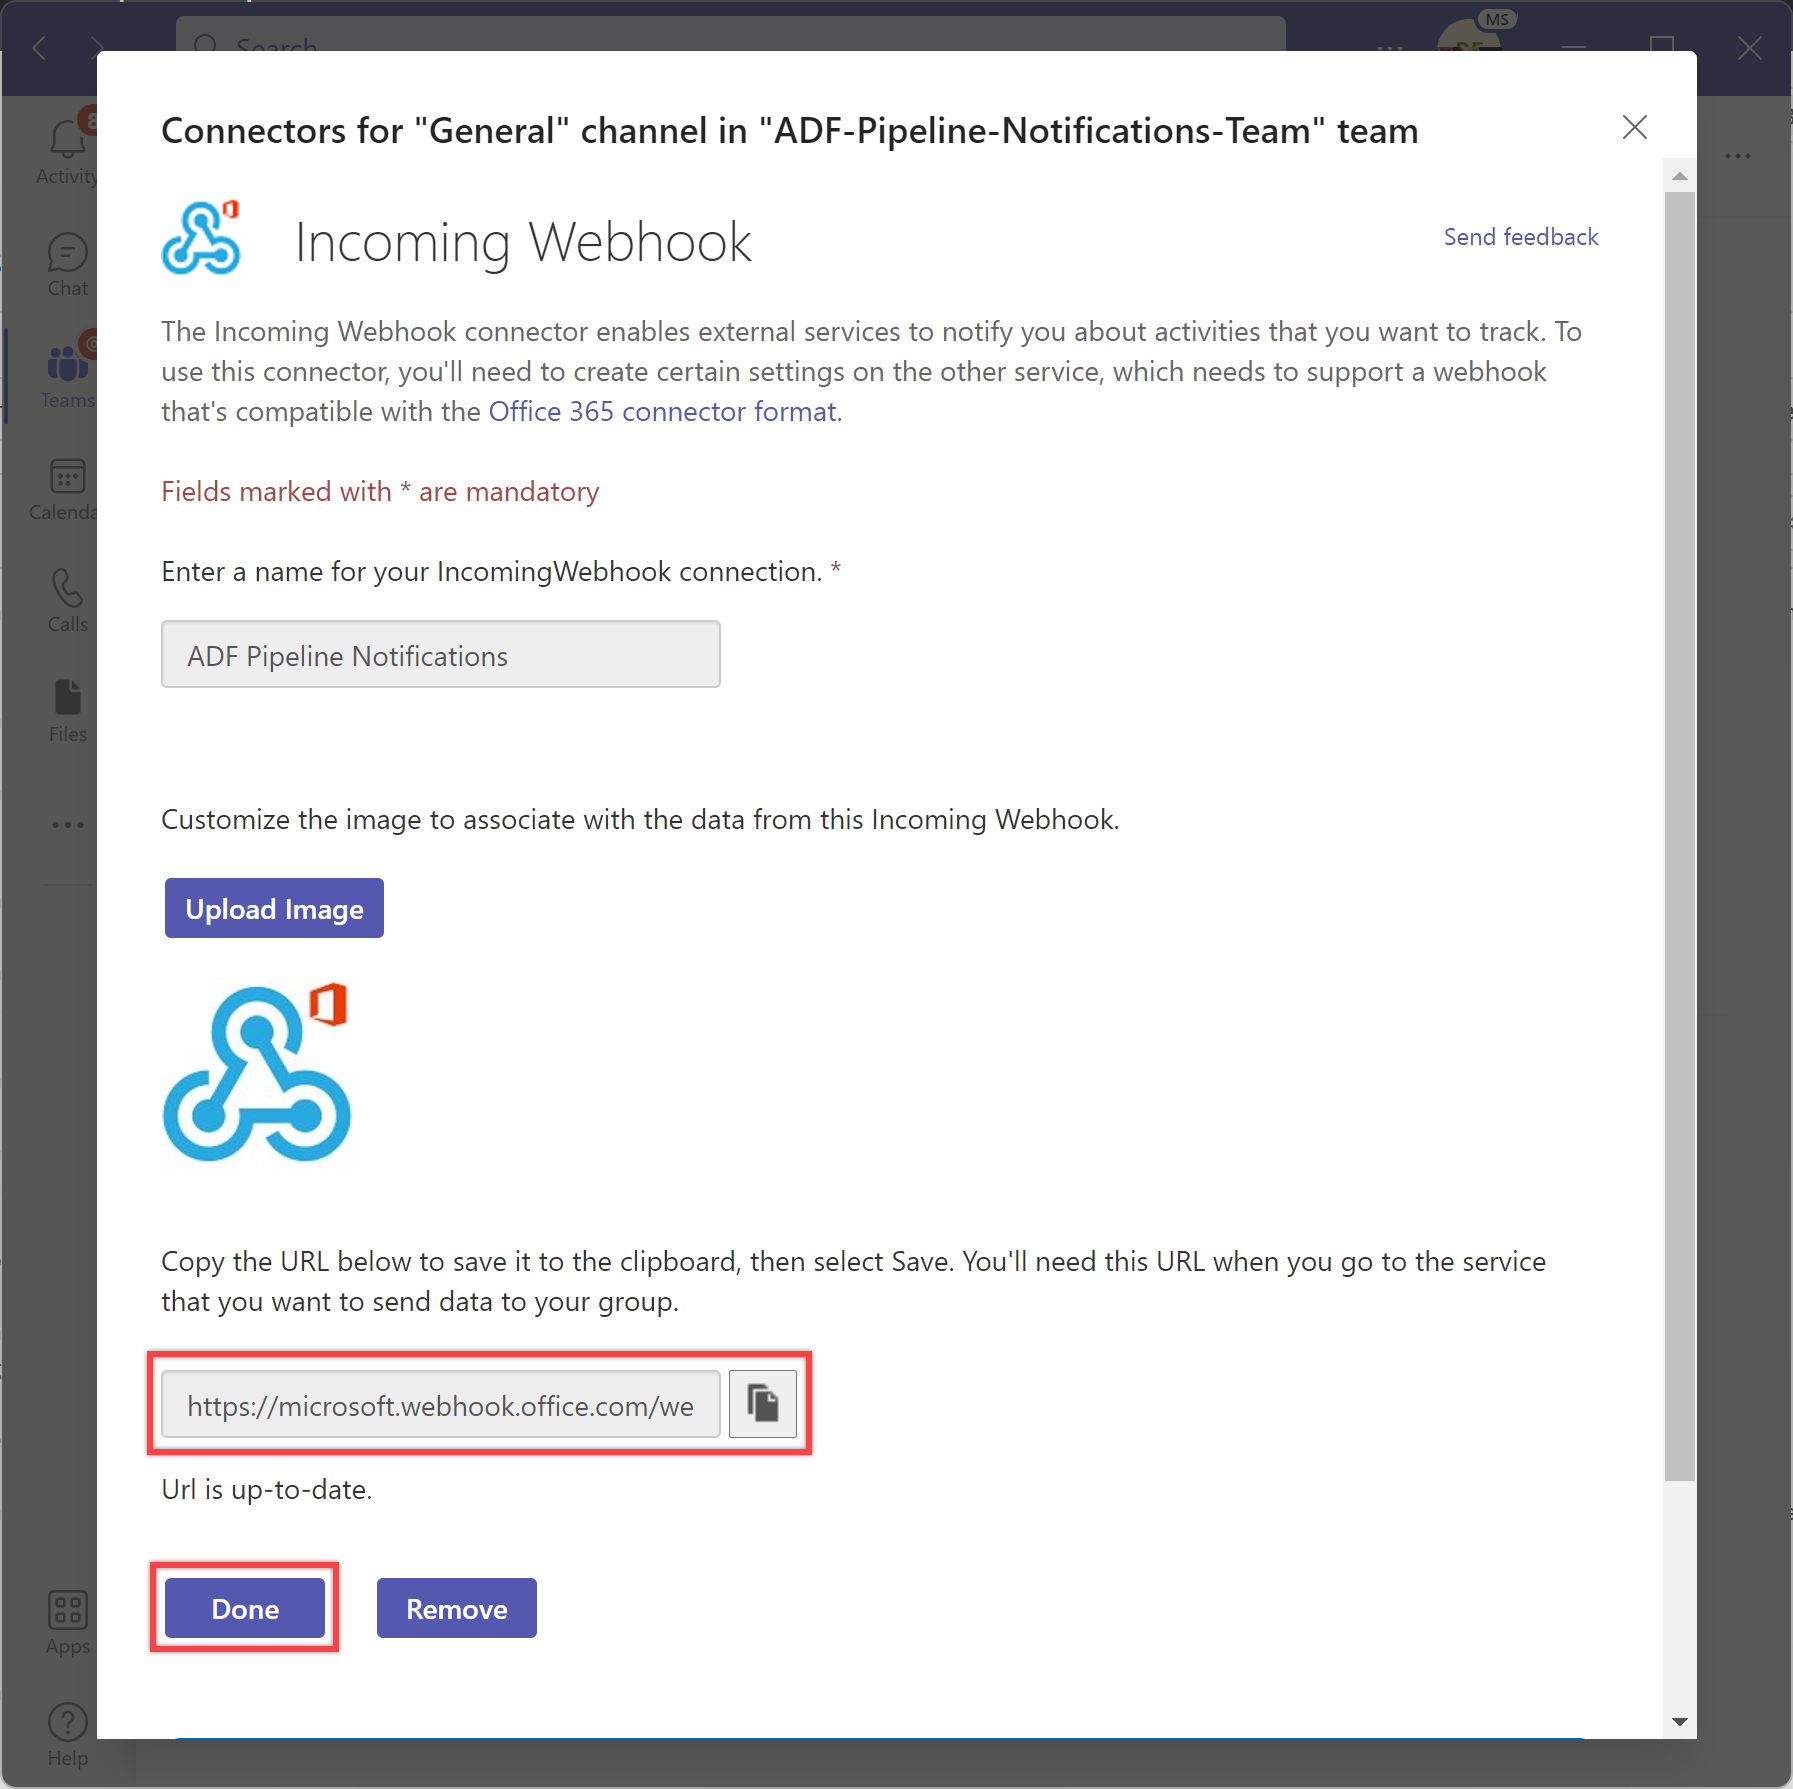
만들 때 생성된 웹후크 URL을 복사하고 나중에 파이프라인에서 사용할 수 있도록 저장합니다. 그런 다음, “완료” 단추를 선택하여 설정을 완료합니다.
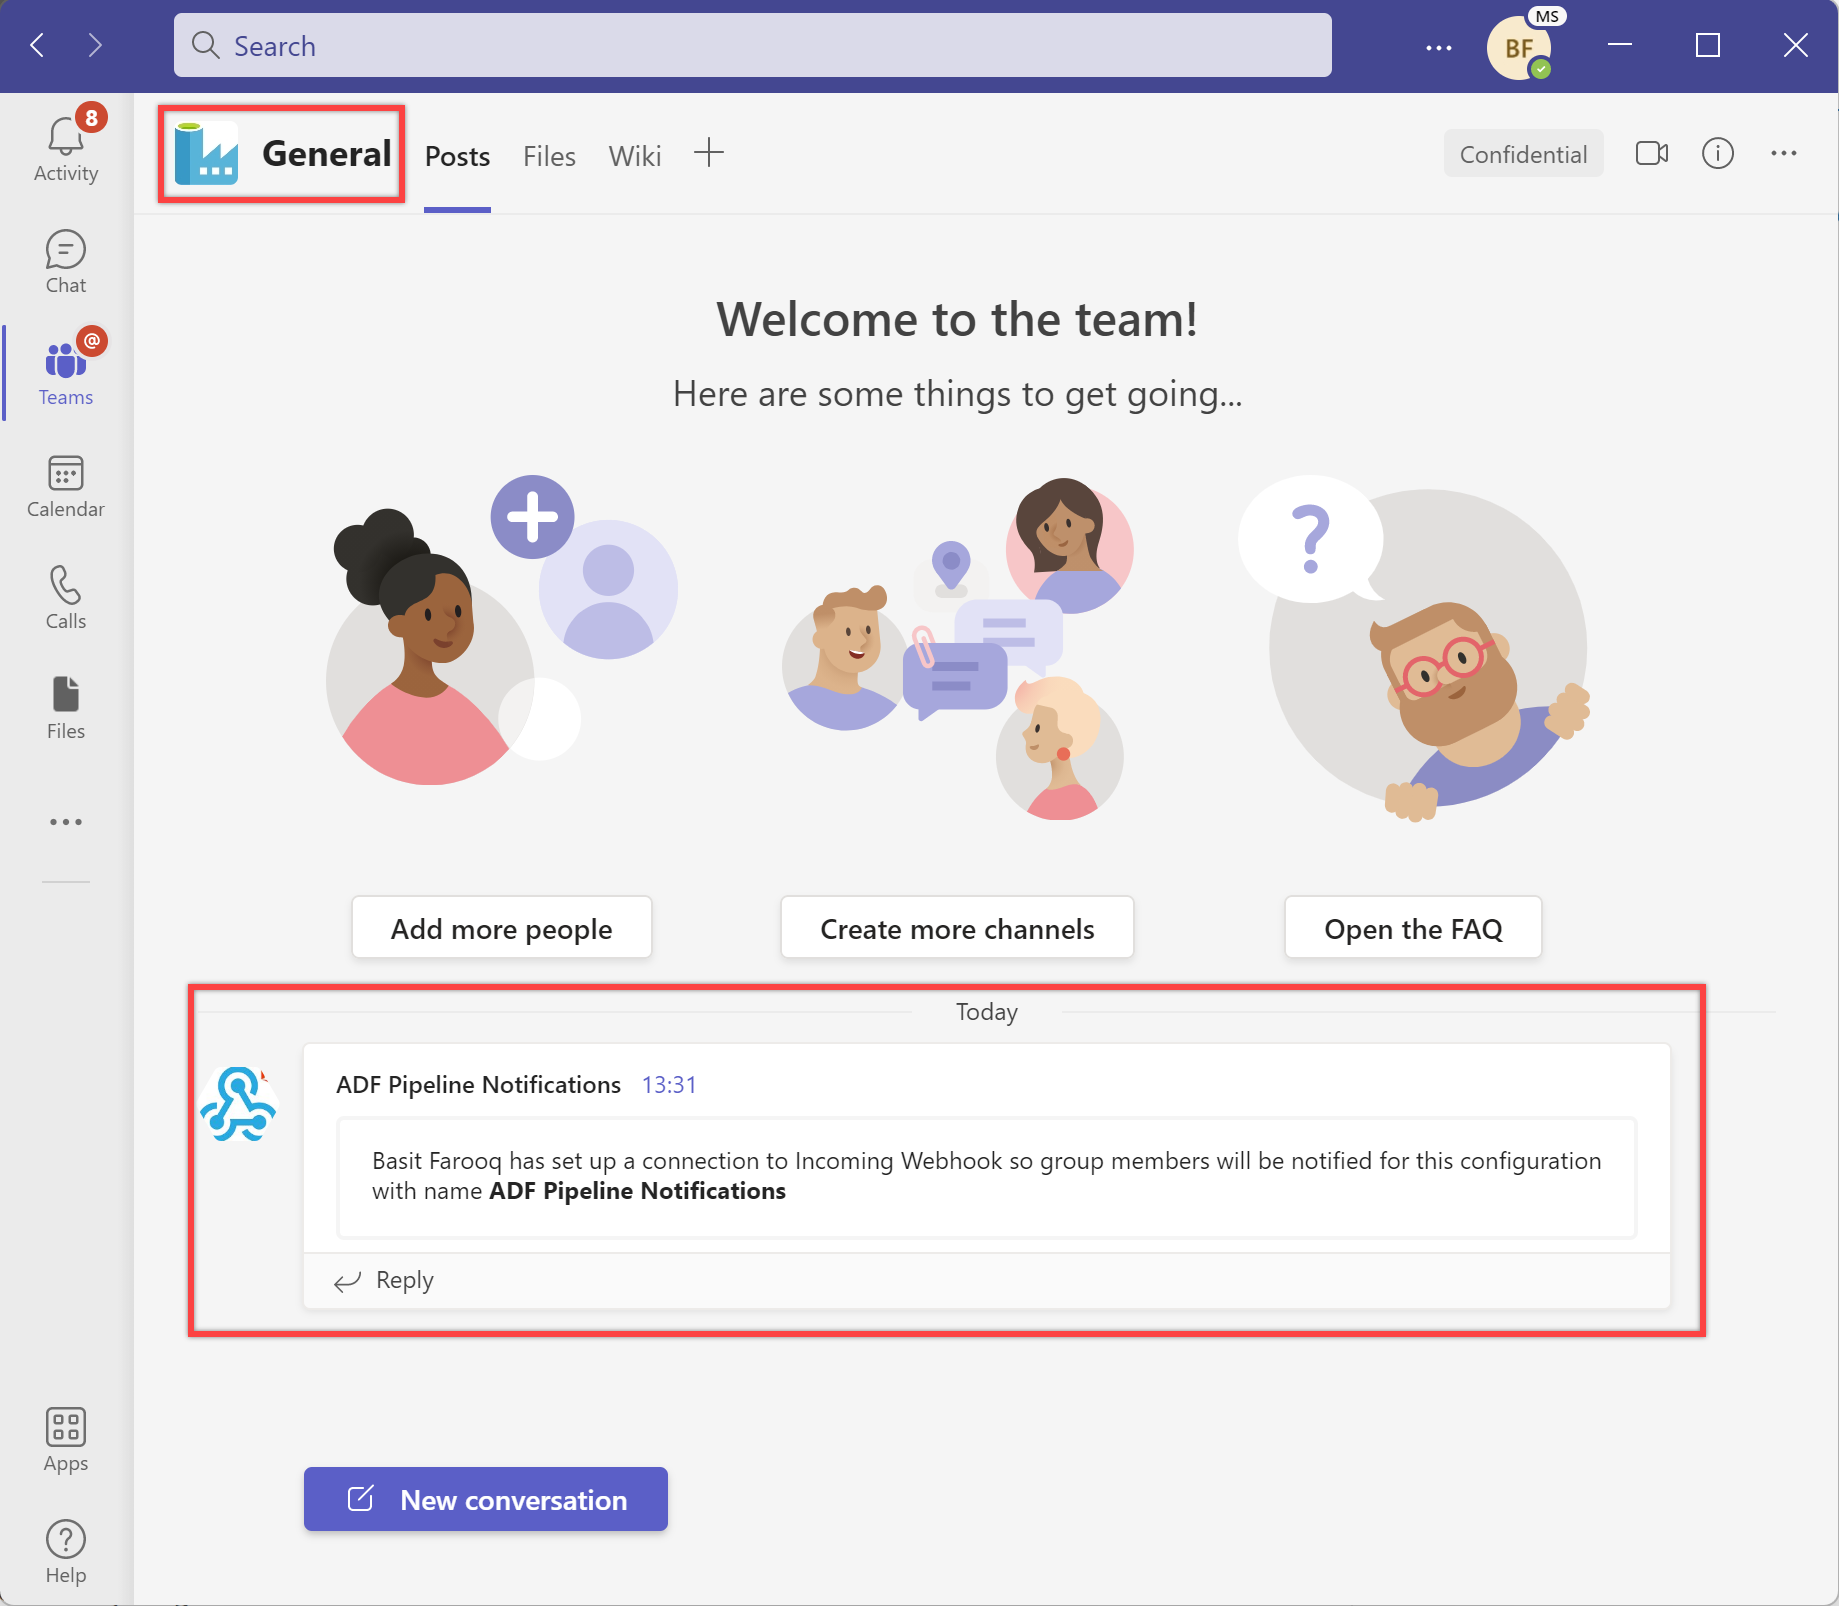
웹후크 커넥터를 추가하는 채널에서 알림을 볼 수 있습니다.
파이프라인에서 Teams 채널에 대한 알림을 보내는 단계:
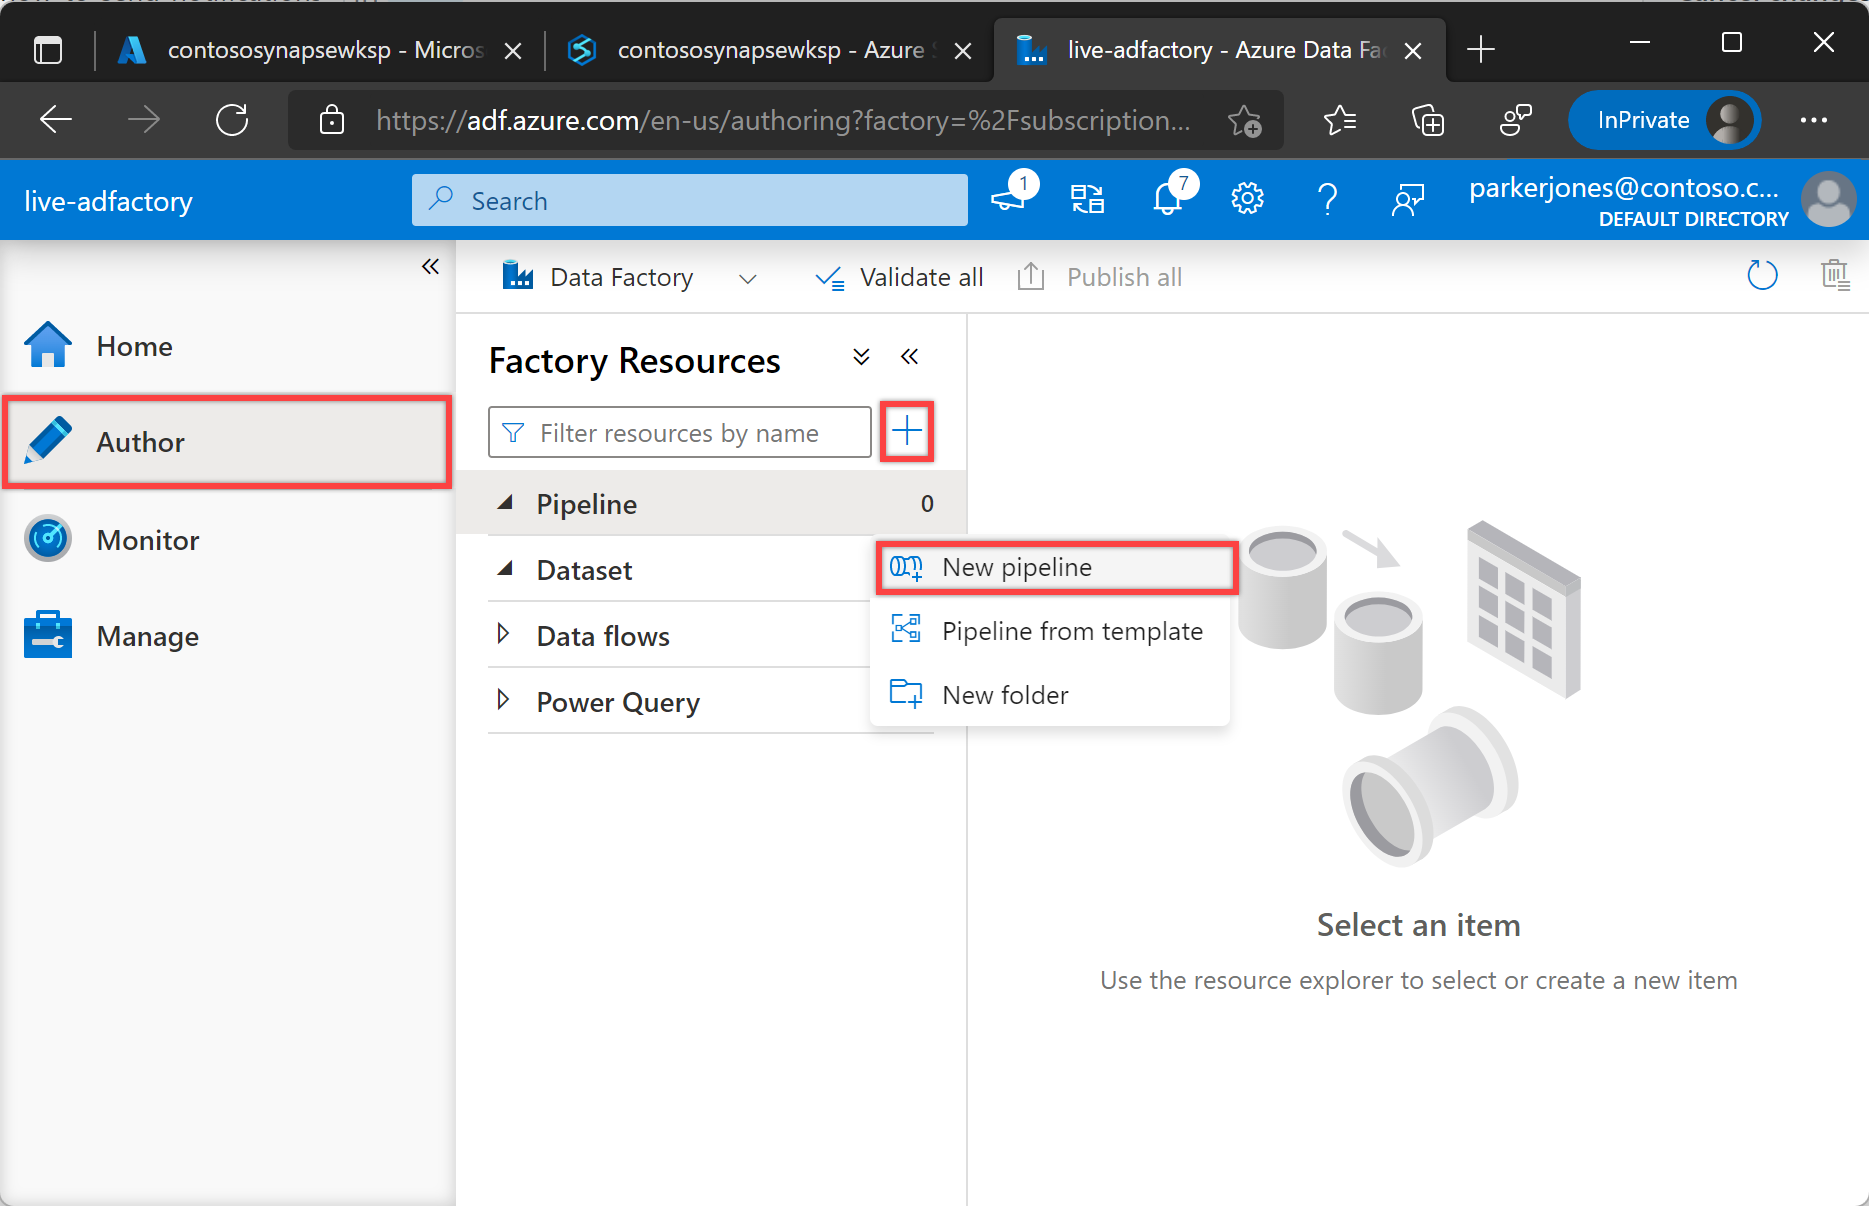
왼쪽 창에서 작성자 탭을 엽니다.
+(더하기) 단추를 선택한 다음, 새 파이프라인을 선택합니다.
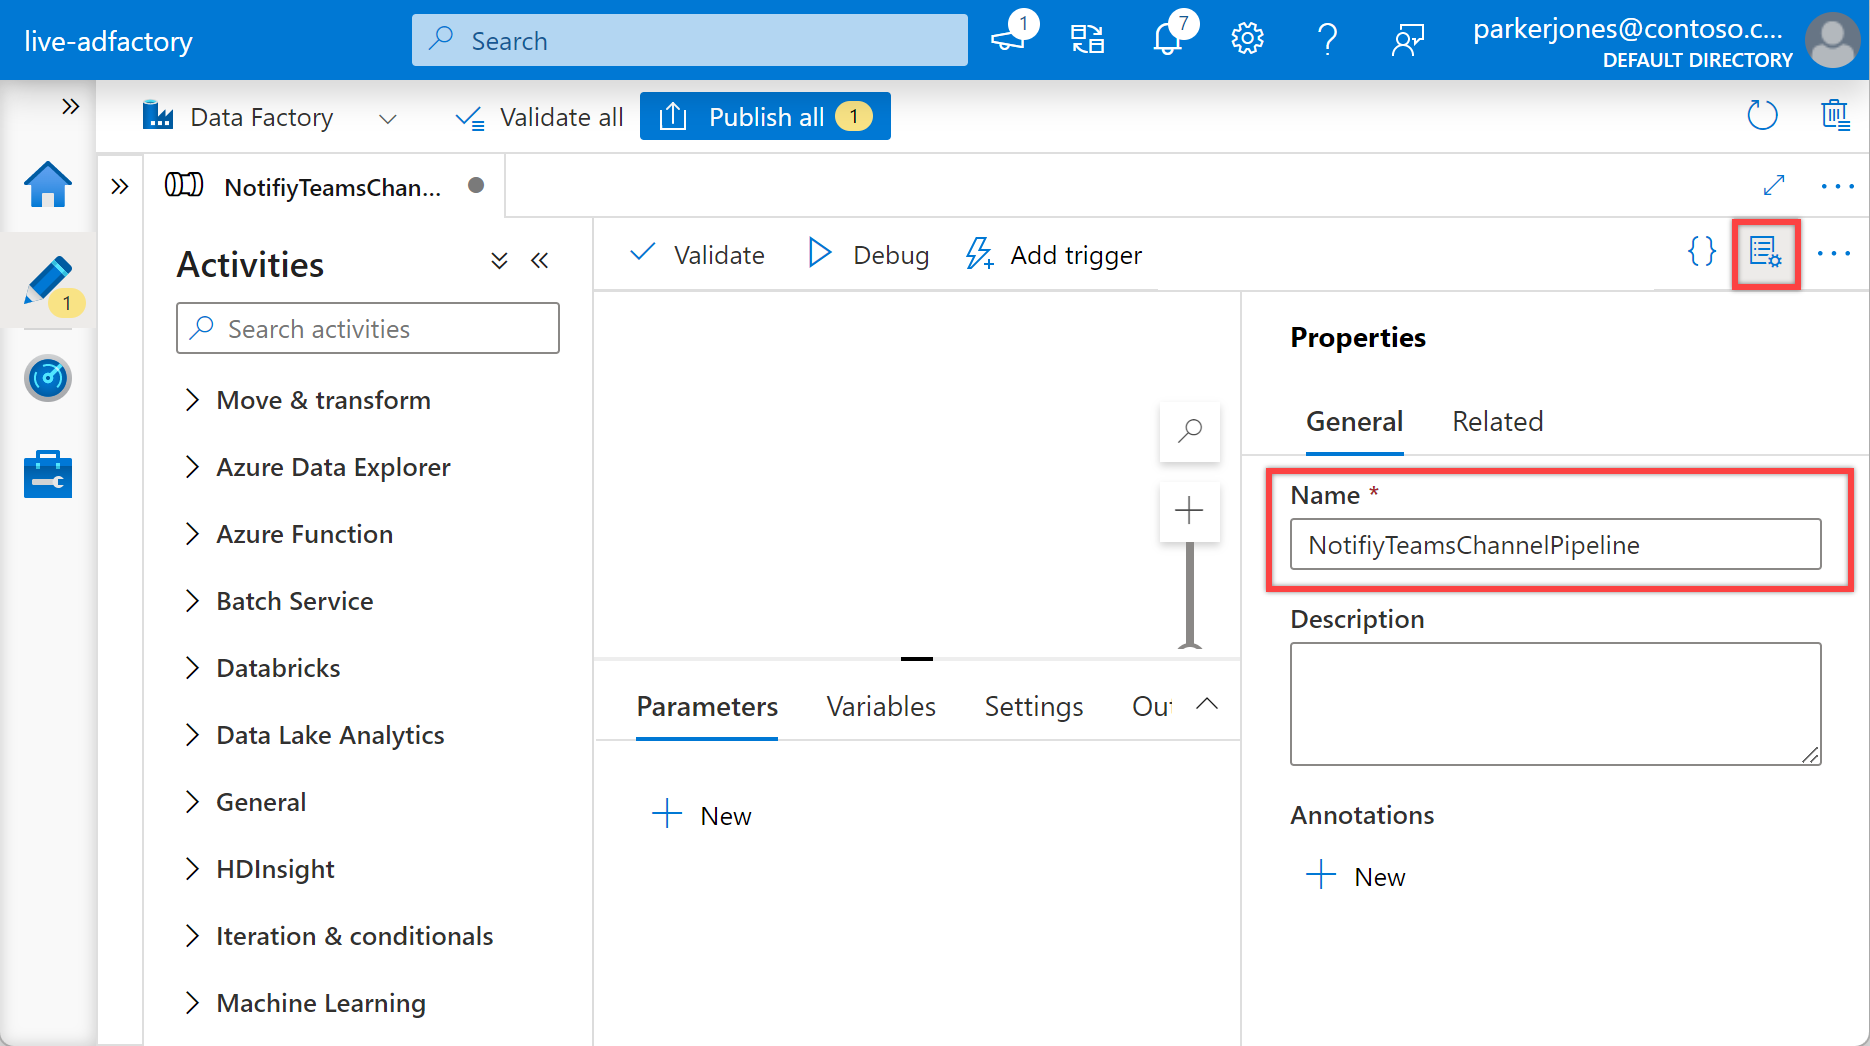
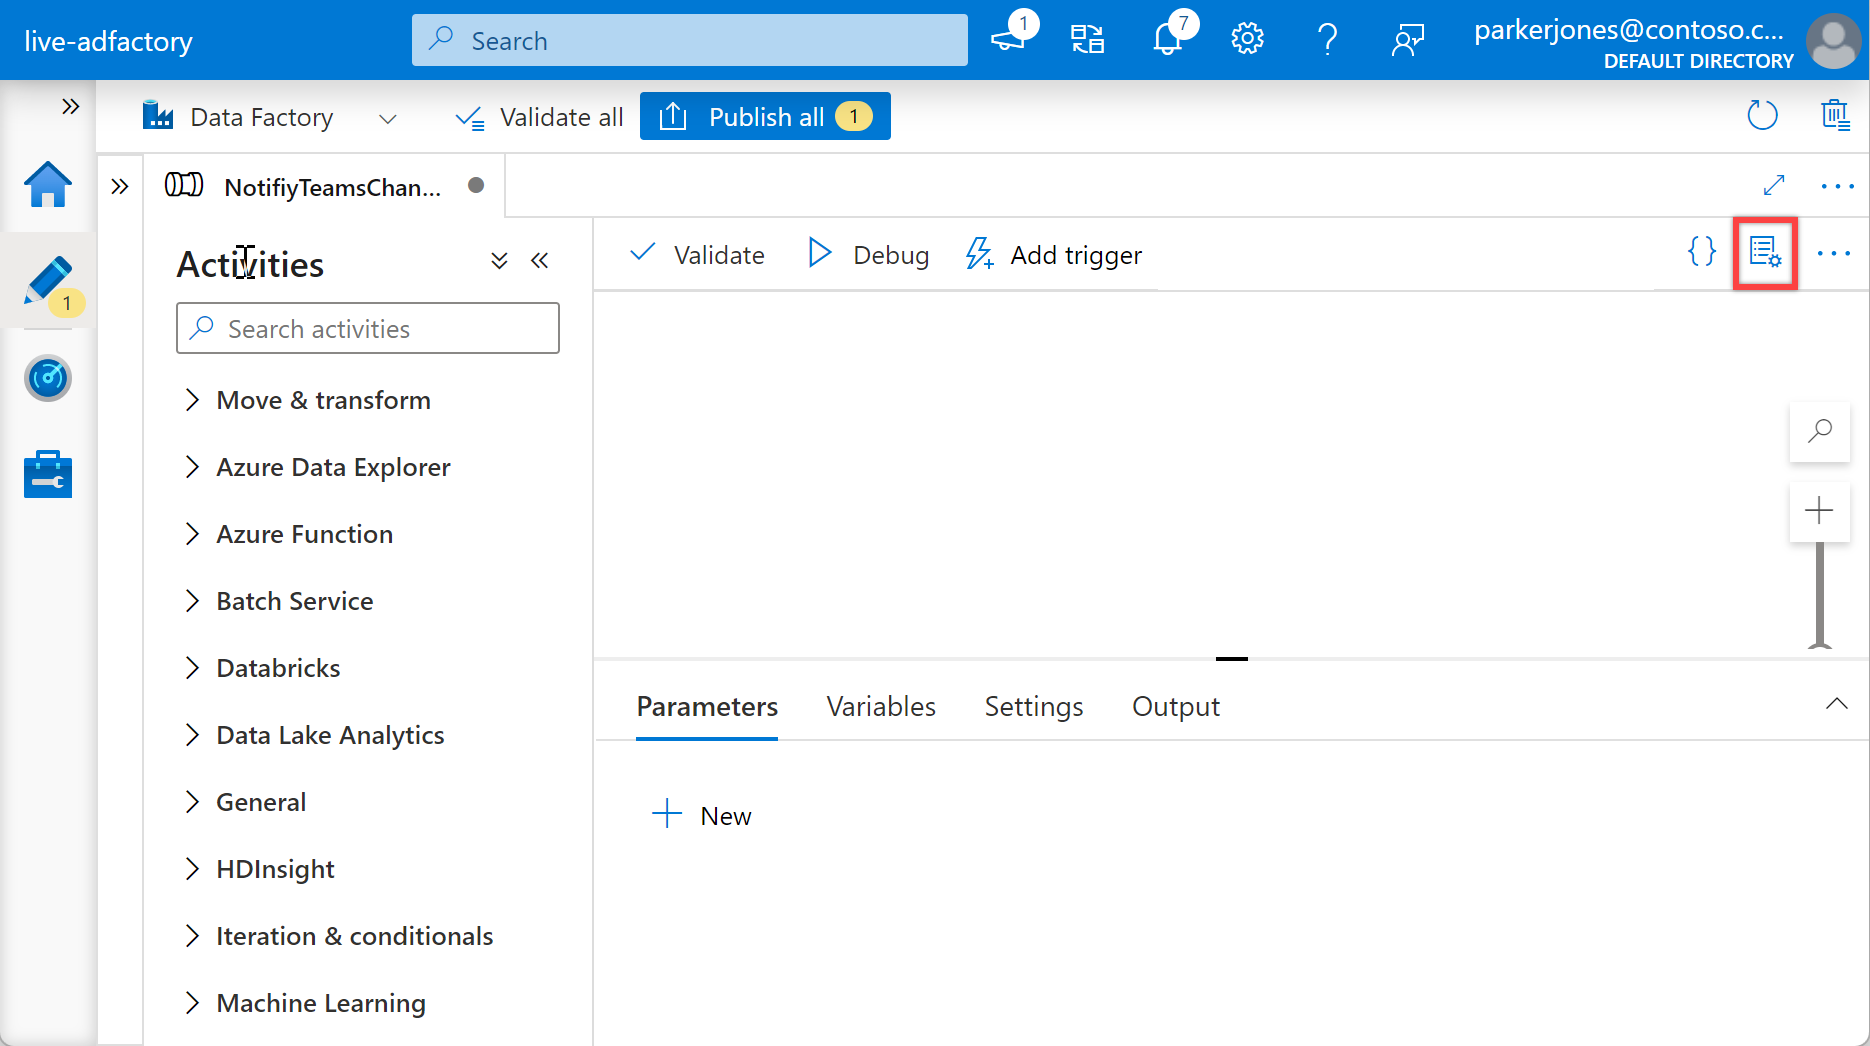
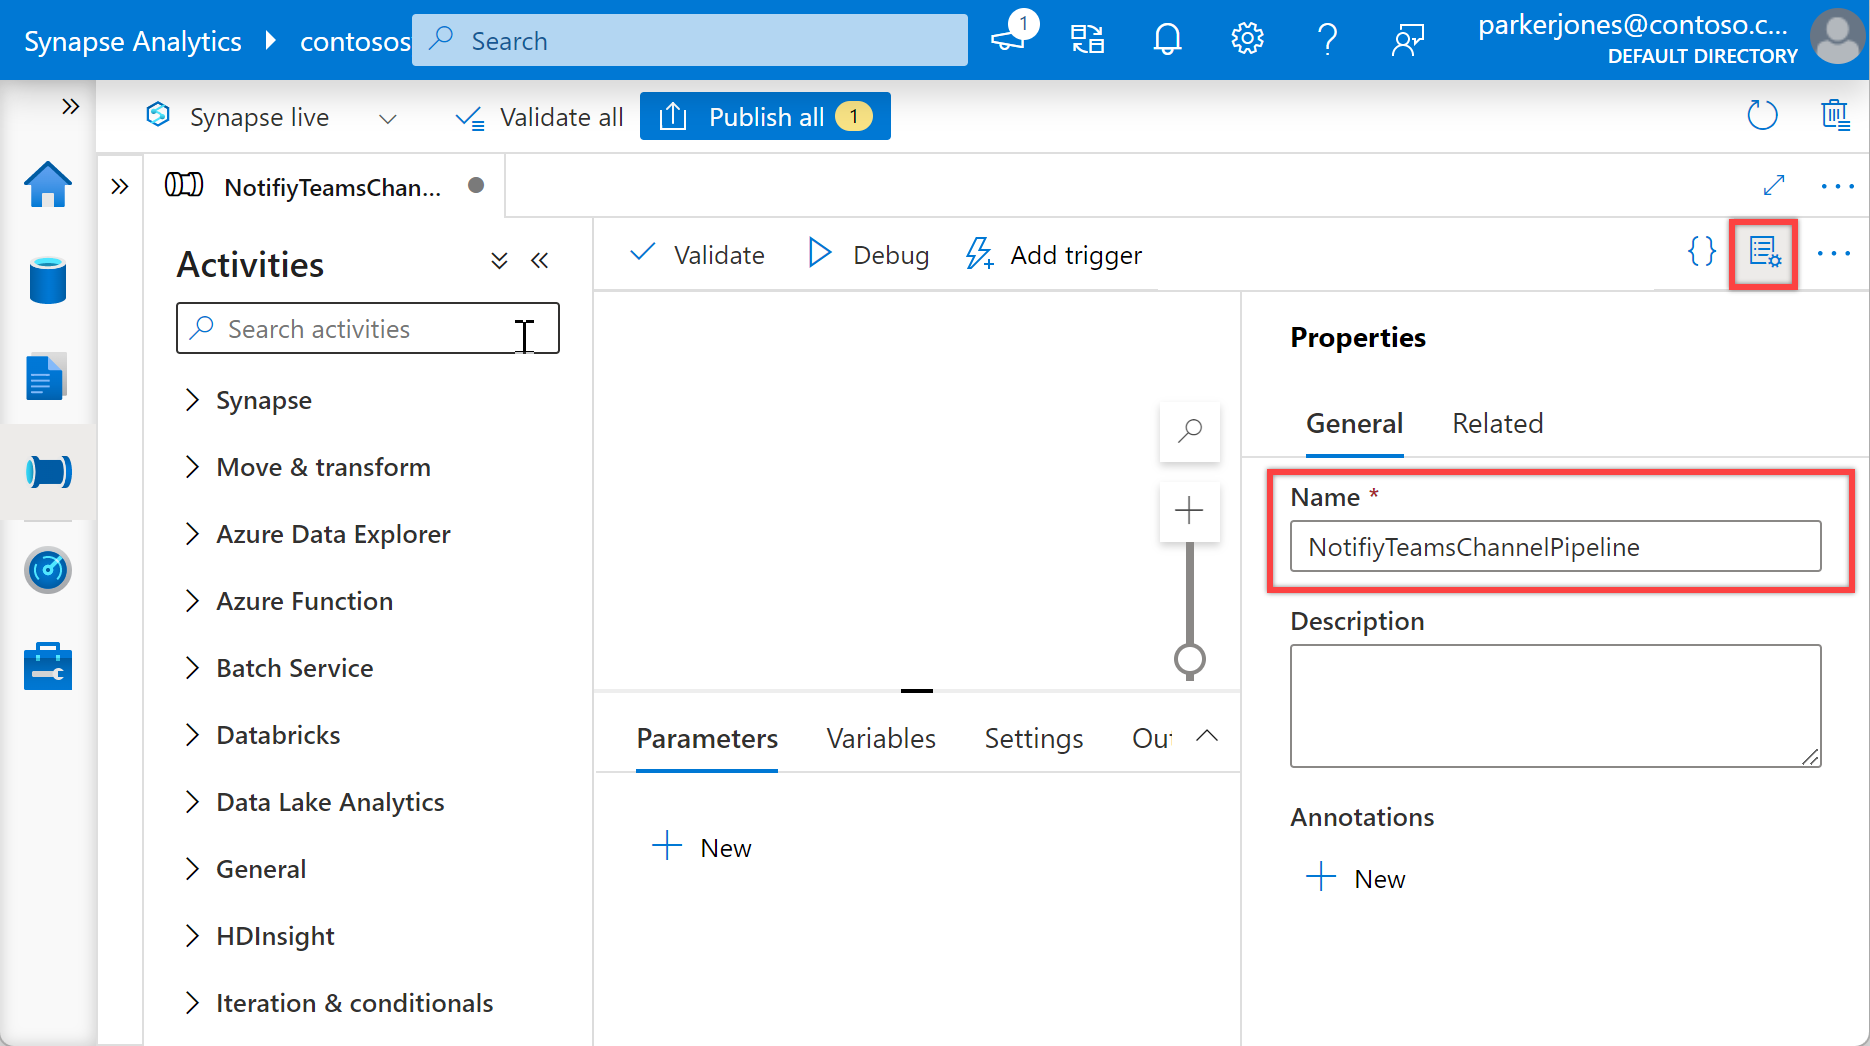
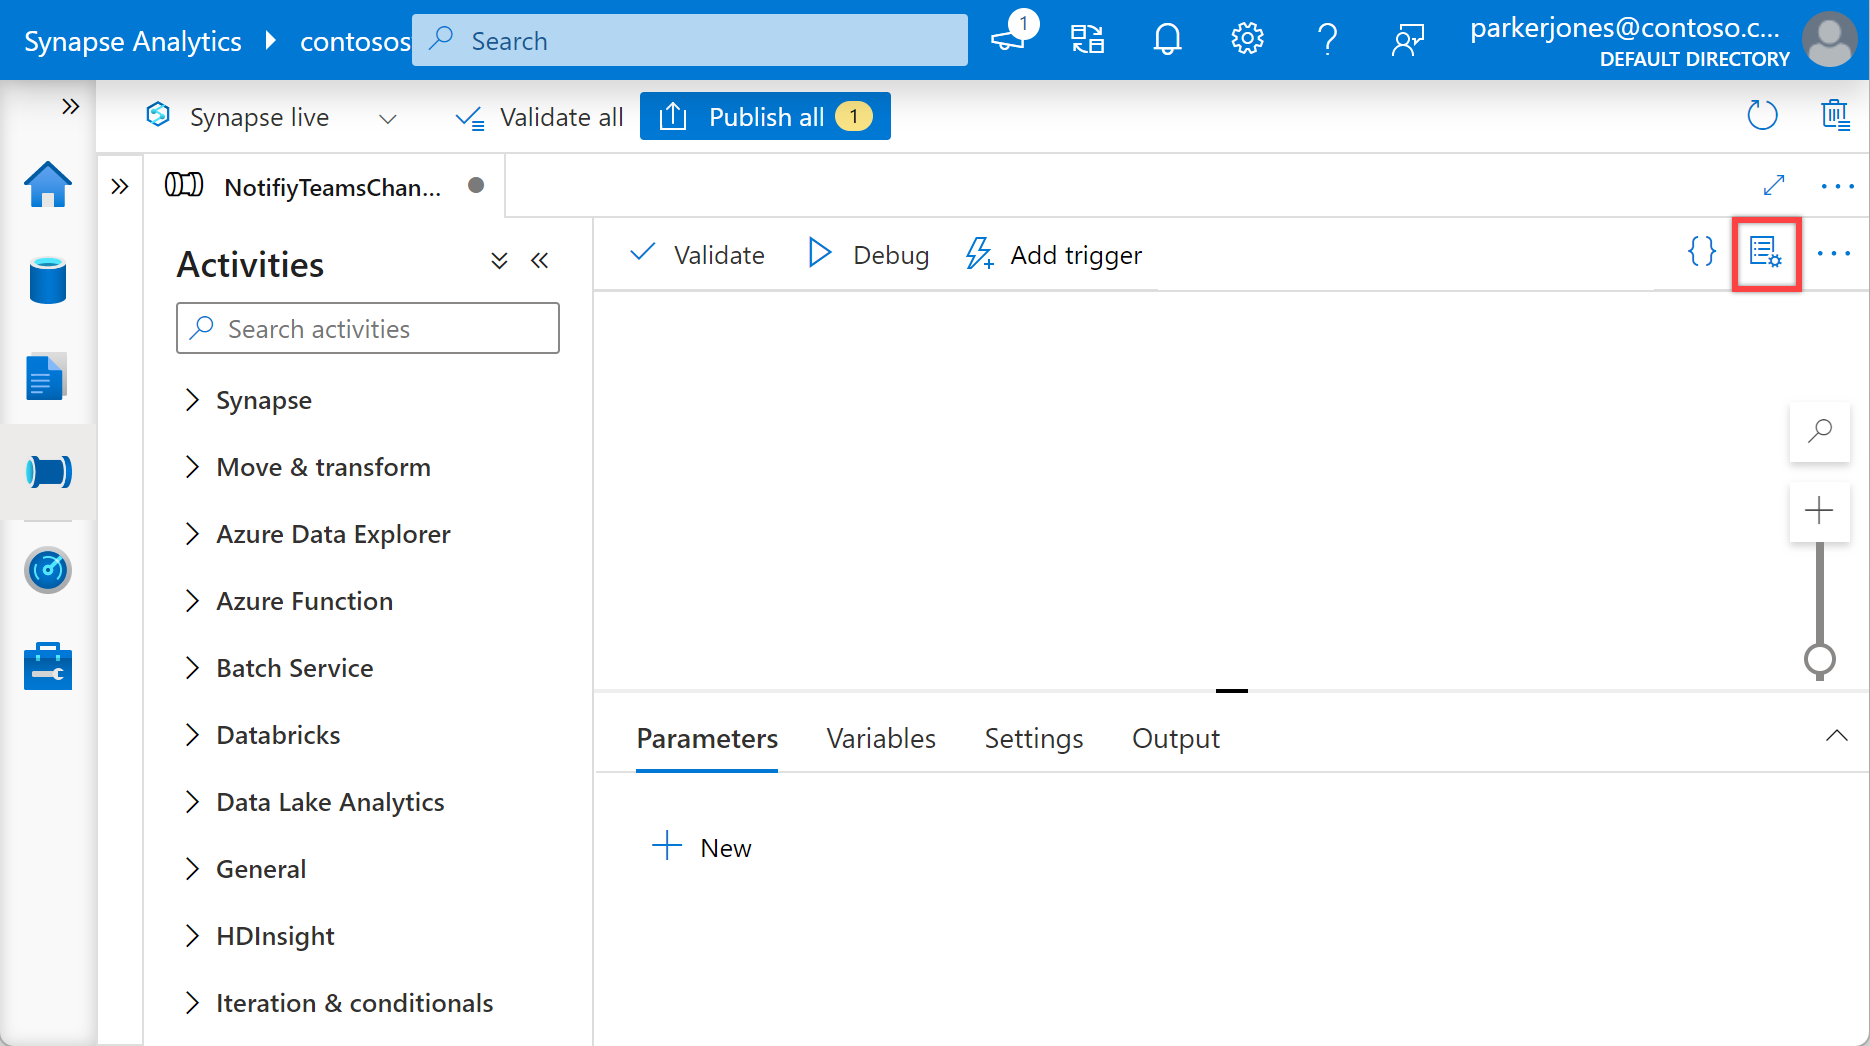
“일반” 아래 “속성” 창에서 이름에 NotifiyTeamsChannelPipeline을 지정합니다. 그런 다음, 오른쪽 위에 있는 속성 아이콘을 클릭하여 패널을 축소합니다.
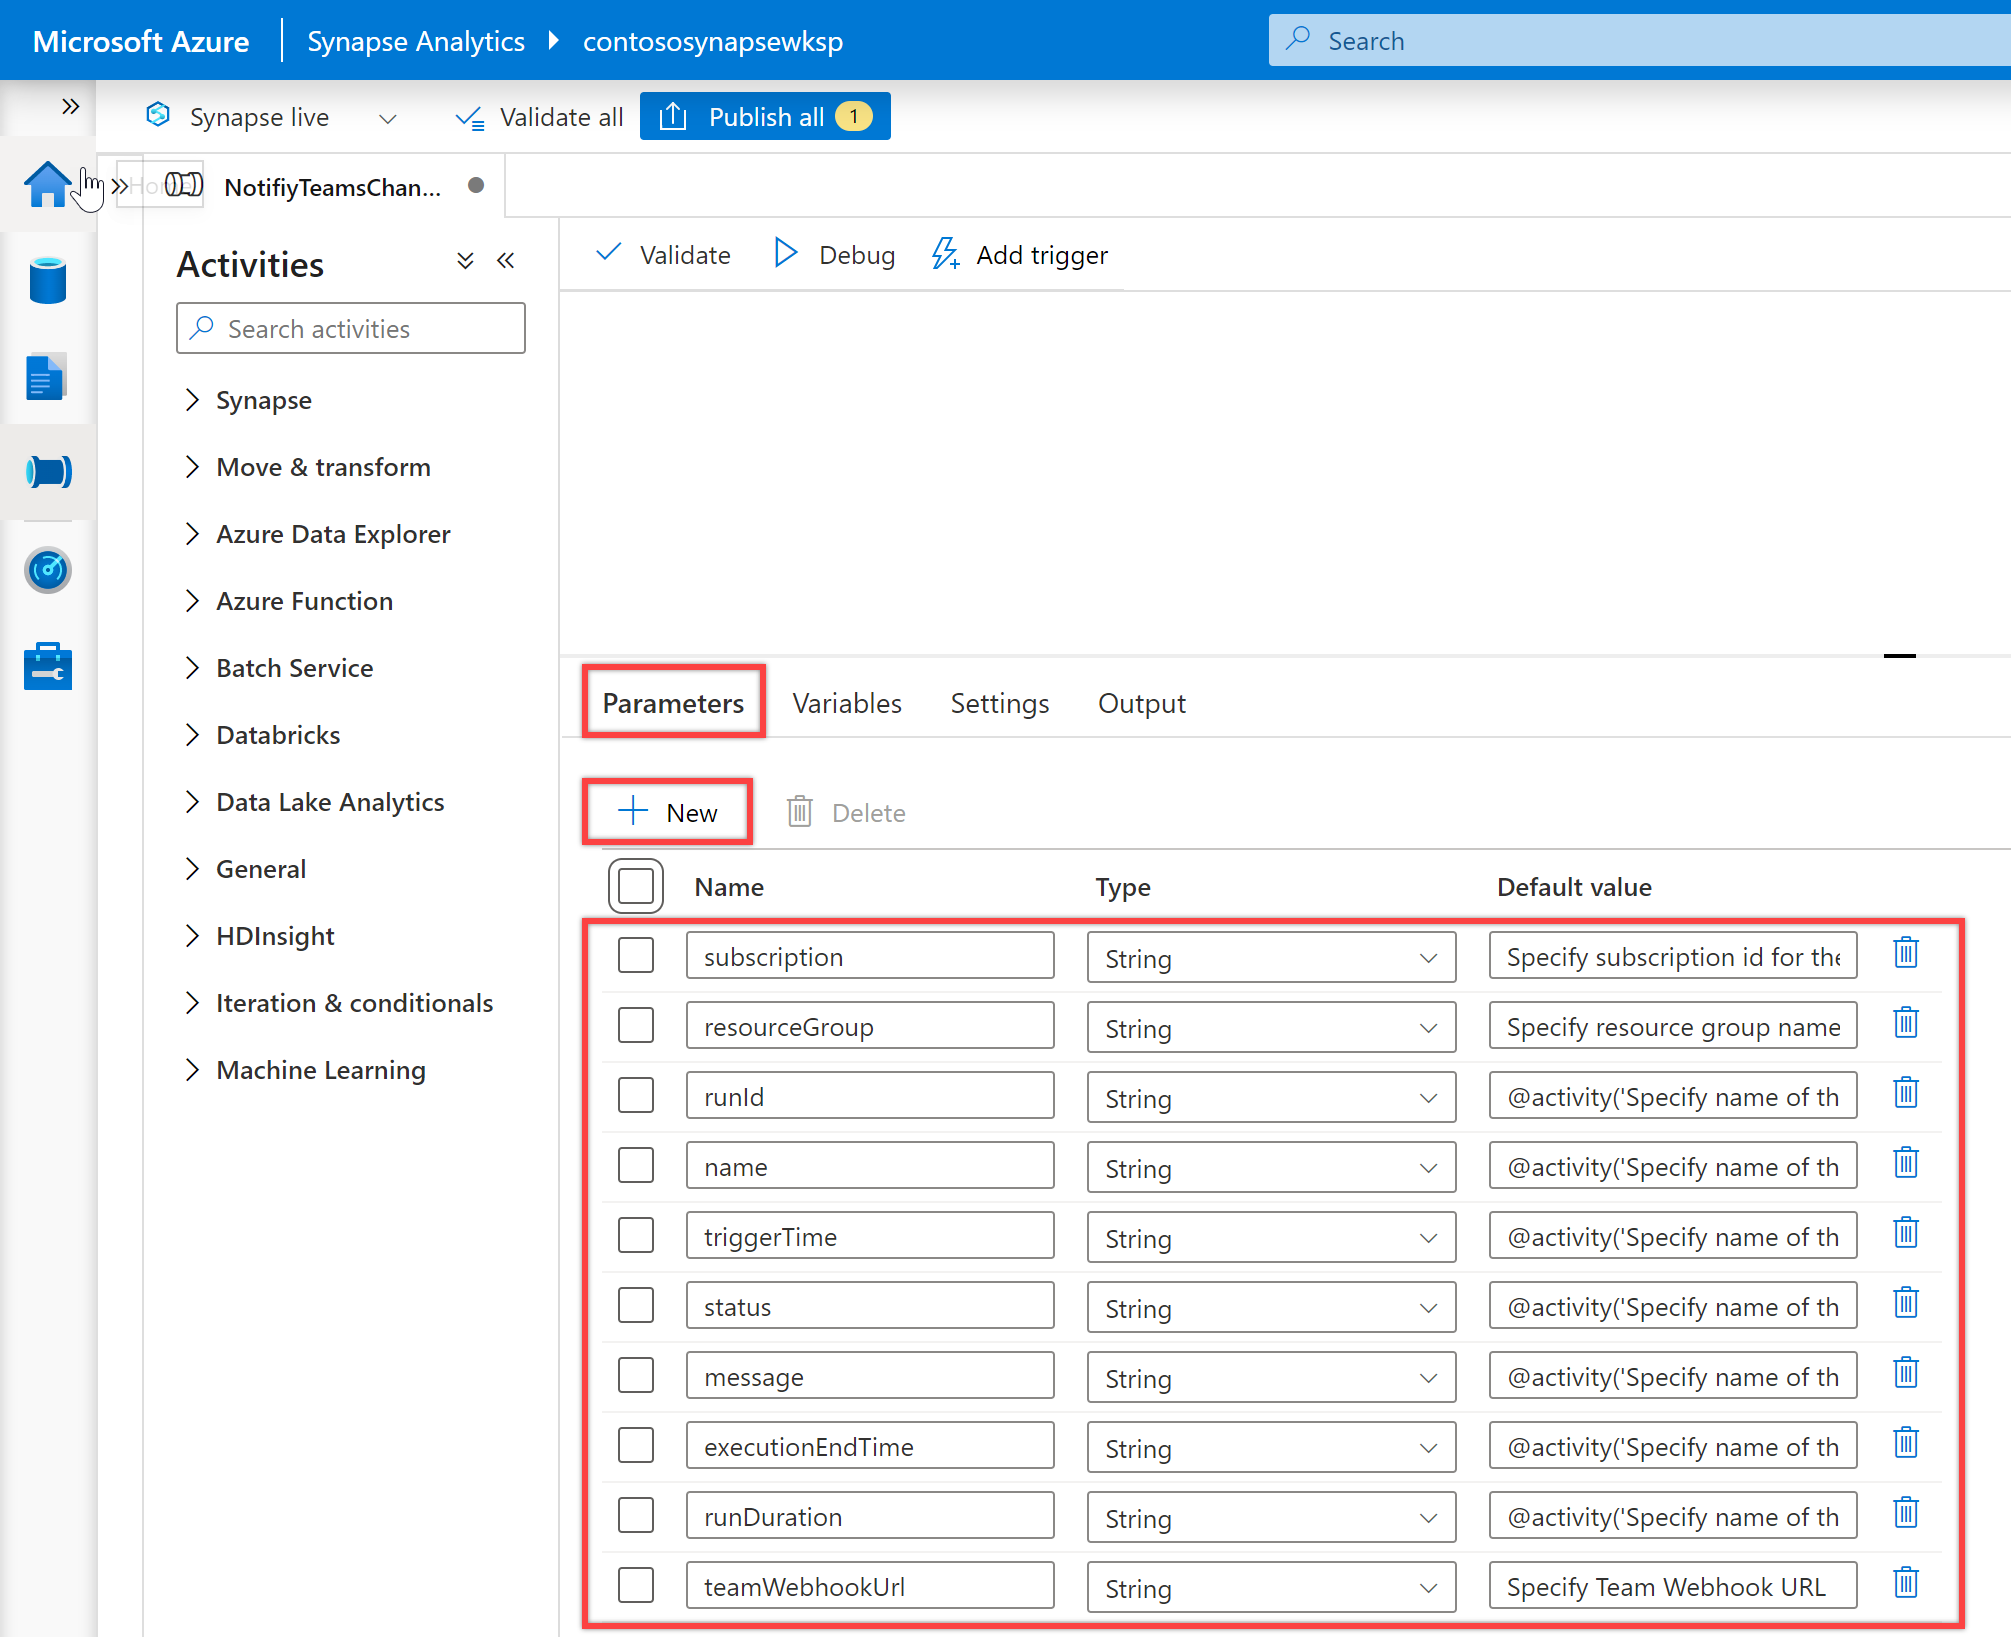
“구성” 창에서 매개 변수를 선택한 다음, + 새로 만들기 단추를 선택하여 파이프라인에 대한 다음 매개 변수를 정의합니다.
이름 Type 기본값 구독 StringSpecify subscription id for the pipelineresourceGroup StringSpecify resource group name for the pipelinerunId String@activity('Specify name of the calling pipeline').output['pipelineRunId']name String@activity('Specify name of the calling pipeline').output['pipelineName']triggerTime String@activity('Specify name of the calling pipeline').ExecutionStartTimestatus String@activity('Specify name of the calling pipeline').Statusmessage String@activity('Specify name of the calling pipeline').Error['message']executionEndTime String@activity('Specify name of the calling pipeline').ExecutionEndTimerunDuration String@activity('Specify name of the calling pipeline').DurationteamWebhookUrl StringSpecify Team Webhook URL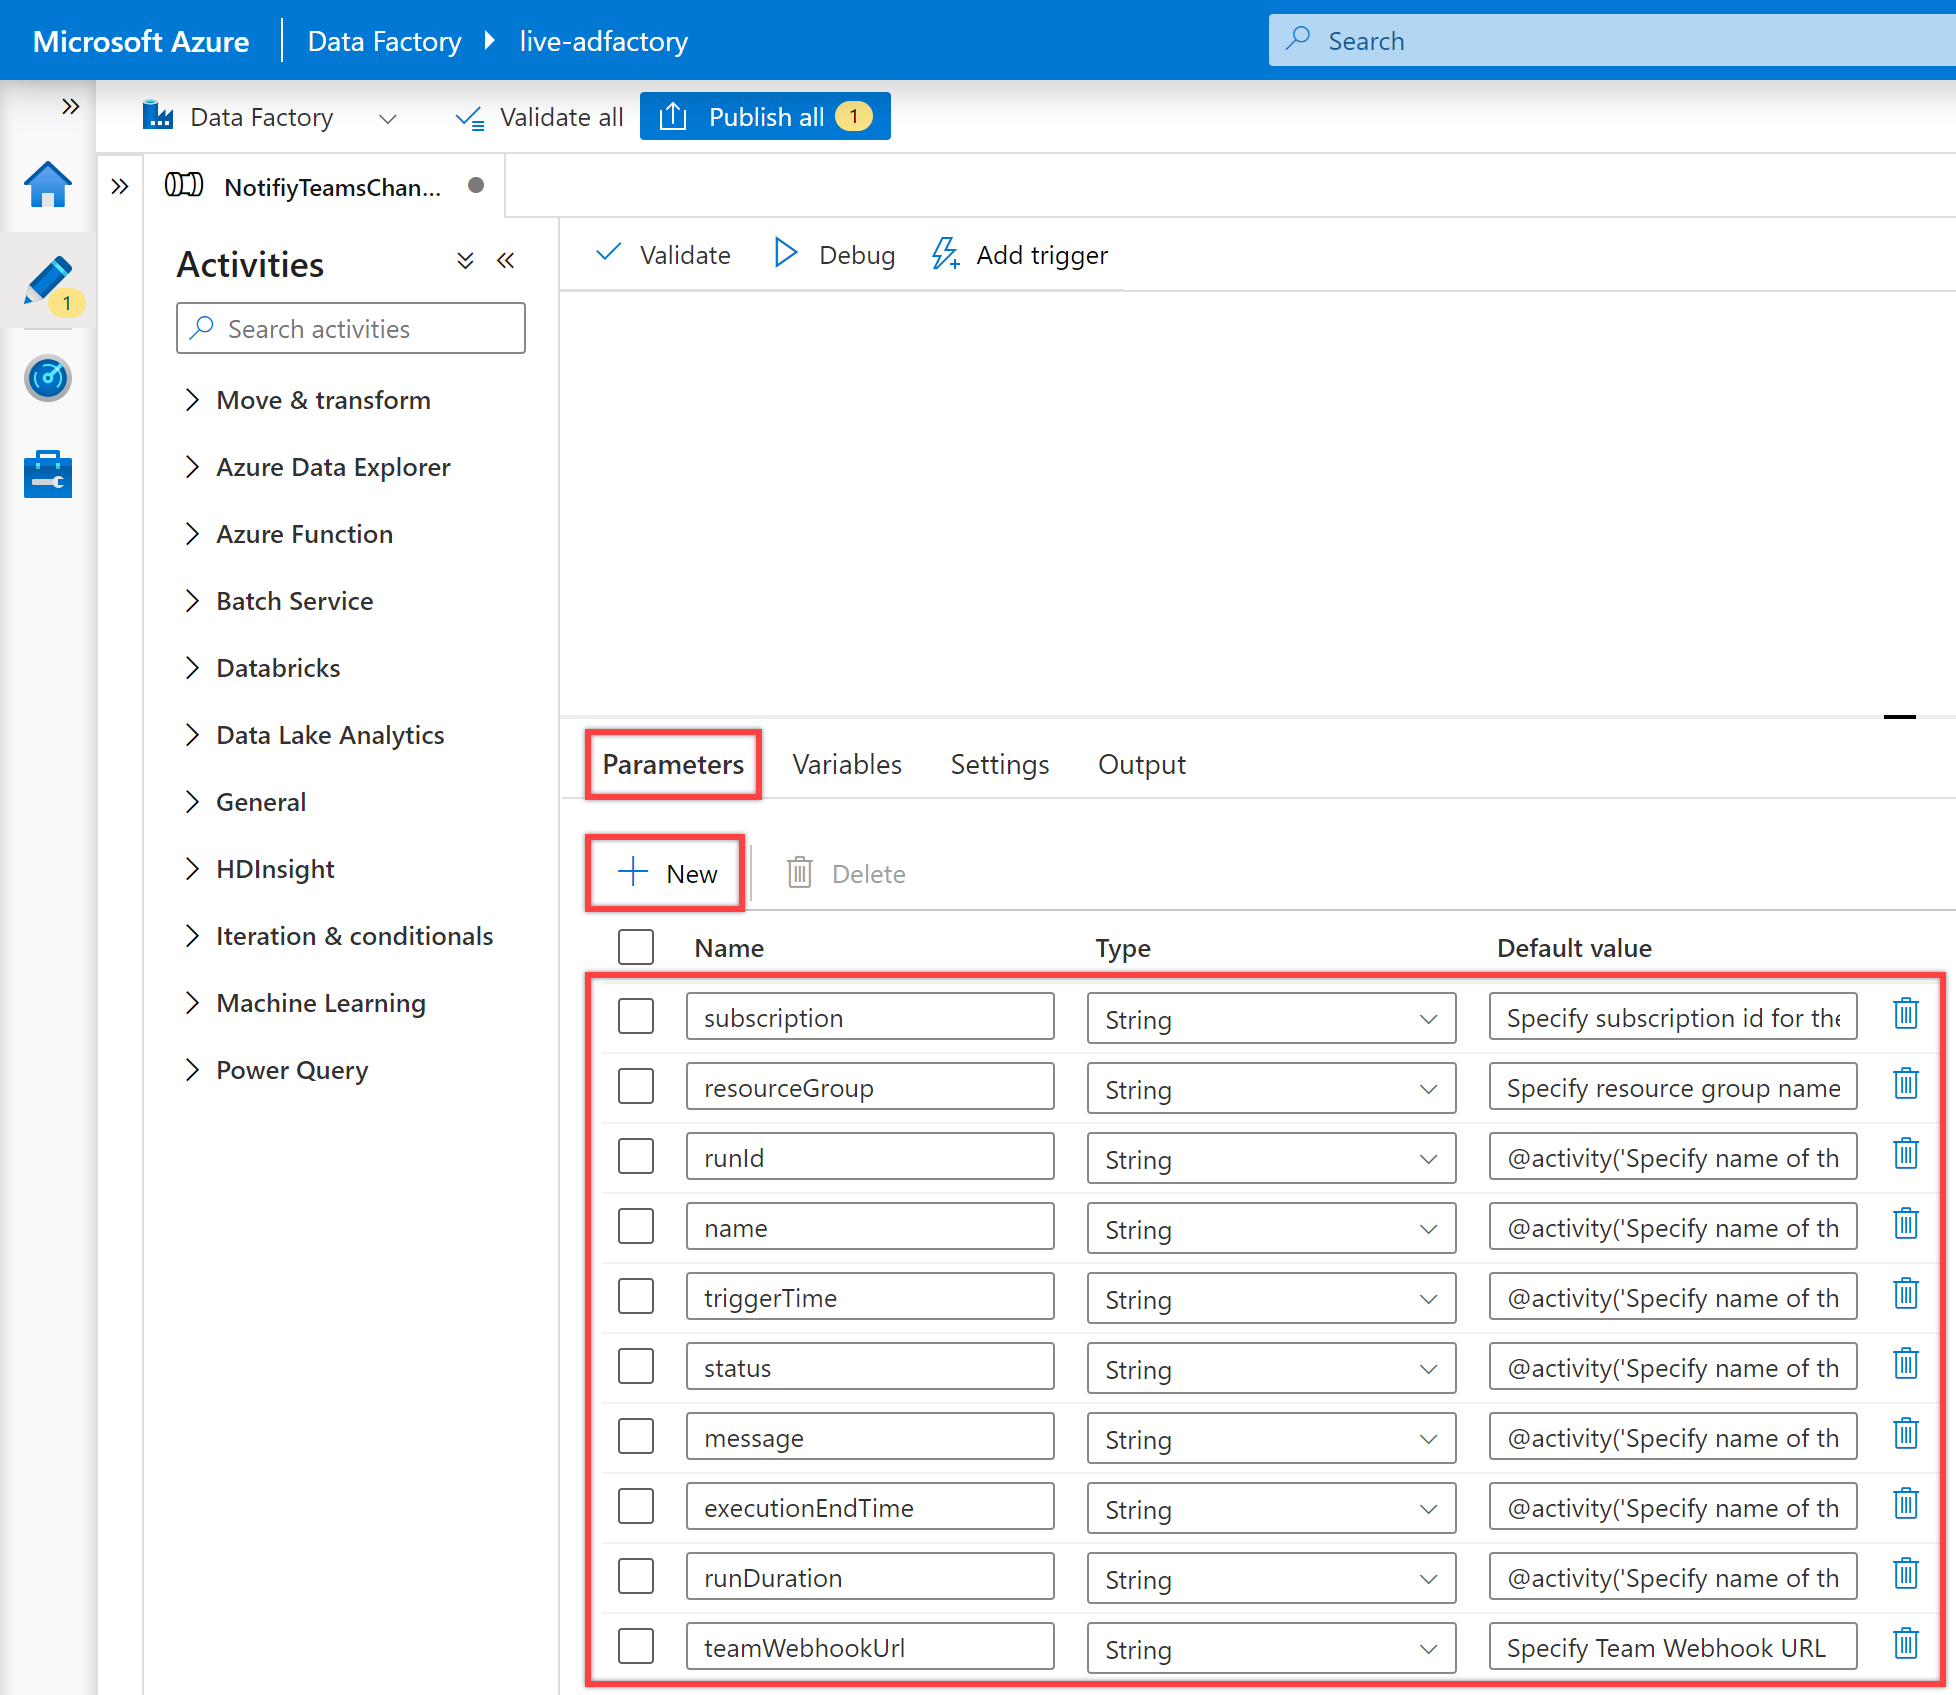
참고 항목
이러한 매개 변수는 모니터링 URL을 생성하는 데 사용됩니다. 파이프라인이 속한 동일한 데이터 팩터리의 유효한 구독 및 리소스 그룹을 제공하지 않는다고 가정합니다. 이 경우 알림에는 유효한 파이프라인 모니터링 URL이 포함되지 않지만 메시지는 계속 작동합니다. 또한 이러한 매개 변수를 추가하면 항상 다른 파이프라인에서 해당 값을 전달할 필요가 없습니다. 메타데이터 기반 접근 방식을 통해 해당 값을 제어하려면 적절하게 수정해야 합니다.
팁
관련 매개 변수의 기본값에 대해 현재 Data Factory 구독 ID, 리소스 그룹 및 Teams 웹후크 URL(필수 조건 참조)을 추가하는 것이 좋습니다.
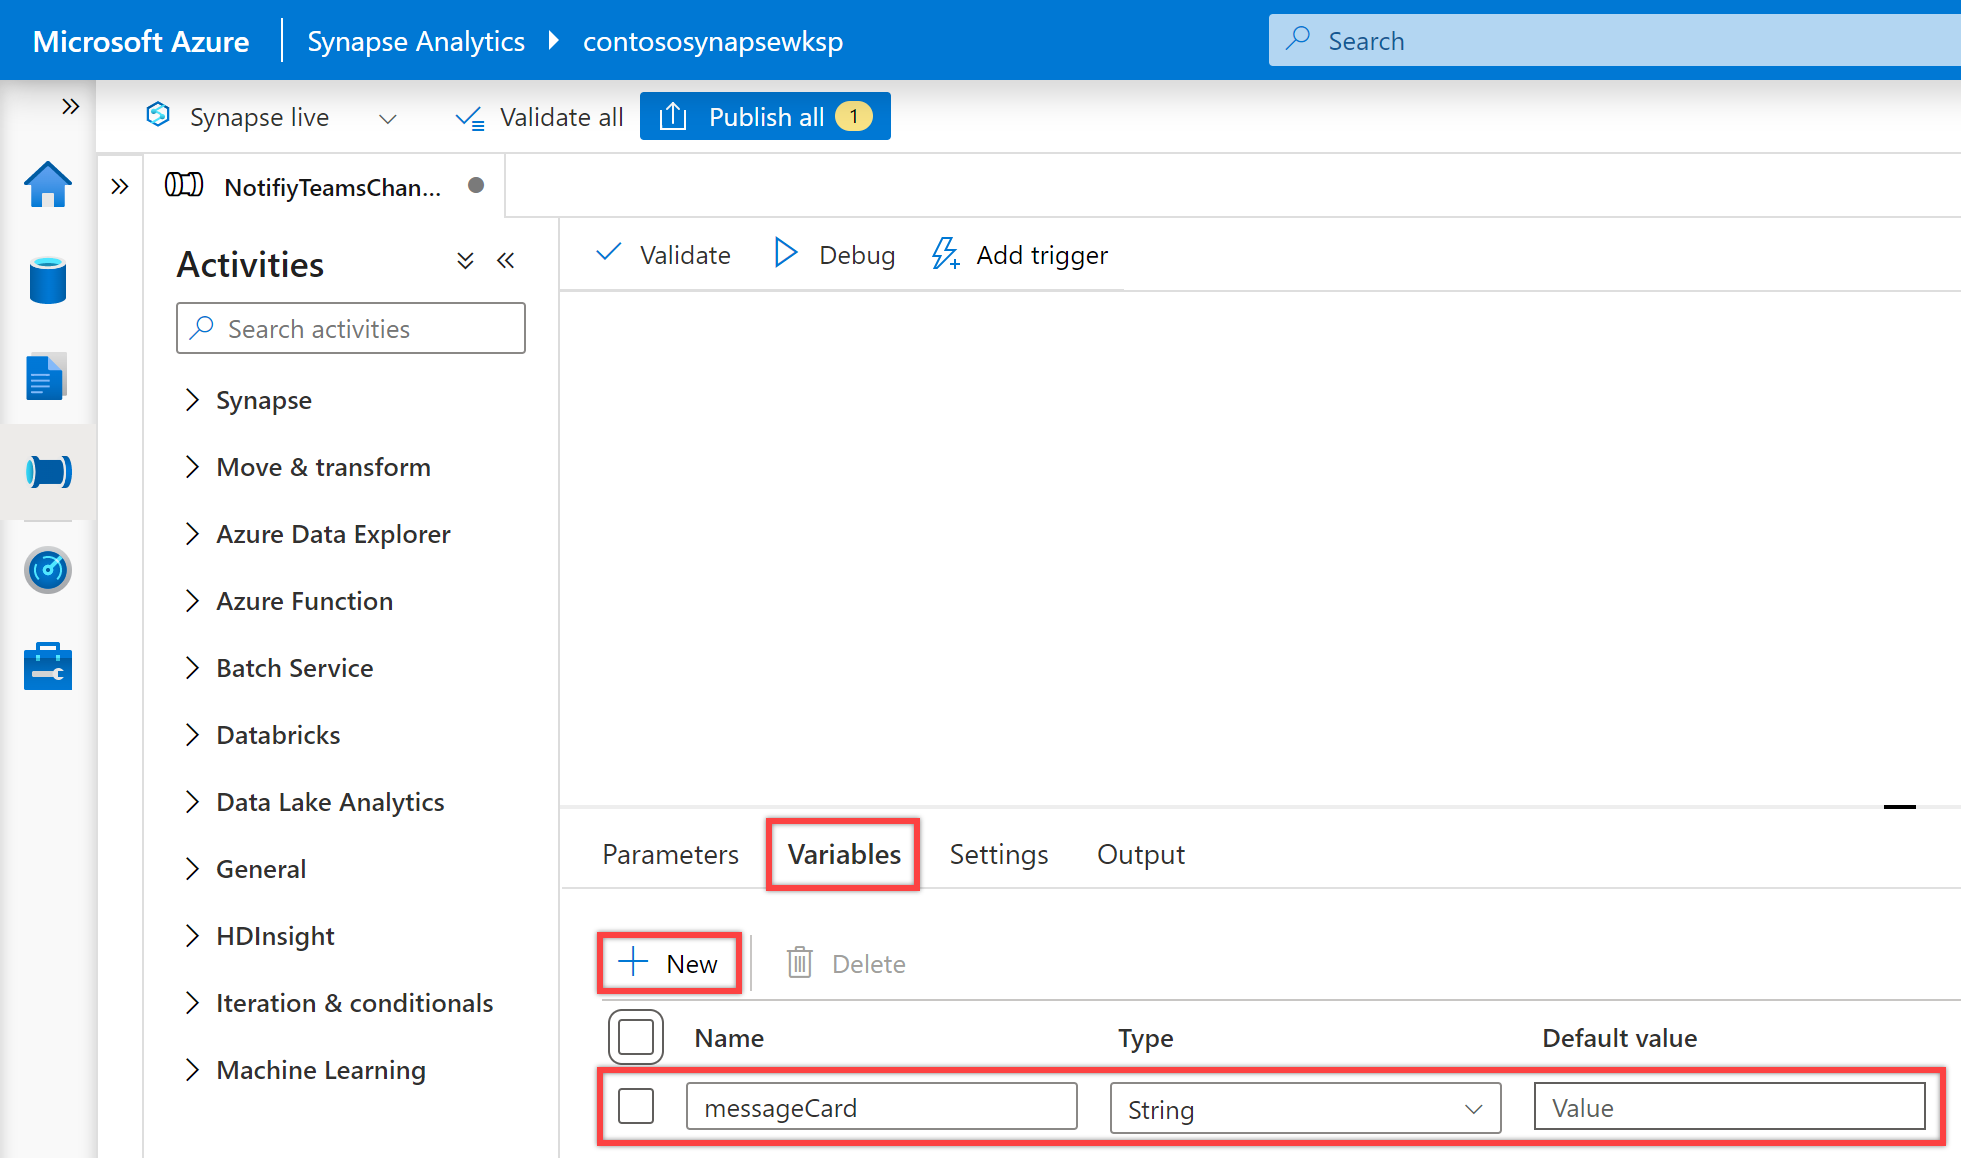
“구성” 창에서 변수를 선택한 다음, + 새로 만들기 단추를 선택하여 파이프라인에 대한 다음 변수를 정의합니다.
이름 Type 기본값 messageCard String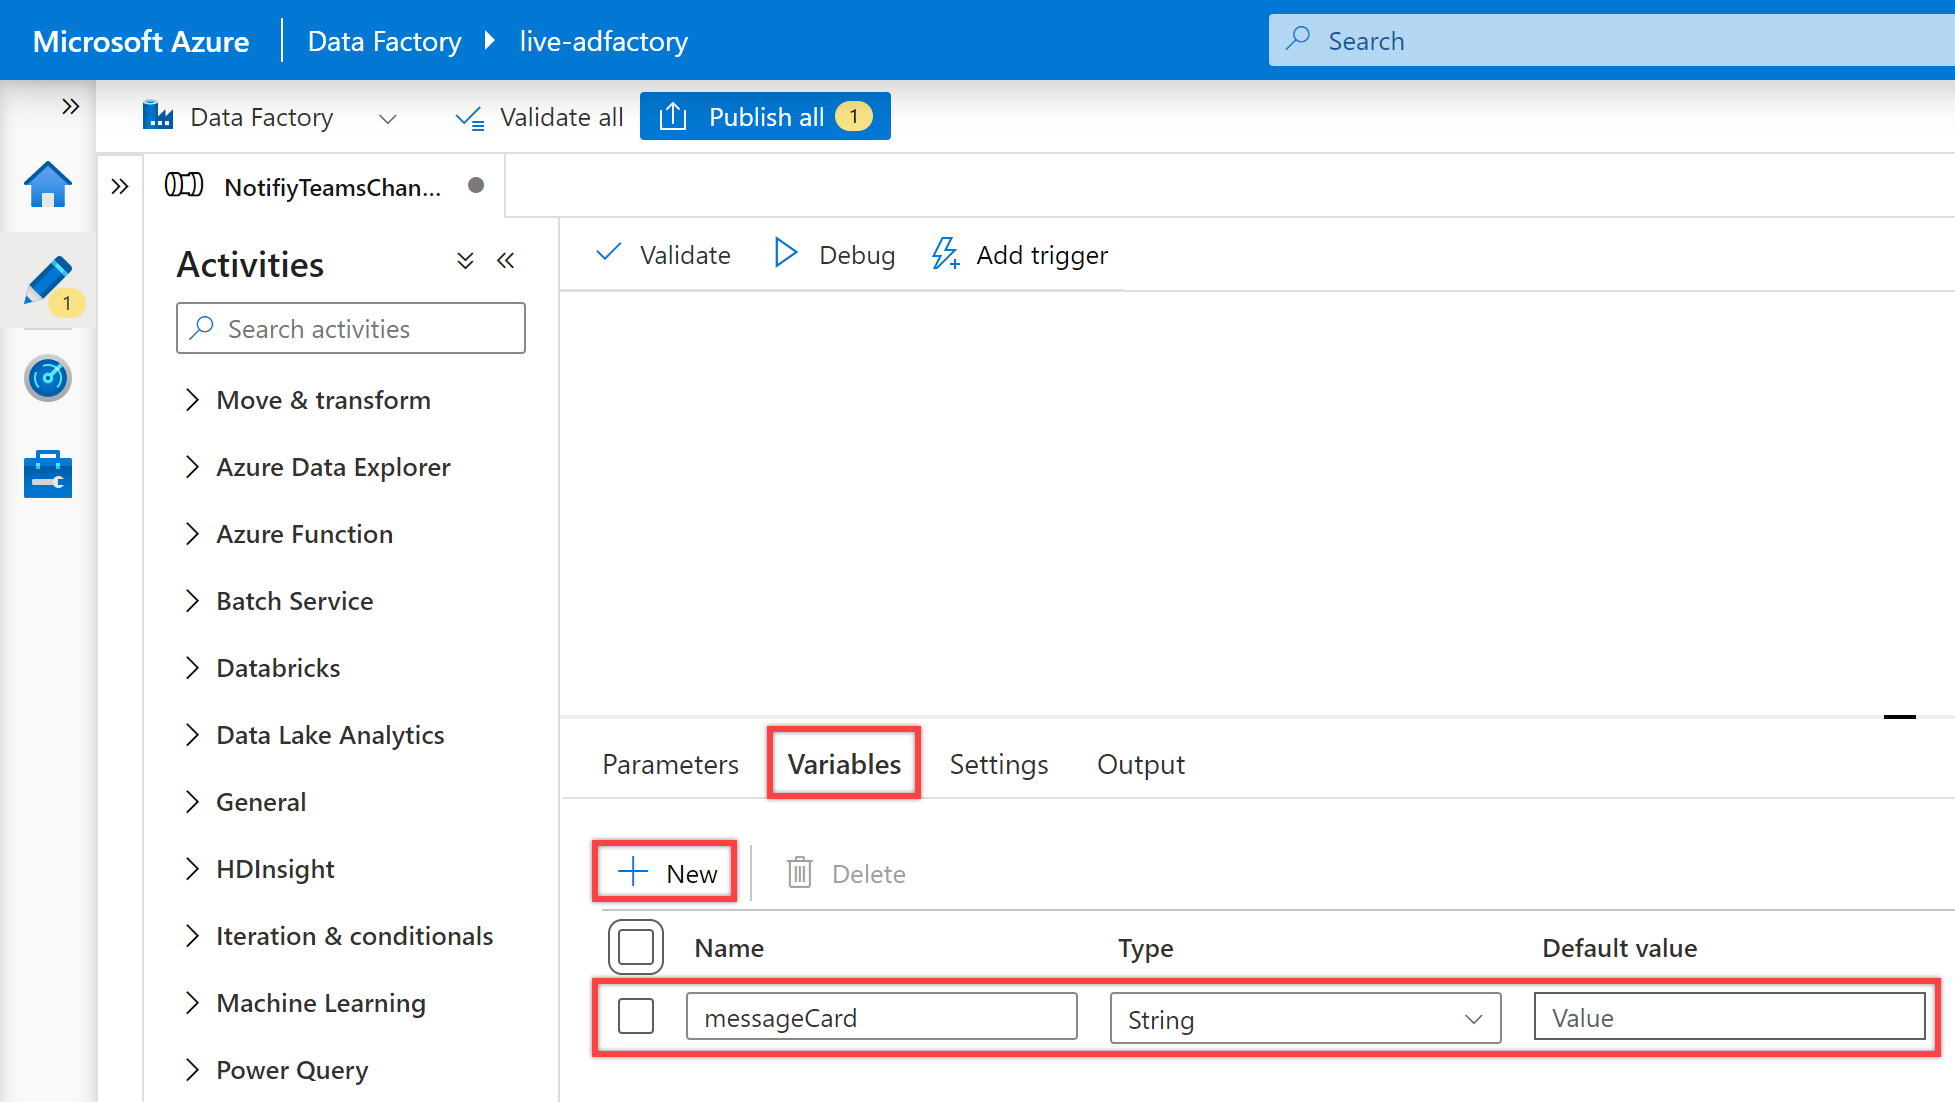
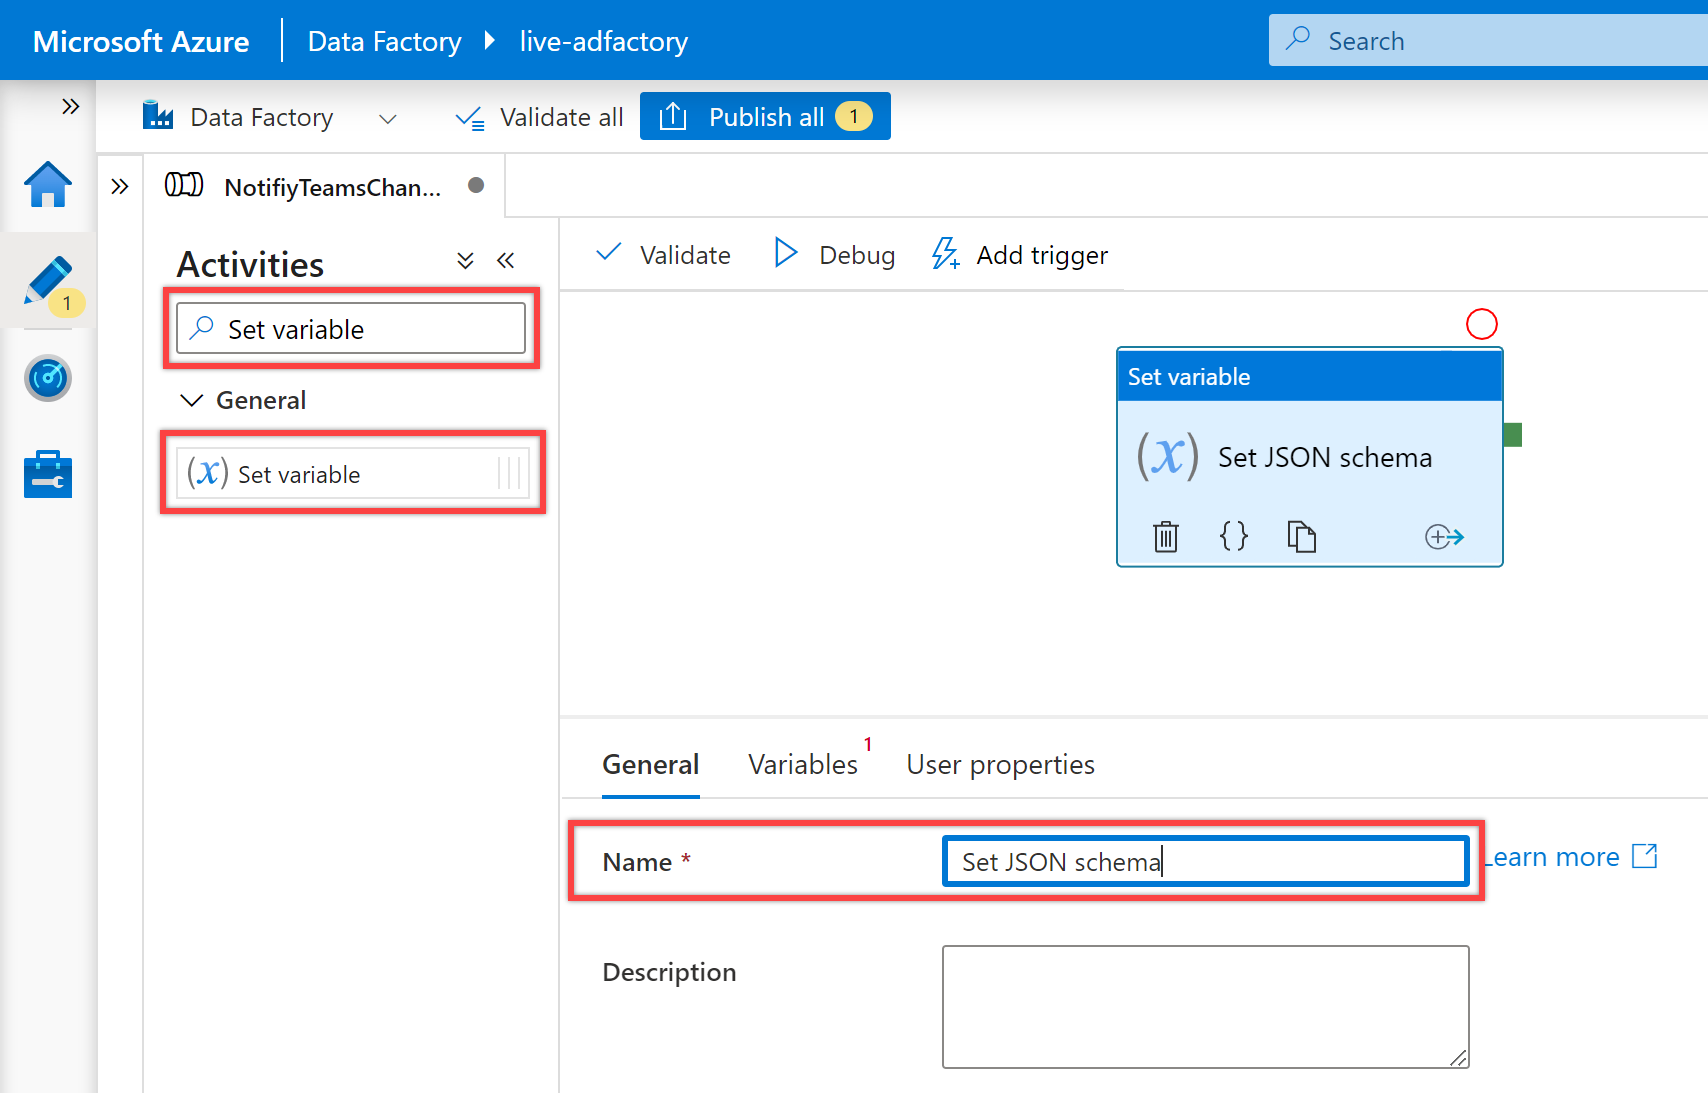
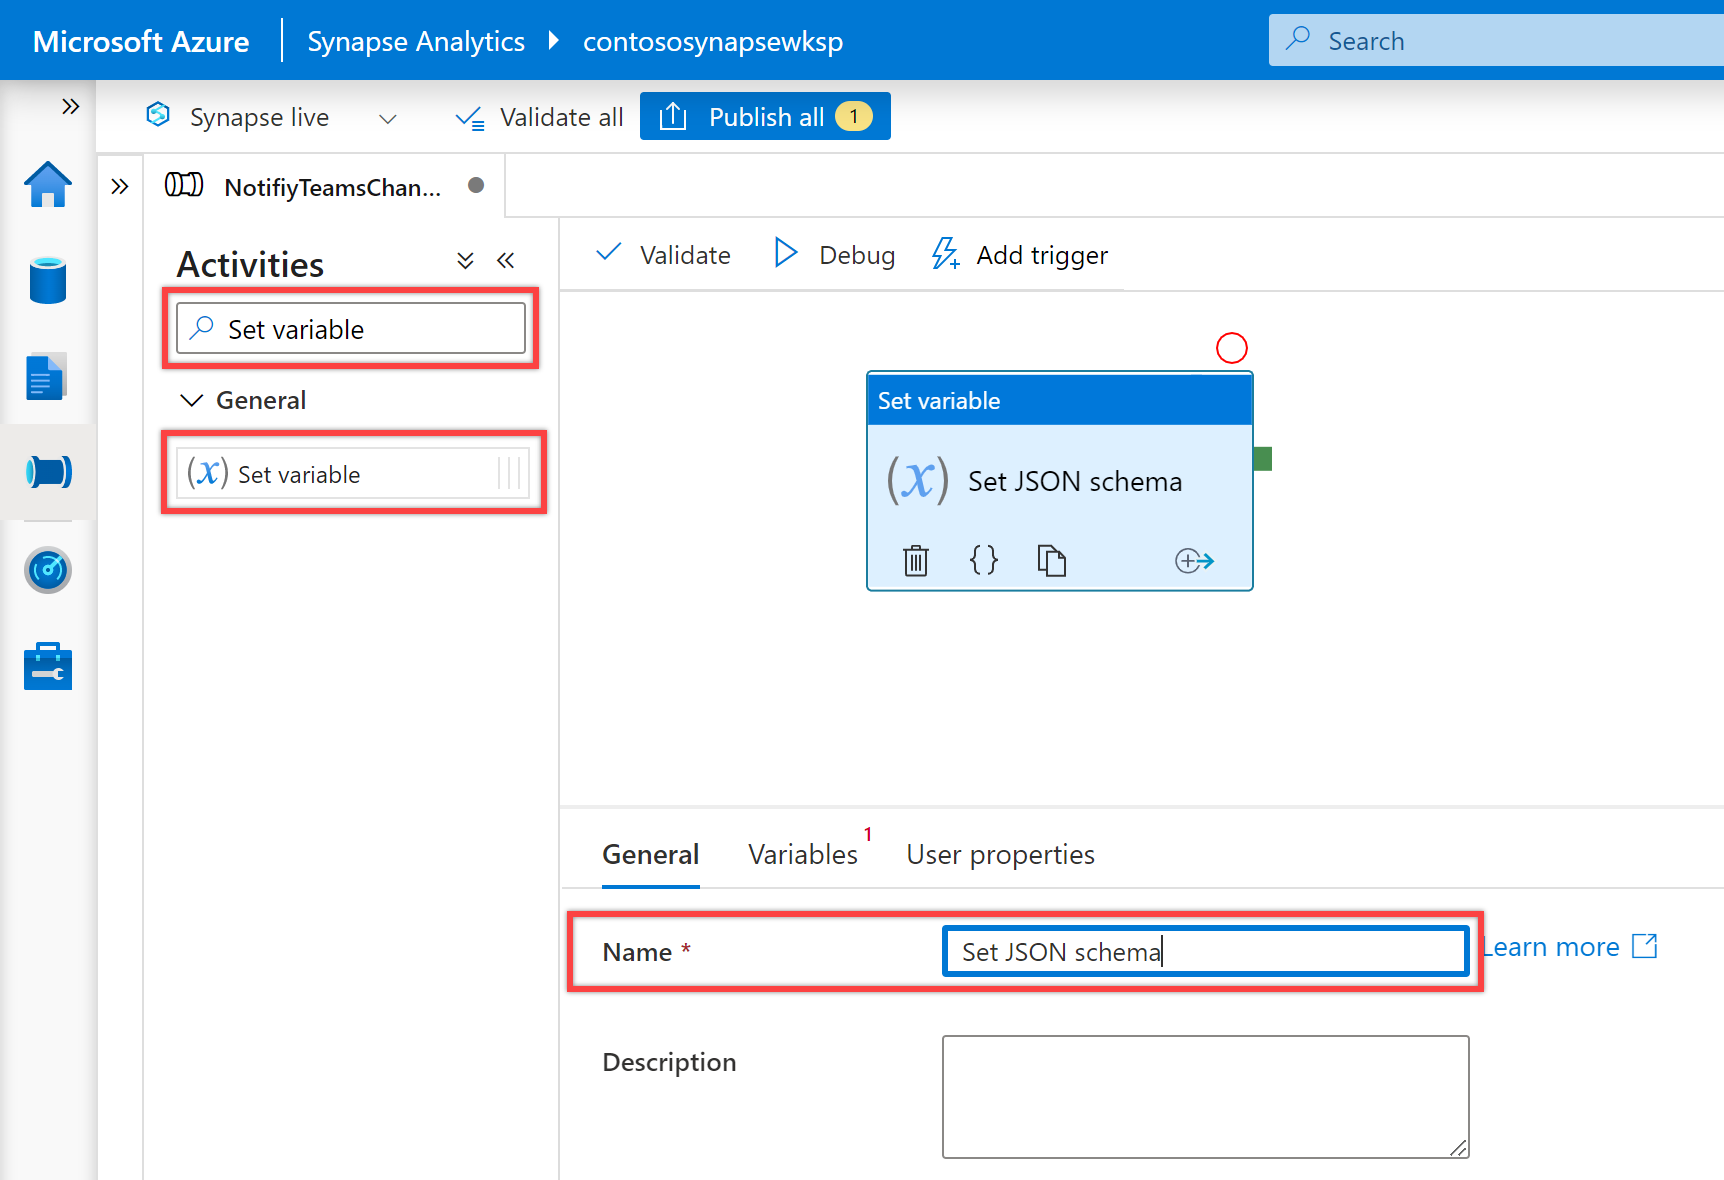
파이프라인 “작업” 창에서 “변수 설정”을 검색하고 변수 설정 작업을 파이프라인 캔버스로 끕니다.
아직 선택하지 않은 경우 캔버스에서 변수 설정 작업을 선택하고 해당 “일반” 탭을 선택하여 세부 정보를 편집합니다.
“일반” 탭에서 변수 설정 작업의 이름에 JSON 스키마 설정을 지정합니다.
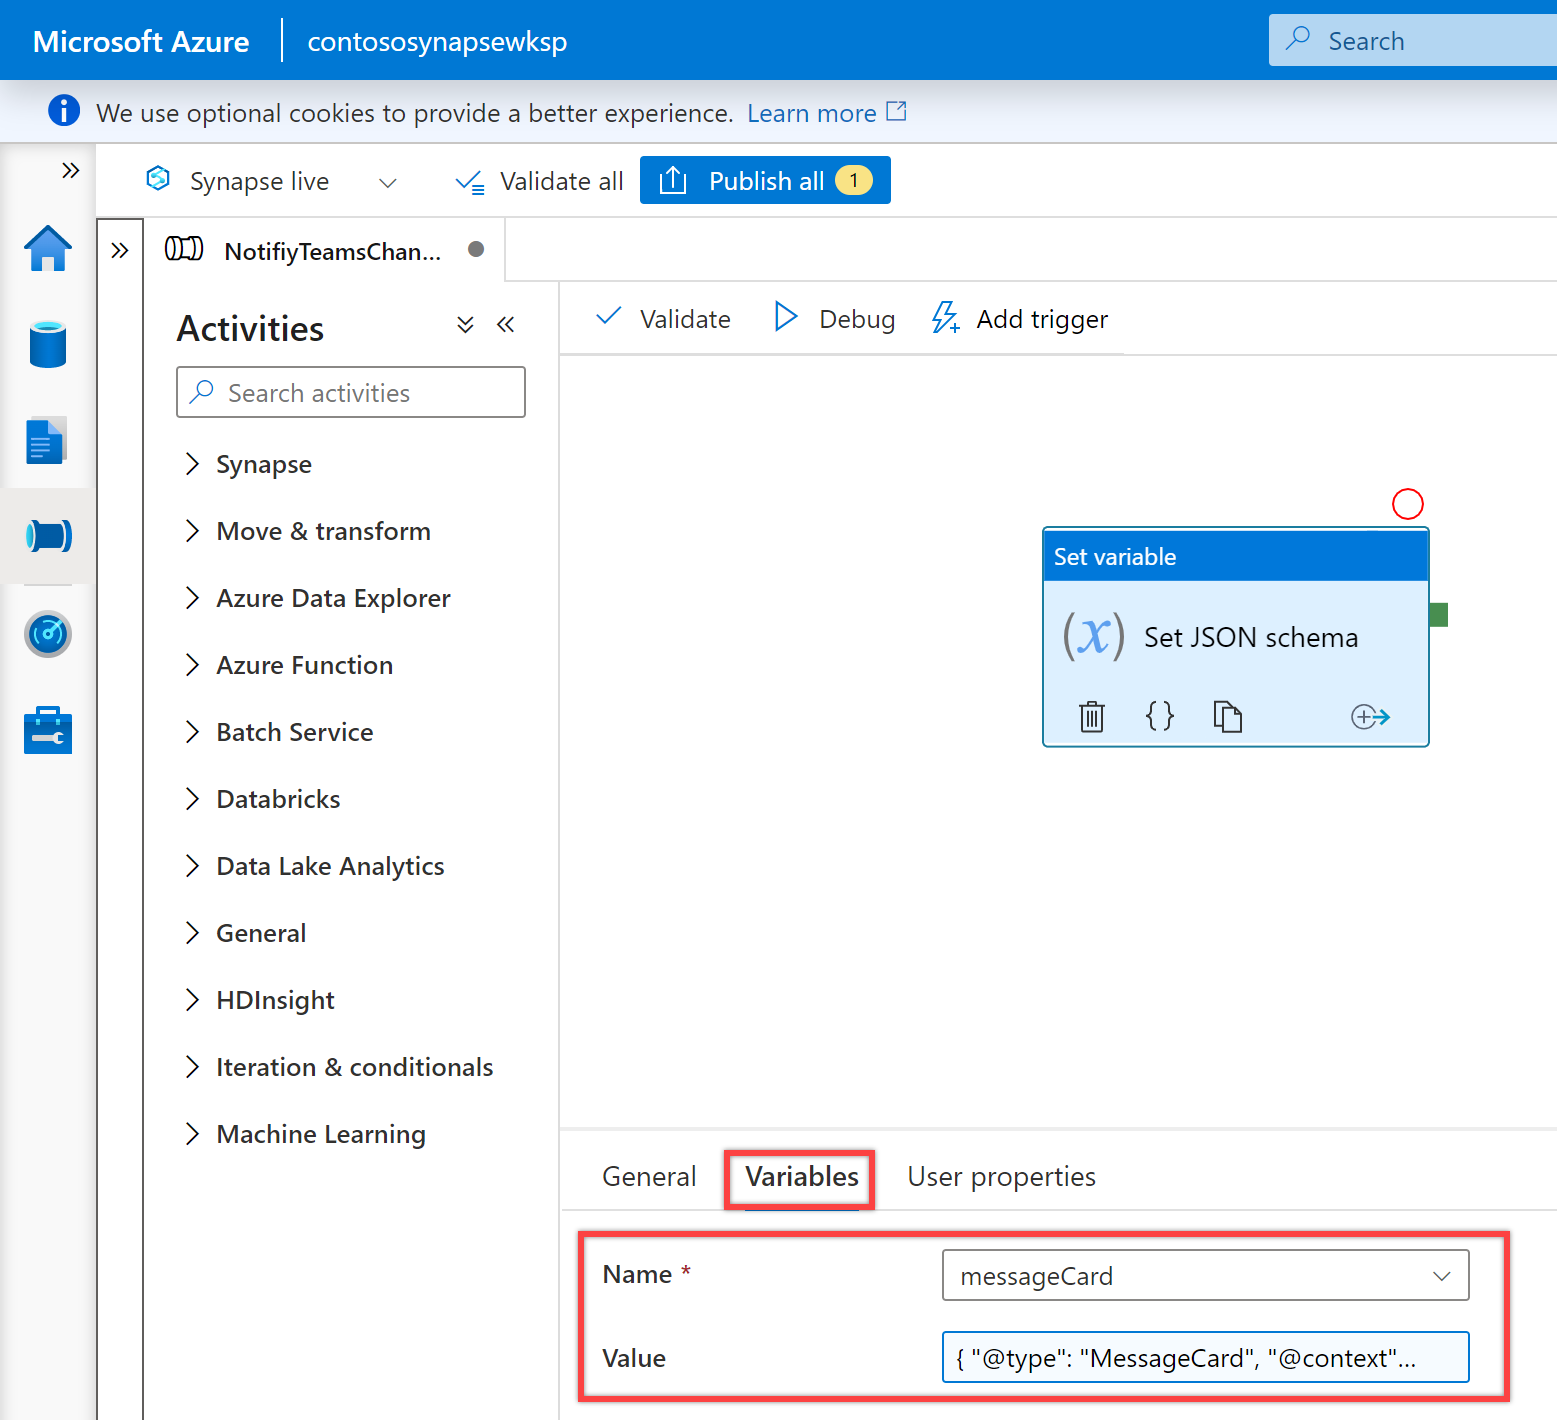
“변수” 탭에서 Name 속성에 대해 messageCard 변수를 선택하고 Value 속성에 대해 다음 JSON을 입력합니다.
{ "@type": "MessageCard", "@context": "http://schema.org/extensions", "themeColor": "0076D7", "summary": "Pipeline status alert message", "sections": [ { "activityTitle": "Pipeline execution alert", "facts": [ { "name": "Subscription Id:", "value": "@{pipeline().parameters.subscription}" }, { "name": "Resource Group:", "value": "@{pipeline().parameters.resourceGroup}" }, { "name": "Data Factory Name:", "value": "@{pipeline().DataFactory}" }, { "name": "Pipeline RunId:", "value": "@{pipeline().parameters.runId}" }, { "name": "Pipline Name:", "value": "@{pipeline().Pipeline}" }, { "name": "Pipeline Status:", "value": "@{pipeline().parameters.status}" }, { "name": "Execution Start Time (UTC):", "value": "@{pipeline().parameters.triggerTime}" }, { "name": "Execution Finish Time (UTC):", "value": "@{pipeline().parameters.executionEndTime}" }, { "name": "Execution Duration (s):", "value": "@{pipeline().parameters.runDuration}" }, { "name": "Message:", "value": "@{pipeline().parameters.message}" }, { "name": "Notification Time (UTC):", "value": "@{utcnow()}" } ], "markdown": true } ], "potentialAction": [ { "@type": "OpenUri", "name": "View pipeline run", "targets": [ { "os": "default", "uri": "@{concat('https://synapse.azure.com/monitoring/pipelineruns/',pipeline().parameters.runId,'?factory=/subscriptions/',pipeline().parameters.subscription,'/resourceGroups/',pipeline().parameters.resourceGroup,'/providers/Microsoft.DataFactory/factories/',pipeline().DataFactory)}" } ] } ] }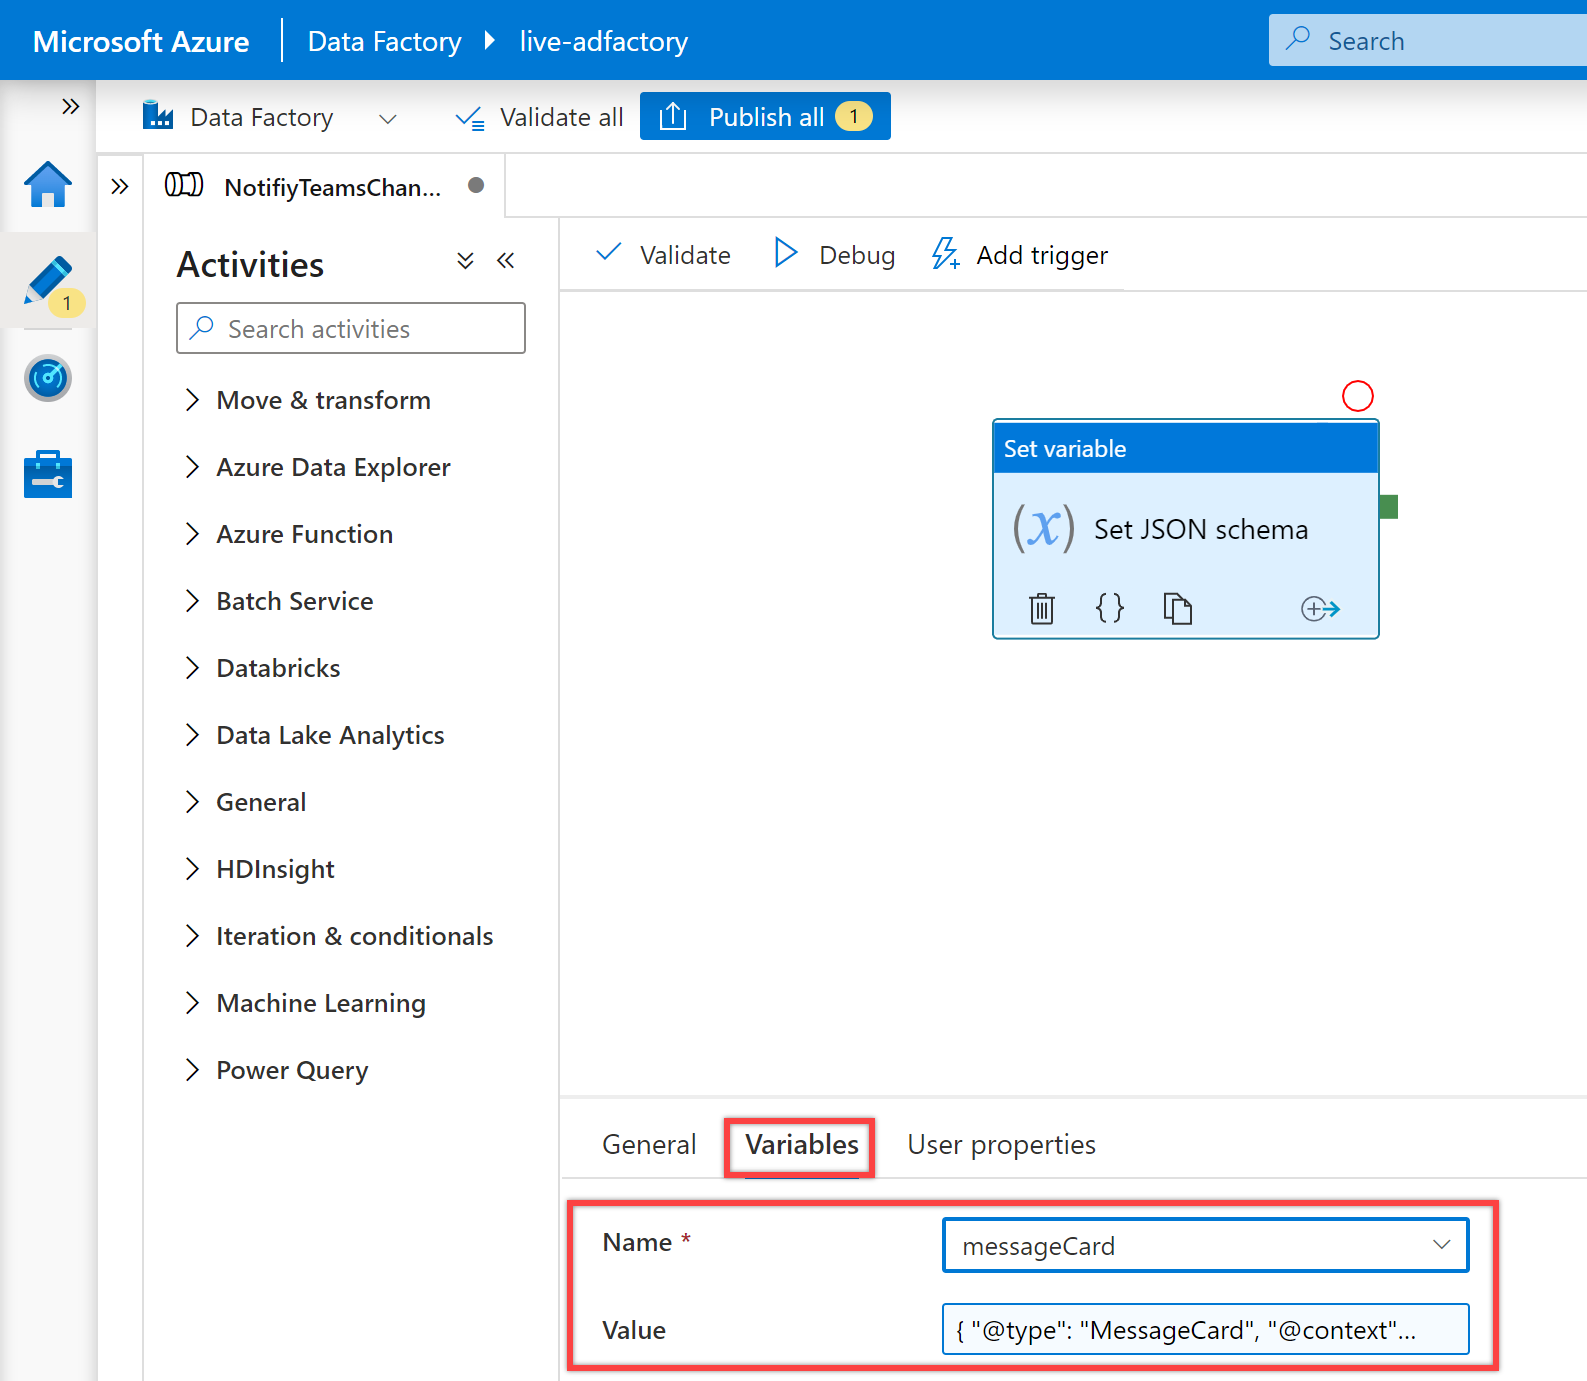
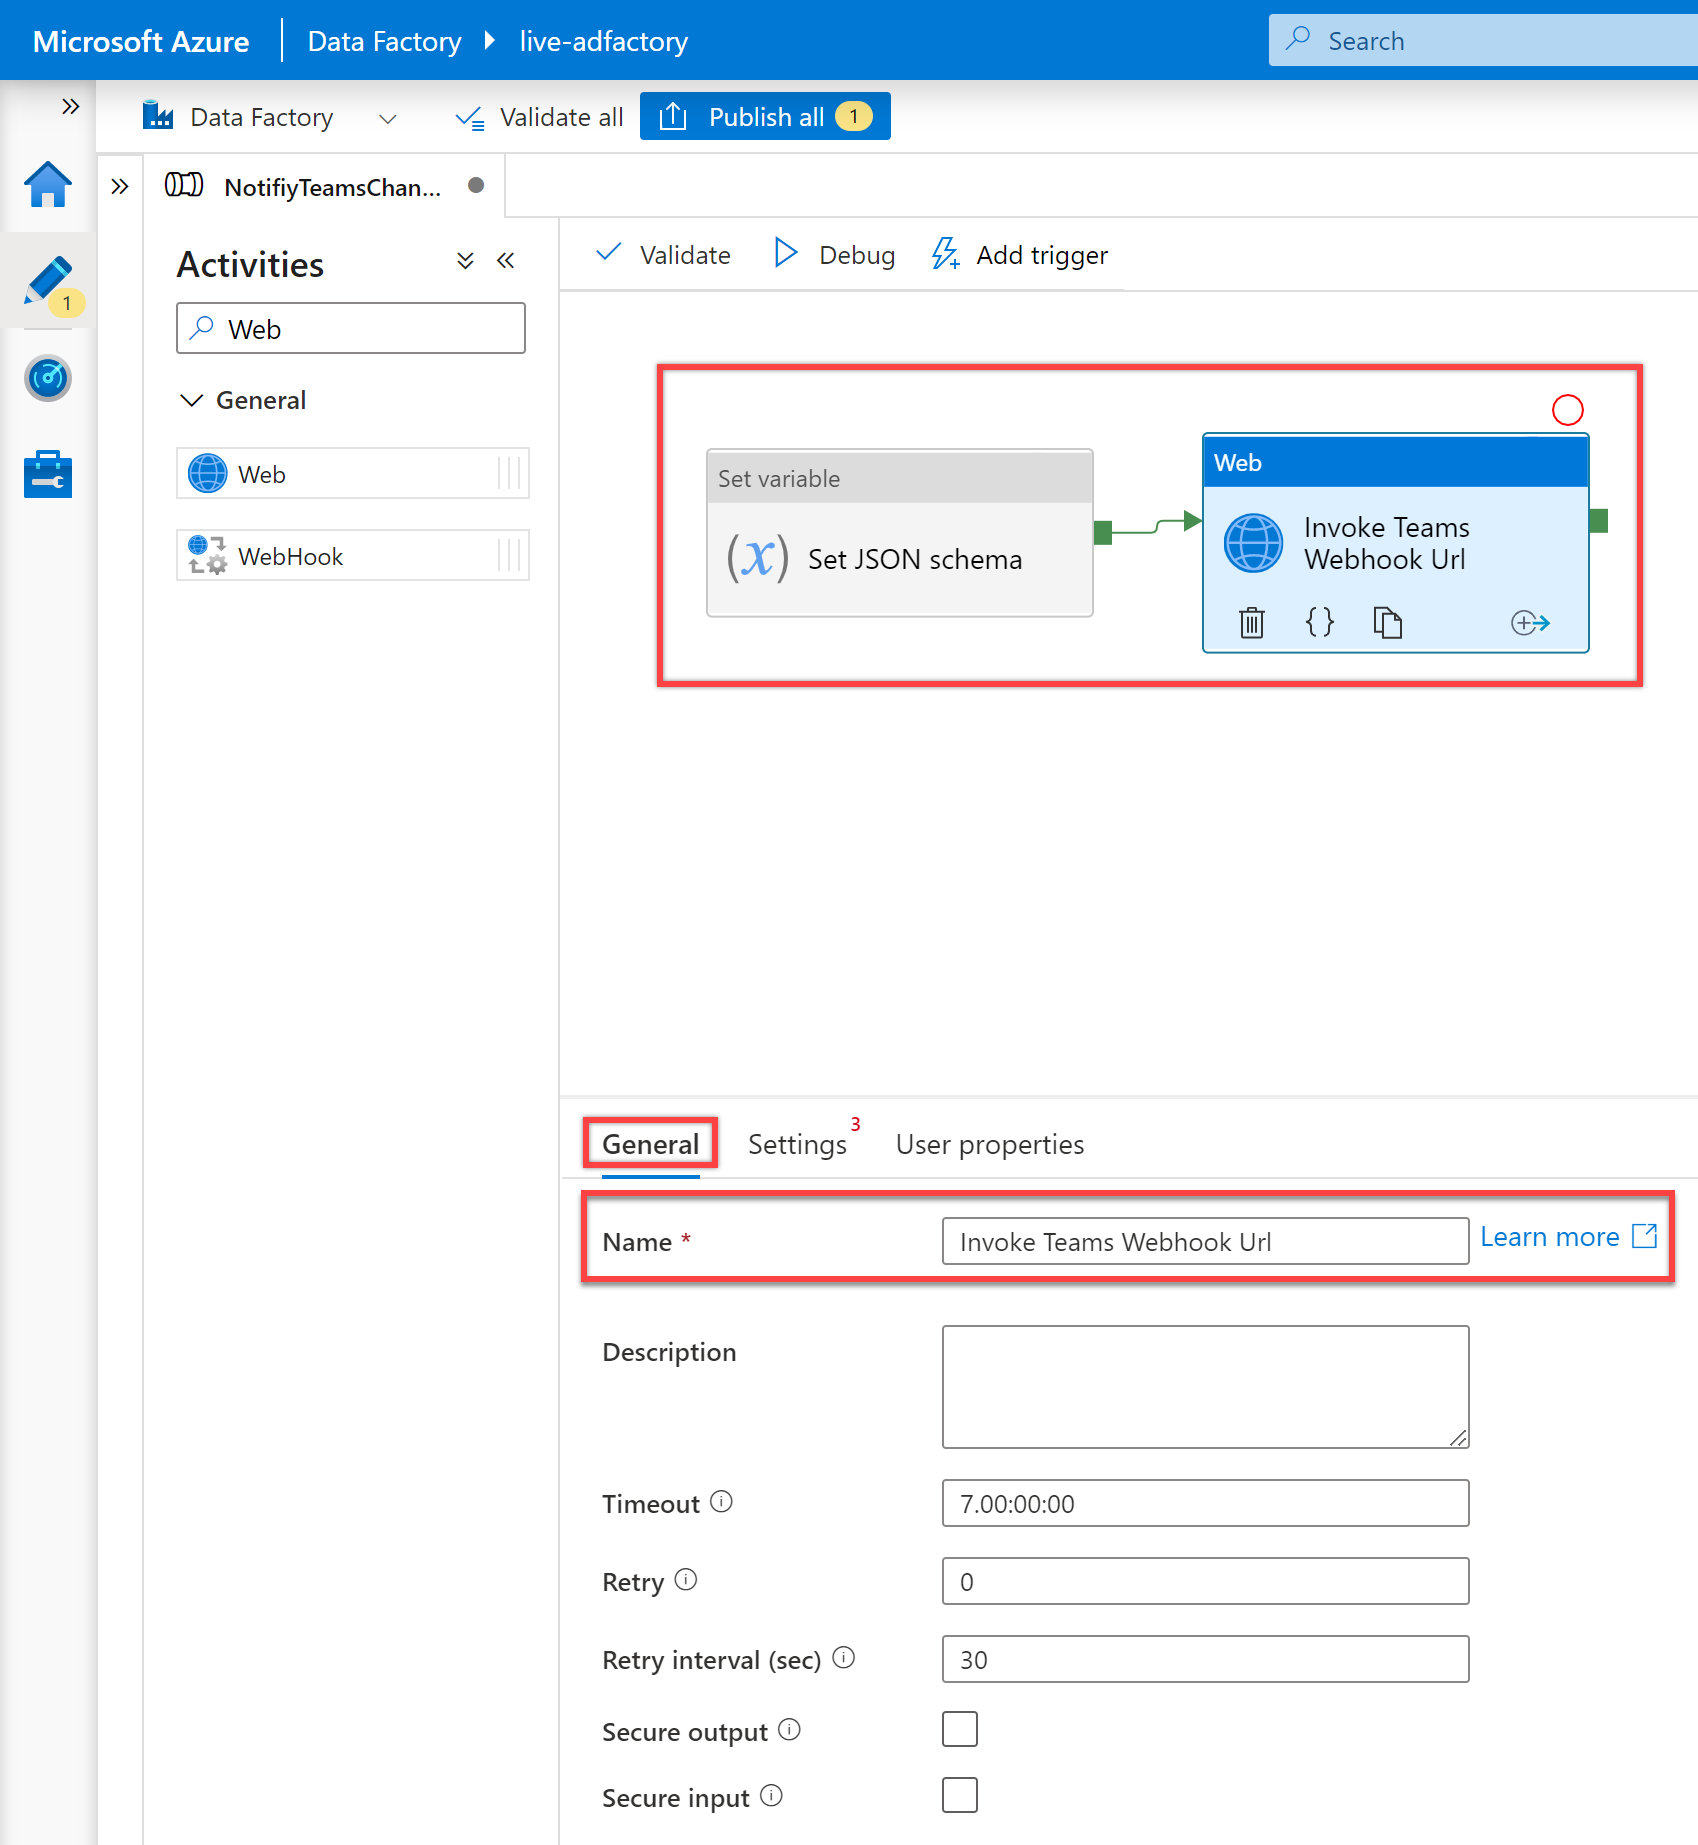
파이프라인 “작업” 창에서 “웹”을 검색하고 웹 작업을 파이프라인 캔버스로 끕니다.
변수 설정 작업이 성공한 경우에만 실행되도록 웹 작업에 대한 종속성 조건을 만듭니다. 이 종속성을 만들려면 변수 설정 작업의 오른쪽에 있는 녹색 핸들을 선택하고 끌어서 웹 작업에 연결합니다.
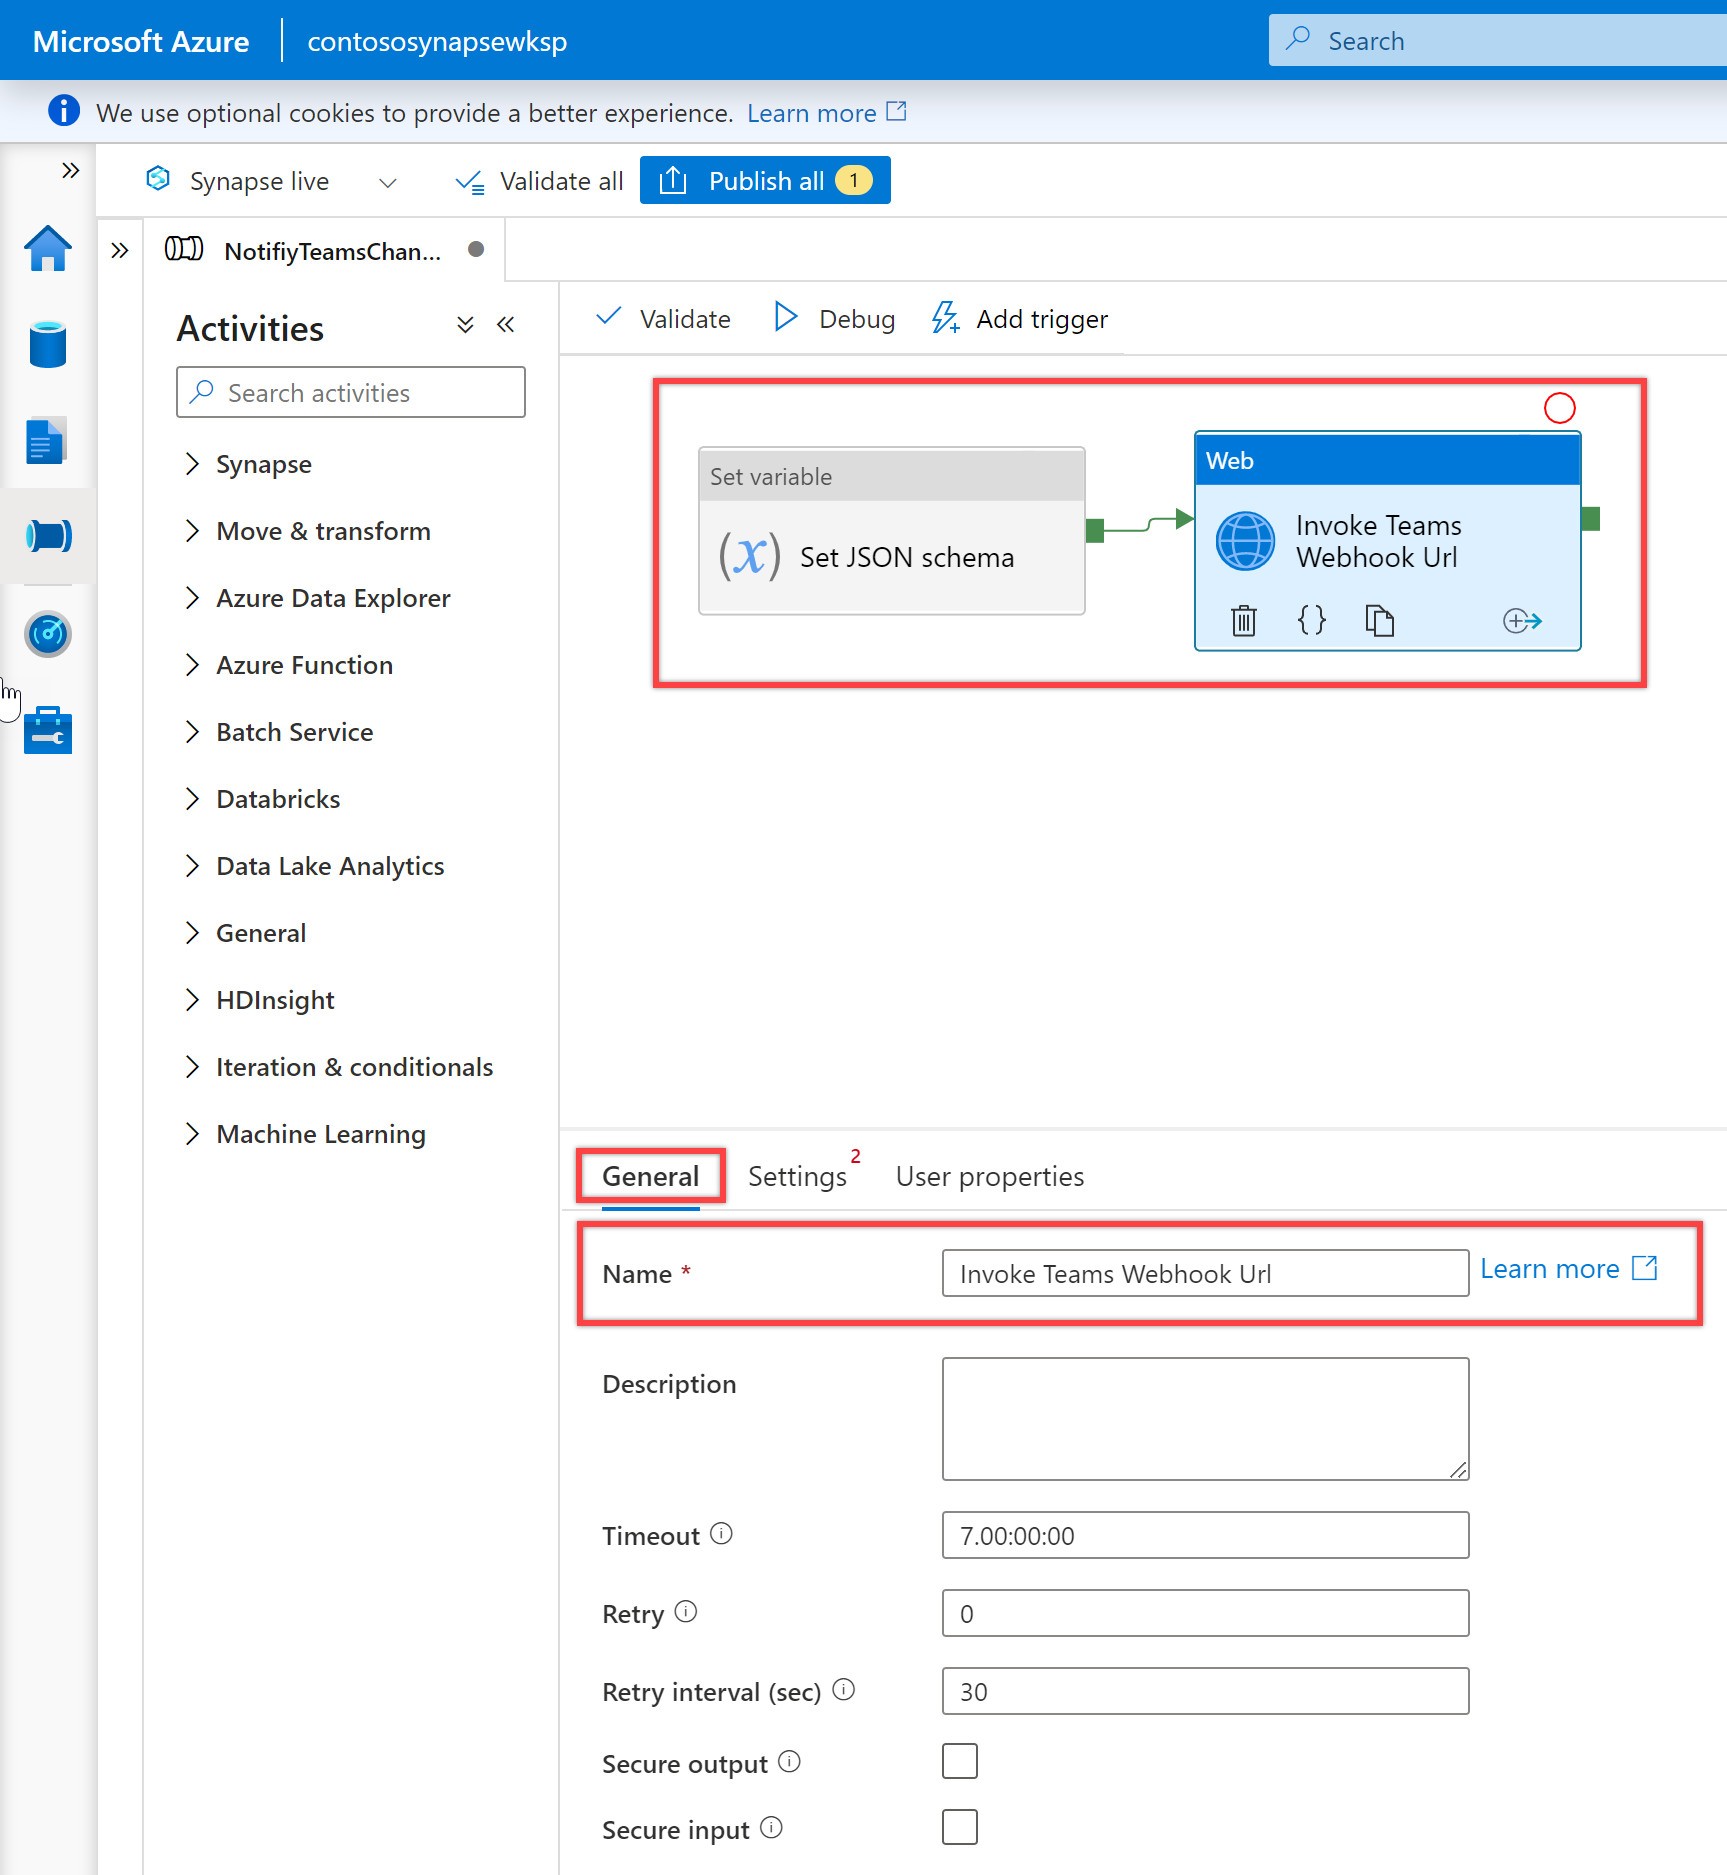
아직 선택하지 않은 경우 캔버스에서 새 웹 작업을 선택하고 해당 “일반” 탭을 선택하여 세부 정보를 편집합니다.
“일반” 창에서 웹 작업의 이름에 Teams 웹후크 URL 호출을 지정합니다.
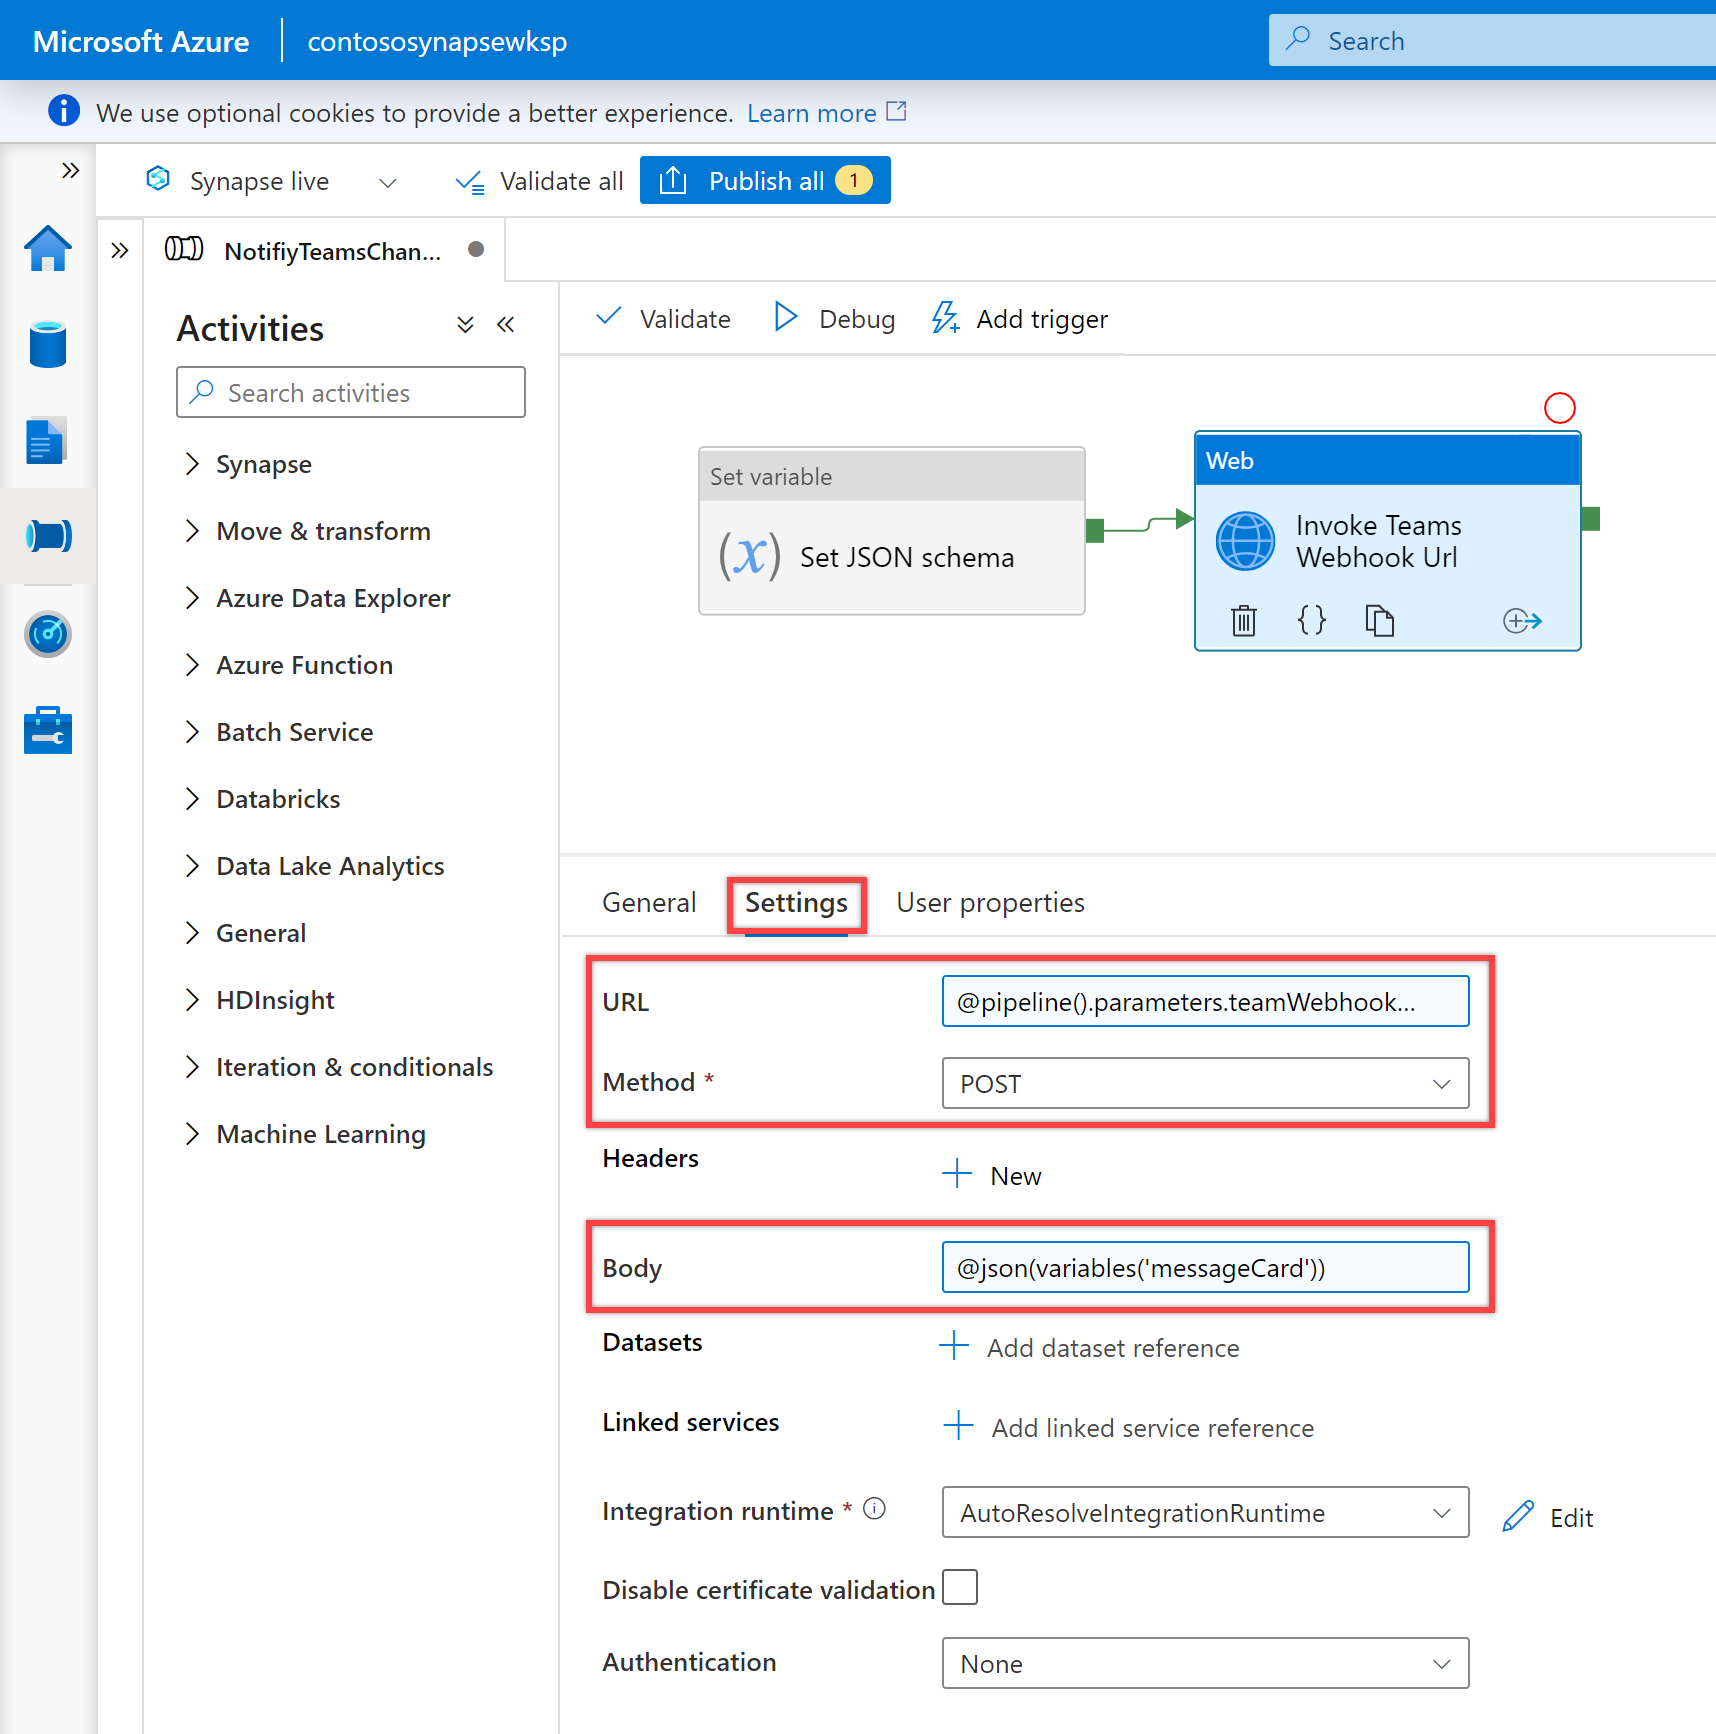
“설정” 창에서 다음 속성을 다음과 같이 설정합니다.
속성 value URL @pipeline().parameters.teamWebhookUrl메서드 POST본문 @json(variables('messageCard'))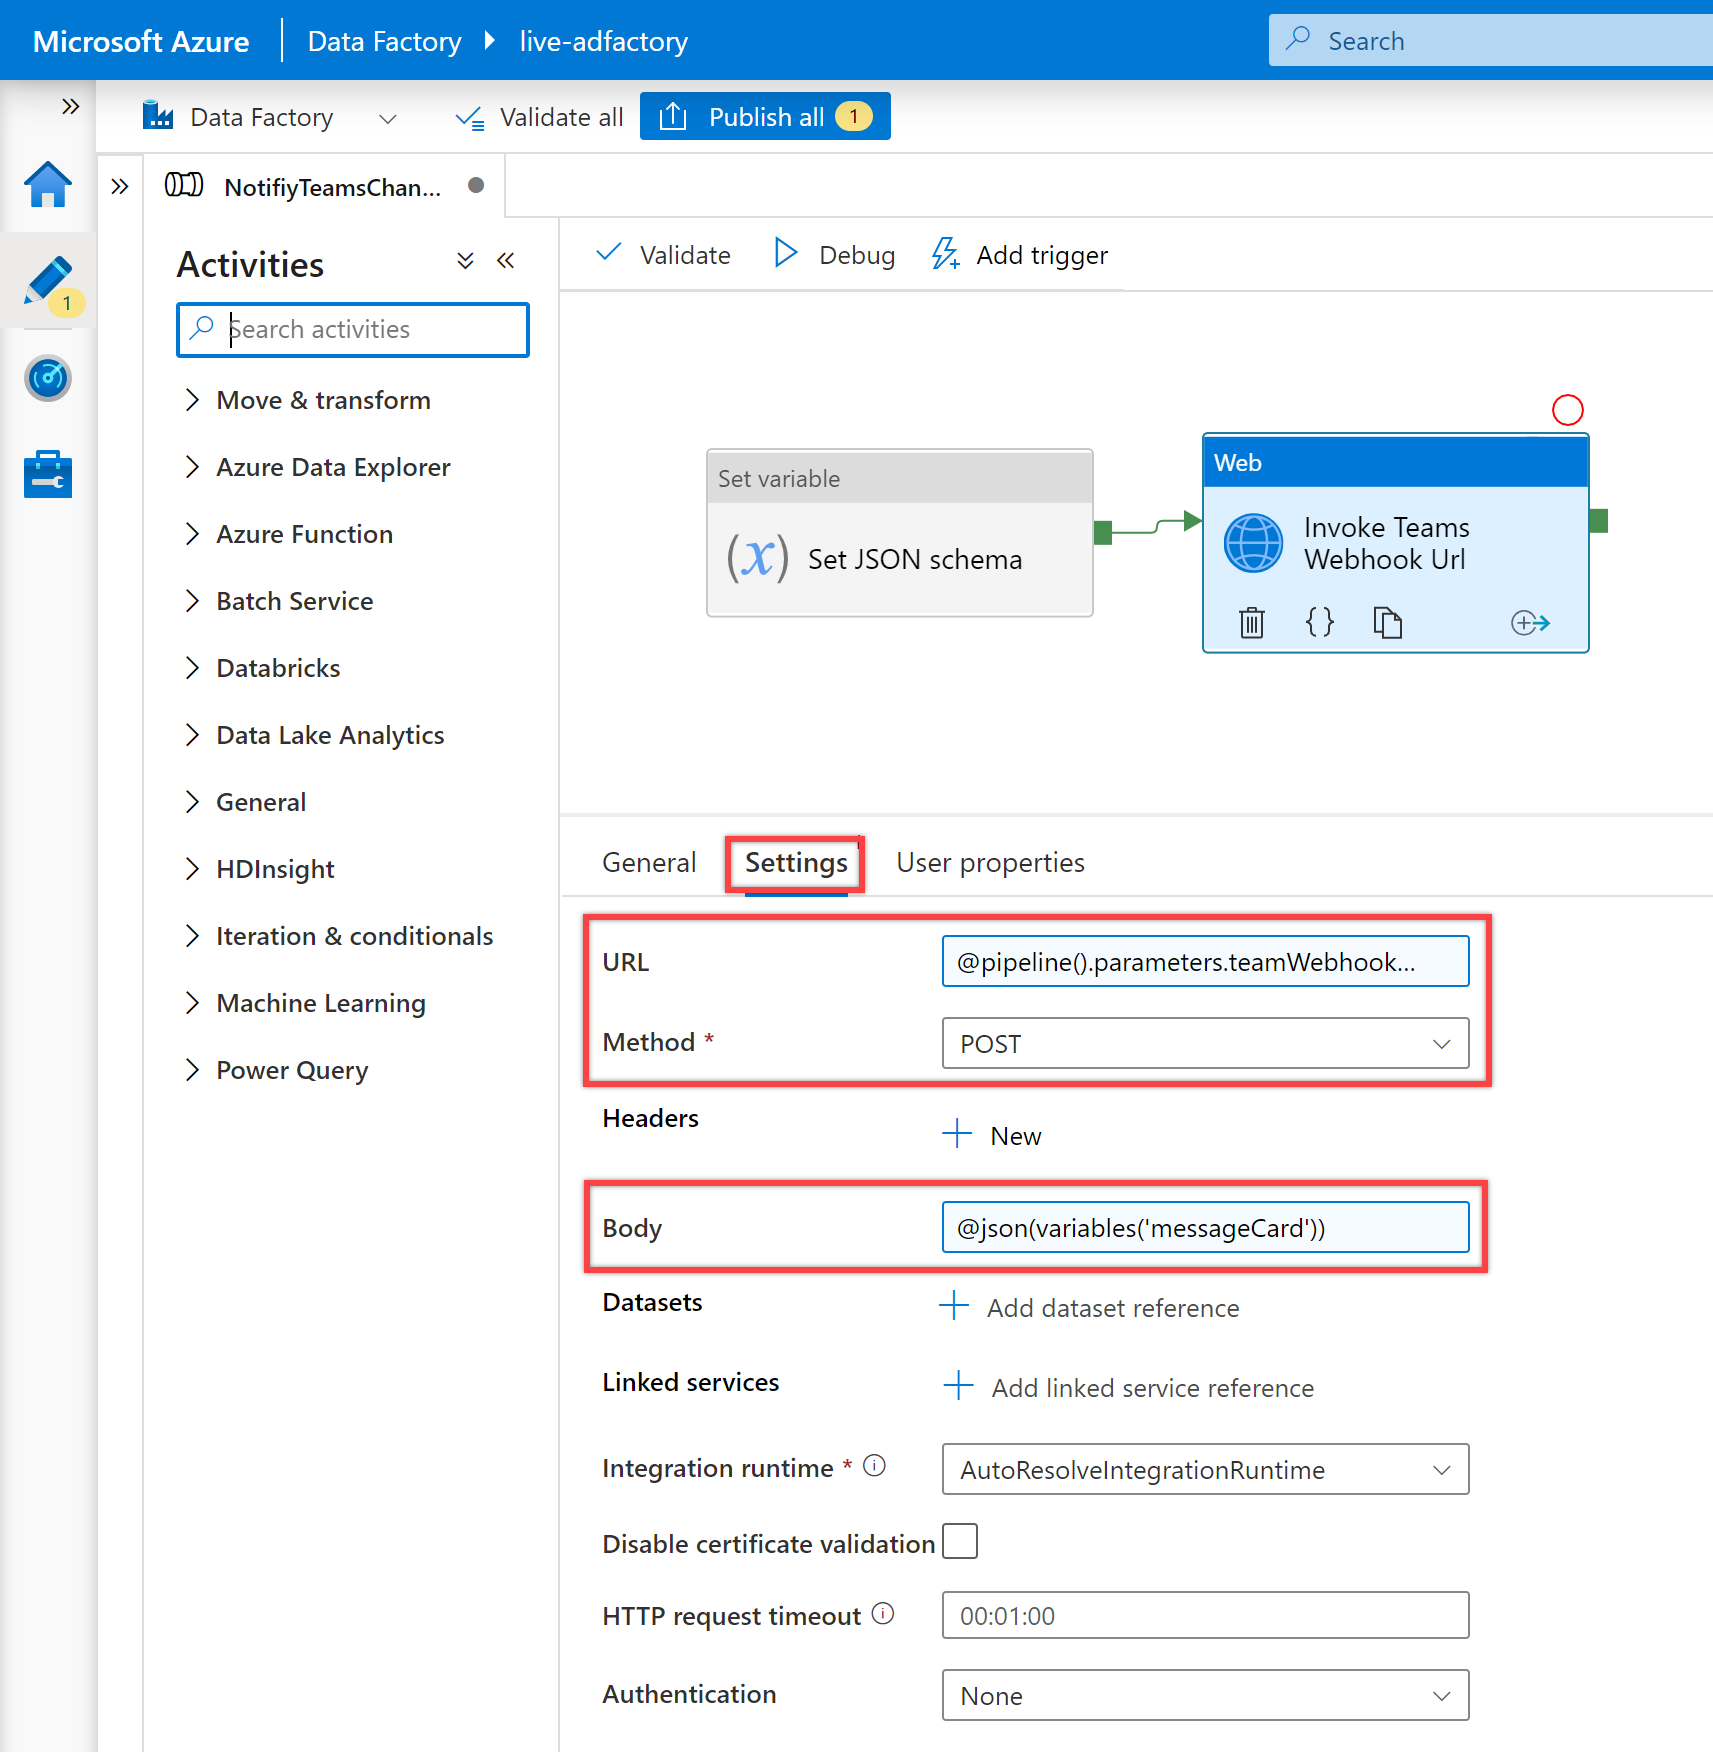
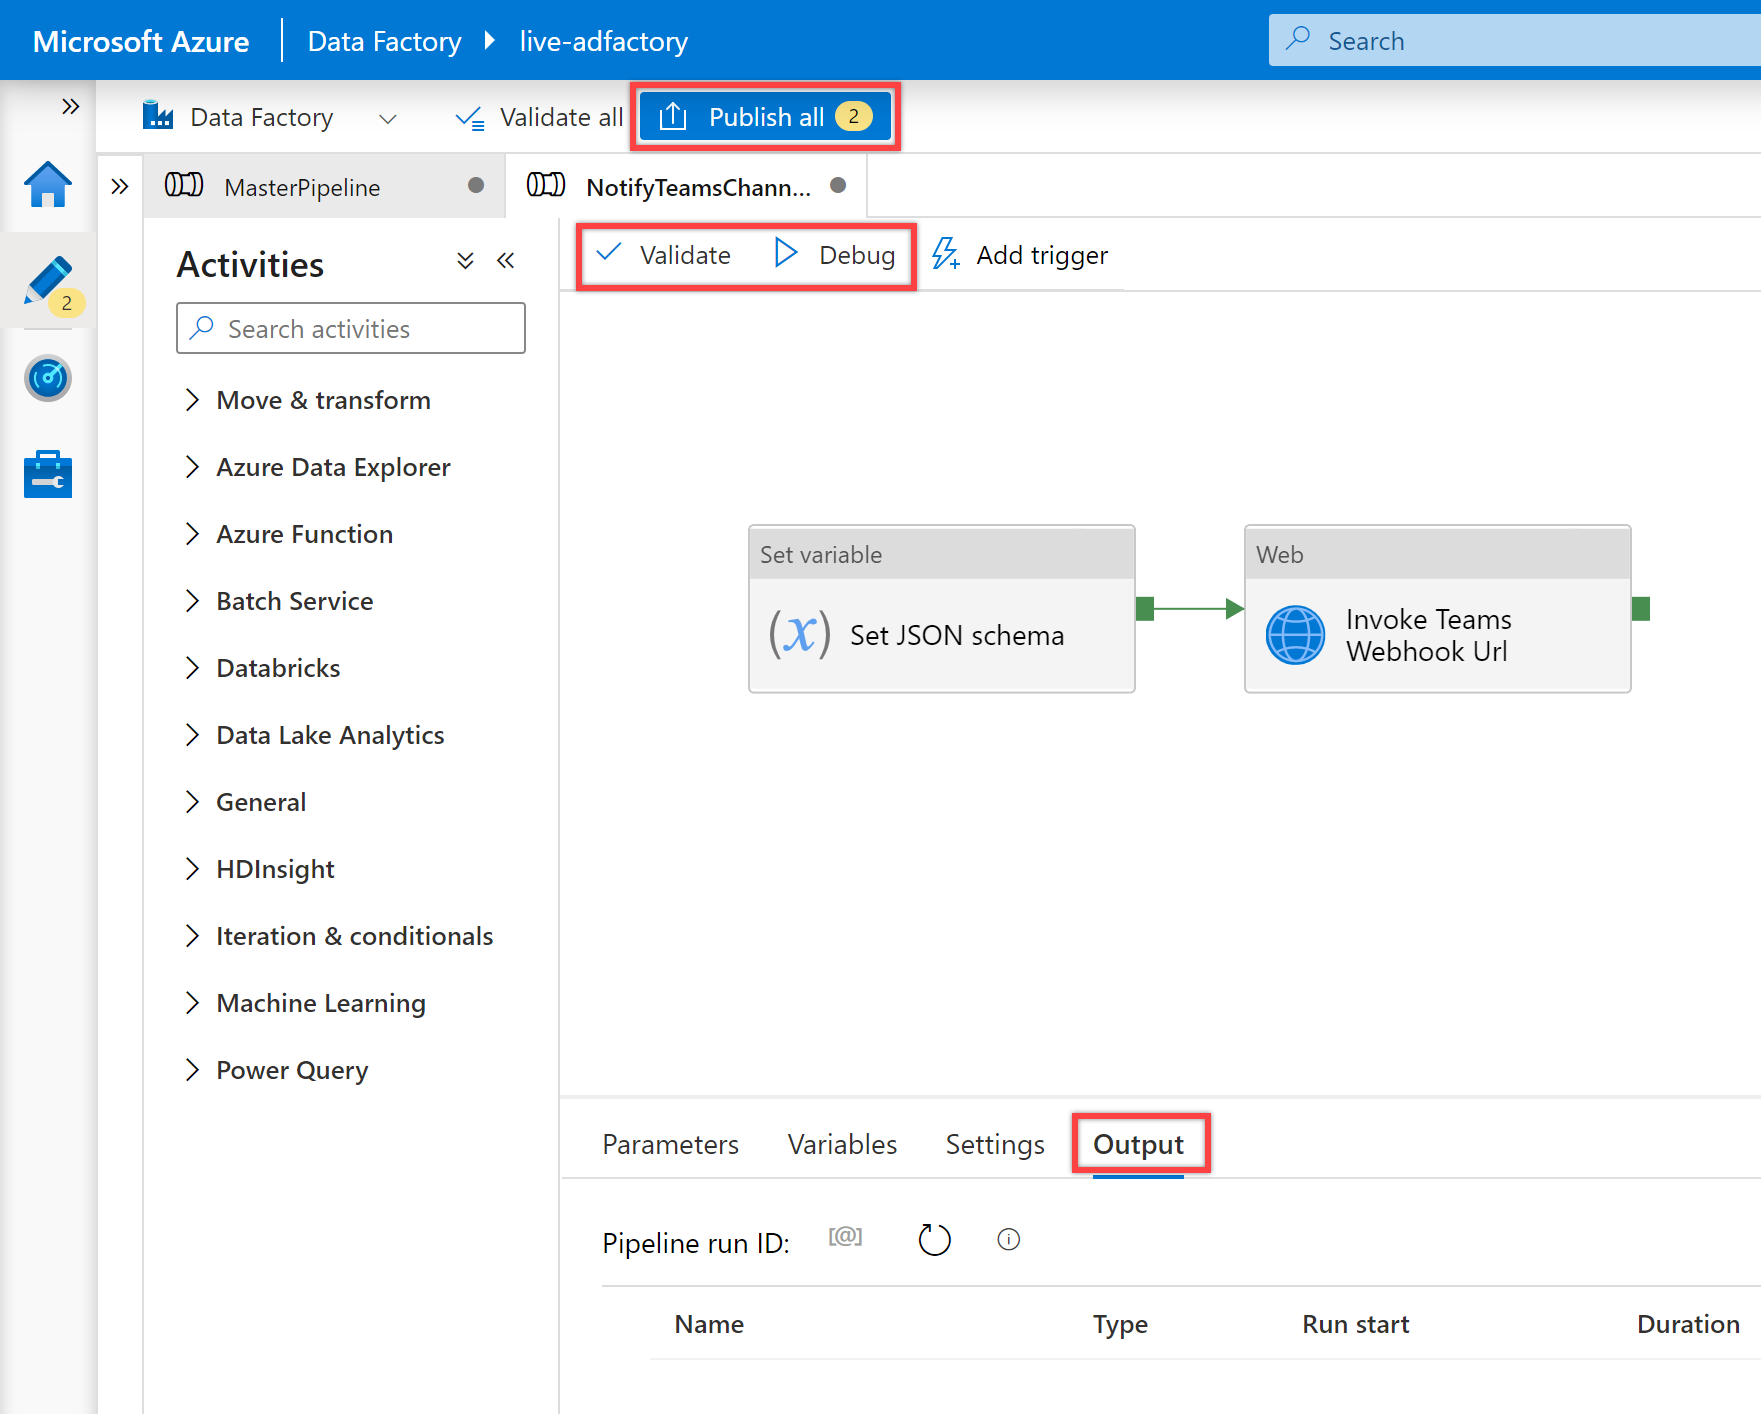
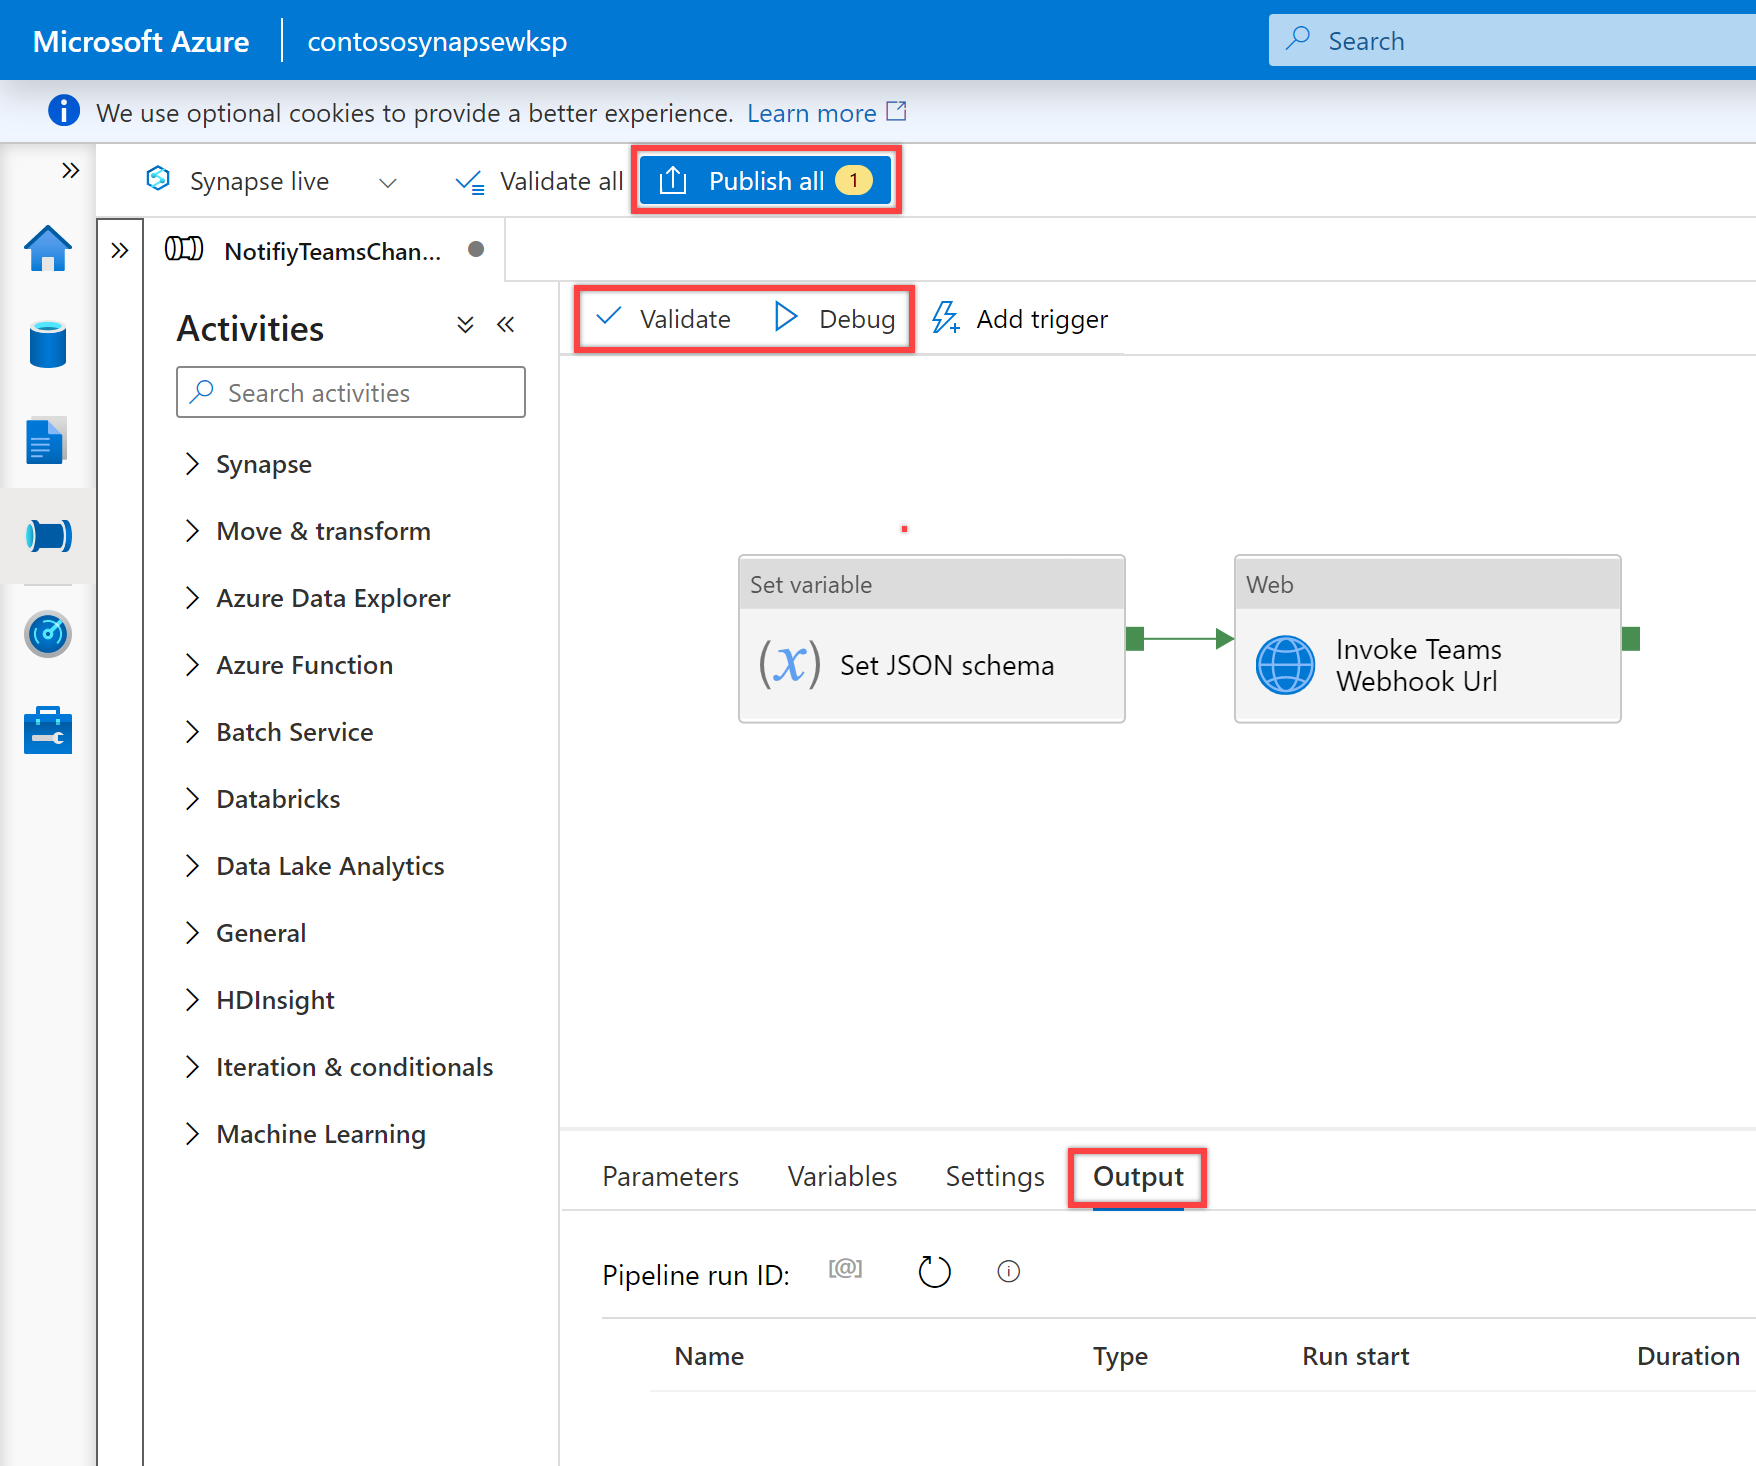
모두 설정되었고 이제 NotifiyTeamsChannelPipeline 파이프라인의 유효성을 검사하고, 디버그한 다음, 게시할 준비가 되었습니다.
- 파이프라인에 대한 유효성을 검사하려면 도구 모음에서 유효성 검사를 선택합니다.
- 파이프라인을 디버그하려면 도구 모음에서 디버그를 선택합니다. 창 아래쪽에 있는 “출력” 탭에서 파이프라인 실행 상태를 확인할 수 있습니다.
- 파이프라인이 성공적으로 실행되면 위쪽 도구 모음에서 모두 게시를 선택합니다. 이 작업은 사용자가 만든 엔터티를 Data Factory에 게시합니다. 게시됨 메시지가 표시될 때까지 기다립니다.
샘플 사용
이 샘플 사용 시나리오에서는 세 가지 Execute Pipeline 작업이 있는 마스터 파이프라인을 만듭니다. 첫 번째 Execute Pipeline 작업은 ETL 파이프라인을 호출하고 나머지 두 개의 Execute Pipeline 작업은 “NotifiyTeamsChannelPipeline” 파이프라인을 호출하여 ETL 파이프라인의 실행 상태에 따라 Teams 채널에 관련 성공 또는 실패 알림을 보냅니다.
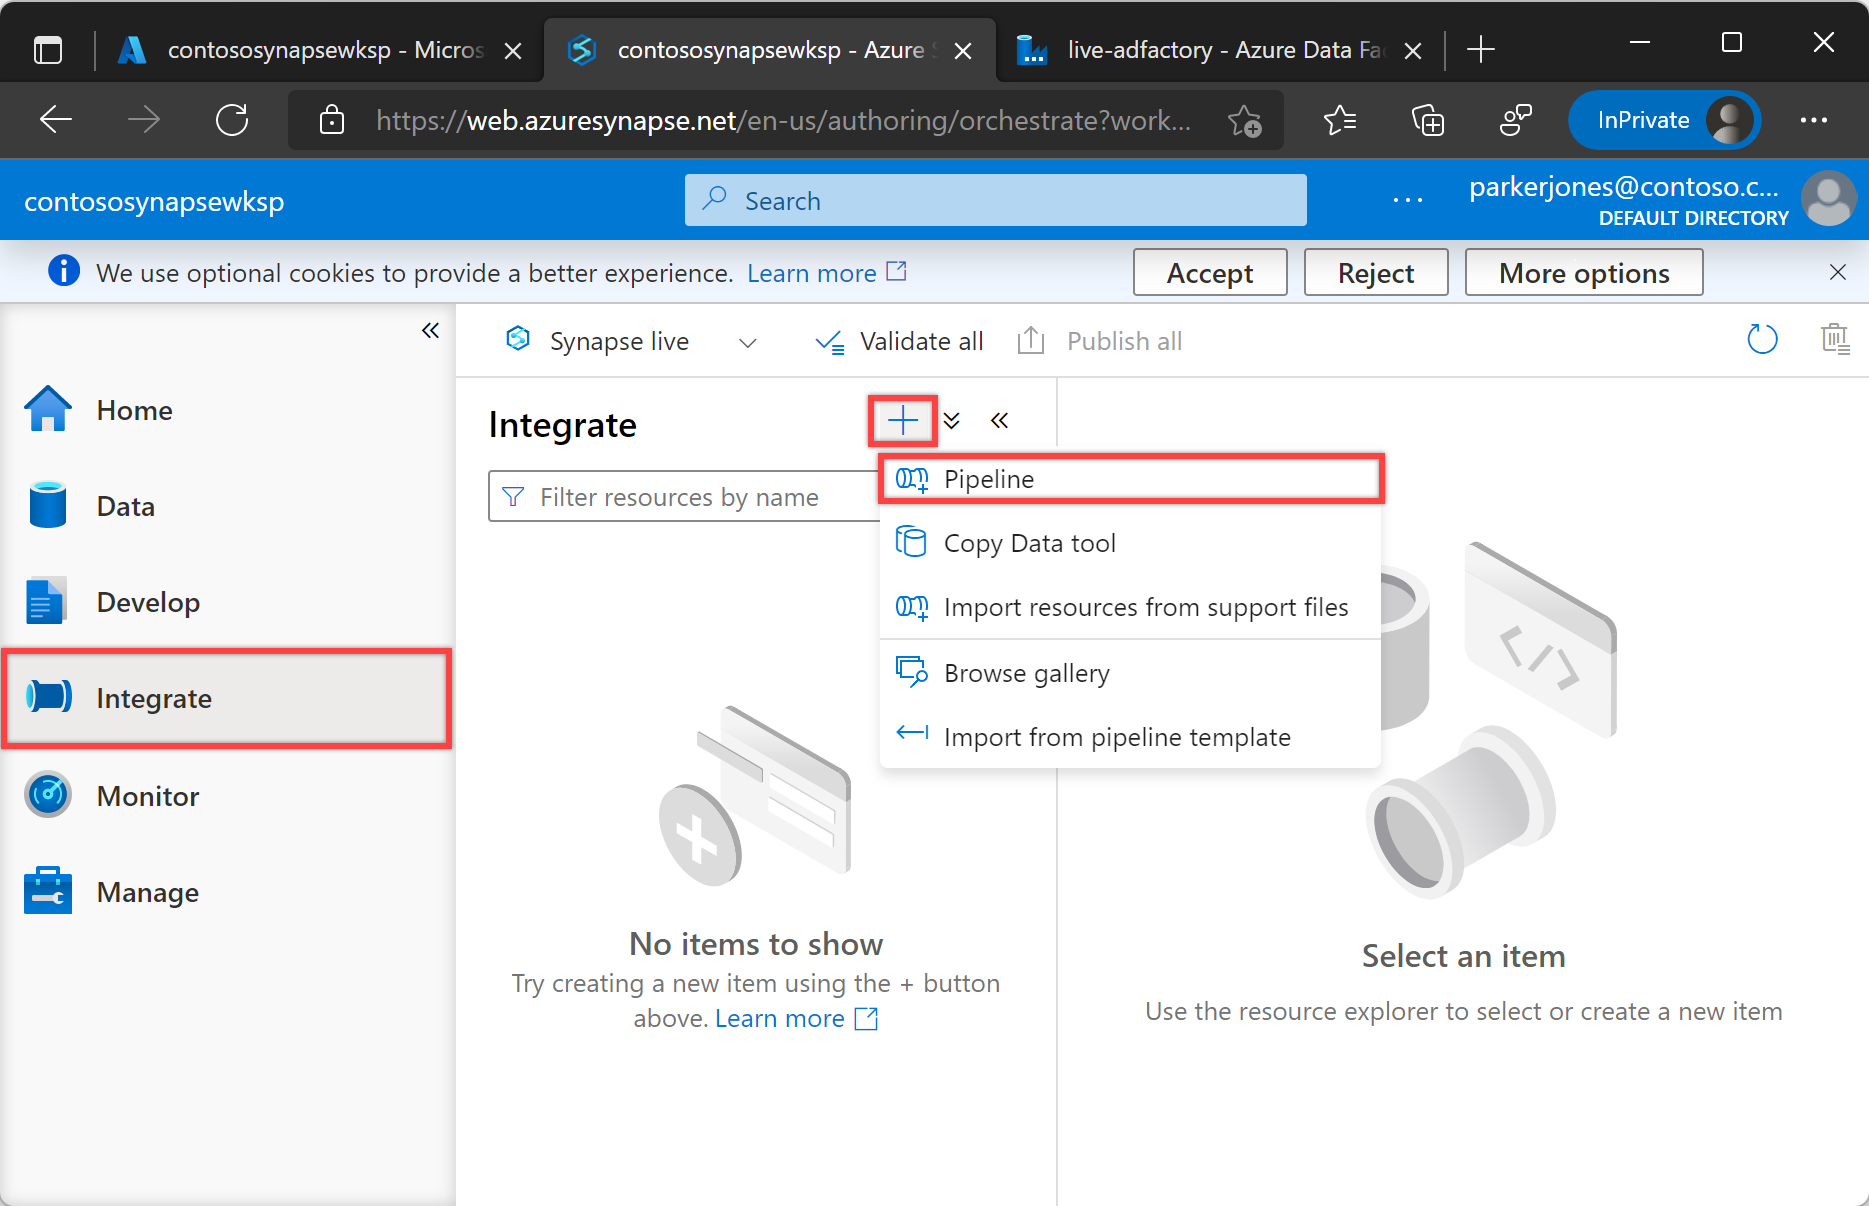
Data Factory의 왼쪽 창에서 작성 탭을 선택하거나 Synapse Studio의 왼쪽 창에서 통합 탭을 선택합니다. 다음으로, +(더하기) 단추를 선택한 후 파이프라인을 선택하여 새 파이프라인을 만듭니다.
속성 아래의 “일반” 패널에서 이름에 MasterPipeline을 지정합니다. 그런 다음, 오른쪽 위에 있는 속성 아이콘을 클릭하여 패널을 축소합니다.
파이프라인 “작업” 창에서 파이프라인을 검색하고 세 개의 Execute Pipeline 작업을 파이프라인 캔버스로 끕니다.
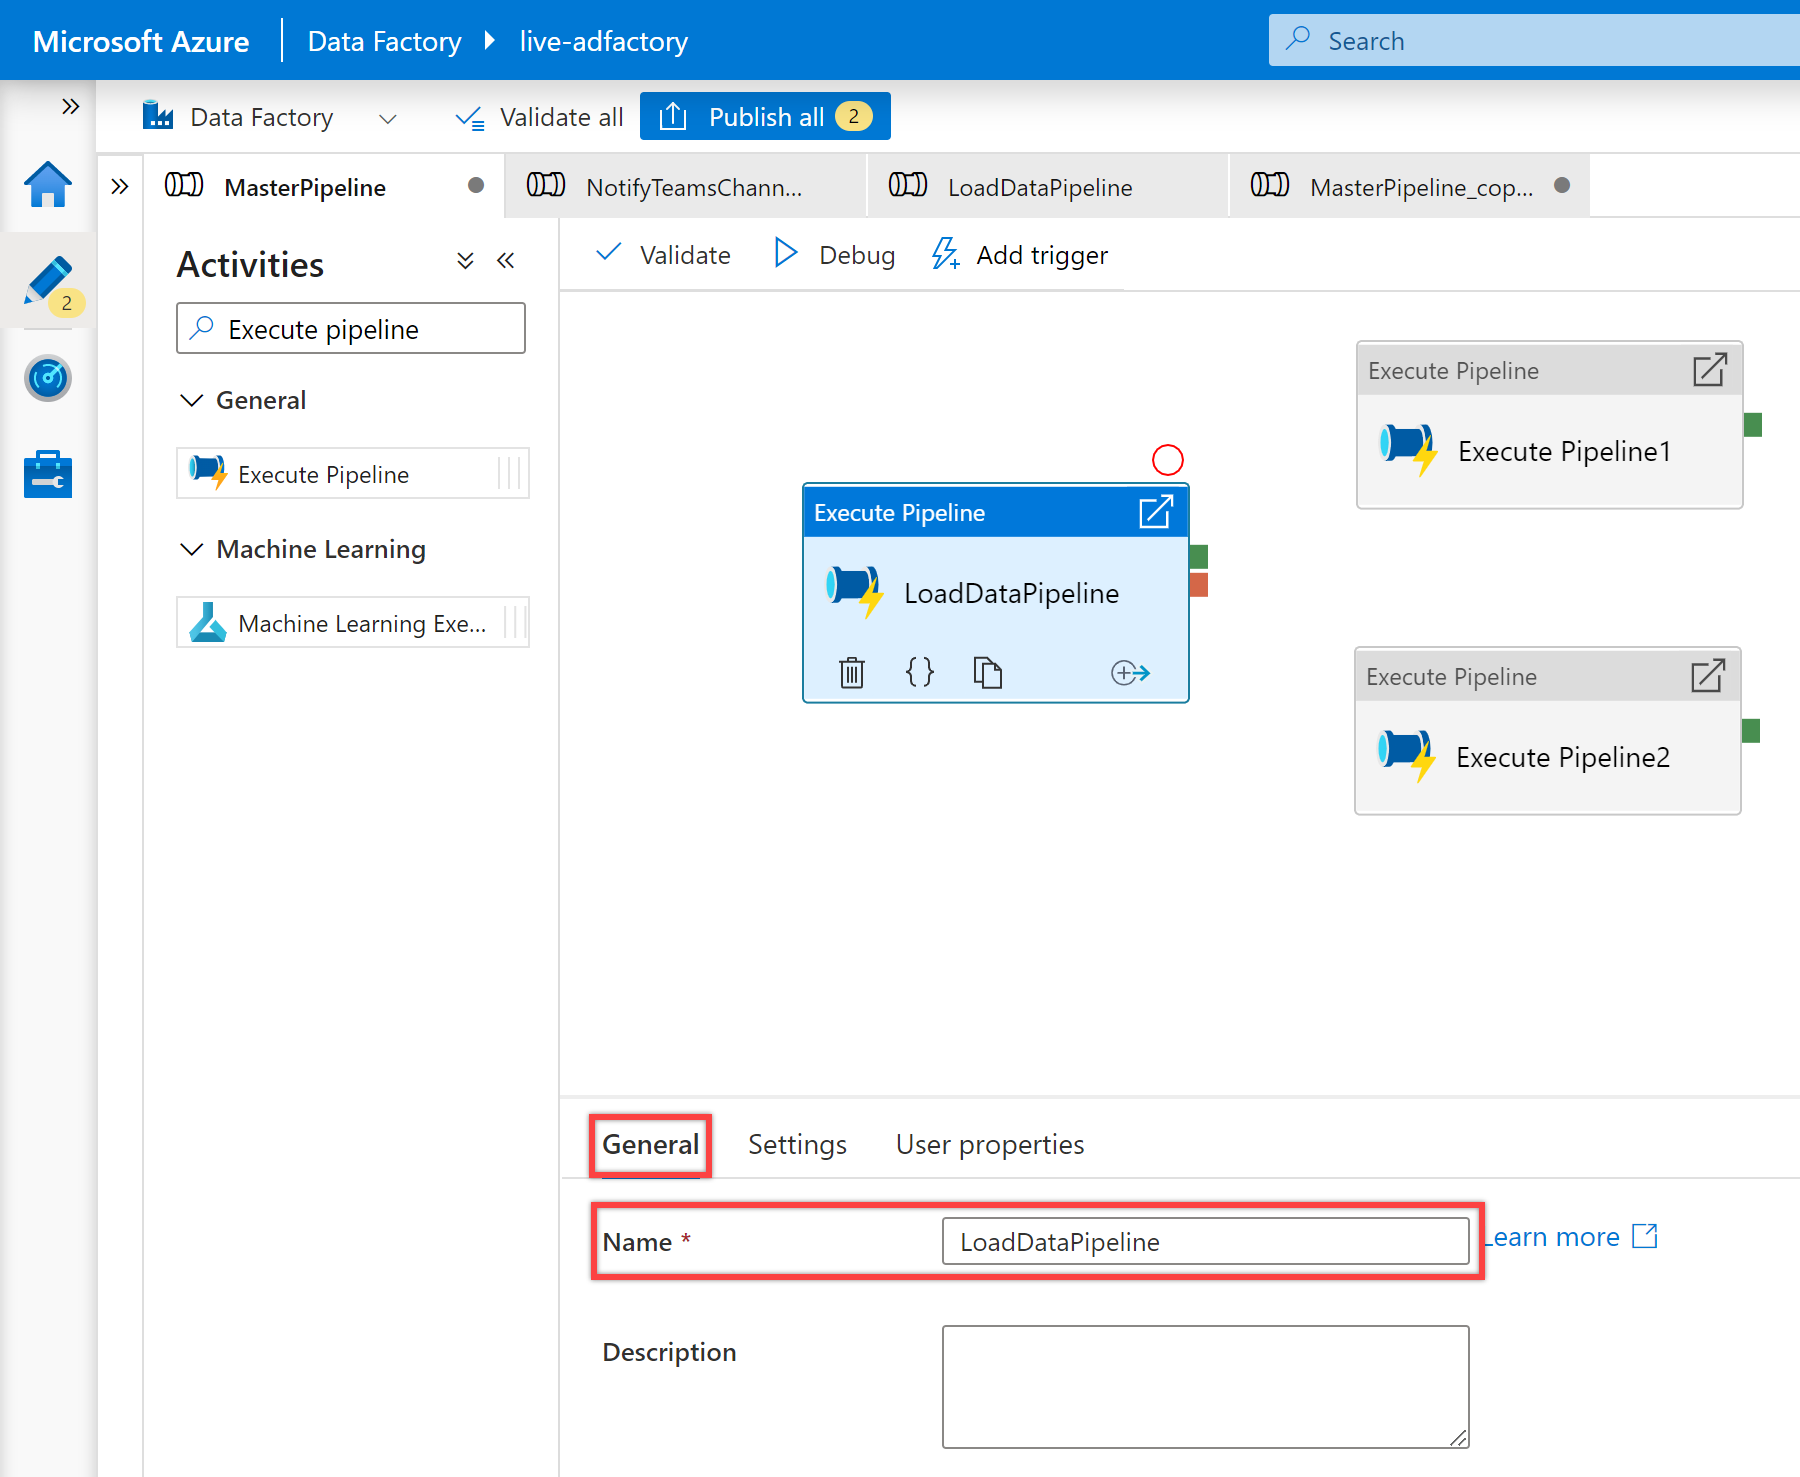
아직 선택하지 않은 경우 캔버스에서 첫 번째 Execute Pipeline 작업을 선택하고 해당 “일반” 탭을 선택하여 세부 정보를 편집합니다.
- Execute Pipeline 작업의 Name 속성에 대해 알림을 보내려는 호출된 ETL 파이프라인의 이름을 사용하는 것이 좋습니다. 예를 들어, 호출된 파이프라인의 이름이기 때문에 Execute Pipeline 작업의 Name에 LoadDataPipeline을 사용했습니다.
- “설정” 창에서 기존 파이프라인을 선택하거나 Invoked pipeline 속성에 대한 + 새로 만들기 단추를 사용하여 새 파이프라인을 만듭니다. 예를 들어, 이 경우 “Invoked pipeline” 속성에 대해 LoadDataPipeline 파이프라인을 선택했습니다. 구성을 완료하는 데 필요한 경우 다른 옵션을 선택하고 파이프라인에 대한 매개 변수를 구성합니다.

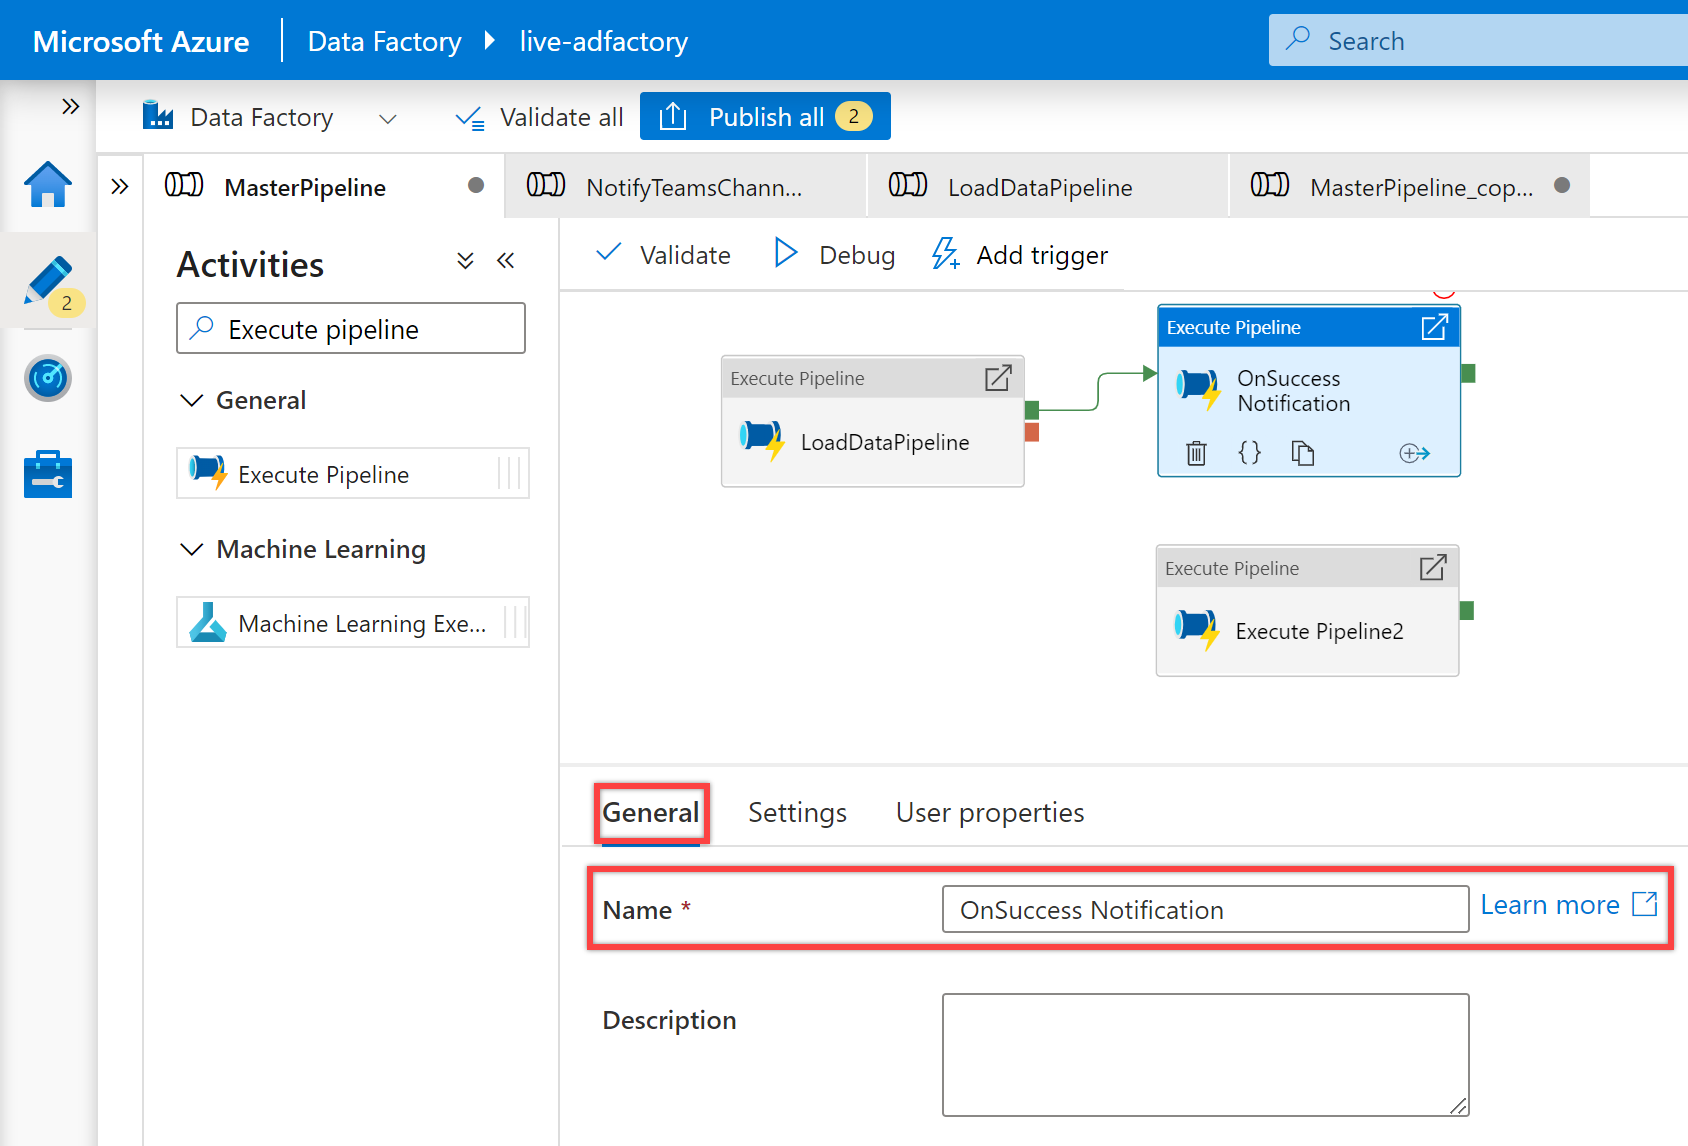
캔버스의 두 번째 Execute Pipeline 작업 및 해당 “일반” 창을 선택하여 세부 정보를 편집합니다.
Execute Pipeline 작업의 이름에 OnSuccess 알림을 지정합니다.
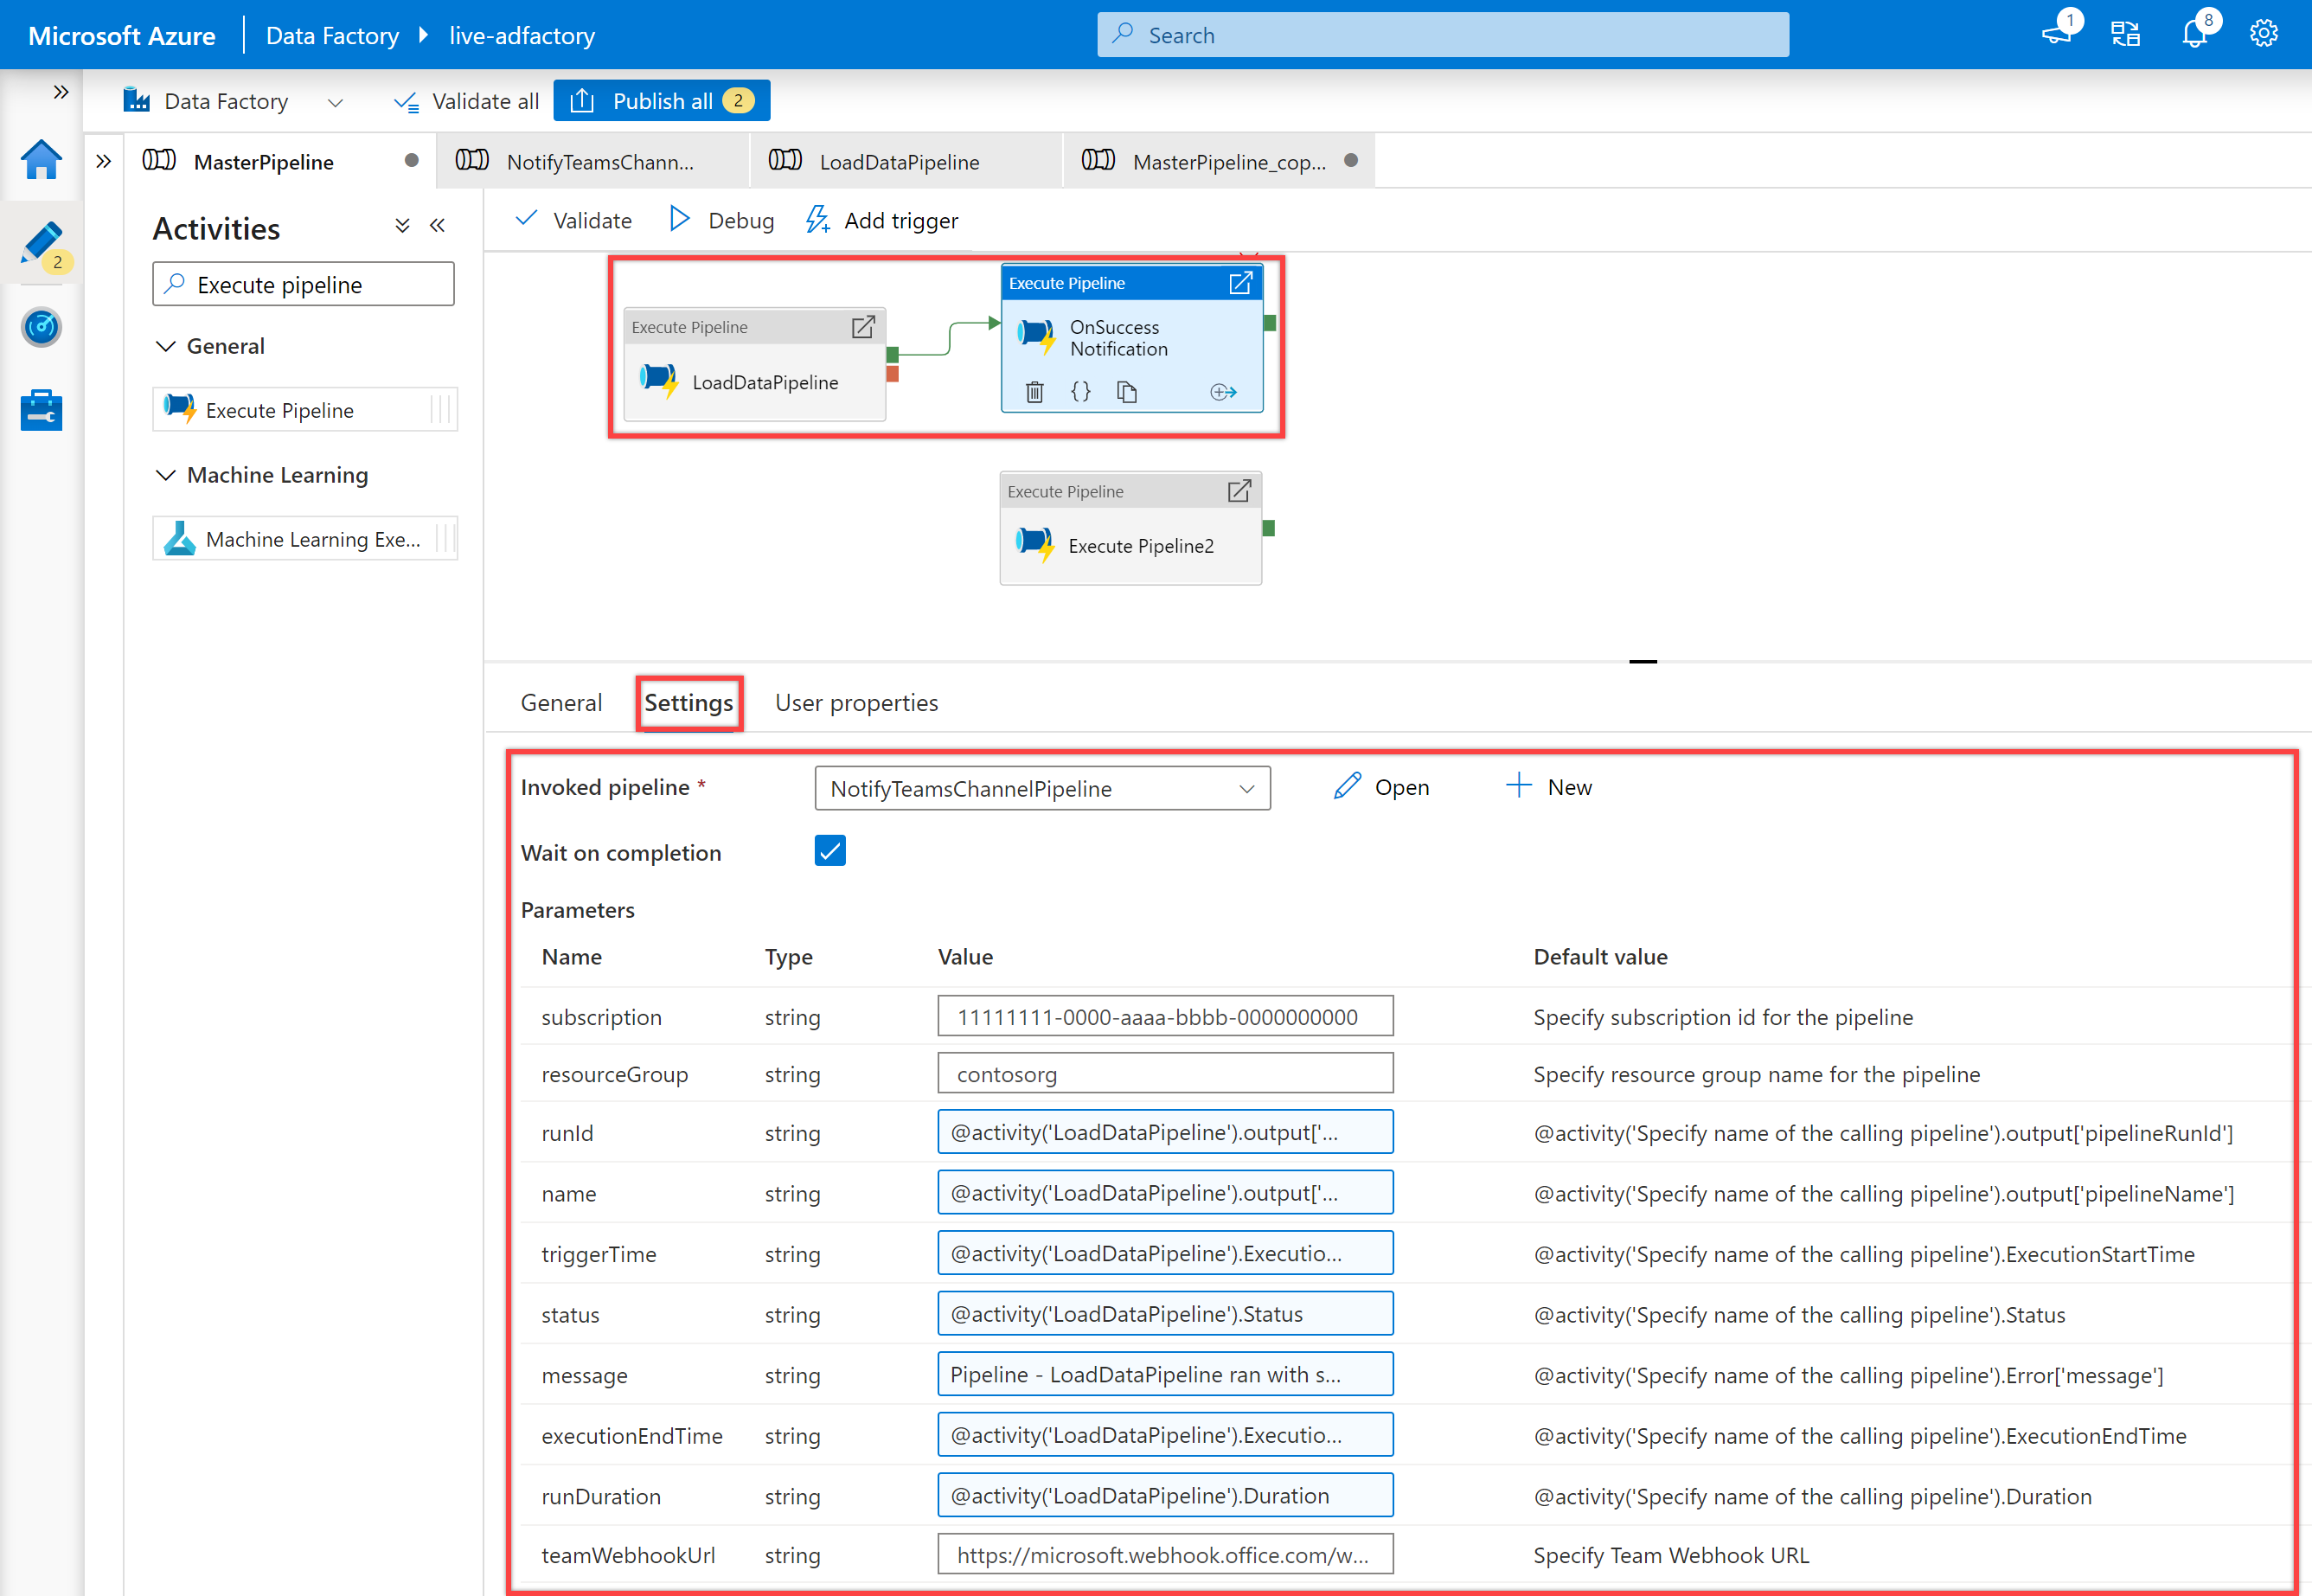
“설정” 창에서 Invoked pipeline 속성에 대해 이전에 만든 NotifiyTeamsChannelPipeline 파이프라인을 선택합니다. 작업 유형을 기준으로 필요에 따라 매개 변수를 사용자 지정합니다. 예를 들어, 다음과 같이 매개 변수를 사용자 지정했습니다.
속성 값 구독 11111111-0000-aaaa-bbbb-0000000000resourceGroup contosorgrunId @activity('LoadDataPipeline').output['pipelineRunId']name @activity('LoadDataPipeline').output['pipelineName']triggerTime @activity('LoadDataPipeline').ExecutionStartTimestatus @activity('LoadDataPipeline').Statusmessage Pipeline - LoadDataPipeline ran with success.executionEndTime @activity('LoadDataPipeline').ExecutionEndTimerunDuration @activity('LoadDataPipeline').DurationteamWebhookUrl https://microsoft.webhook.office.com/webhookb2/1234abcd-1x11-2ff1-ab2c-1234d0699a9e@72f988bf-32b1-41af-91ab-2d7cd011db47/IncomingWebhook/8212f66ad80040ab83cf68b554d9232a/17d524d0-ed5c-44ed-98a0-35c12dd89a6d첫 번째 Execute Pipeline 작업이 성공하는 경우에만 실행되도록 두 번째 Execute Pipeline 작업에 대한 종속성 조건을 만듭니다. 이 종속성을 만들려면 첫 번째 Execute Pipeline 작업의 오른쪽에 있는 녹색 핸들을 선택하고 끌어서 두 번째 Execute Pipeline 작업에 연결합니다.
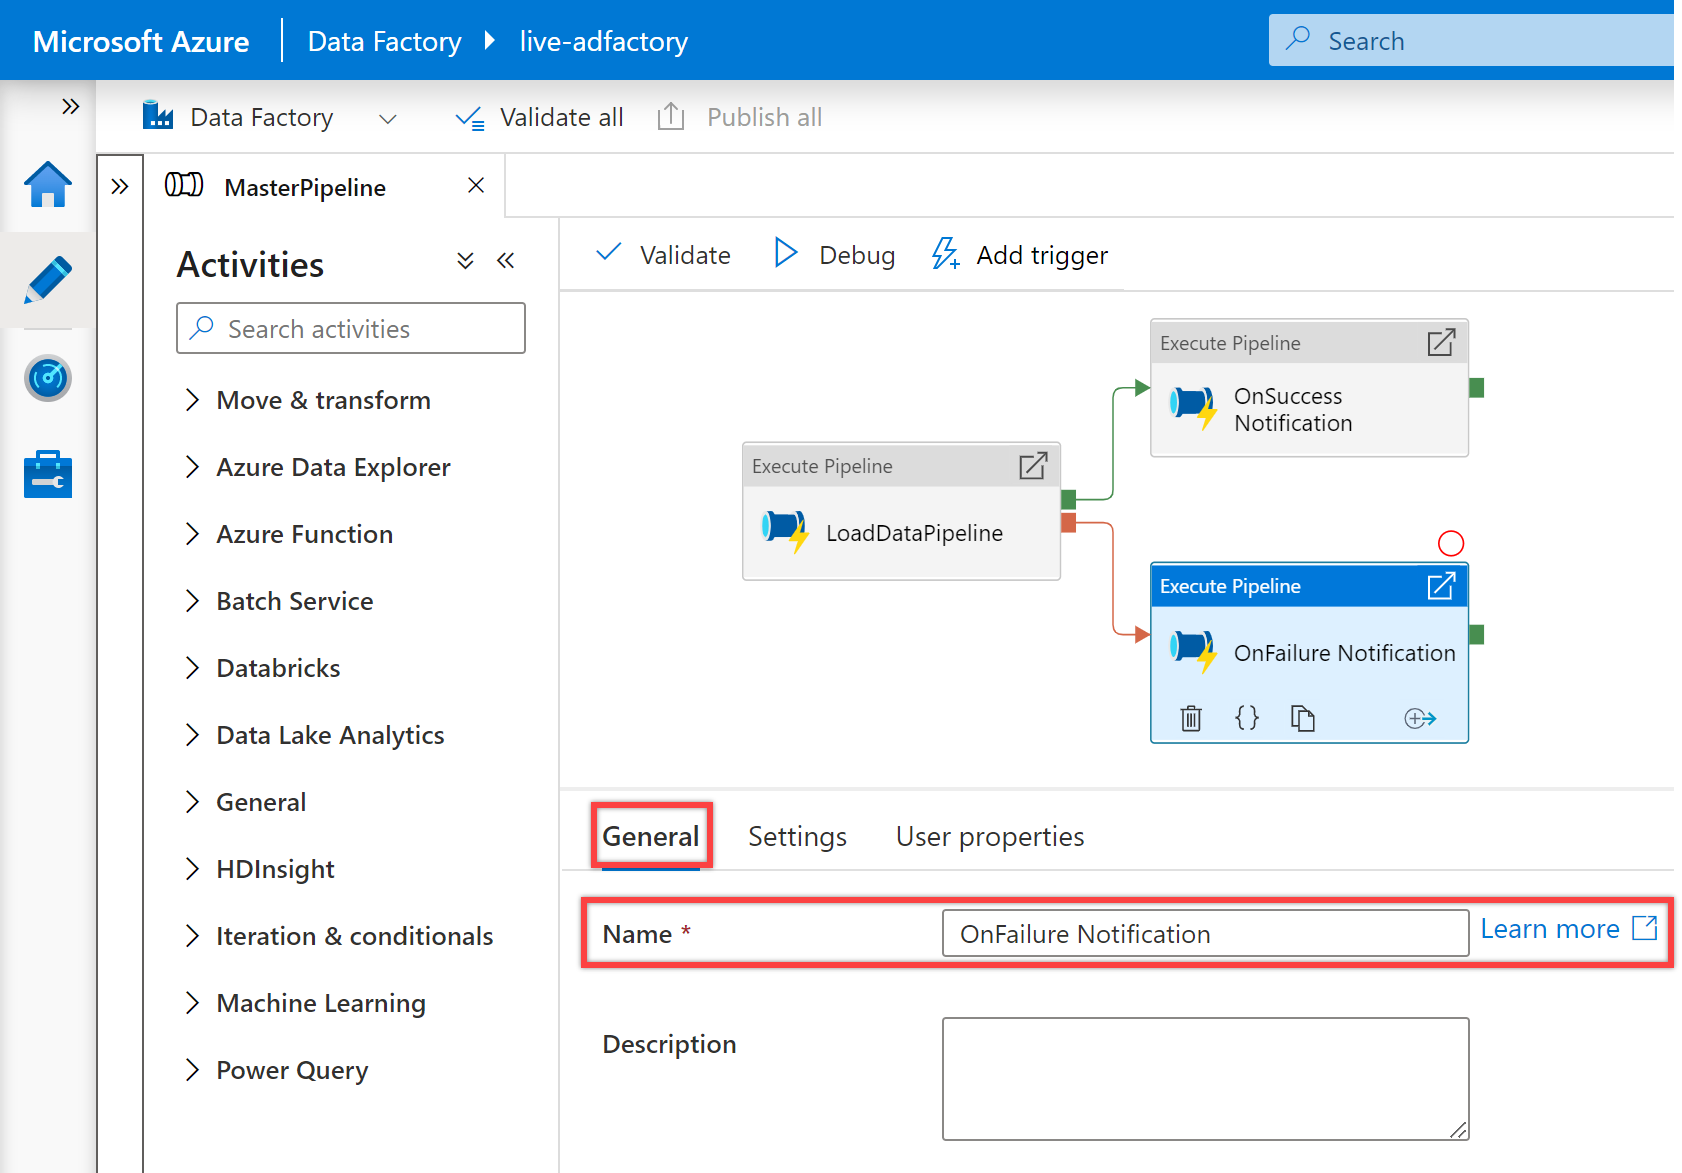
캔버스의 세 번째 Execute Pipeline 작업 및 해당 “일반” 창을 선택하여 세부 정보를 편집합니다.
Execute Pipeline 작업의 이름에 OnFailure 알림을 지정합니다.
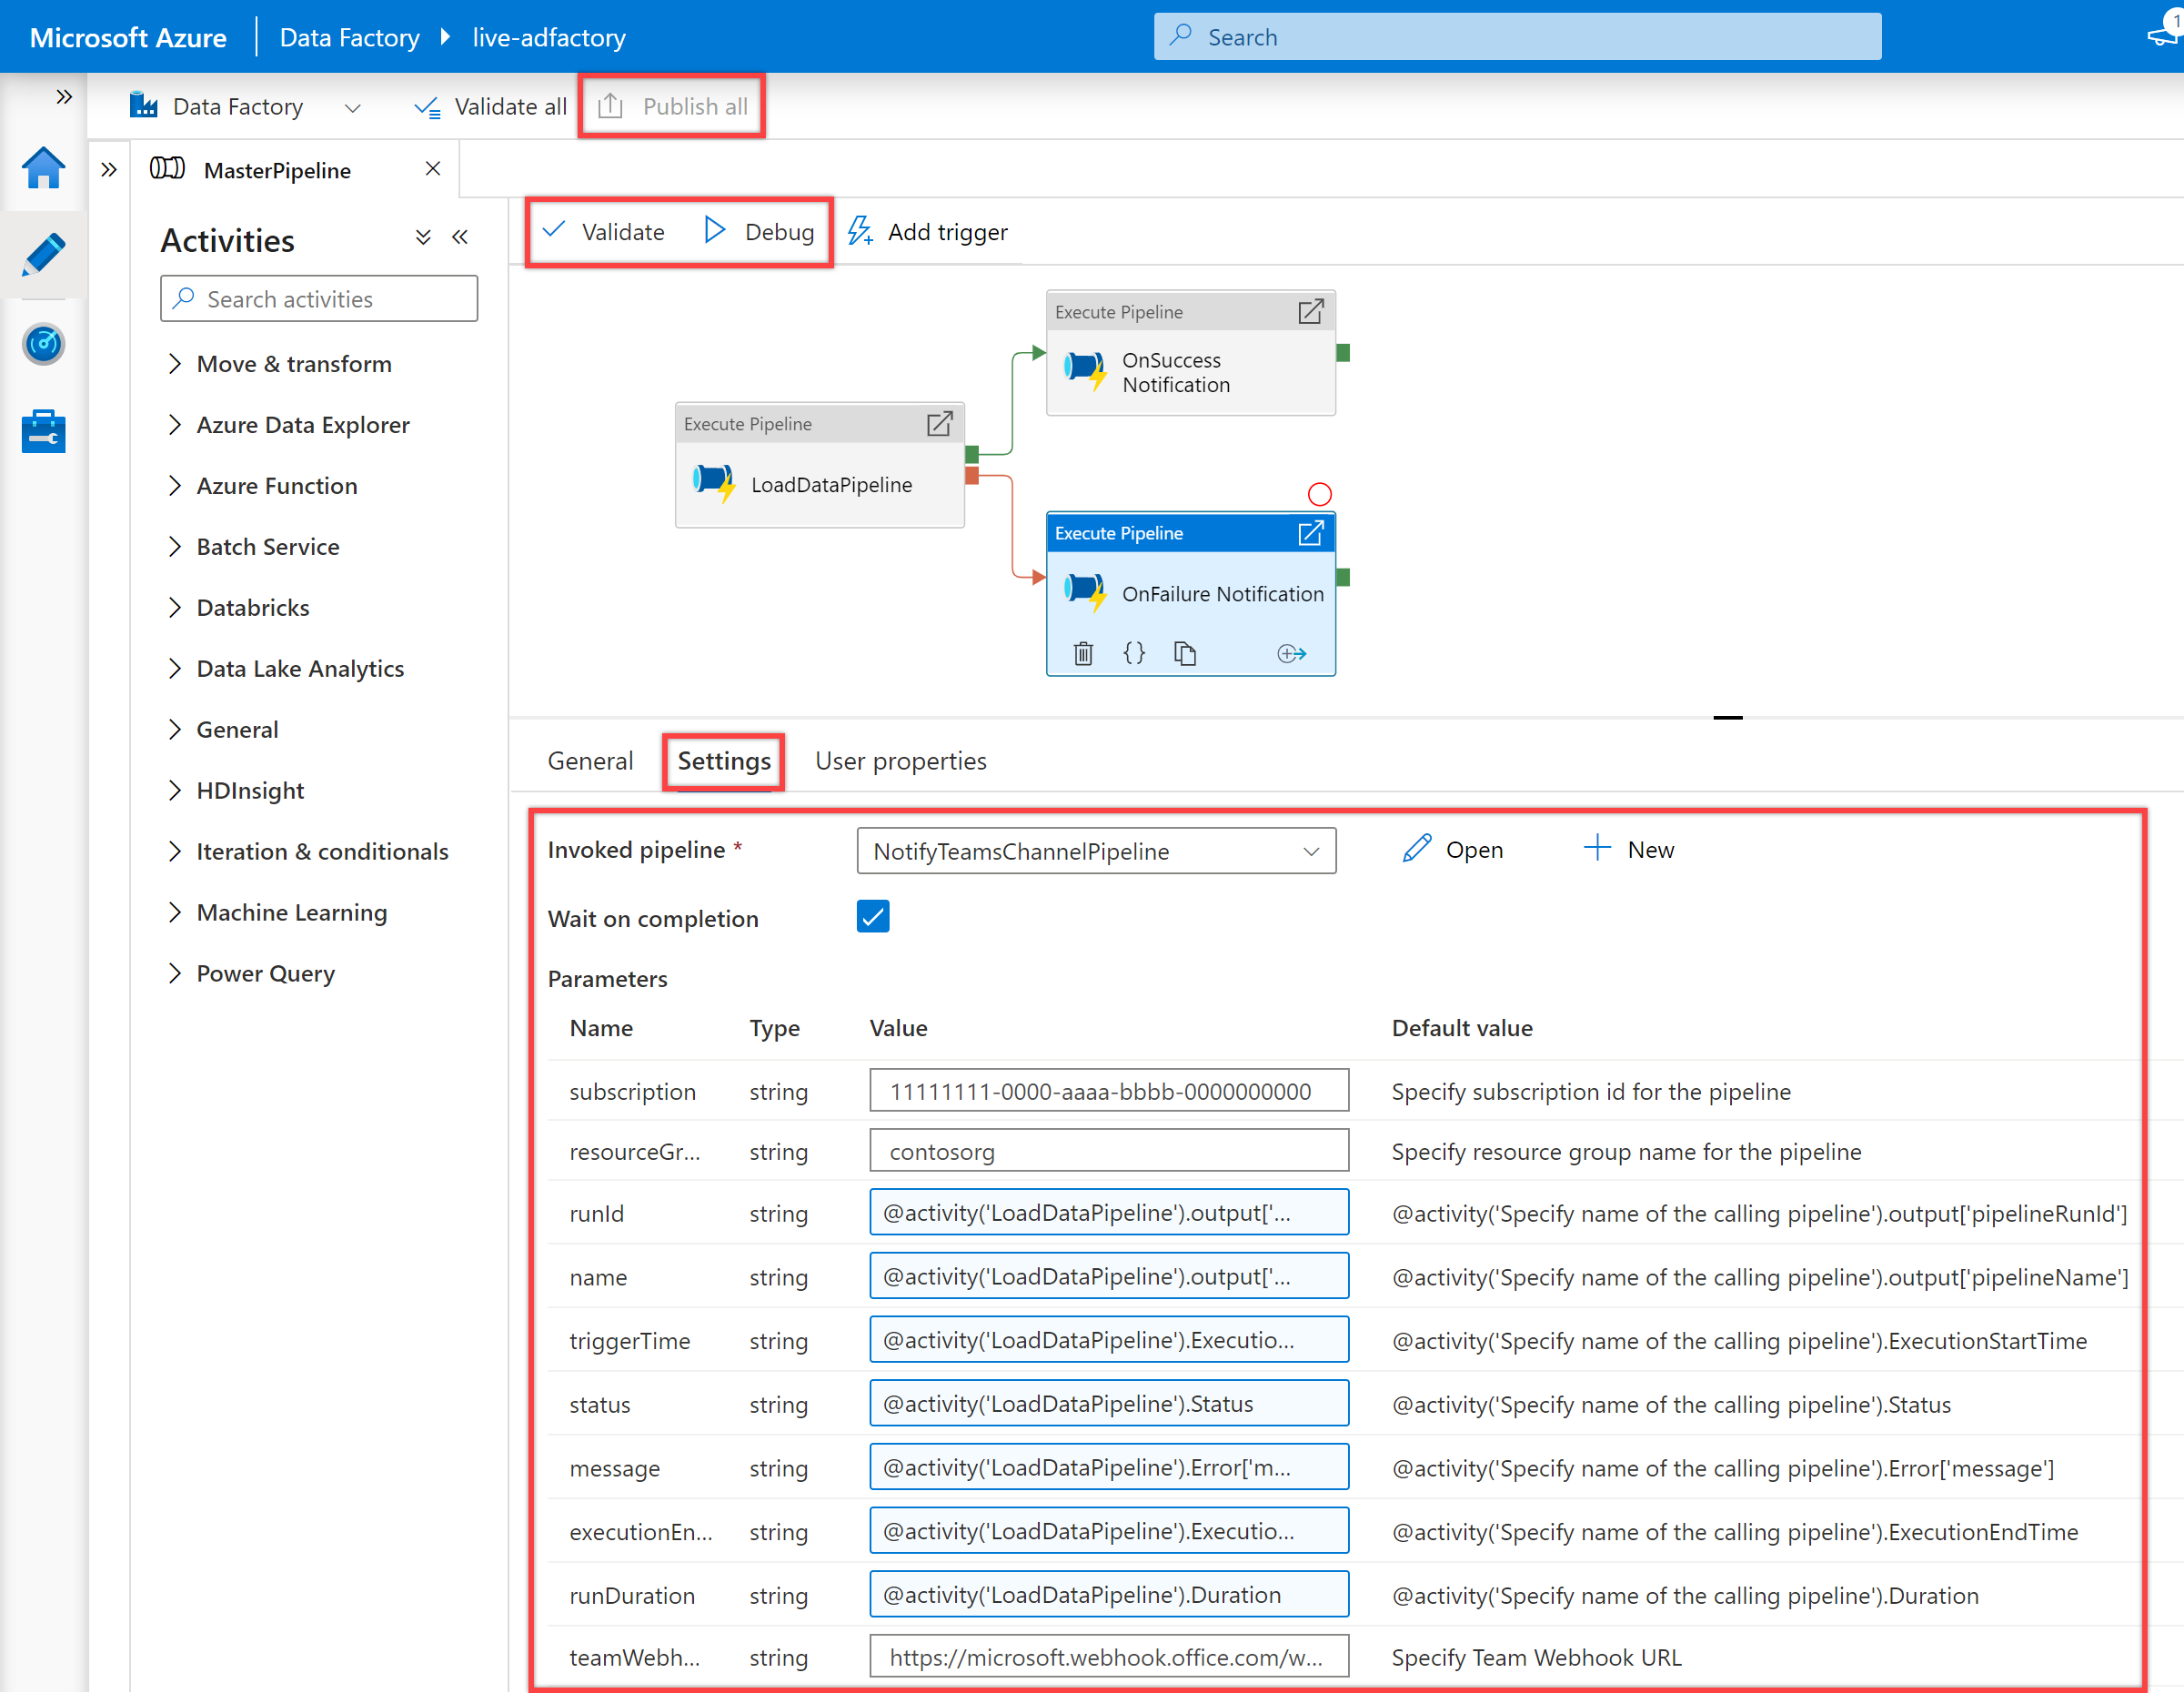
“설정” 창에서 Invoked pipeline 속성에 대해 NotifiyTeamsChannelPipeline 파이프라인을 선택합니다. 작업 유형을 기준으로 필요에 따라 매개 변수를 사용자 지정합니다. 예를 들어, 이번에는 다음과 같이 매개 변수를 사용자 지정했습니다.
속성 값 구독 11111111-0000-aaaa-bbbb-0000000000resourceGroup contosorgrunId @activity('LoadDataPipeline').output['pipelineRunId']name @activity('LoadDataPipeline').output['pipelineName']triggerTime @activity('LoadDataPipeline').ExecutionStartTimestatus @activity('LoadDataPipeline').Statusmessage @activity('LoadDataPipeline').Error['message']executionEndTime @activity('LoadDataPipeline').ExecutionEndTimerunDuration @activity('LoadDataPipeline').DurationteamWebhookUrl https://microsoft.webhook.office.com/webhookb2/1234abcd-1x11-2ff1-ab2c-1234d0699a9e@72f988bf-32b1-41af-91ab-2d7cd011db47/IncomingWebhook/8212f66ad80040ab83cf68b554d9232a/17d524d0-ed5c-44ed-98a0-35c12dd89a6d첫 번째 Execute Pipeline 작업이 실패하는 경우에만 실행되도록 세 번째 Execute Pipeline 작업에 대한 종속성 조건을 만듭니다. 이 종속성을 만들려면 첫 번째 Execute Pipeline 작업의 오른쪽에 있는 빨간색 핸들을 선택하고 끌어서 세 번째 Execute Pipeline 작업에 연결합니다.
MasterPipeline 파이프라인의 유효성을 검사하고, 디버그한 다음, 게시합니다.
파이프라인을 실행하여 Teams에서 알림을 받습니다. 예를 들어, 파이프라인이 성공적으로 실행된 경우 및 실패한 경우 샘플 알림은 다음과 같습니다.
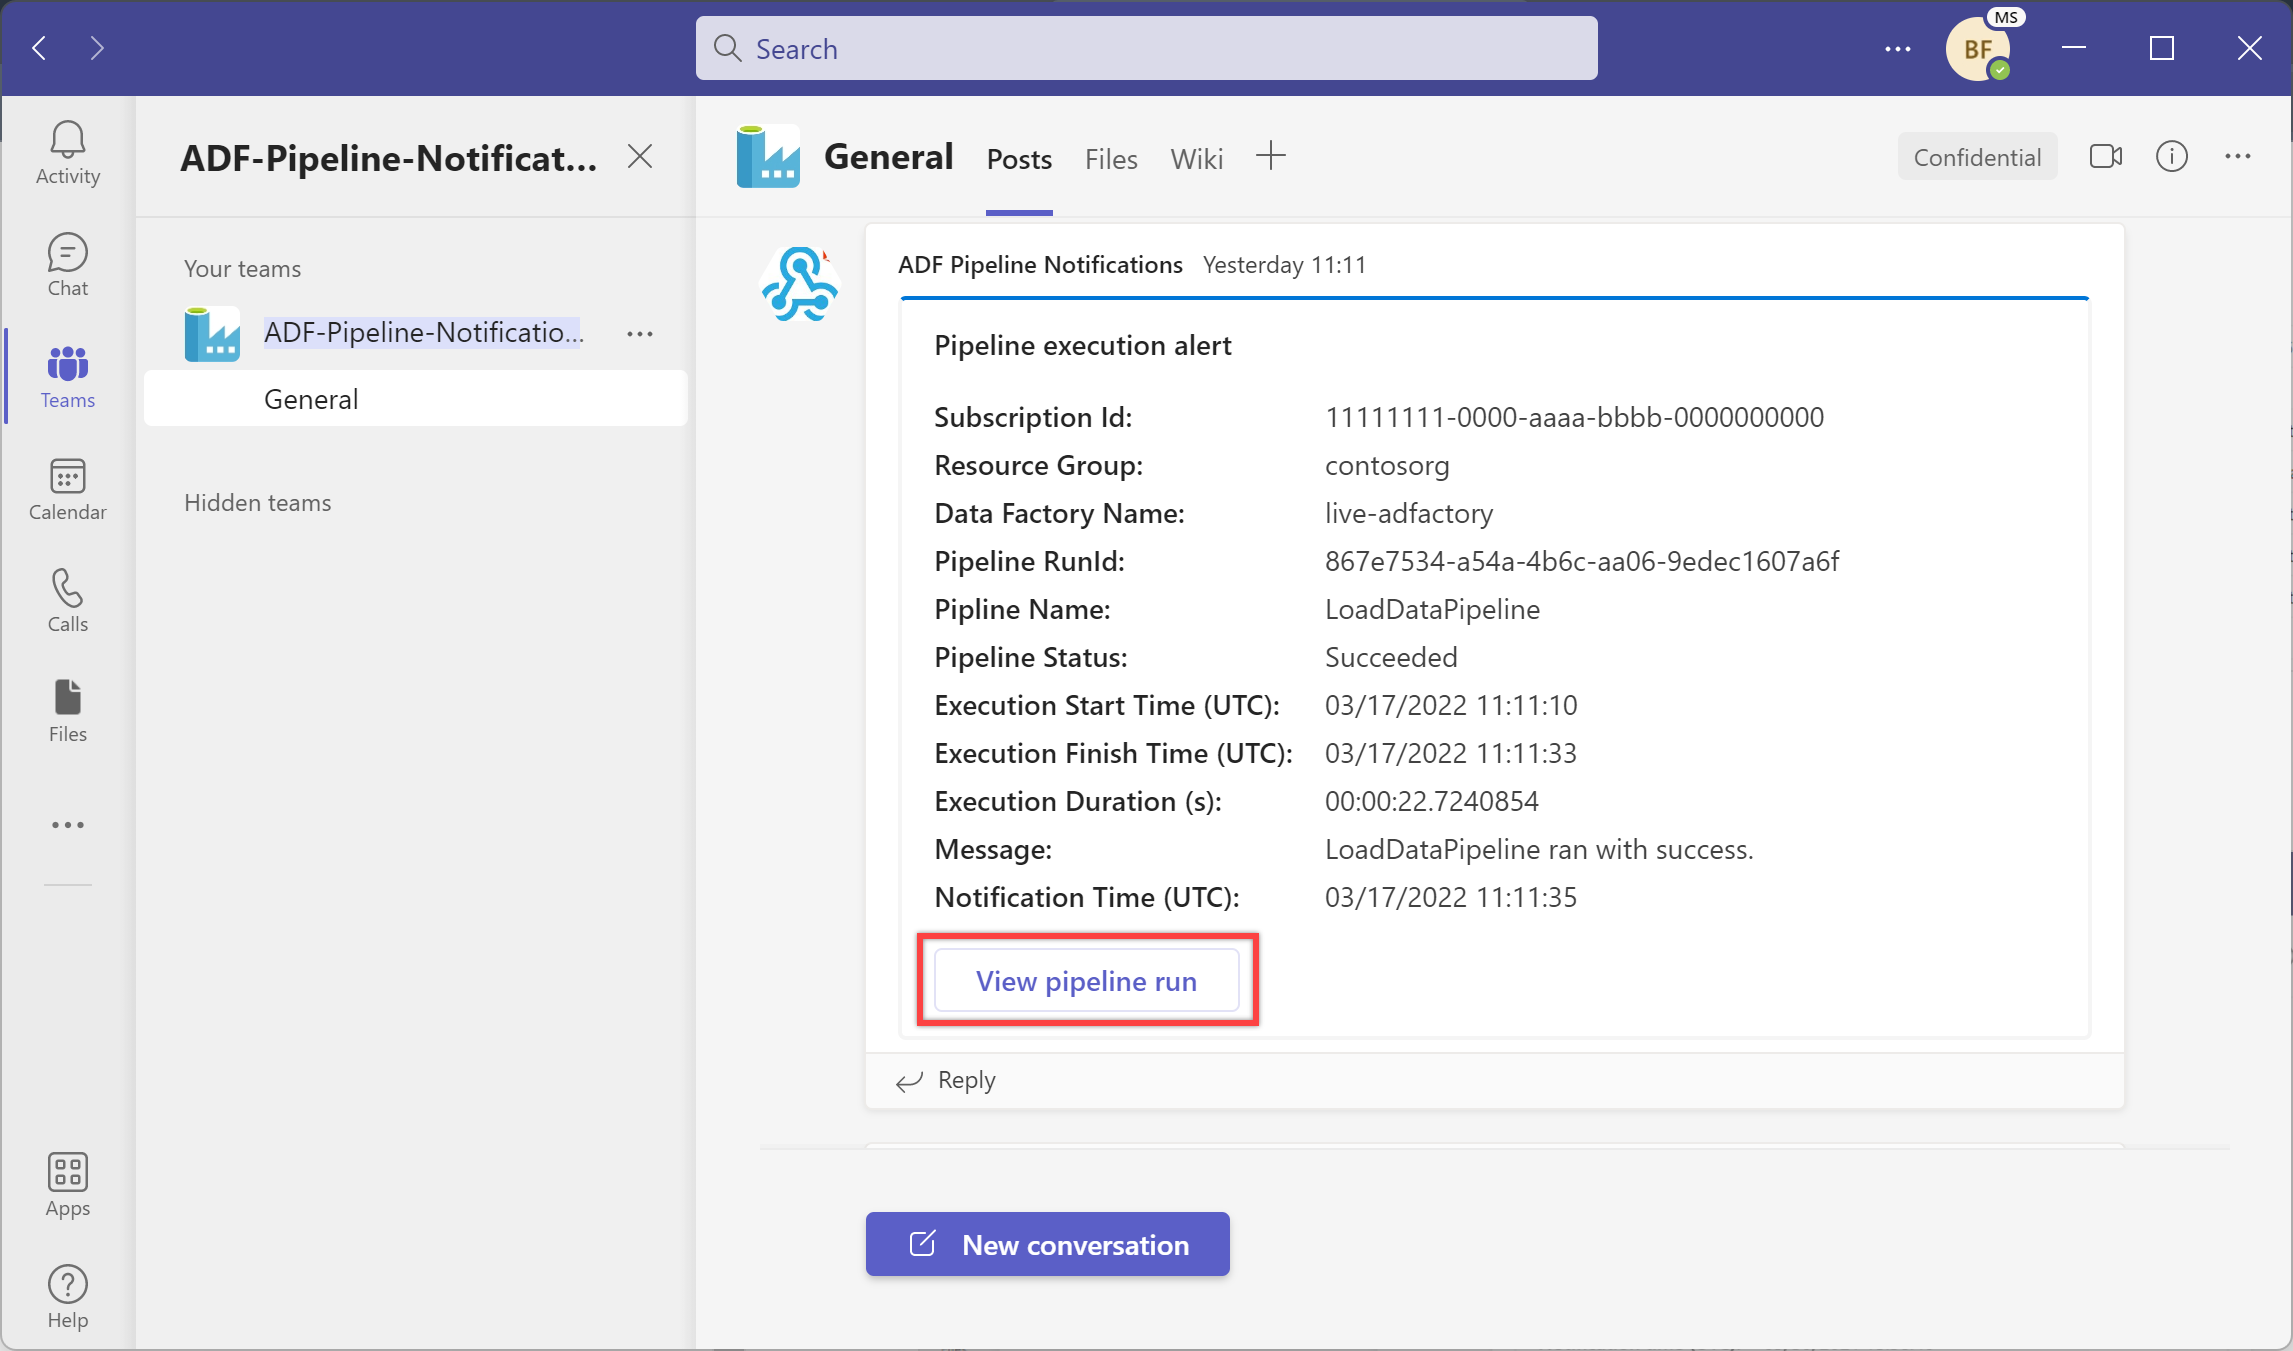
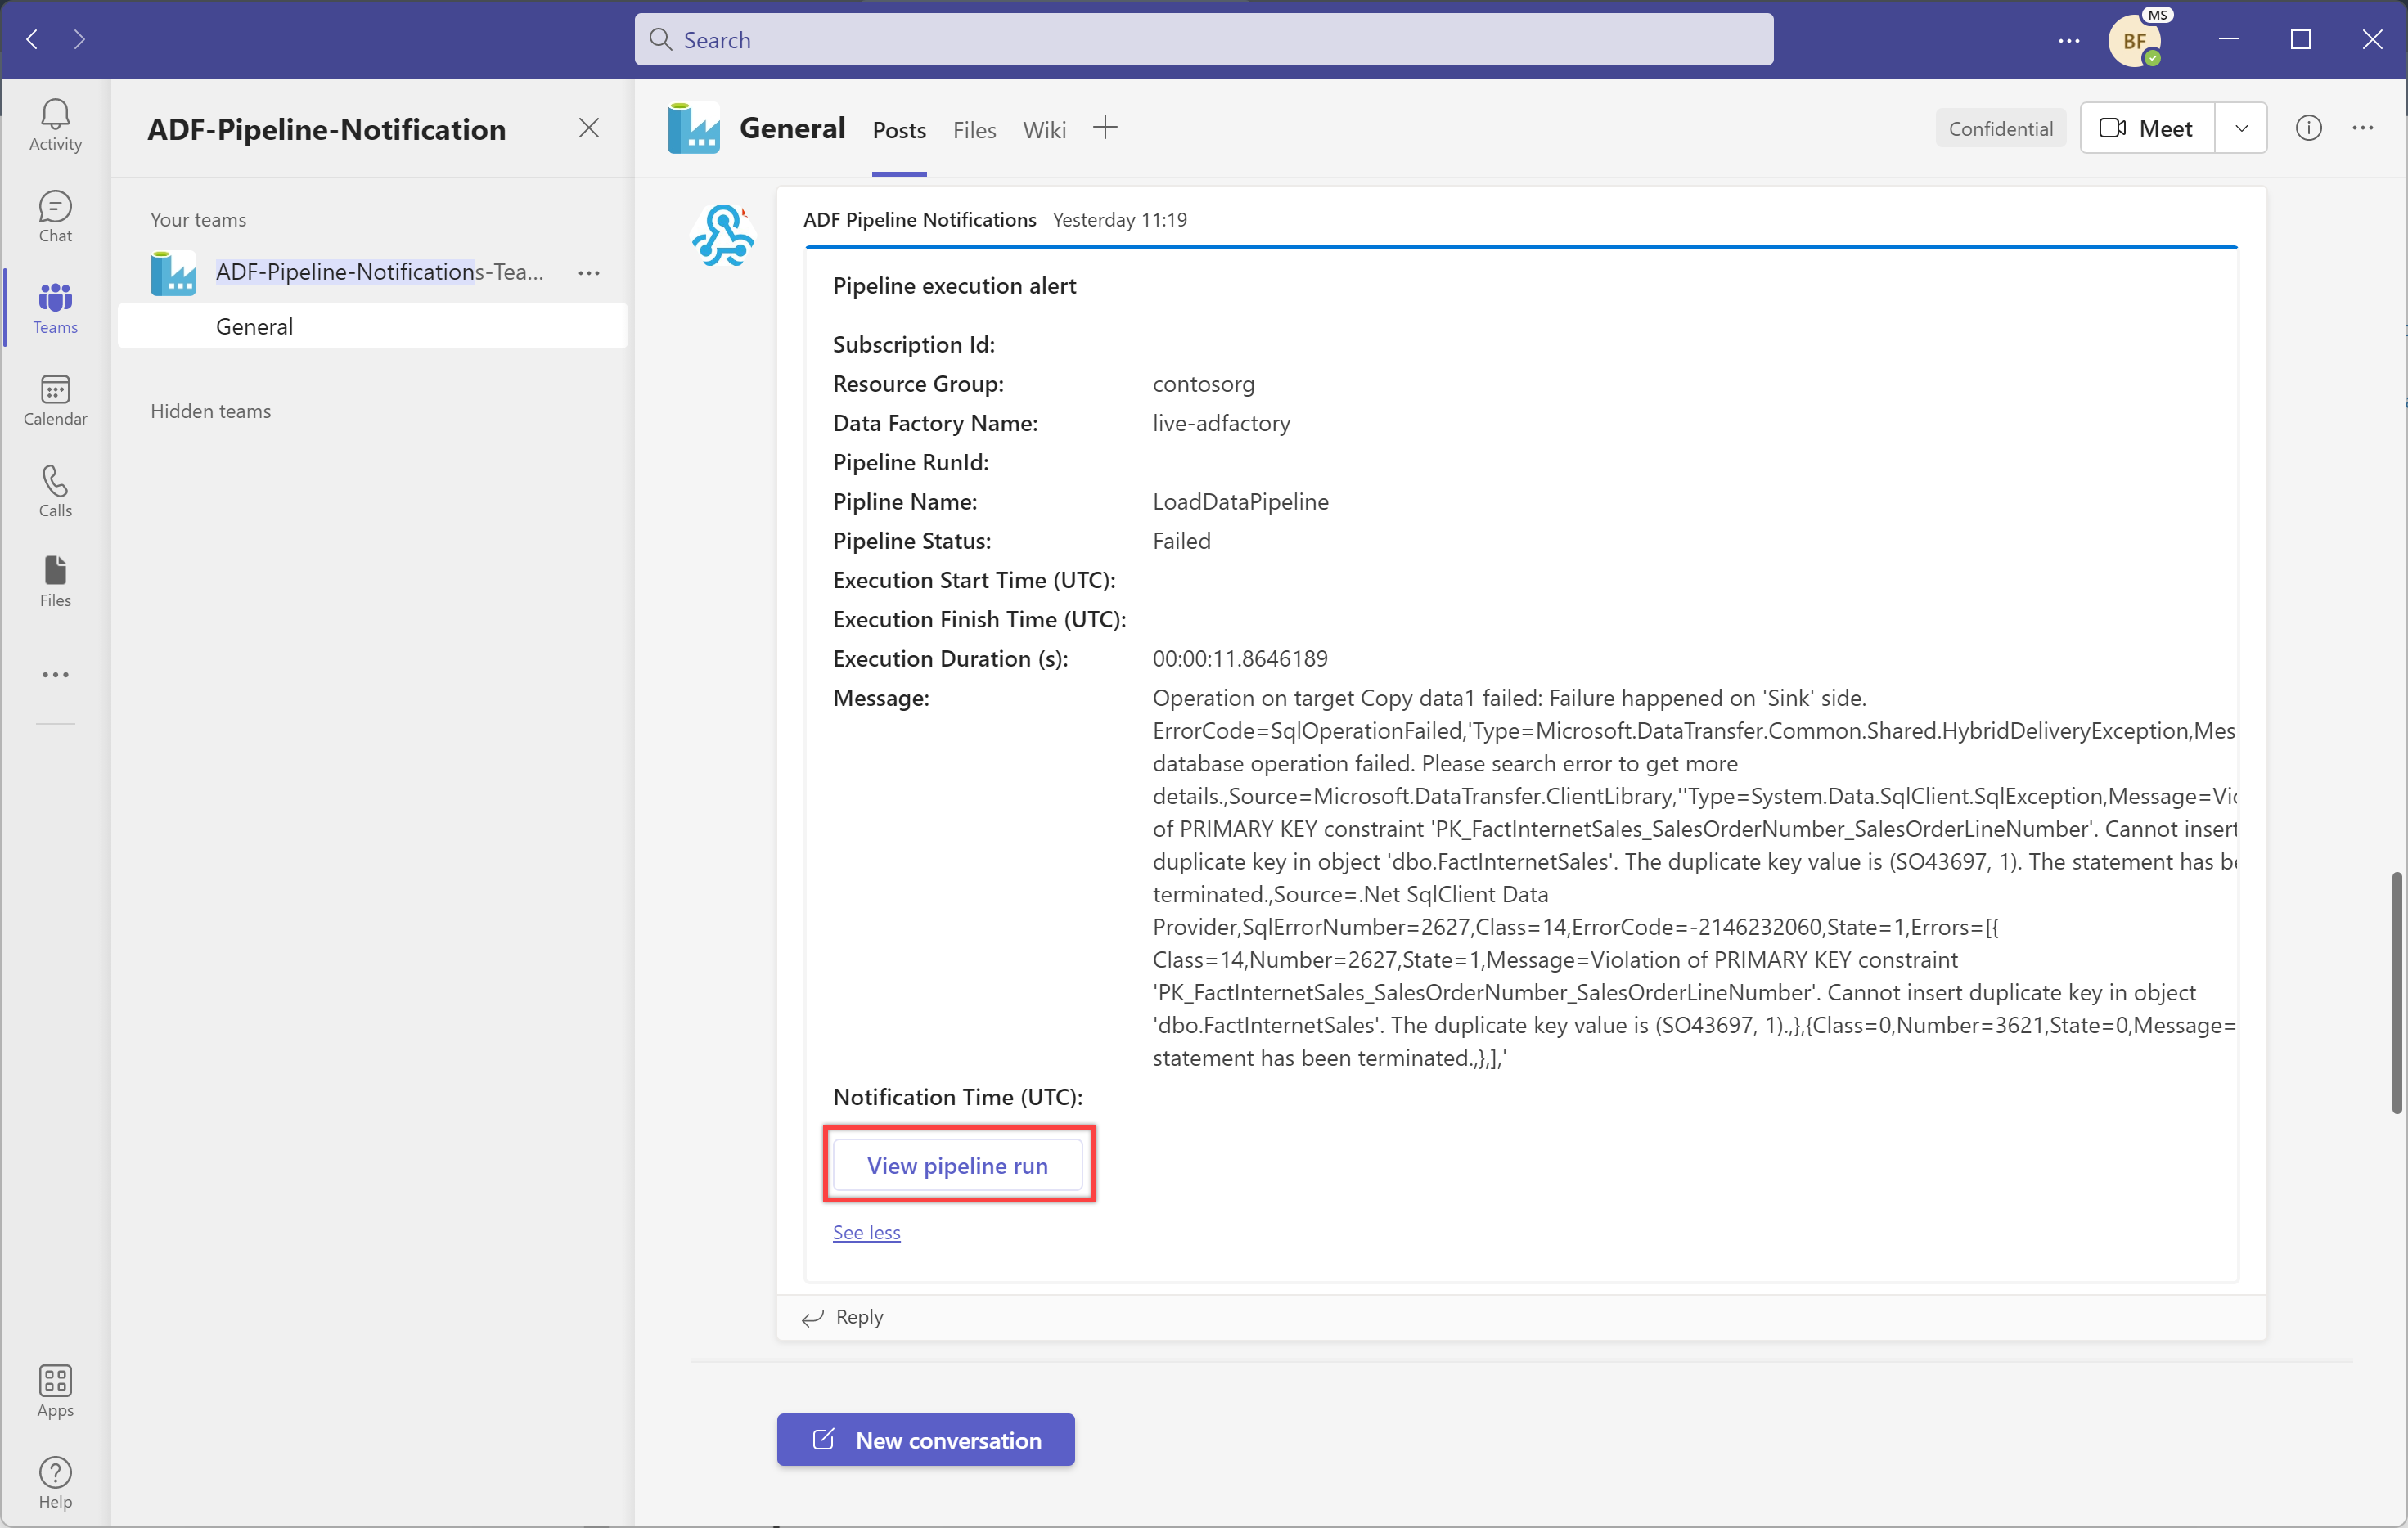
“파이프라인 실행 보기” 단추를 선택하여 파이프라인 실행을 봅니다.
시스템 변수 및 식을 사용하여 동적 메시지 추가
시스템 변수 및 식을 사용하여 메시지를 동적으로 만들 수 있습니다. 예:
@activity("CopyData").output.errors[0].Message@activity("DataFlow").error.Message
위 식은 실패로 인한 관련 오류 메시지를 반환하며, 이 메시지는 Teams 채널에 대한 알림으로 보낼 수 있습니다. 이 항목에 관한 자세한 내용은 복사 작업 출력 속성 문서를 참조하세요.
또한 Microsoft Teams 지원되는 알림 페이로드 스키마를 검토하고 위 템플릿을 필요에 맞게 추가로 사용자 지정하는 것이 좋습니다.