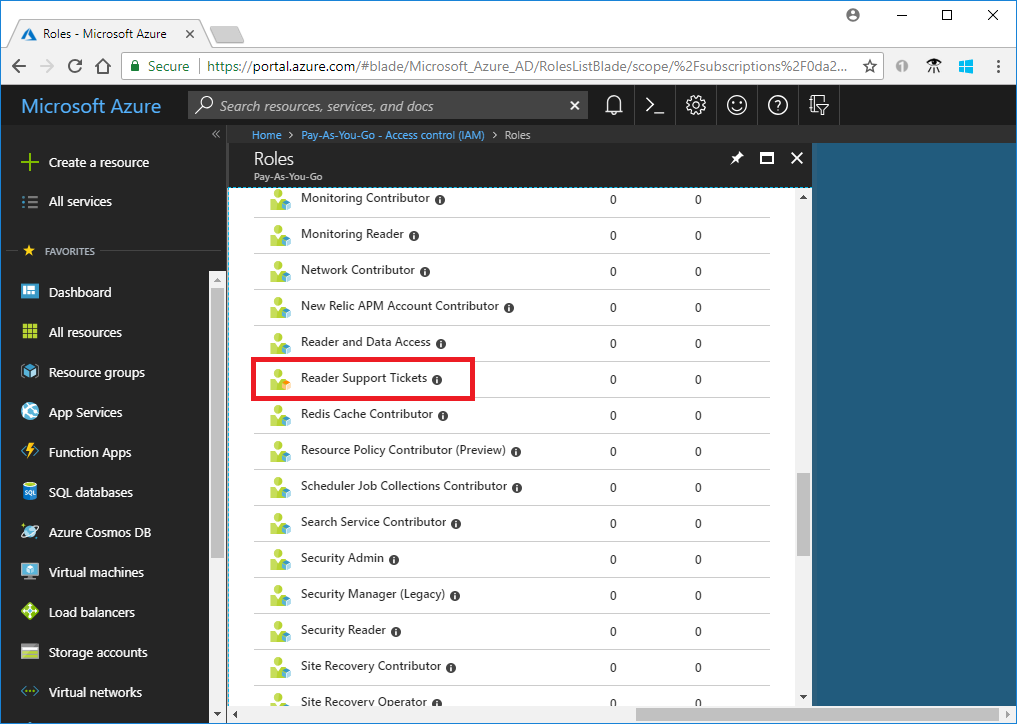
Azure 기본 제공 역할이 조직의 특정 요구 사항을 충족하지 않는 경우 사용자 지정 역할을 만들면 됩니다. 이 자습서에서는 Azure PowerShell을 사용하여 Reader 지원 티켓이라는 사용자 지정 역할을 만듭니다. 사용자는 사용자 지정 역할을 통해 구독의 컨트롤 플레인에서 모든 것을 살펴보고 지원 티켓을 열 수도 있습니다.
이 자습서에서는 다음을 하는 방법을 알아볼 수 있습니다.
- 사용자 지정 역할 만들기
- 사용자 지정 역할 나열
- 사용자 지정 역할 업데이트
- 사용자 지정 역할 삭제
Azure 구독이 아직 없는 경우 시작하기 전에 체험 계정을 만듭니다.
참고 항목
Azure Az PowerShell 모듈을 사용하여 Azure와 상호 작용하는 것이 좋습니다. 시작하려면 Azure PowerShell 설치를 참조하세요. Az PowerShell 모듈로 마이그레이션하는 방법에 대한 자세한 내용은 Azure PowerShell을 AzureRM에서 Azure로 마이그레이션을 참조하세요.
필수 조건
이 자습서를 완료하려면 다음 항목이 필요합니다.
- 사용자 액세스 관리자와 같은 사용자 지정 역할을 만들 수 있는 권한
- Azure Cloud Shell 또는 Azure PowerShell
Azure PowerShell에 로그인
Azure PowerShell에 로그인합니다.
사용자 지정 역할 만들기
사용자 지정 역할을 만드는 가장 쉬운 방법은 기본 제공 역할로 시작하여 편집한 다음, 새 역할을 만드는 것입니다.
PowerShell에서 Get-AzProviderOperation 명령을 사용하여 Microsoft.Support 리소스 공급자의 작업 목록을 가져옵니다. 권한을 만드는 데 사용할 수 있는 작업을 파악하는 데 도움이 됩니다. Azure 리소스 공급자 작업에서 모든 작업 목록을 볼 수도 있습니다.
Get-AzProviderOperation "Microsoft.Support/*" | FT Operation, Description -AutoSizeOperation Description --------- ----------- Microsoft.Support/register/action Registers to Support Resource Provider Microsoft.Support/supportTickets/read Gets Support Ticket details (including status, severity, contact ... Microsoft.Support/supportTickets/write Creates or Updates a Support Ticket. You can create a Support Tic...Get-AzRoleDefinition 명령을 사용하여 Reader 역할을 JSON 형식으로 내보냅니다.
Get-AzRoleDefinition -Name "Reader" | ConvertTo-Json | Out-File C:\CustomRoles\ReaderSupportRole.json편집기에서 ReaderSupportRole.json 파일을 엽니다.
다음은 JSON 출력을 보여줍니다. 여러 속성에 대한 내용은 Azure 사용자 지정 역할을 참조하세요.
{
  "Name": "Reader",
  "Id": "acdd72a7-3385-48ef-bd42-f606fba81ae7",
  "IsCustom": false,
  "Description": "Lets you view everything, but not make any changes.",
  "Actions": [
    "*/read"
  ],
  "NotActions": [],
  "DataActions": [],
  "NotDataActions": [],
  "AssignableScopes": [
    "/"
  ]
}
JSON 파일을 편집하여
"Microsoft.Support/*"작업을Actions속성에 추가합니다. 읽기 작업 뒤에는 꼭 쉼표를 추가해야 합니다. 이 작업을 통해 사용자가 지원 티켓을 만들 수 있게 됩니다.Get-AzSubscription 명령을 사용하여 구독 ID를 가져옵니다.
Get-AzSubscriptionAssignableScopes에서 구독 ID를"/subscriptions/00000000-0000-0000-0000-000000000000"형식으로 추가합니다.명시적 구독 ID를 추가해야 합니다. 그렇지 않으면 역할을 구독으로 가져올 수 없습니다.
Id속성 줄을 삭제하고IsCustom속성을true로 변경합니다.Name및Description속성을 "Reader 지원 티켓" 및 "구독의 모든 것을 살펴보고 지원 티켓 열기"로 변경합니다.JSON 파일은 다음과 비슷합니다.
{
  "Name": "Reader Support Tickets",
  "IsCustom": true,
  "Description": "View everything in the subscription and also open support tickets.",
  "Actions": [
    "*/read",
    "Microsoft.Support/*"
  ],
  "NotActions": [],
  "DataActions": [],
  "NotDataActions": [],
  "AssignableScopes": [
    "/subscriptions/00000000-0000-0000-0000-000000000000"
  ]
}
새로운 사용자 지정 역할을 만들려면 New-AzRoleDefinition 명령을 사용하여 JSON 역할 정의 파일을 지정합니다.
New-AzRoleDefinition -InputFile "C:\CustomRoles\ReaderSupportRole.json"Name : Reader Support Tickets Id : 22222222-2222-2222-2222-222222222222 IsCustom : True Description : View everything in the subscription and also open support tickets. Actions : {*/read, Microsoft.Support/*} NotActions : {} DataActions : {} NotDataActions : {} AssignableScopes : {/subscriptions/00000000-0000-0000-0000-000000000000}이제 Azure Portal에서 새로운 사용자 지정 역할을 사용할 수 있으며 기본 제공 역할과 마찬가지로 사용자, 그룹 또는 서비스 사용자에게 할당할 수 있습니다.
사용자 지정 역할 나열
모든 사용자 지정 역할을 나열하려면 Get-AzRoleDefinition 명령을 사용합니다.
Get-AzRoleDefinition | ? {$_.IsCustom -eq $true} | FT Name, IsCustomName IsCustom ---- -------- Reader Support Tickets TrueAzure Portal에서도 사용자 지정 역할을 볼 수 있습니다.

사용자 지정 역할 업데이트
사용자 지정 역할을 업데이트하려면 JSON 파일을 업데이트하거나 PSRoleDefinition 개체를 사용하면 됩니다.
JSON 파일을 업데이트하려면 Get-AzRoleDefinition 명령을 사용하여 사용자 지정 역할을 JSON 형식으로 내보냅니다.
Get-AzRoleDefinition -Name "Reader Support Tickets" | ConvertTo-Json | Out-File C:\CustomRoles\ReaderSupportRole2.json편집기에서 파일을 엽니다.
Actions에 리소스 그룹 배포"Microsoft.Resources/deployments/*"을(를) 만들고 관리하는 작업을 추가합니다.업데이트된 JSON 파일은 다음과 비슷합니다.
{
  "Name": "Reader Support Tickets",
  "Id": "22222222-2222-2222-2222-222222222222",
  "IsCustom": true,
  "Description": "View everything in the subscription and also open support tickets.",
  "Actions": [
    "*/read",
    "Microsoft.Support/*",
    "Microsoft.Resources/deployments/*"
  ],
  "NotActions": [],
  "DataActions": [],
  "NotDataActions": [],
  "AssignableScopes": [
    "/subscriptions/00000000-0000-0000-0000-000000000000"
  ]
}
사용자 지정 역할을 업데이트하려면 Set-AzRoleDefinition 명령을 사용하여 업데이트된 JSON 파일을 지정합니다.
Set-AzRoleDefinition -InputFile "C:\CustomRoles\ReaderSupportRole2.json"Name : Reader Support Tickets Id : 22222222-2222-2222-2222-222222222222 IsCustom : True Description : View everything in the subscription and also open support tickets. Actions : {*/read, Microsoft.Support/*, Microsoft.Resources/deployments/*} NotActions : {} DataActions : {} NotDataActions : {} AssignableScopes : {/subscriptions/00000000-0000-0000-0000-000000000000}PSRoleDefinition개체를 사용하여 사용자 지정 역할을 업데이트하려면 먼저 Get-AzRoleDefinition 명령을 사용하여 역할을 가져옵니다.$role = Get-AzRoleDefinition "Reader Support Tickets"Add메서드를 호출하여 읽기 진단 설정에 작업을 추가합니다.$role.Actions.Add("Microsoft.Insights/diagnosticSettings/*/read")Set-AzRoleDefinition 명령을 사용하여 역할을 업데이트합니다.
Set-AzRoleDefinition -Role $roleName : Reader Support Tickets Id : 22222222-2222-2222-2222-222222222222 IsCustom : True Description : View everything in the subscription and also open support tickets. Actions : {*/read, Microsoft.Support/*, Microsoft.Resources/deployments/*, Microsoft.Insights/diagnosticSettings/*/read} NotActions : {} DataActions : {} NotDataActions : {} AssignableScopes : {/subscriptions/00000000-0000-0000-0000-000000000000}
사용자 지정 역할 삭제
Get-AzRoleDefinition 명령을 사용하여 사용자 지정 역할 ID를 가져옵니다.
Get-AzRoleDefinition "Reader Support Tickets"Remove-AzRoleDefinition 명령을 사용하여 사용자 지정 역할을 삭제할 역할 ID를 지정합니다.
Remove-AzRoleDefinition -Id "22222222-2222-2222-2222-222222222222"Confirm Are you sure you want to remove role definition with id '22222222-2222-2222-2222-222222222222'. [Y] Yes [N] No [S] Suspend [?] Help (default is "Y"):확인을 묻는 메시지가 나타나면 Y를 선택합니다.