적용 대상:✅ Fabric 데이터 엔지니어링 및 데이터 과학
Fabric Data Engineering용 Livy API를 사용하여 Spark 세션 작업을 제출하는 방법을 알아봅니다.
필수 조건
Visual Studio Code Jupyter Notebooks ,PySpark 및 PythonMicrosoft Authentication Library)과 같은 원격 클라이언트입니다>Microsoft Entra 앱 토큰 중 하나입니다. 마이크로소프트 아이덴티티 플랫폼에 애플리케이션 등록
또는 Microsoft Entra SPN 토큰입니다.
Microsoft Entra 레이크하우스의 일부 데이터로 이 예제에서는 레이크하우스에 로드된 parquet 파일인 NYC Taxi 및 리무진 커미션의 green_tripdata_2022_08을 사용합니다.
Livy API는 작업에 대한 통합 엔드포인트를 정의합니다. 이 문서의 예제를 따를 때 자리 표시자 {Entra_TenantID}, {Entra_ClientID}, {Fabric_WorkspaceID}, {Fabric_LakehouseID}을(를) 적절한 값으로 바꿉니다.
Livy API 세션에 대한 Visual Studio Code 구성
Fabric Lakehouse에서 Lakehouse 설정을 선택합니다.

Livy 엔드포인트 섹션으로 이동합니다.
Lakehouse Livy 엔드포인트 및 세션 작업 연결 문자열을 보여주는 스크린샷입니다. 세션 작업의 연결 문자열(이미지의 첫 번째 빨간색 상자)을 코드에 복사합니다.
Microsoft Entra admin center로 이동하고 애플리케이션(클라이언트) ID와 디렉터리(테넌트) ID를 모두 코드에 복사합니다.
Microsoft Entra 관리 센터에서 Livy API 앱 개요를 보여주는 스크린샷입니다.

Microsoft Entra 사용자 토큰 또는 Microsoft Entra SPN 토큰을 사용하여 Livy API Spark 세션 인증
Microsoft Entra SPN 토큰을 사용하여 Livy API Spark 세션 인증
Visual Studio Code
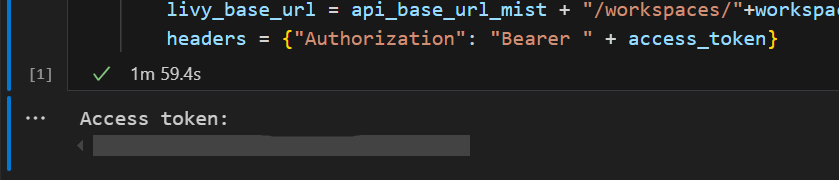
.ipynbNotebook을 만들고 다음 코드를 삽입합니다.import sys from msal import ConfidentialClientApplication # Configuration - Replace with your actual values tenant_id = "Entra_TenantID" # Microsoft Entra tenant ID client_id = "Entra_ClientID" # Service Principal Application ID # Certificate paths - Update these paths to your certificate files certificate_path = "PATH_TO_YOUR_CERTIFICATE.pem" # Public certificate file private_key_path = "PATH_TO_YOUR_PRIVATE_KEY.pem" # Private key file certificate_thumbprint = "YOUR_CERTIFICATE_THUMBPRINT" # Certificate thumbprint # OAuth settings audience = "https://analysis.windows.net/powerbi/api/.default" authority = f"https://login.windows.net/{tenant_id}" def get_access_token(client_id, audience, authority, certificate_path, private_key_path, certificate_thumbprint=None): """ Get an app-only access token for a Service Principal using OAuth 2.0 client credentials flow. This function uses certificate-based authentication which is more secure than client secrets. Args: client_id (str): The Service Principal's client ID audience (str): The audience for the token (resource scope) authority (str): The OAuth authority URL certificate_path (str): Path to the certificate file (.pem format) private_key_path (str): Path to the private key file (.pem format) certificate_thumbprint (str): Certificate thumbprint (optional but recommended) Returns: str: The access token for API authentication Raises: Exception: If token acquisition fails """ try: # Read the certificate from PEM file with open(certificate_path, "r", encoding="utf-8") as f: certificate_pem = f.read() # Read the private key from PEM file with open(private_key_path, "r", encoding="utf-8") as f: private_key_pem = f.read() # Create the confidential client application app = ConfidentialClientApplication( client_id=client_id, authority=authority, client_credential={ "private_key": private_key_pem, "thumbprint": certificate_thumbprint, "certificate": certificate_pem } ) # Acquire token using client credentials flow token_response = app.acquire_token_for_client(scopes=[audience]) if "access_token" in token_response: print("Successfully acquired access token") return token_response["access_token"] else: raise Exception(f"Failed to retrieve token: {token_response.get('error_description', 'Unknown error')}") except FileNotFoundError as e: print(f"Certificate file not found: {e}") sys.exit(1) except Exception as e: print(f"Error retrieving token: {e}", file=sys.stderr) sys.exit(1) # Get the access token token = get_access_token(client_id, audience, authority, certificate_path, private_key_path, certificate_thumbprint)Notebook 셀을 실행합니다. 반환된 Microsoft Entra 토큰이 표시됩니다.


Microsoft Entra 사용자 토큰을 사용하여 Livy API Spark 세션 인증
Visual Studio Code
.ipynbNotebook을 만들고 다음 코드를 삽입합니다.from msal import PublicClientApplication import requests import time # Configuration - Replace with your actual values tenant_id = "Entra_TenantID" # Microsoft Entra tenant ID client_id = "Entra_ClientID" # Application ID (can be the same as above or different) # Required scopes for Livy API access scopes = [ "https://api.fabric.microsoft.com/Lakehouse.Execute.All", # Required — execute operations in lakehouses "https://api.fabric.microsoft.com/Lakehouse.Read.All", # Required — read lakehouse metadata "https://api.fabric.microsoft.com/Code.AccessFabric.All", # Required — general Fabric API access from Spark Runtime "https://api.fabric.microsoft.com/Code.AccessStorage.All", # Required — access OneLake and Azure storage from Spark Runtime ] # Optional scopes — add these only if your Spark jobs need access to the corresponding services: # "https://api.fabric.microsoft.com/Code.AccessAzureKeyvault.All" # Optional — access Azure Key Vault from Spark Runtime # "https://api.fabric.microsoft.com/Code.AccessAzureDataLake.All" # Optional — access Azure Data Lake Storage Gen1 from Spark Runtime # "https://api.fabric.microsoft.com/Code.AccessAzureDataExplorer.All" # Optional — access Azure Data Explorer from Spark Runtime # "https://api.fabric.microsoft.com/Code.AccessSQL.All" # Optional — access Azure SQL audience tokens from Spark Runtime def get_access_token(tenant_id, client_id, scopes): """ Get an access token using interactive authentication. This method will open a browser window for user authentication. Args: tenant_id (str): The Microsoft Entra tenant ID client_id (str): The application client ID scopes (list): List of required permission scopes Returns: str: The access token, or None if authentication fails """ app = PublicClientApplication( client_id, authority=f"https://login.microsoftonline.com/{tenant_id}" ) print("Opening browser for interactive authentication...") token_response = app.acquire_token_interactive(scopes=scopes) if "access_token" in token_response: print("Successfully authenticated") return token_response["access_token"] else: print(f"Authentication failed: {token_response.get('error_description', 'Unknown error')}") return None # Uncomment the lines below to use interactive authentication token = get_access_token(tenant_id, client_id, scopes) print("Access token acquired via interactive login")Notebook 셀을 실행합니다. 반환된 Microsoft Entra 토큰이 표시됩니다.

Livy API의 Code.* 범위에 대한 이해
Spark 작업이 Livy API Code.* 를 통해 실행되는 경우 범위는 Spark 런타임이 인증된 사용자를 대신하여 액세스할 수 있는 외부 서비스를 제어합니다. 두 가지가 필요합니다. 나머지는 워크로드에 따라 선택 사항입니다.
필수 코드.* 범위
| Scope | 설명 |
|---|---|
Code.AccessFabric.All |
Microsoft Fabric에 대한 액세스 토큰을 얻을 수 있습니다. 모든 Livy API 작업에 필요합니다. |
Code.AccessStorage.All |
OneLake 및 Azure 스토리지에 대한 액세스 토큰을 가져오도록 허용합니다. 레이크하우스에서 데이터를 읽고 쓰는 데 필요합니다. |
선택적 코드.*의 범위
Spark 작업이 런타임에 해당 Azure 서비스에 액세스해야 하는 경우에만 이러한 범위를 추가합니다.
| Scope | 설명 | 사용 시기 |
|---|---|---|
Code.AccessAzureKeyvault.All |
Azure Key Vault에 대한 액세스 토큰을 얻을 수 있도록 허용합니다. | Spark 코드는 Azure Key Vault 비밀, 키 또는 인증서를 검색합니다. |
Code.AccessAzureDataLake.All |
Azure Data Lake Storage Gen1에 대한 액세스 토큰을 얻을 수 있습니다. | Spark 코드는 Azure Data Lake Storage Gen1 계정에서 읽거나 씁니다. |
Code.AccessAzureDataExplorer.All |
Azure Data Explorer(Kusto) 액세스 토큰을 얻을 수 있습니다. | Spark 코드는 Azure Data Explorer 클러스터 간 데이터를 쿼리하거나 수집합니다. |
Code.AccessSQL.All |
Azure SQL에 대한 액세스 토큰을 얻을 수 있도록 허용합니다. | Spark 코드는 Azure SQL 데이터베이스에 연결해야 합니다. |
메모
Lakehouse.Execute.All 범위와 Lakehouse.Read.All 범위도 필요하지만 Code.* 그룹의 일부가 아닙니다. 각각 Fabric 레이크하우스에서 작업을 실행할 수 있는 권한과 메타데이터를 읽을 수 있는 권한을 부여합니다.
Livy API Spark 세션 만들기
팁 (조언)
워크로드에서 여러 Spark 문을 동시에 실행해야 하는 경우 높은 동시성 세션을 대신 사용하는 것이 좋습니다. HC 세션은 시스템이 기본 Livy 세션의 재사용을 관리하는 동안 병렬로 실행되는 독립적인 실행 컨텍스트를 제공합니다.
다른 Notebook 셀을 추가하고 이 코드를 삽입합니다.
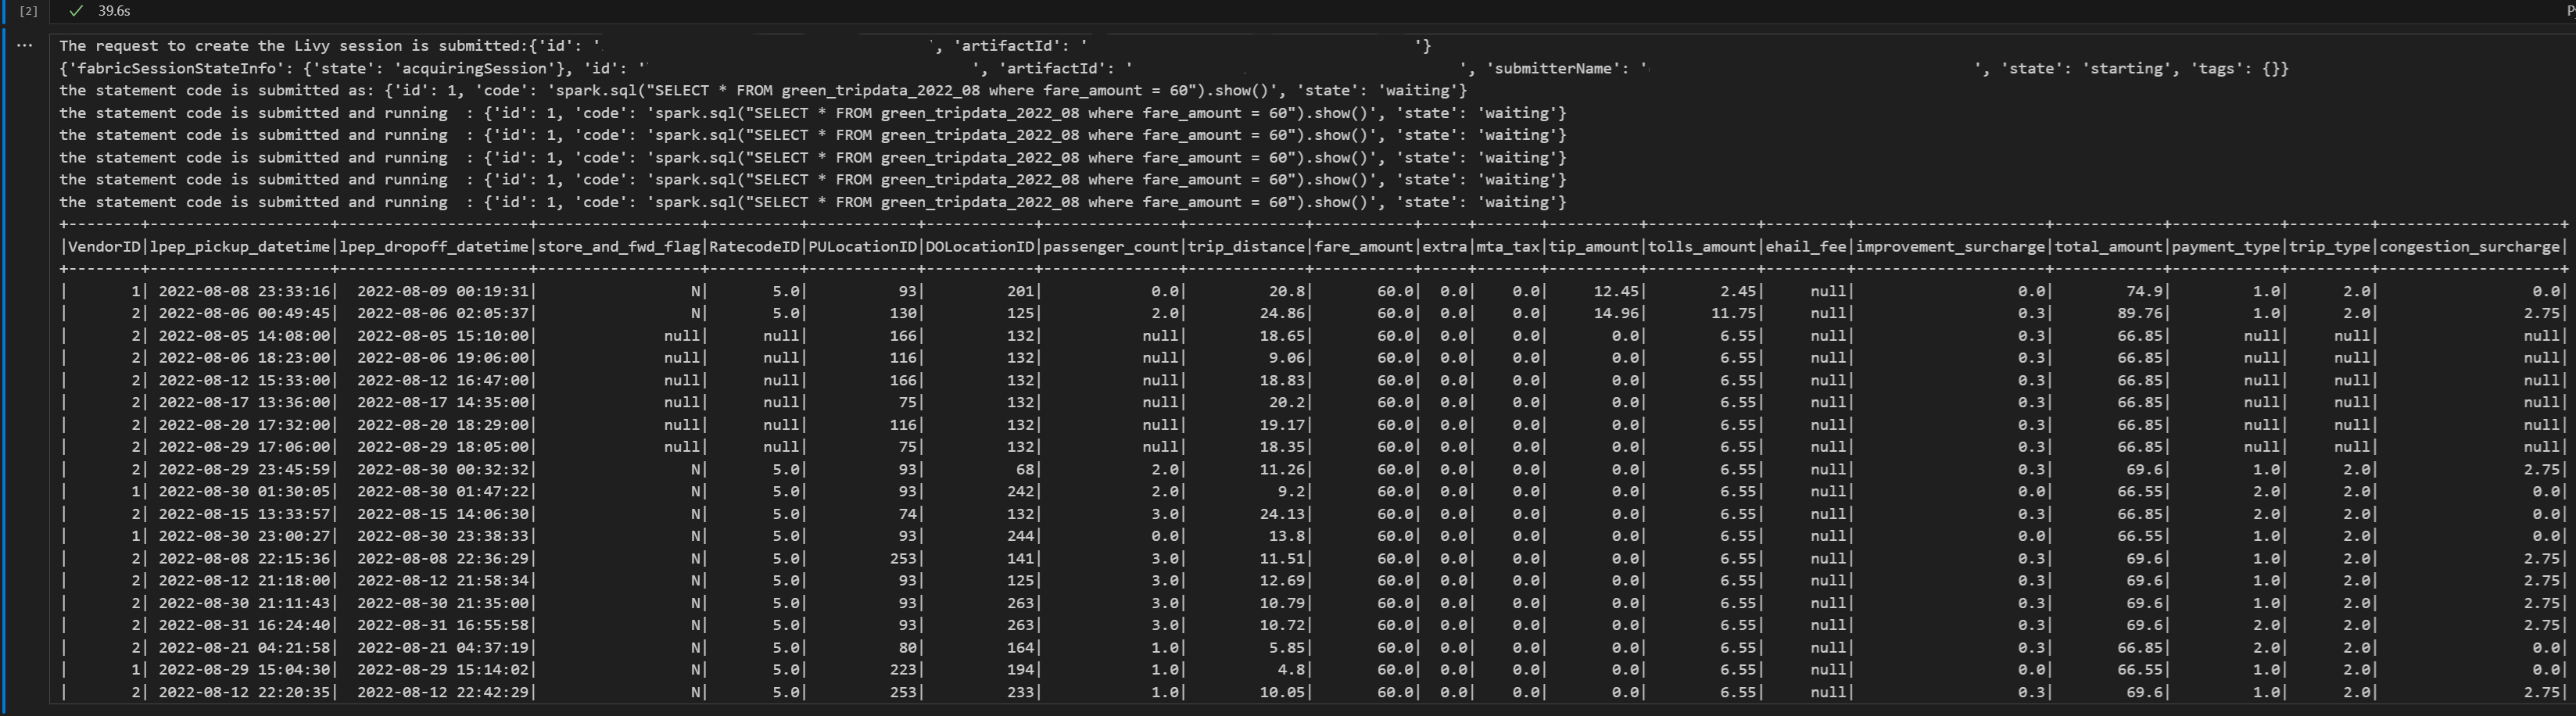
import json
import requests

api_base_url = "https://api.fabric.microsoft.com/"  # Base URL for Fabric APIs

# Fabric Resource IDs - Replace with your workspace and lakehouse IDs
workspace_id = "Fabric_WorkspaceID"
lakehouse_id = "Fabric_LakehouseID"

# Construct the Livy API session URL
# URL pattern: {base_url}/v1/workspaces/{workspace_id}/lakehouses/{lakehouse_id}/livyapi/versions/{api_version}/sessions
livy_api_session_url = (f"{api_base_url}v1/workspaces/{workspace_id}/lakehouses/{lakehouse_id}/"
                       f"livyapi/versions/2023-12-01/sessions")

# Set up authentication headers
headers = {"Authorization": f"Bearer {token}"}

print(f"Livy API URL: {livy_api_session_url}")
print("Creating Livy session...")

try:
    # Create a new Livy session with default configuration
    create_livy_session = requests.post(livy_api_session_url, headers=headers, json={})

    # Check if the request was successful
    if create_livy_session.status_code == 202:
        session_info = create_livy_session.json()
        print('Livy session creation request submitted successfully')
        print(f'Session Info: {json.dumps(session_info, indent=2)}')

        # Extract session ID for future operations
        livy_session_id = session_info['id']
        livy_session_url = f"{livy_api_session_url}/{livy_session_id}"

        print(f"Session ID: {livy_session_id}")
        print(f"Session URL: {livy_session_url}")

    else:
        print(f"Failed to create session. Status code: {create_livy_session.status_code}")
        print(f"Response: {create_livy_session.text}")

except requests.exceptions.RequestException as e:
    print(f"Network error occurred: {e}")
except json.JSONDecodeError as e:
    print(f"JSON decode error: {e}")
    print(f"Response text: {create_livy_session.text}")
except Exception as e:
    print(f"Unexpected error: {e}")
Notebook 셀을 실행하면 Livy 세션이 생성될 때 한 줄이 인쇄됩니다.

[모니터링 허브에서 작업 보기](모니터링 허브에서 작업 #View)를 사용하여 Livy 세션이 생성되었는지 확인할 수 있습니다.

Fabric 환경과의 통합
기본적으로 이 Livy API 세션은 작업 영역에 대한 기본 시작 풀에 대해 실행됩니다. 또는 Fabric Environments 만들기, 구성 및 Microsoft Fabric 환경을 사용하여 Livy API 세션에서 이러한 Spark 작업에 사용하는 Spark 풀을 사용자 지정할 수 있습니다. Fabric 환경을 사용하려면 이전 Notebook 셀을 이 json 페이로드로 업데이트합니다.
create_livy_session = requests.post(livy_base_url, headers = headers, json = {
    "conf" : {
        "spark.fabric.environmentDetails" : "{\"id\" : \""EnvironmentID""}"}
        }
)
spark.sql 문을 Livy API Spark 세션을 사용하여 제출하십시오.
다른 Notebook 셀을 추가하고 이 코드를 삽입합니다.
    # call get session API
import time

table_name = "green_tripdata_2022"

print("Checking session status...")

# Get current session status
get_session_response = requests.get(livy_session_url, headers=headers)
session_status = get_session_response.json()
print(f"Current session state: {session_status['state']}")

# Wait for session to become idle (ready to accept statements)
print("Waiting for session to become idle...")
while session_status["state"] != "idle":
    print(f"   Session state: {session_status['state']} - waiting 5 seconds...")
    time.sleep(5)
    get_session_response = requests.get(livy_session_url, headers=headers)
    session_status = get_session_response.json()

print("Session is now idle and ready to accept statements")

# Execute a Spark SQL statement
execute_statement_url = f"{livy_session_url}/statements"

# Define your Spark SQL query - Replace with your actual table and query
payload_data = {
    "code": "spark.sql(\"SELECT * FROM {table_name} WHERE column_name = 'some_value' LIMIT 10\").show()",
    "kind": "spark"  # Type of code (spark, pyspark, sql, etc.)
}

print("Submitting Spark SQL statement...")
print(f"Query: {payload_data['code']}")

try:
    # Submit the statement for execution
    execute_statement_response = requests.post(execute_statement_url, headers=headers, json=payload_data)

    if execute_statement_response.status_code == 200:
        statement_info = execute_statement_response.json()
        print('Statement submitted successfully')
        print(f"Statement Info: {json.dumps(statement_info, indent=2)}")

        # Get statement ID for monitoring
        statement_id = str(statement_info['id'])
        get_statement_url = f"{livy_session_url}/statements/{statement_id}"

        print(f"Statement ID: {statement_id}")

        # Monitor statement execution
        print("Monitoring statement execution...")
        get_statement_response = requests.get(get_statement_url, headers=headers)
        statement_status = get_statement_response.json()

        while statement_status["state"] != "available":
            print(f"   Statement state: {statement_status['state']} - waiting 5 seconds...")
            time.sleep(5)
            get_statement_response = requests.get(get_statement_url, headers=headers)
            statement_status = get_statement_response.json()

        # Retrieve and display results
        print("Statement execution completed!")
        if 'output' in statement_status and 'data' in statement_status['output']:
            results = statement_status['output']['data']['text/plain']
            print("Query Results:")
            print(results)
        else:
            print("No output data available")

    else:
        print(f"Failed to submit statement. Status code: {execute_statement_response.status_code}")
        print(f"Response: {execute_statement_response.text}")

except Exception as e:
    print(f"Error executing statement: {e}")
Notebook 셀을 실행하면 작업이 제출되고 결과가 반환될 때 여러 증분 줄이 인쇄됩니다.

Livy API Spark 세션을 사용하여 두 번째 spark.sql 문 제출
다른 Notebook 셀을 추가하고 이 코드를 삽입합니다.
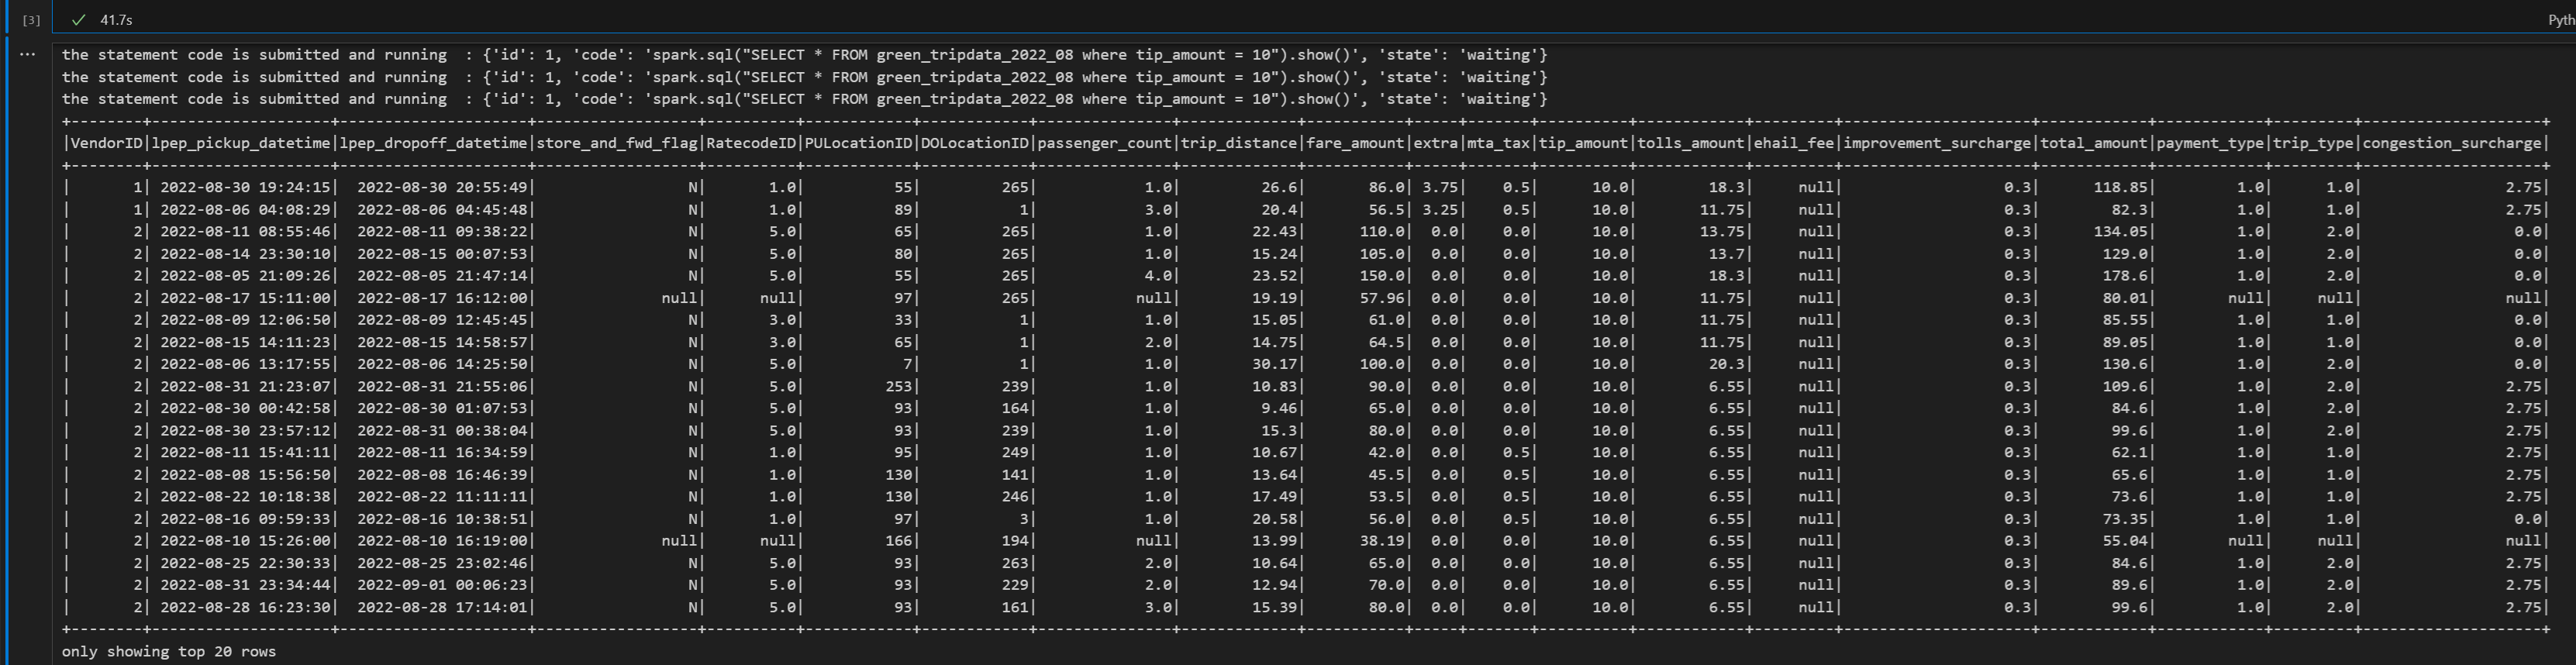
print("Executing additional Spark SQL statement...")

# Wait for session to be idle again
get_session_response = requests.get(livy_session_url, headers=headers)
session_status = get_session_response.json()

while session_status["state"] != "idle":
    print(f"   Waiting for session to be idle... Current state: {session_status['state']}")
    time.sleep(5)
    get_session_response = requests.get(livy_session_url, headers=headers)
    session_status = get_session_response.json()

# Execute another statement - Replace with your actual query
payload_data = {
    "code": f"spark.sql(\"SELECT COUNT(*) as total_records FROM {table_name}\").show()",
    "kind": "spark"
}

print(f"Executing query: {payload_data['code']}")

try:
    # Submit the second statement
    execute_statement_response = requests.post(execute_statement_url, headers=headers, json=payload_data)

    if execute_statement_response.status_code == 200:
        statement_info = execute_statement_response.json()
        print('Second statement submitted successfully')

        statement_id = str(statement_info['id'])
        get_statement_url = f"{livy_session_url}/statements/{statement_id}"

        # Monitor execution
        print("Monitoring statement execution...")
        get_statement_response = requests.get(get_statement_url, headers=headers)
        statement_status = get_statement_response.json()

        while statement_status["state"] != "available":
            print(f"   Statement state: {statement_status['state']} - waiting 5 seconds...")
            time.sleep(5)
            get_statement_response = requests.get(get_statement_url, headers=headers)
            statement_status = get_statement_response.json()

        # Display results
        print("Second statement execution completed!")
        if 'output' in statement_status and 'data' in statement_status['output']:
            results = statement_status['output']['data']['text/plain']
            print("Query Results:")
            print(results)
        else:
            print("No output data available")

    else:
        print(f"Failed to submit second statement. Status code: {execute_statement_response.status_code}")

except Exception as e:
    print(f"Error executing second statement: {e}")
Notebook 셀을 실행하면 작업이 제출되고 결과가 반환될 때 여러 증분 줄이 인쇄됩니다.

Livy 세션 종료
다른 Notebook 셀을 추가하고 이 코드를 삽입합니다.
print("Cleaning up Livy session...")

try:
    # Check current session status before deletion
    get_session_response = requests.get(livy_session_url, headers=headers)
    if get_session_response.status_code == 200:
        session_info = get_session_response.json()
        print(f"Session state before deletion: {session_info.get('state', 'unknown')}")

    print(f"Deleting session at: {livy_session_url}")

    # Delete the session
    delete_response = requests.delete(livy_session_url, headers=headers)

    if delete_response.status_code == 200:
        print("Session deleted successfully")
    elif delete_response.status_code == 404:
        print("Session was already deleted or not found")
    else:
        print(f"Delete request completed with status code: {delete_response.status_code}")
        print(f"Response: {delete_response.text}")

    print(f"Delete response details: {delete_response}")

except requests.exceptions.RequestException as e:
    print(f"Network error during session deletion: {e}")
except Exception as e:
    print(f"Error during session cleanup: {e}")
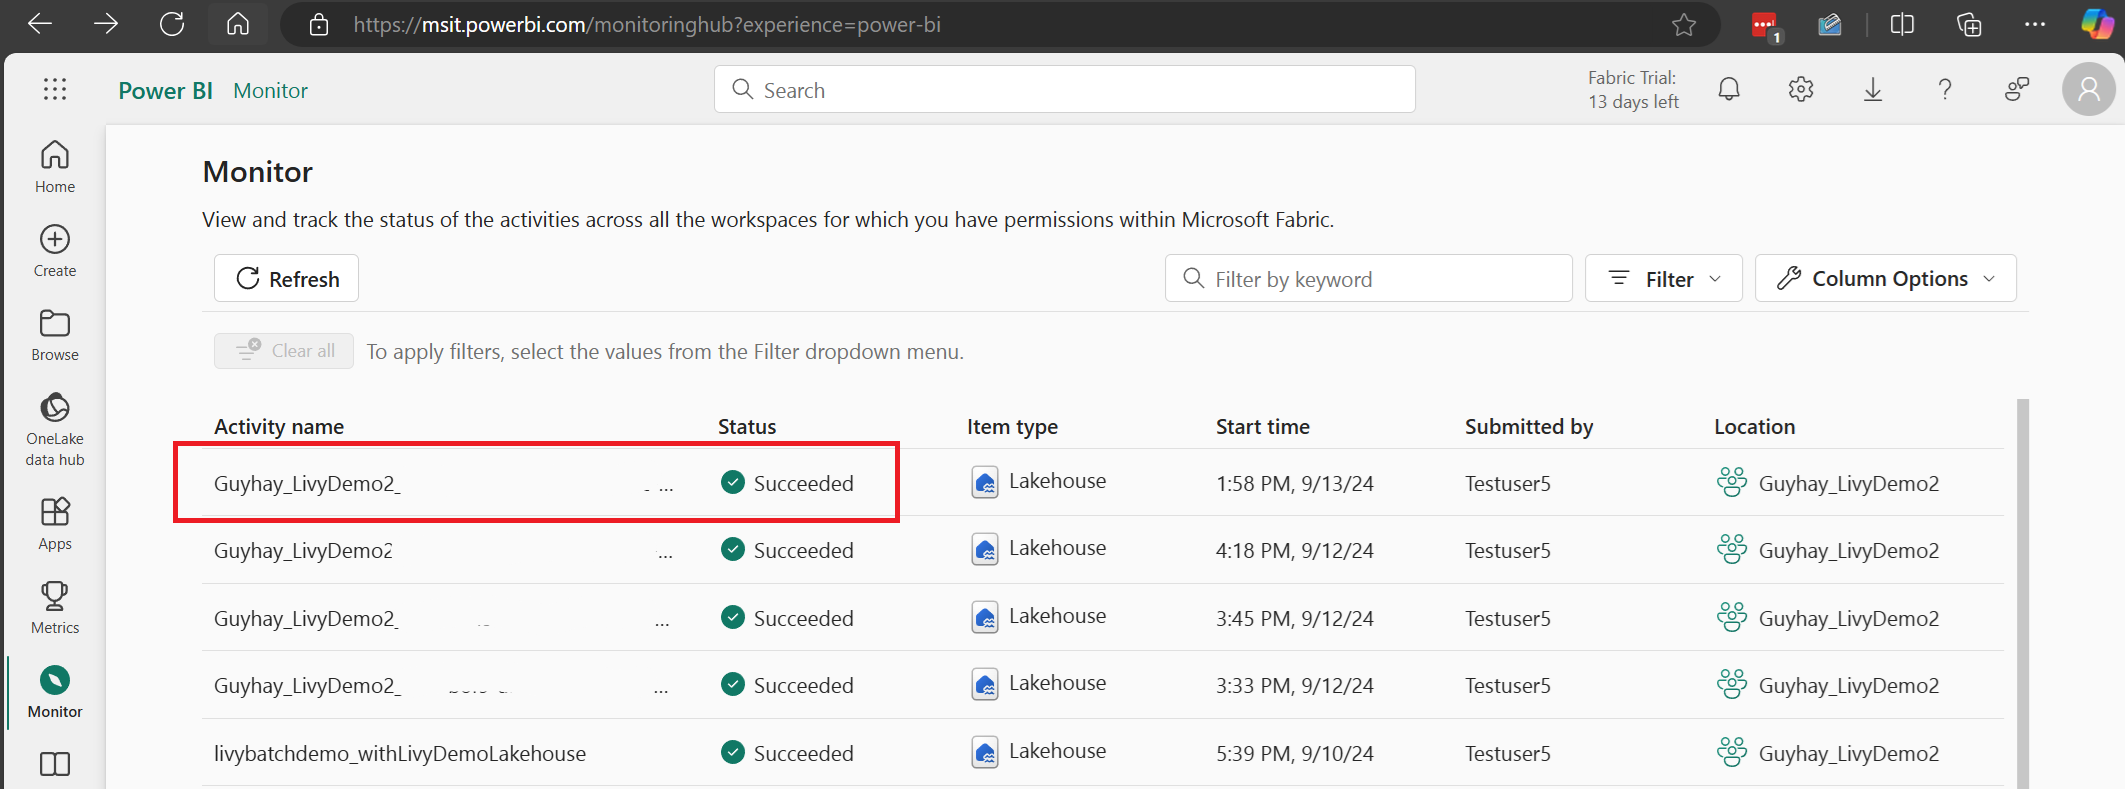
모니터링 허브에서 작업 보기
왼쪽 탐색 링크에서 모니터를 선택하여 모니터링 허브에 액세스하여 다양한 Apache Spark 활동을 볼 수 있습니다.
세션이 진행 중이거나 완료된 상태인 경우 모니터로 이동하여 세션 상태를 볼 수 있습니다.
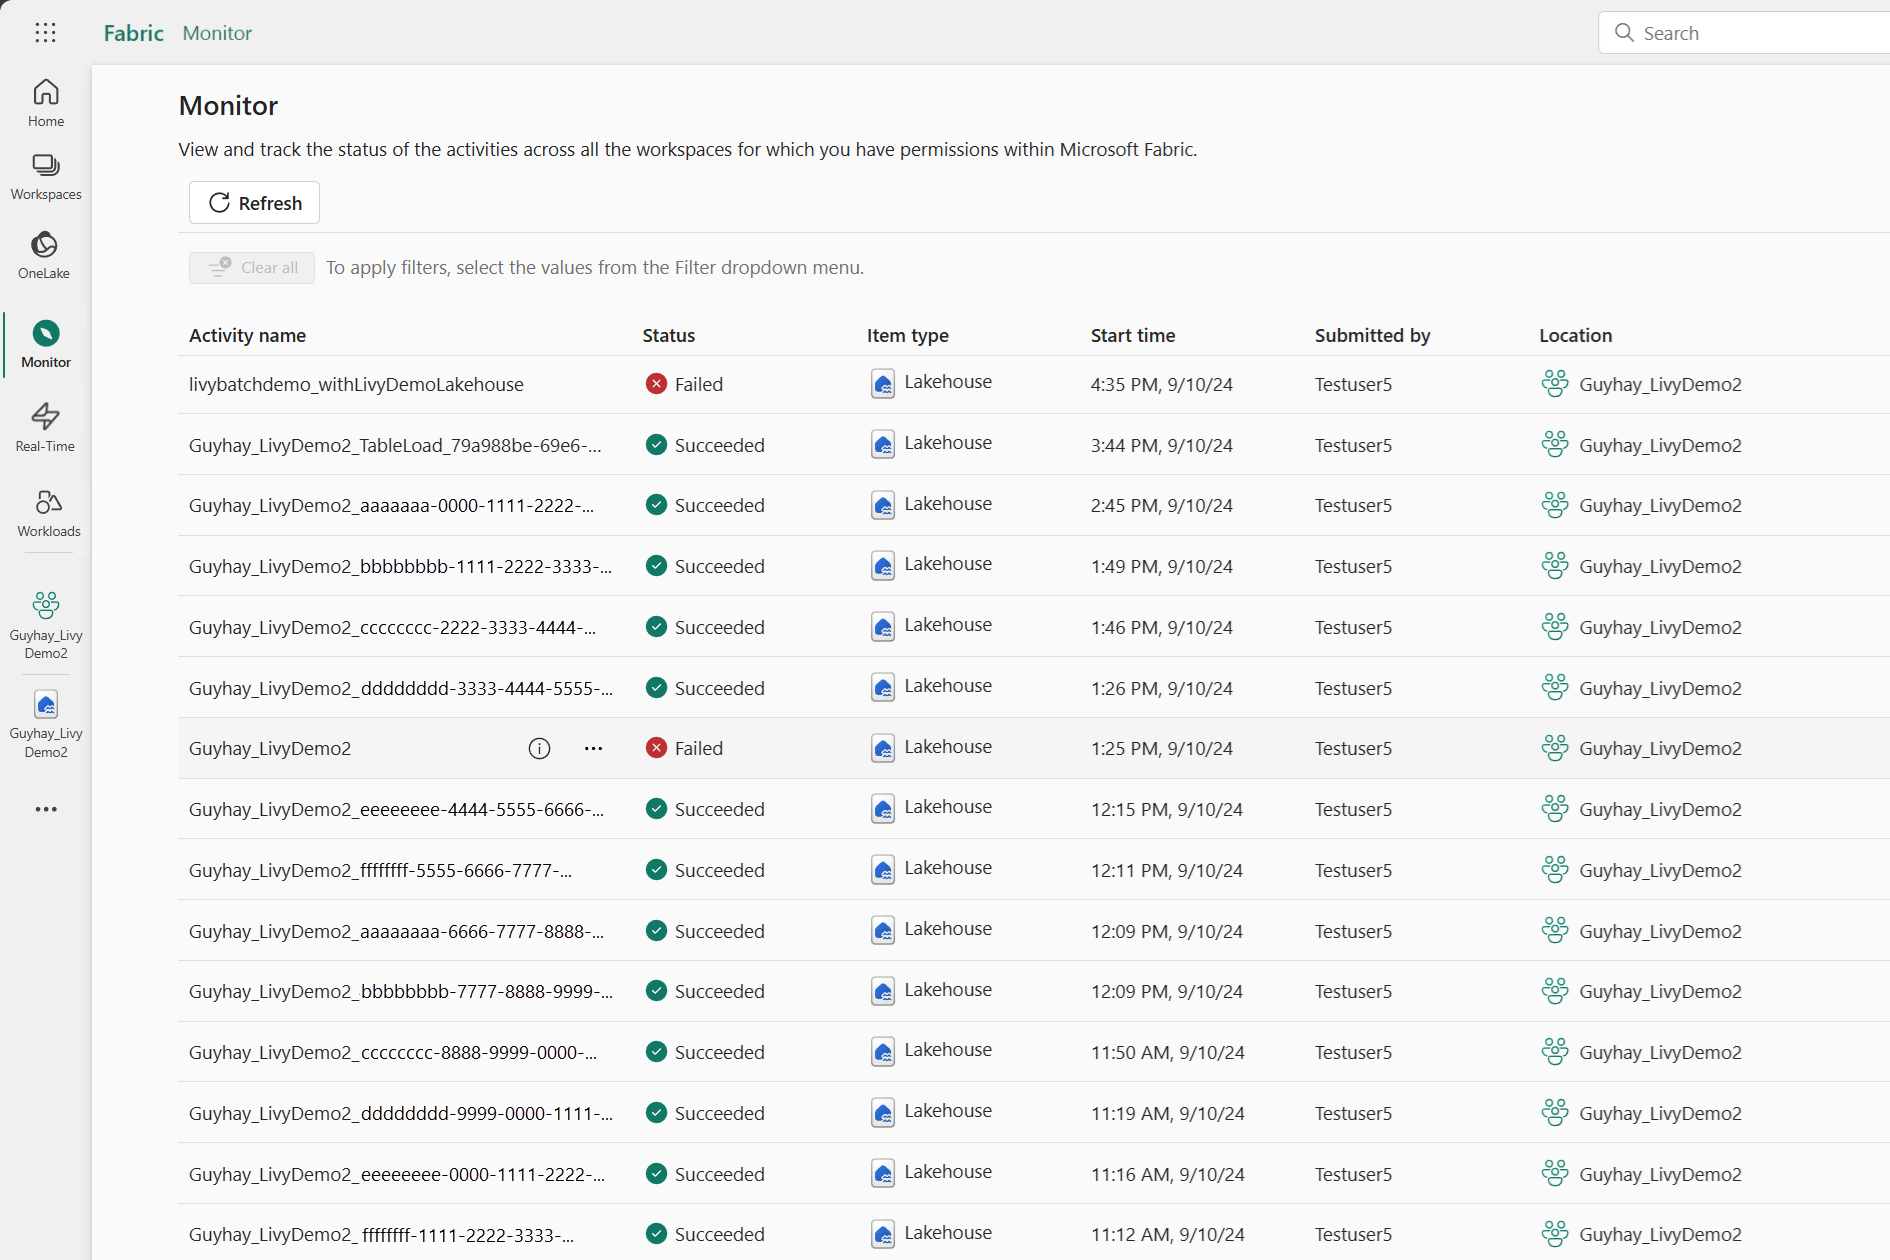
가장 최근 활동 이름을 선택하고 엽니다.
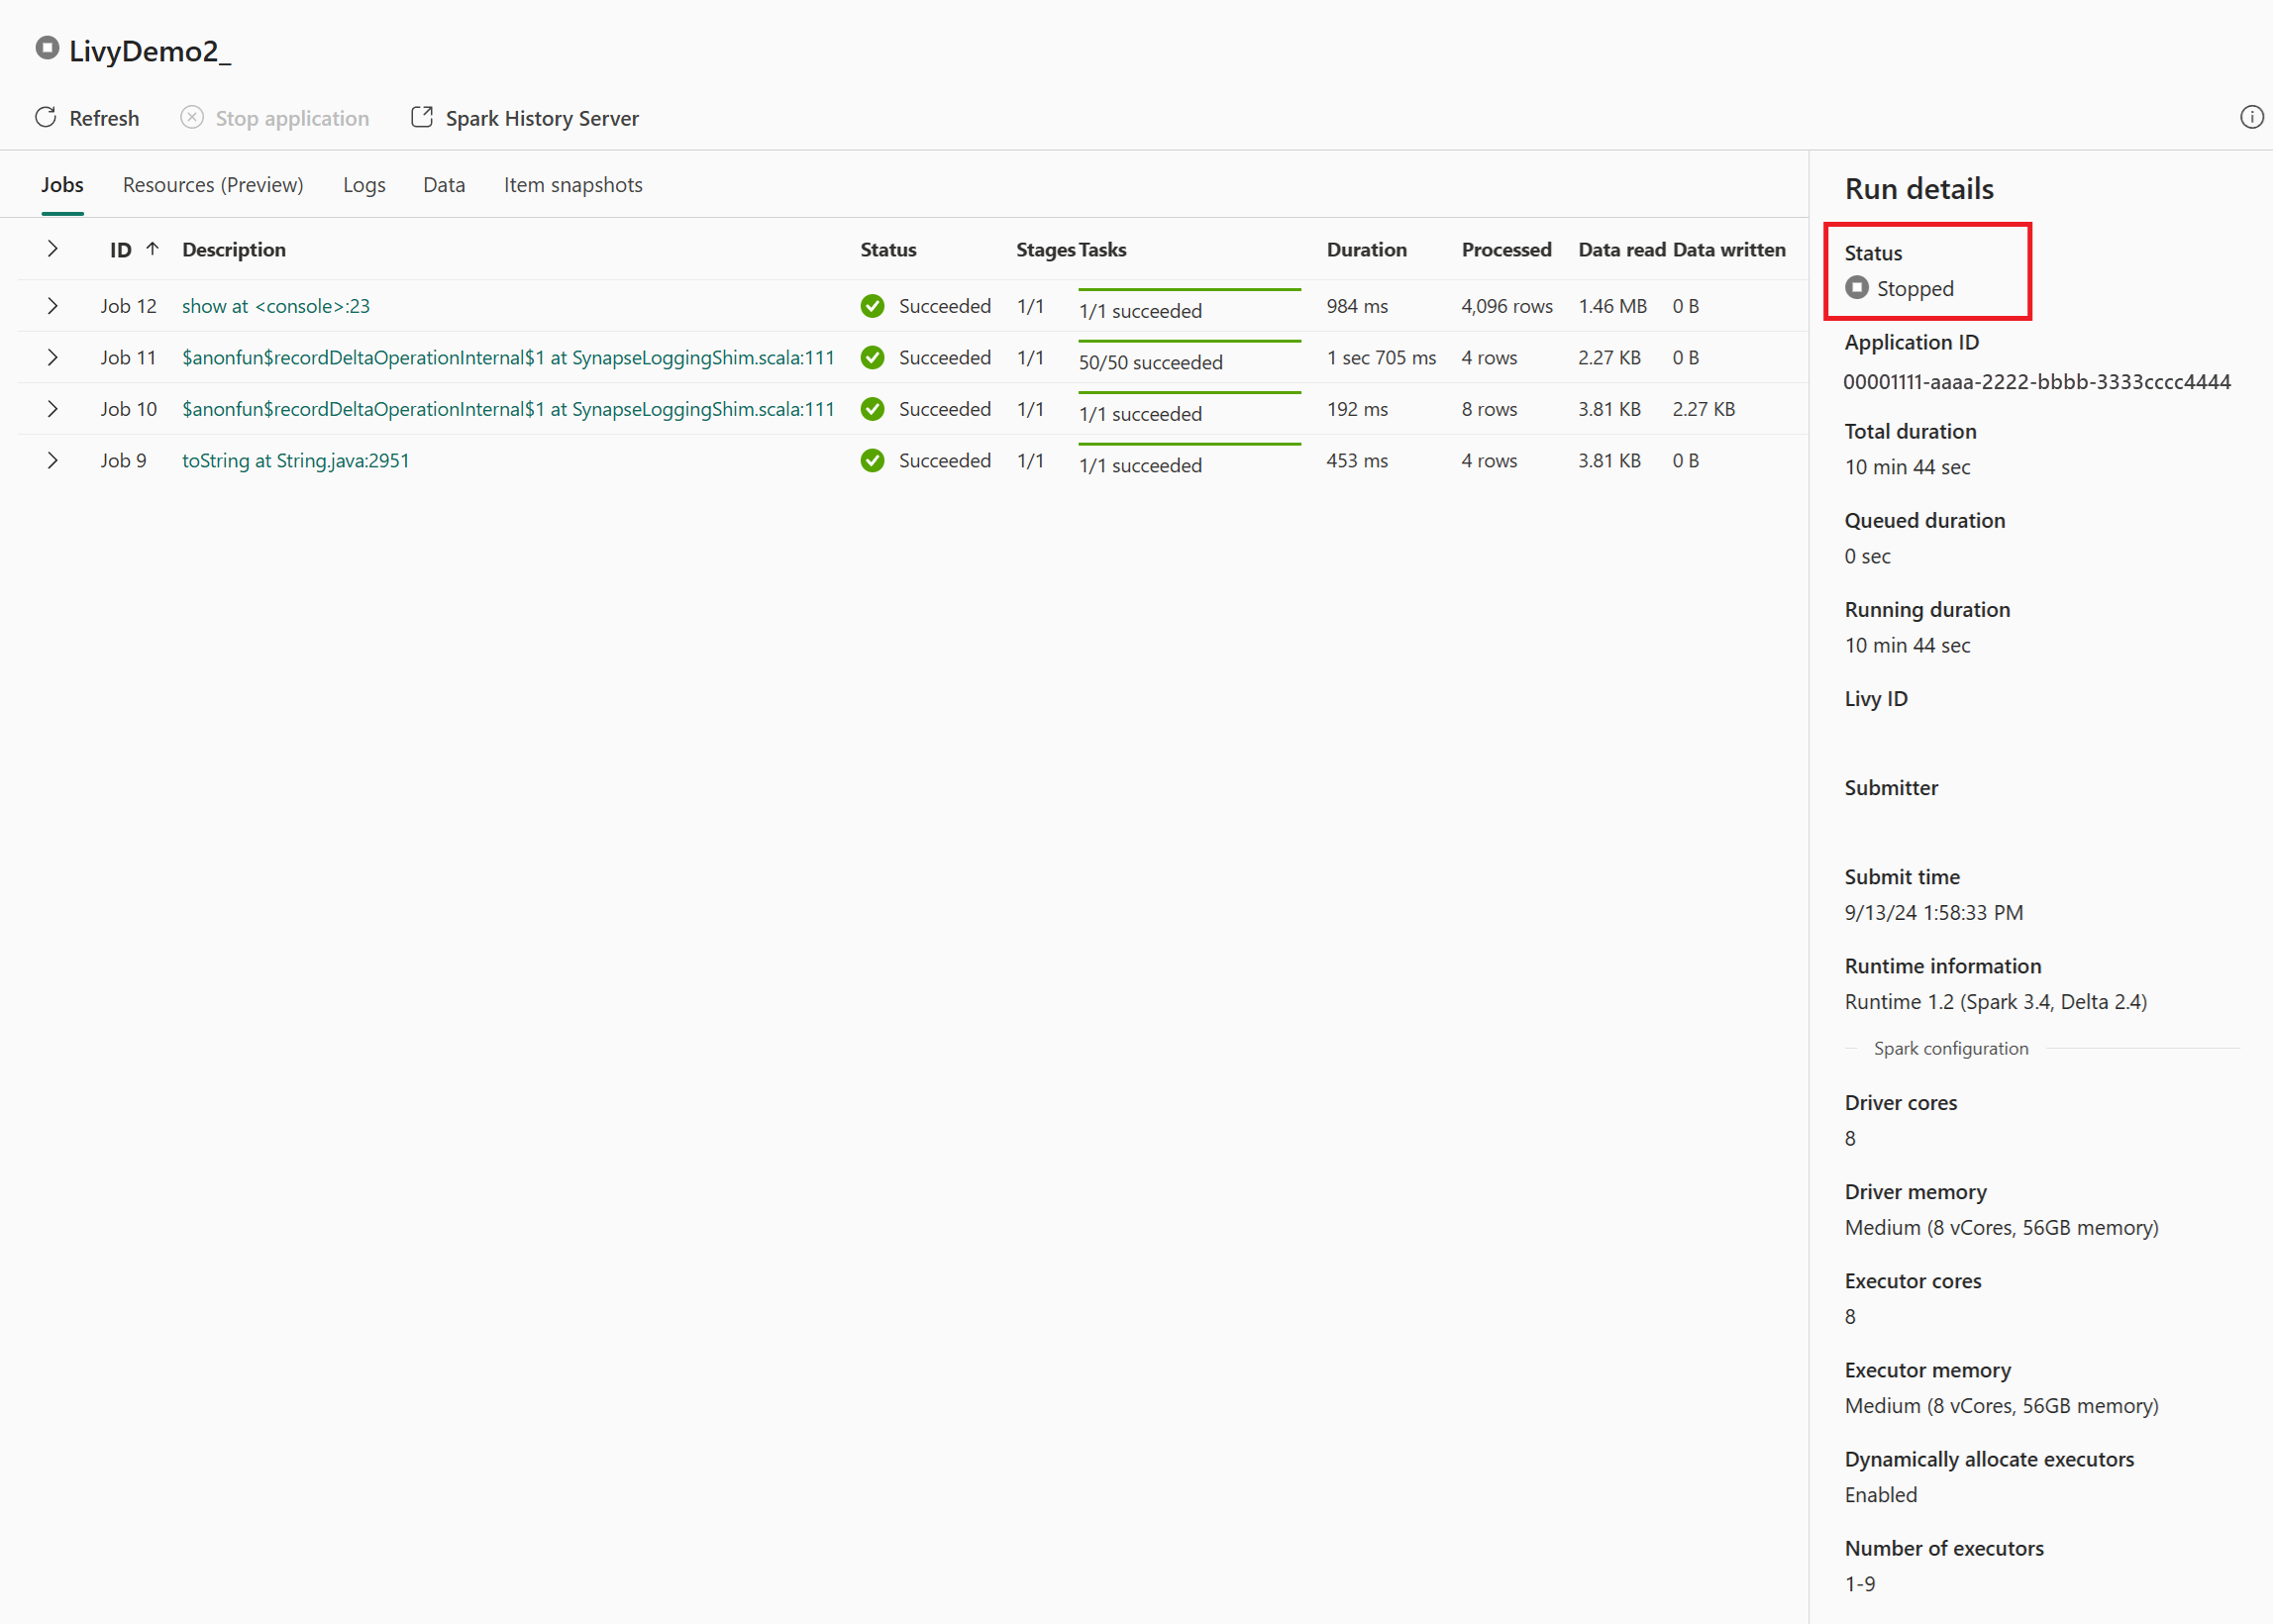
이 Livy API 세션의 경우 이전 세션 제출, 실행 세부 정보, Spark 버전 및 구성을 볼 수 있습니다. 오른쪽 위에 중지된 상태를 확인합니다.


전체 프로세스를 요약하려면 Visual Studio Code, Microsoft Entra 앱/SPN 토큰, Livy API 엔드포인트 URL, Lakehouse에 대한 인증 및 마지막으로 Session Livy API와 같은 원격 클라이언트가 필요합니다.